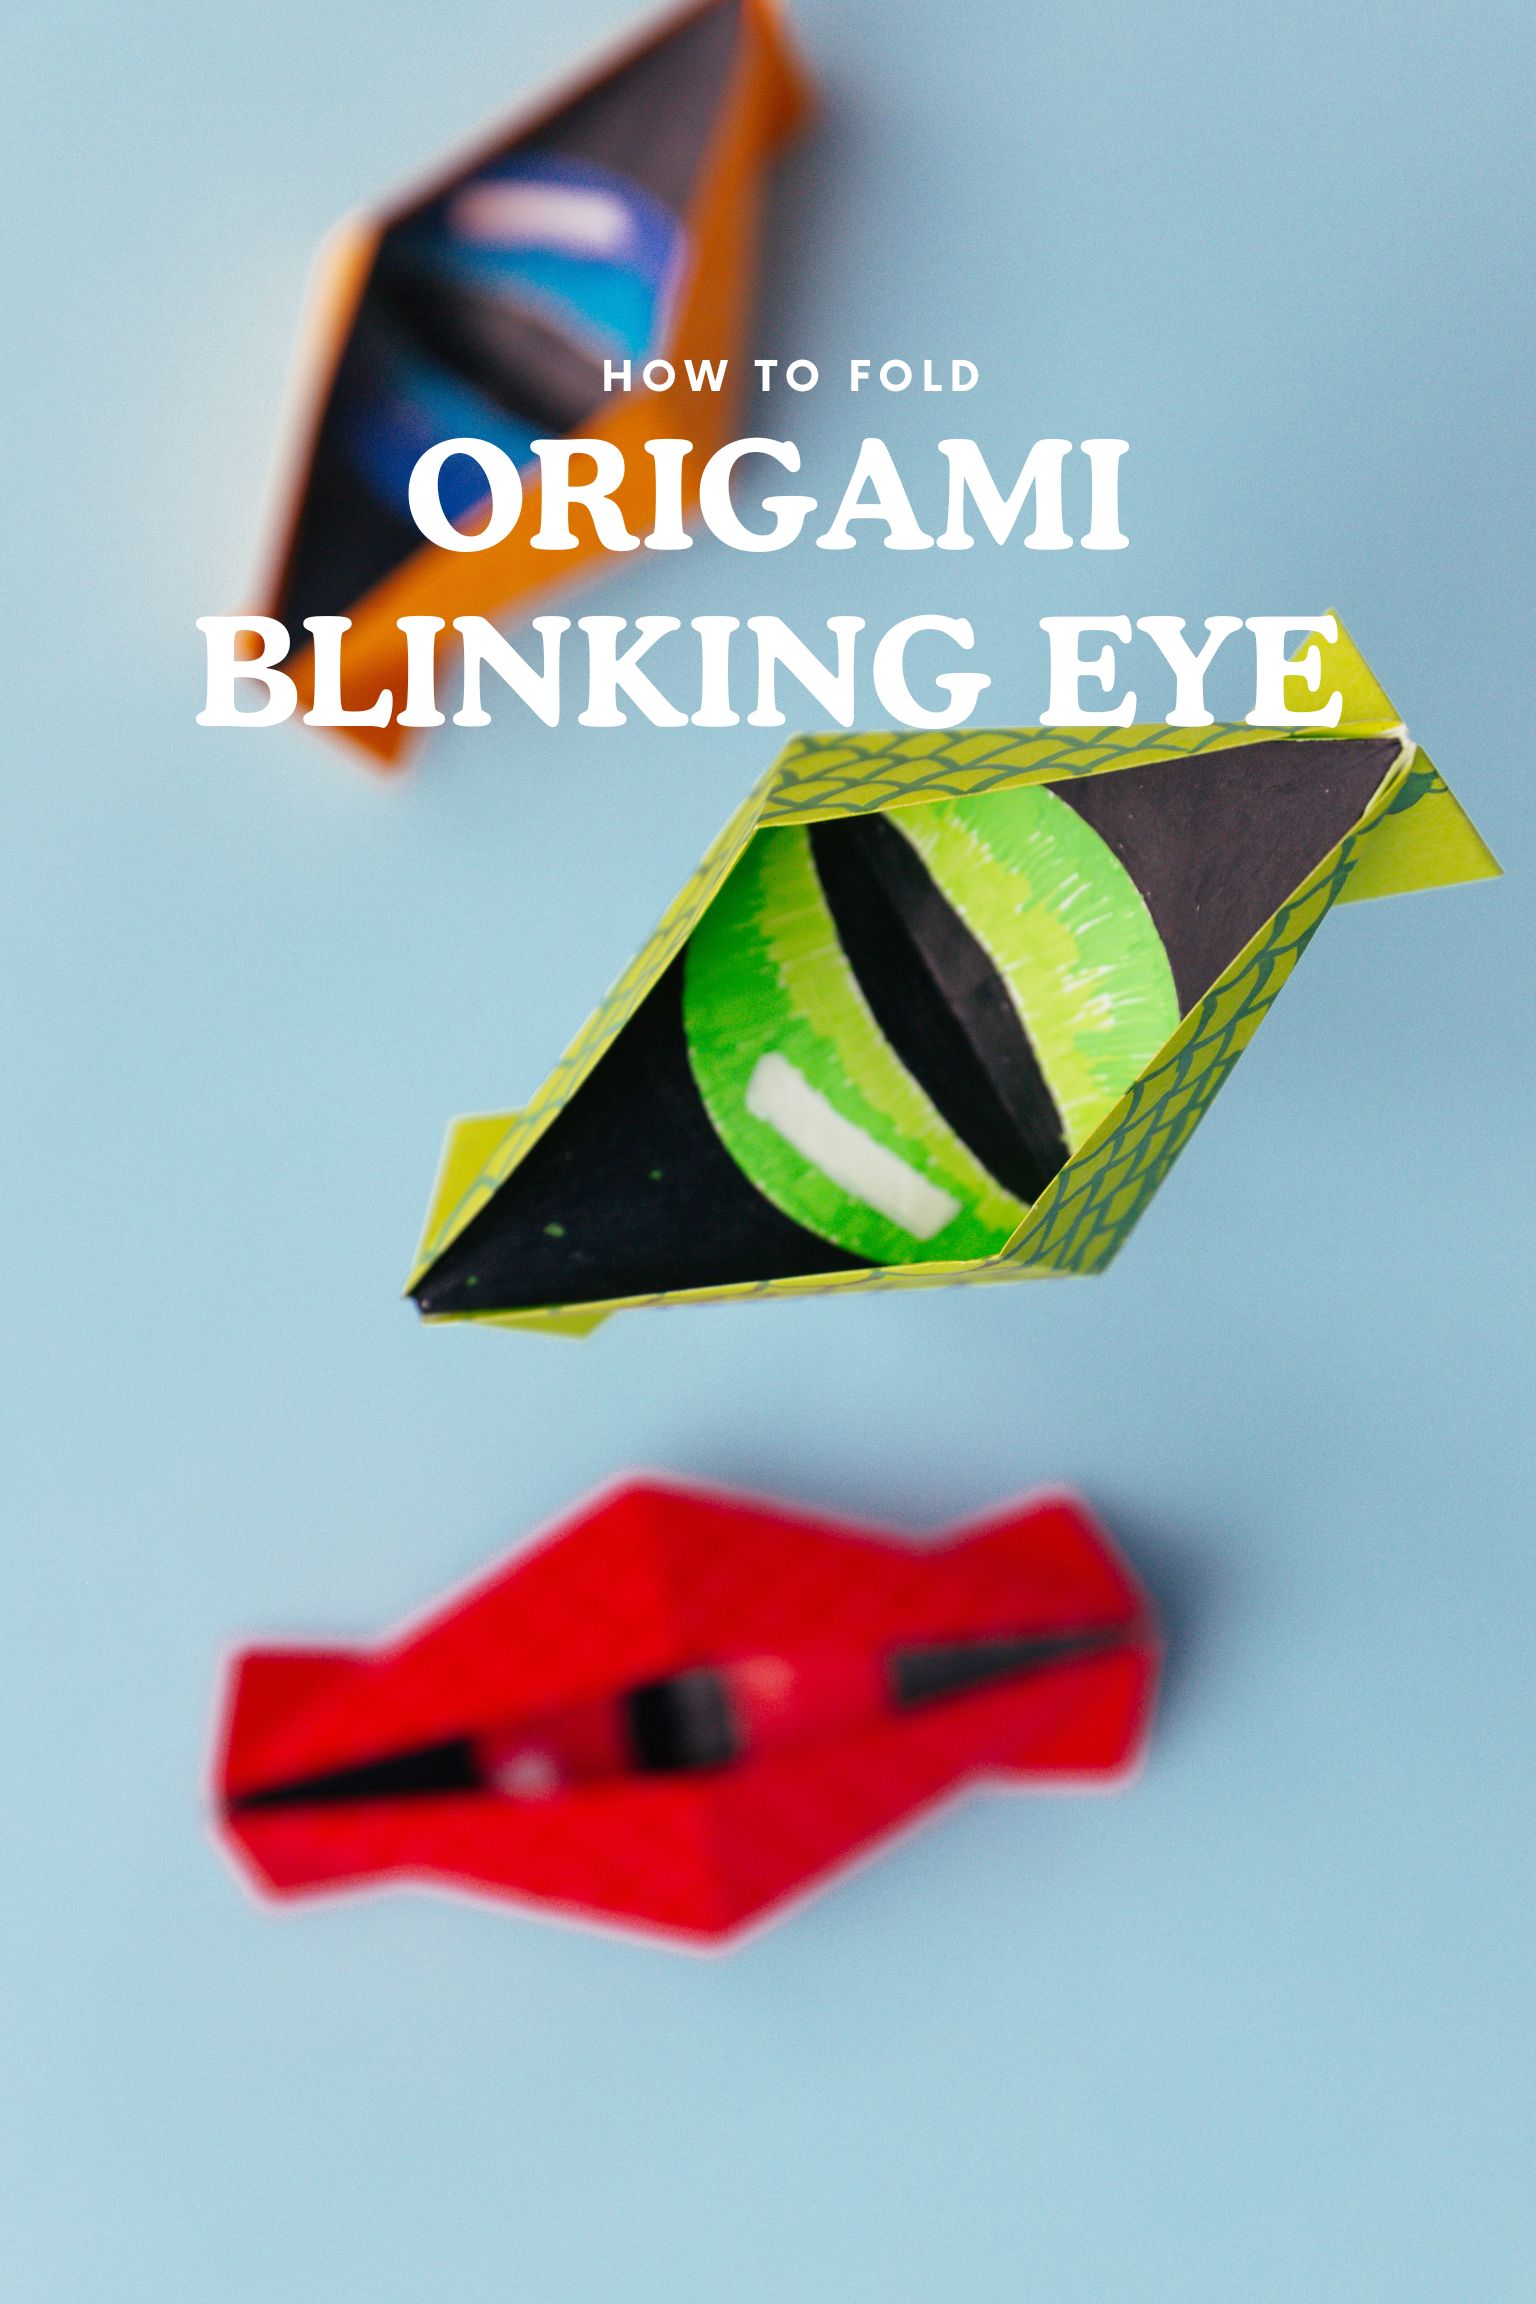
How to Make an Origami Blinking Eye
Step 1
Place the paper with the desired display side face down to begin folding. Fold and unfold it in half horizontally, then vertically.
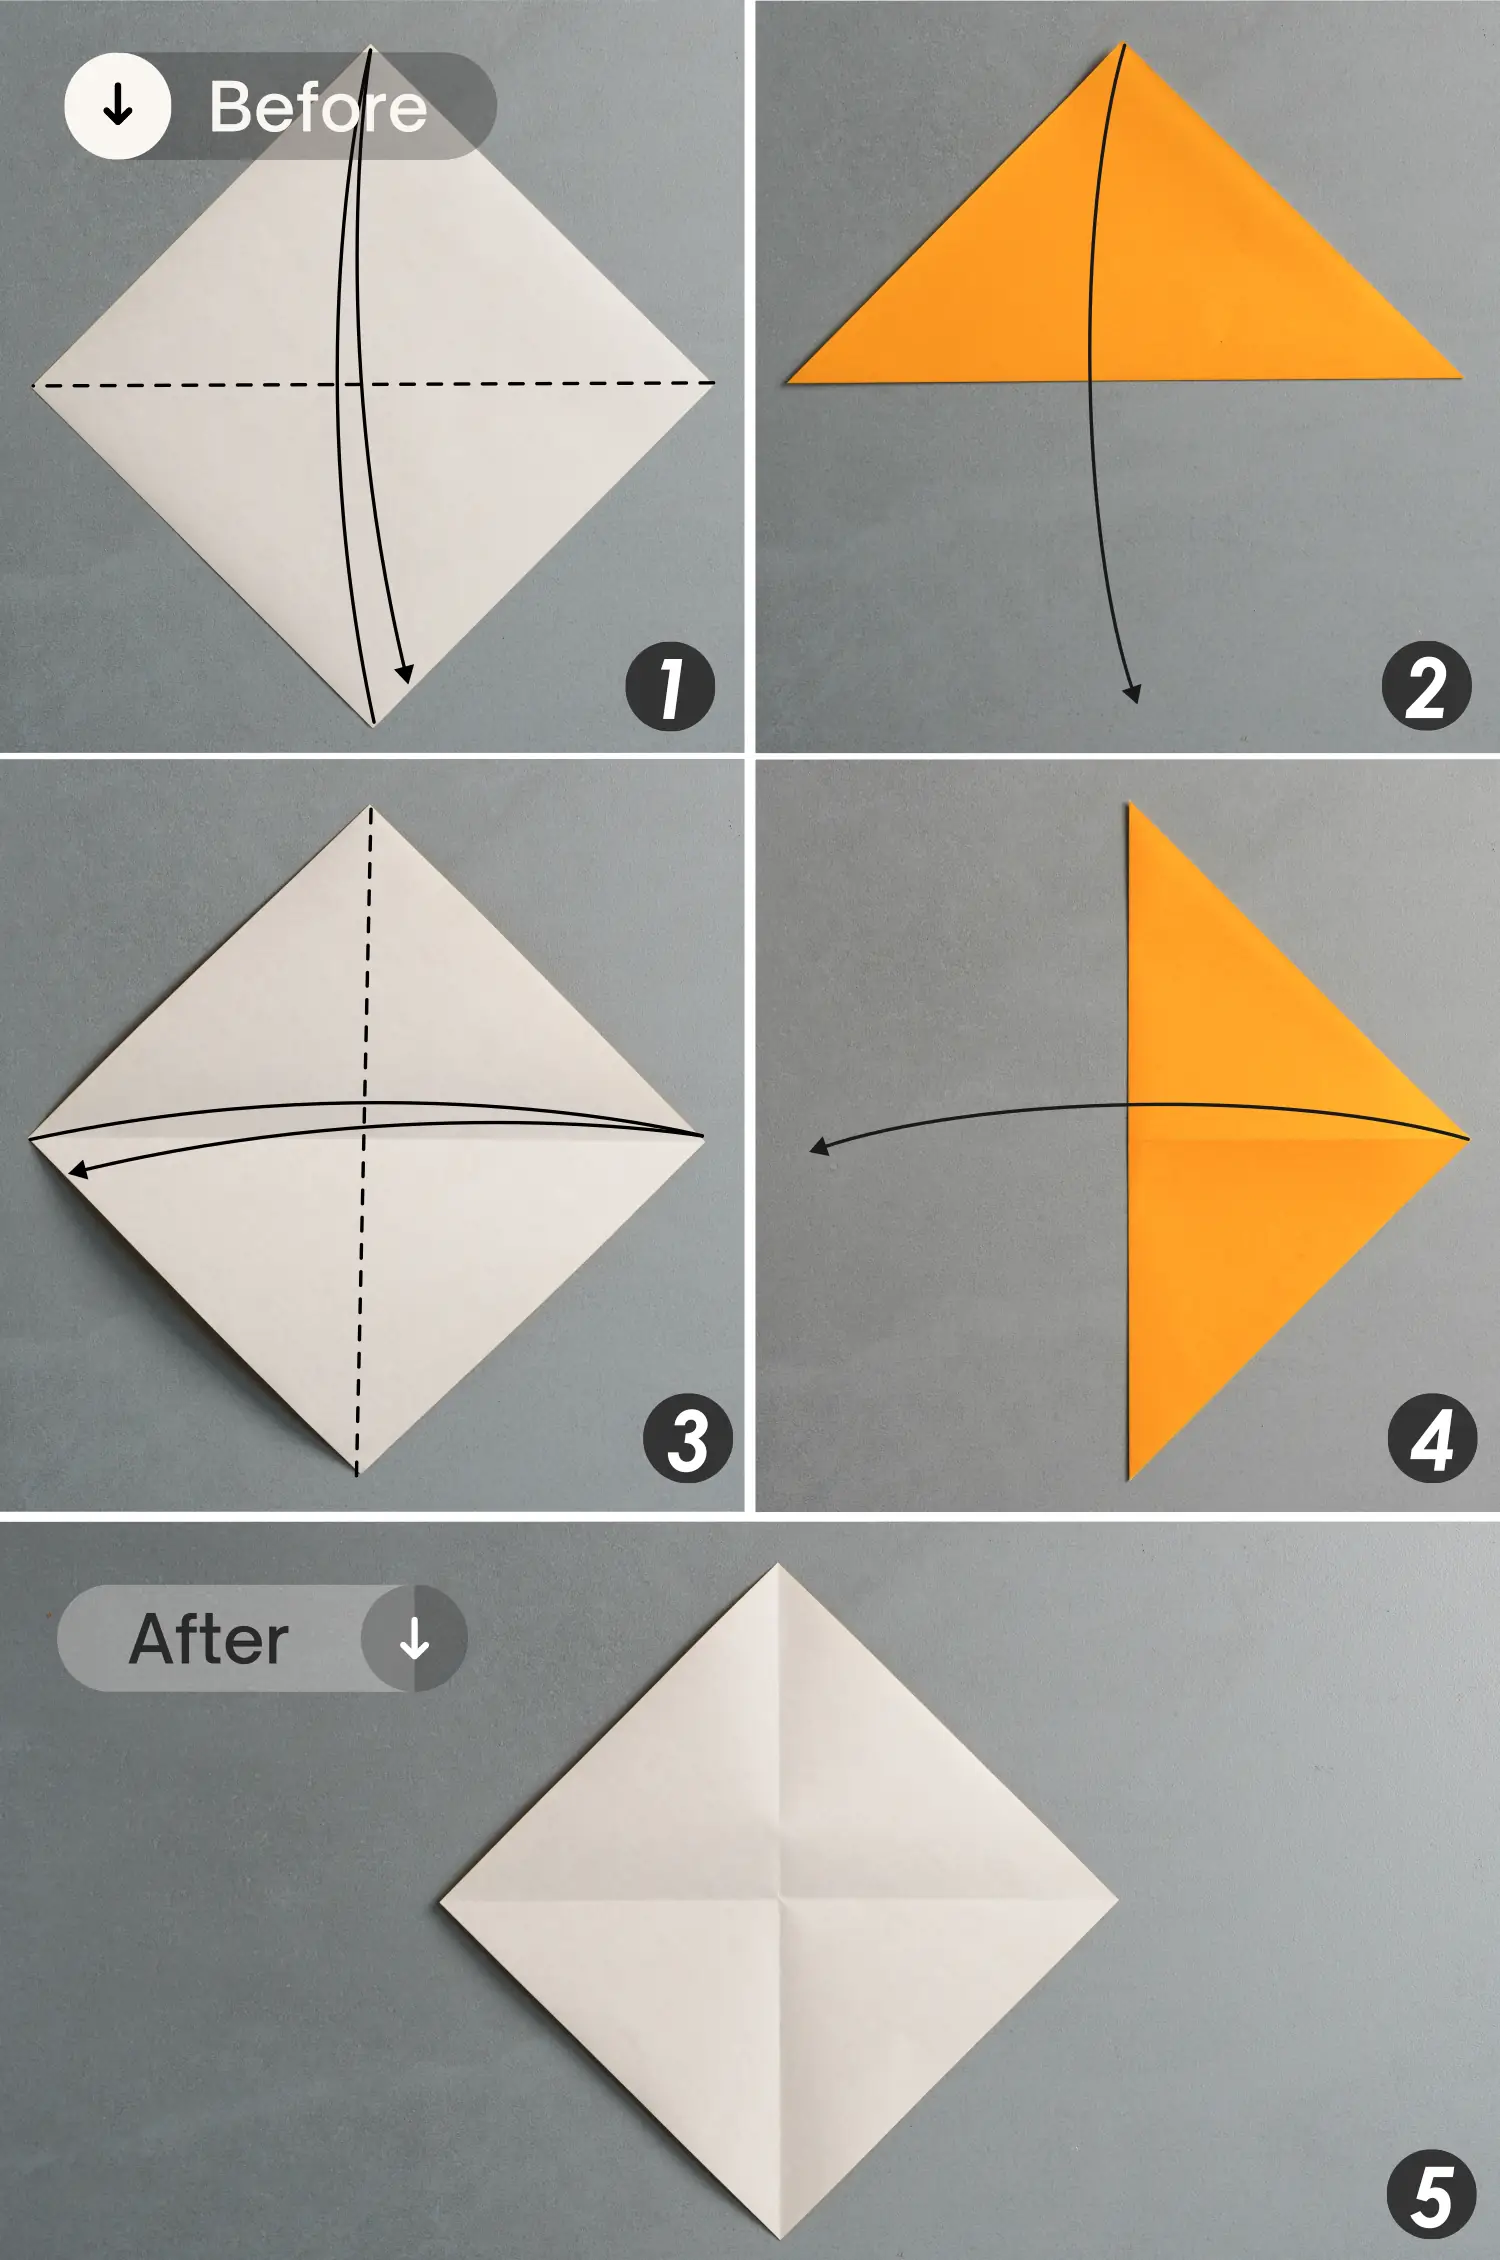
Step 2
Fold the top and bottom corners to meet the center intersection point formed by the two creases you made.
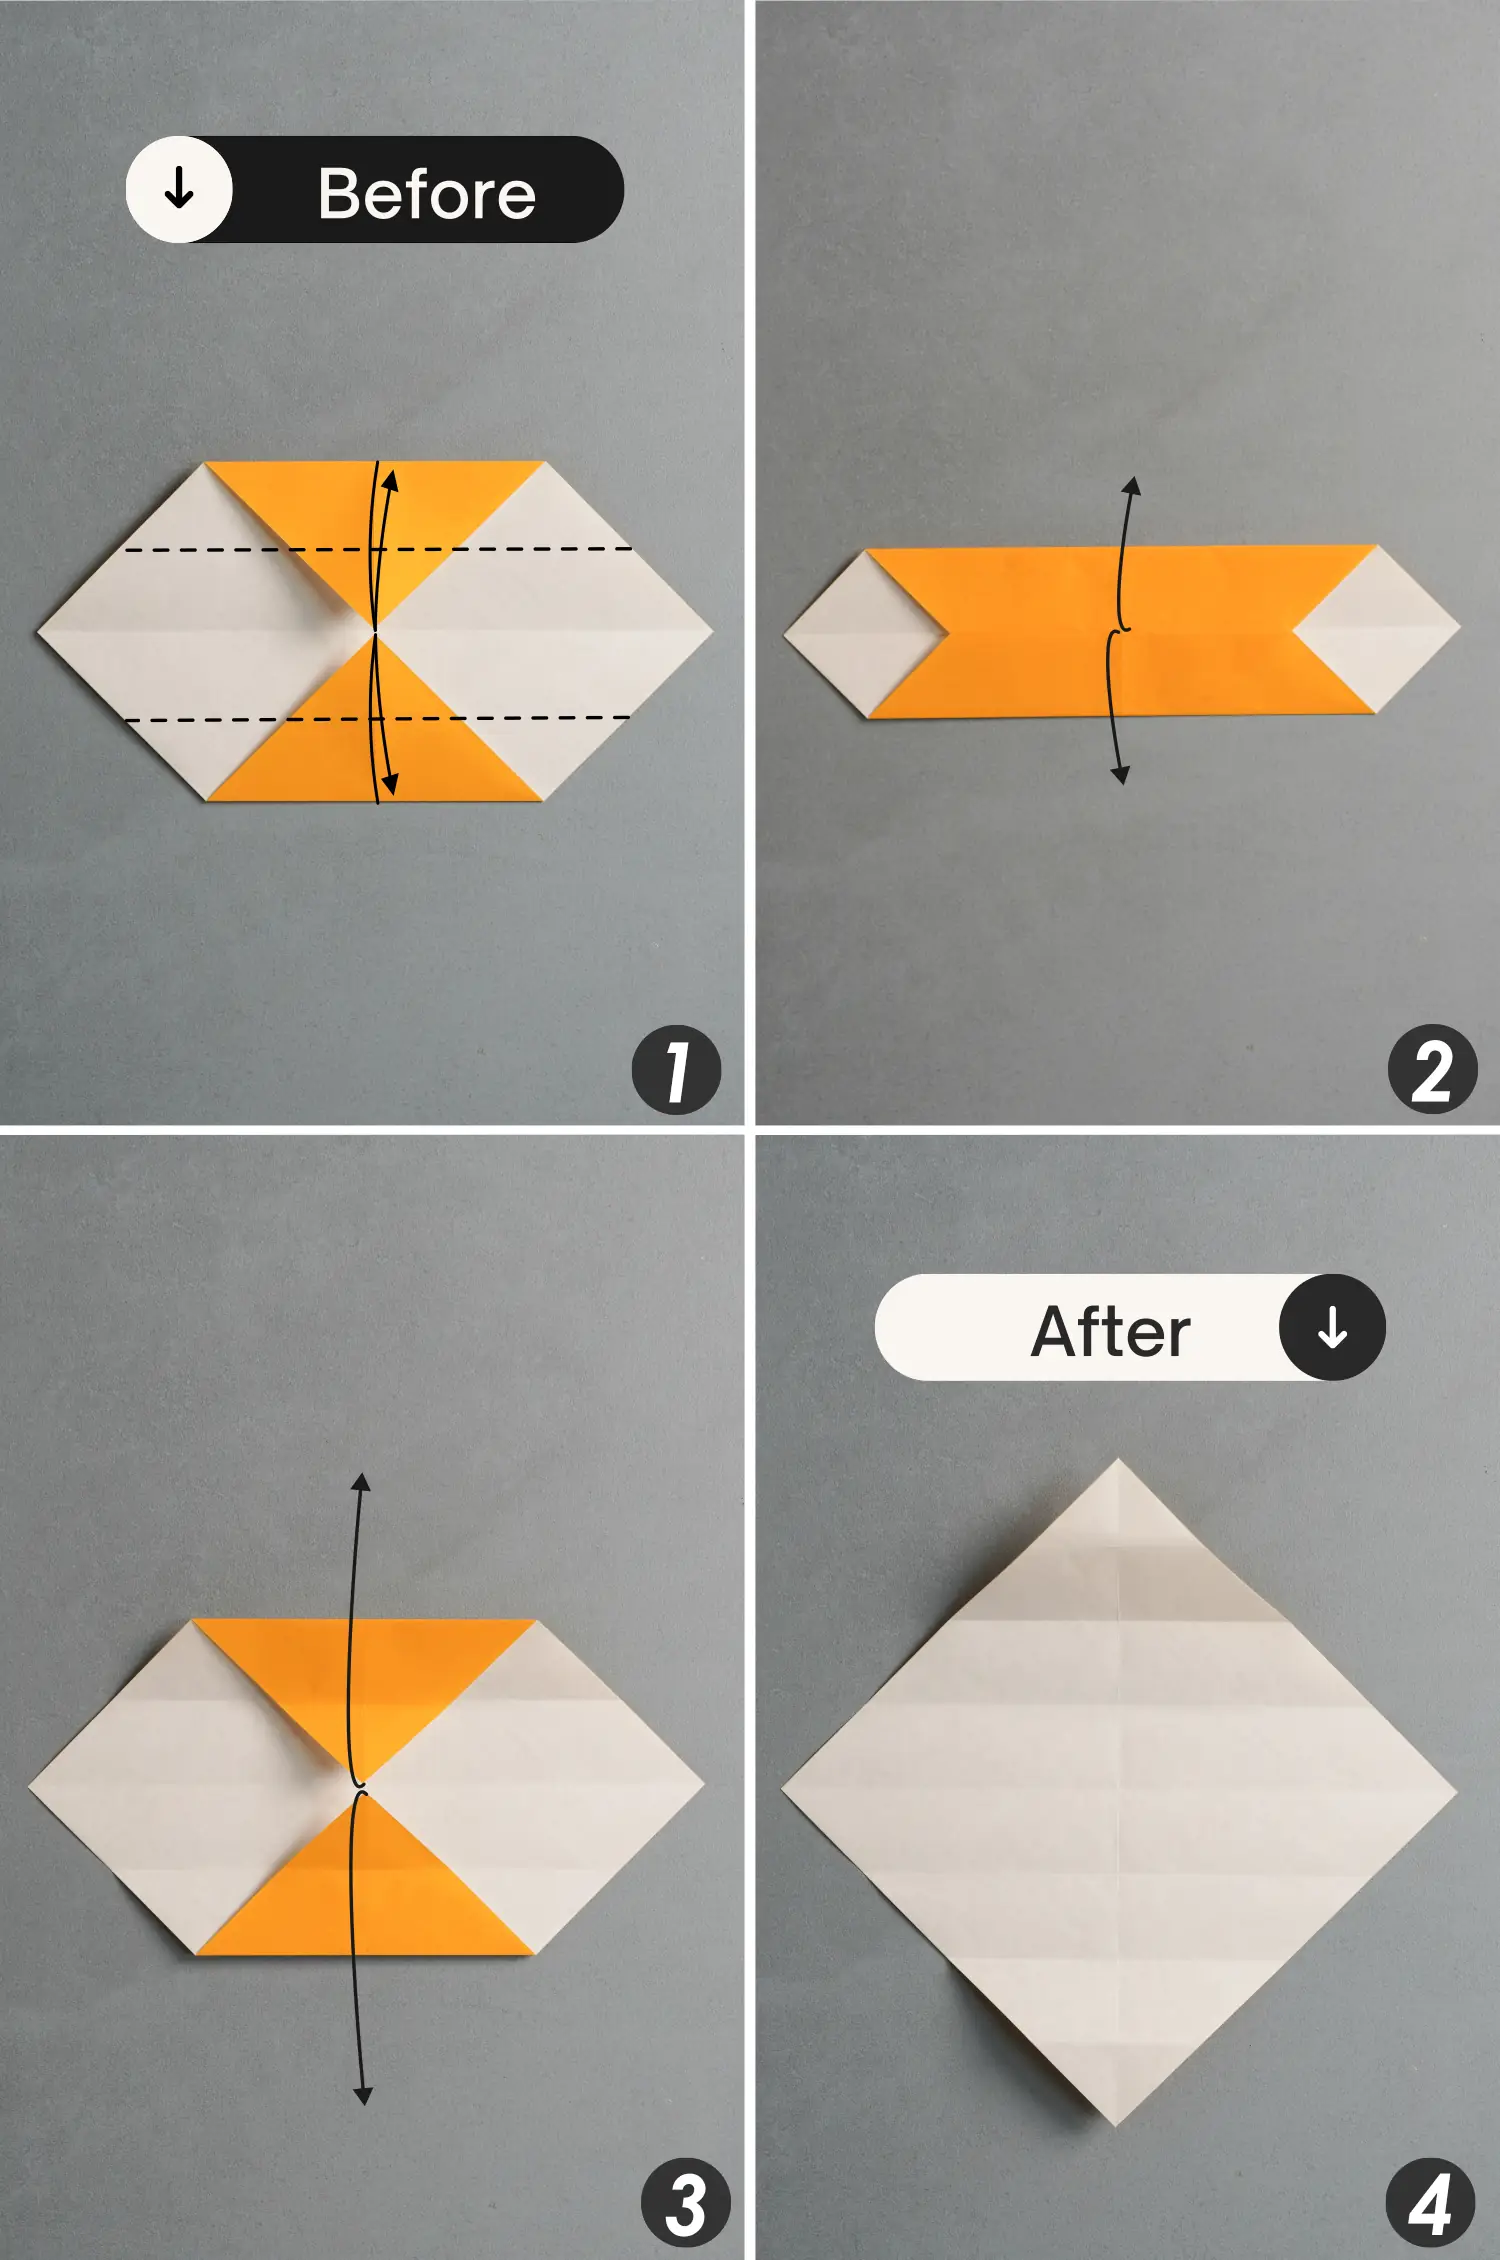
Step 3
Fold the top and bottom edges to align with the horizontal crease, crease them well, and unfold the paper completely.
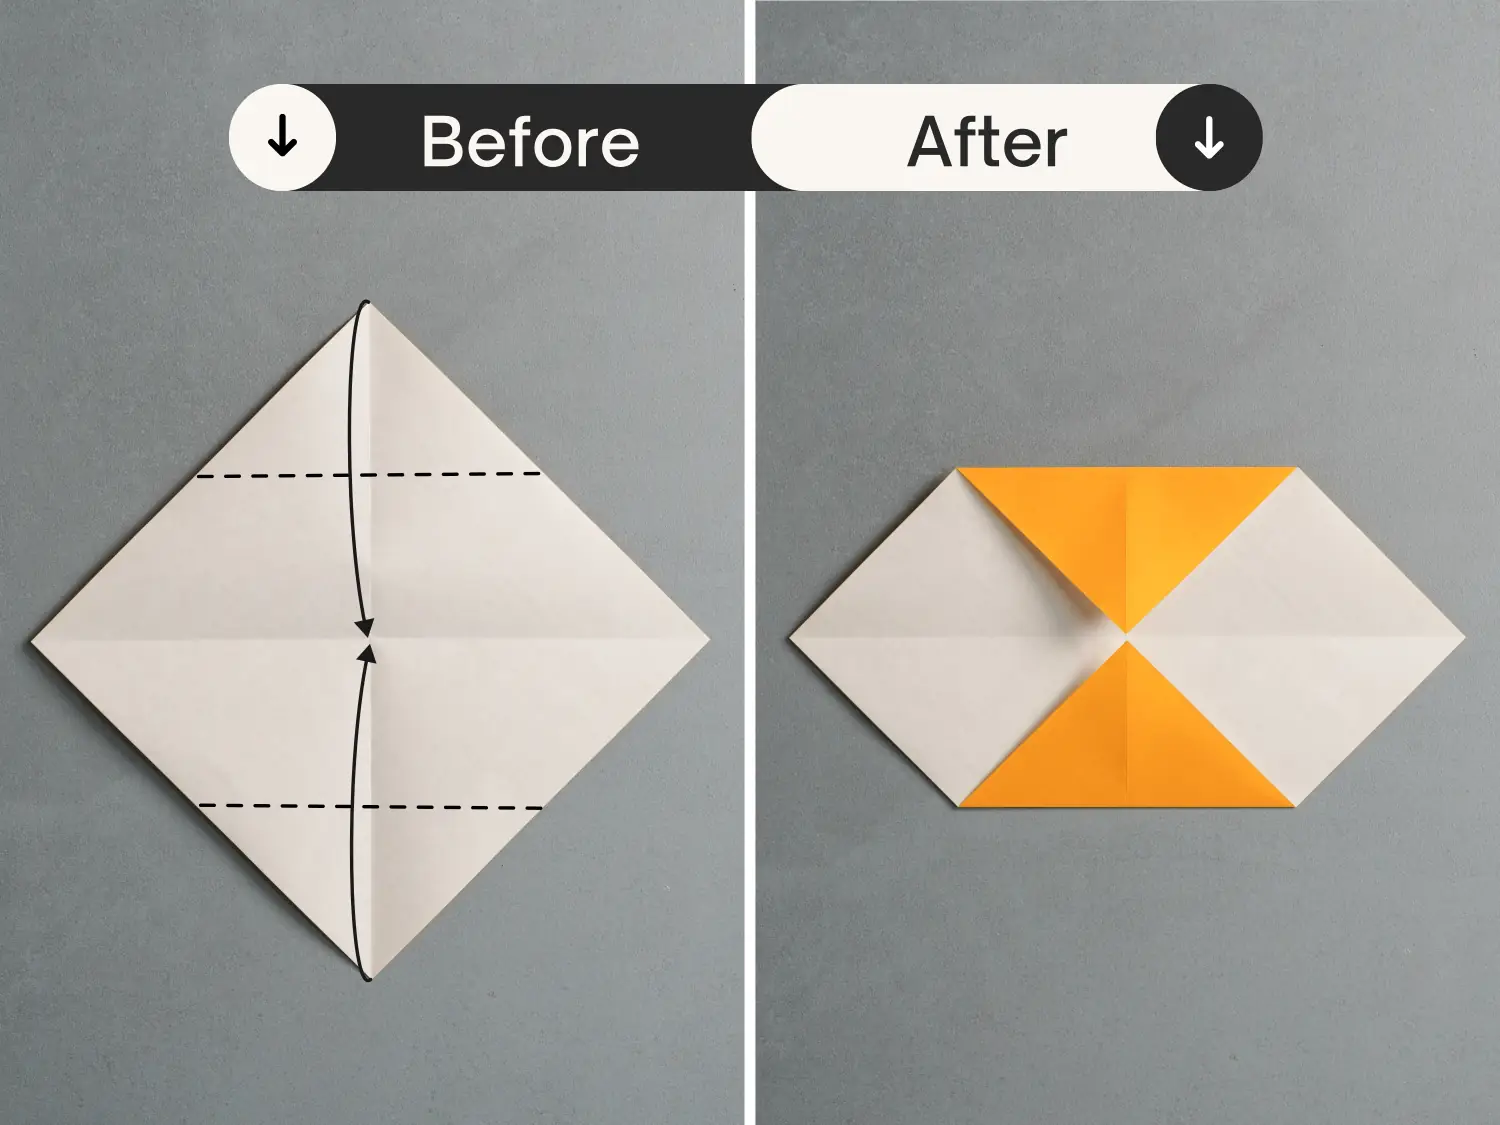
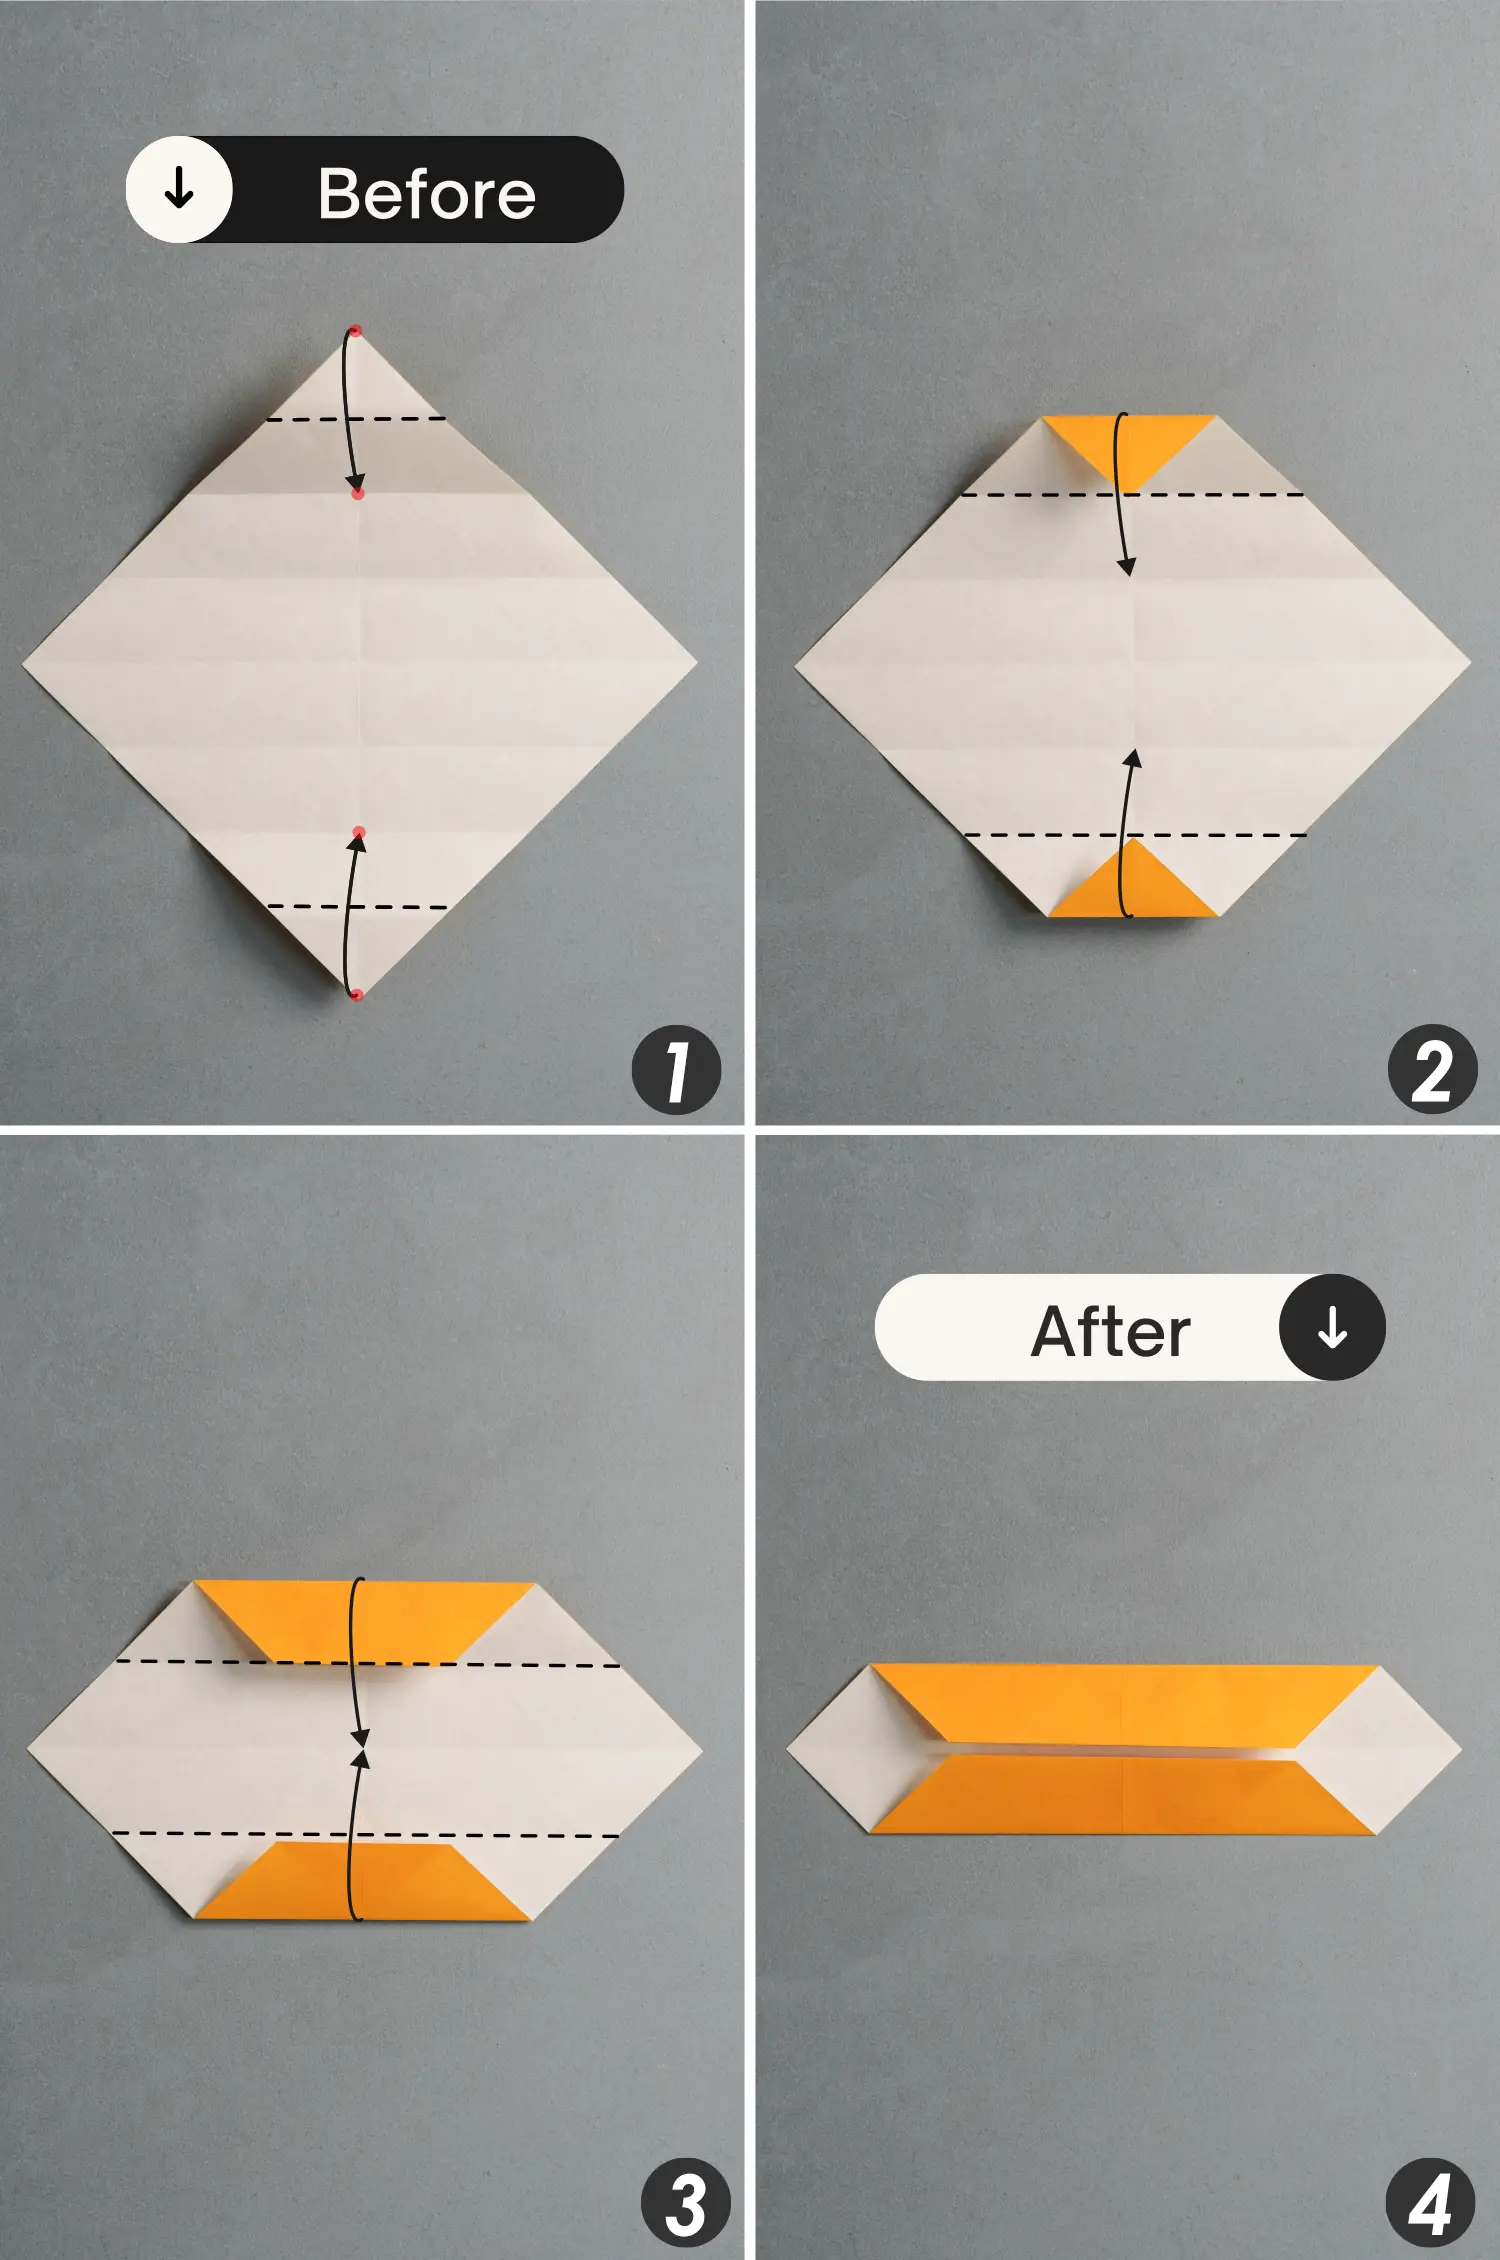
Step 4
Fold the top and bottom corners toward the center to meet the intersection points indicated by the red spots. Then, fold the top and bottom edges along the existing creases indicated by the dotted lines, and repeat this one more time; there will be two symmetrical trapezoids in the middle.
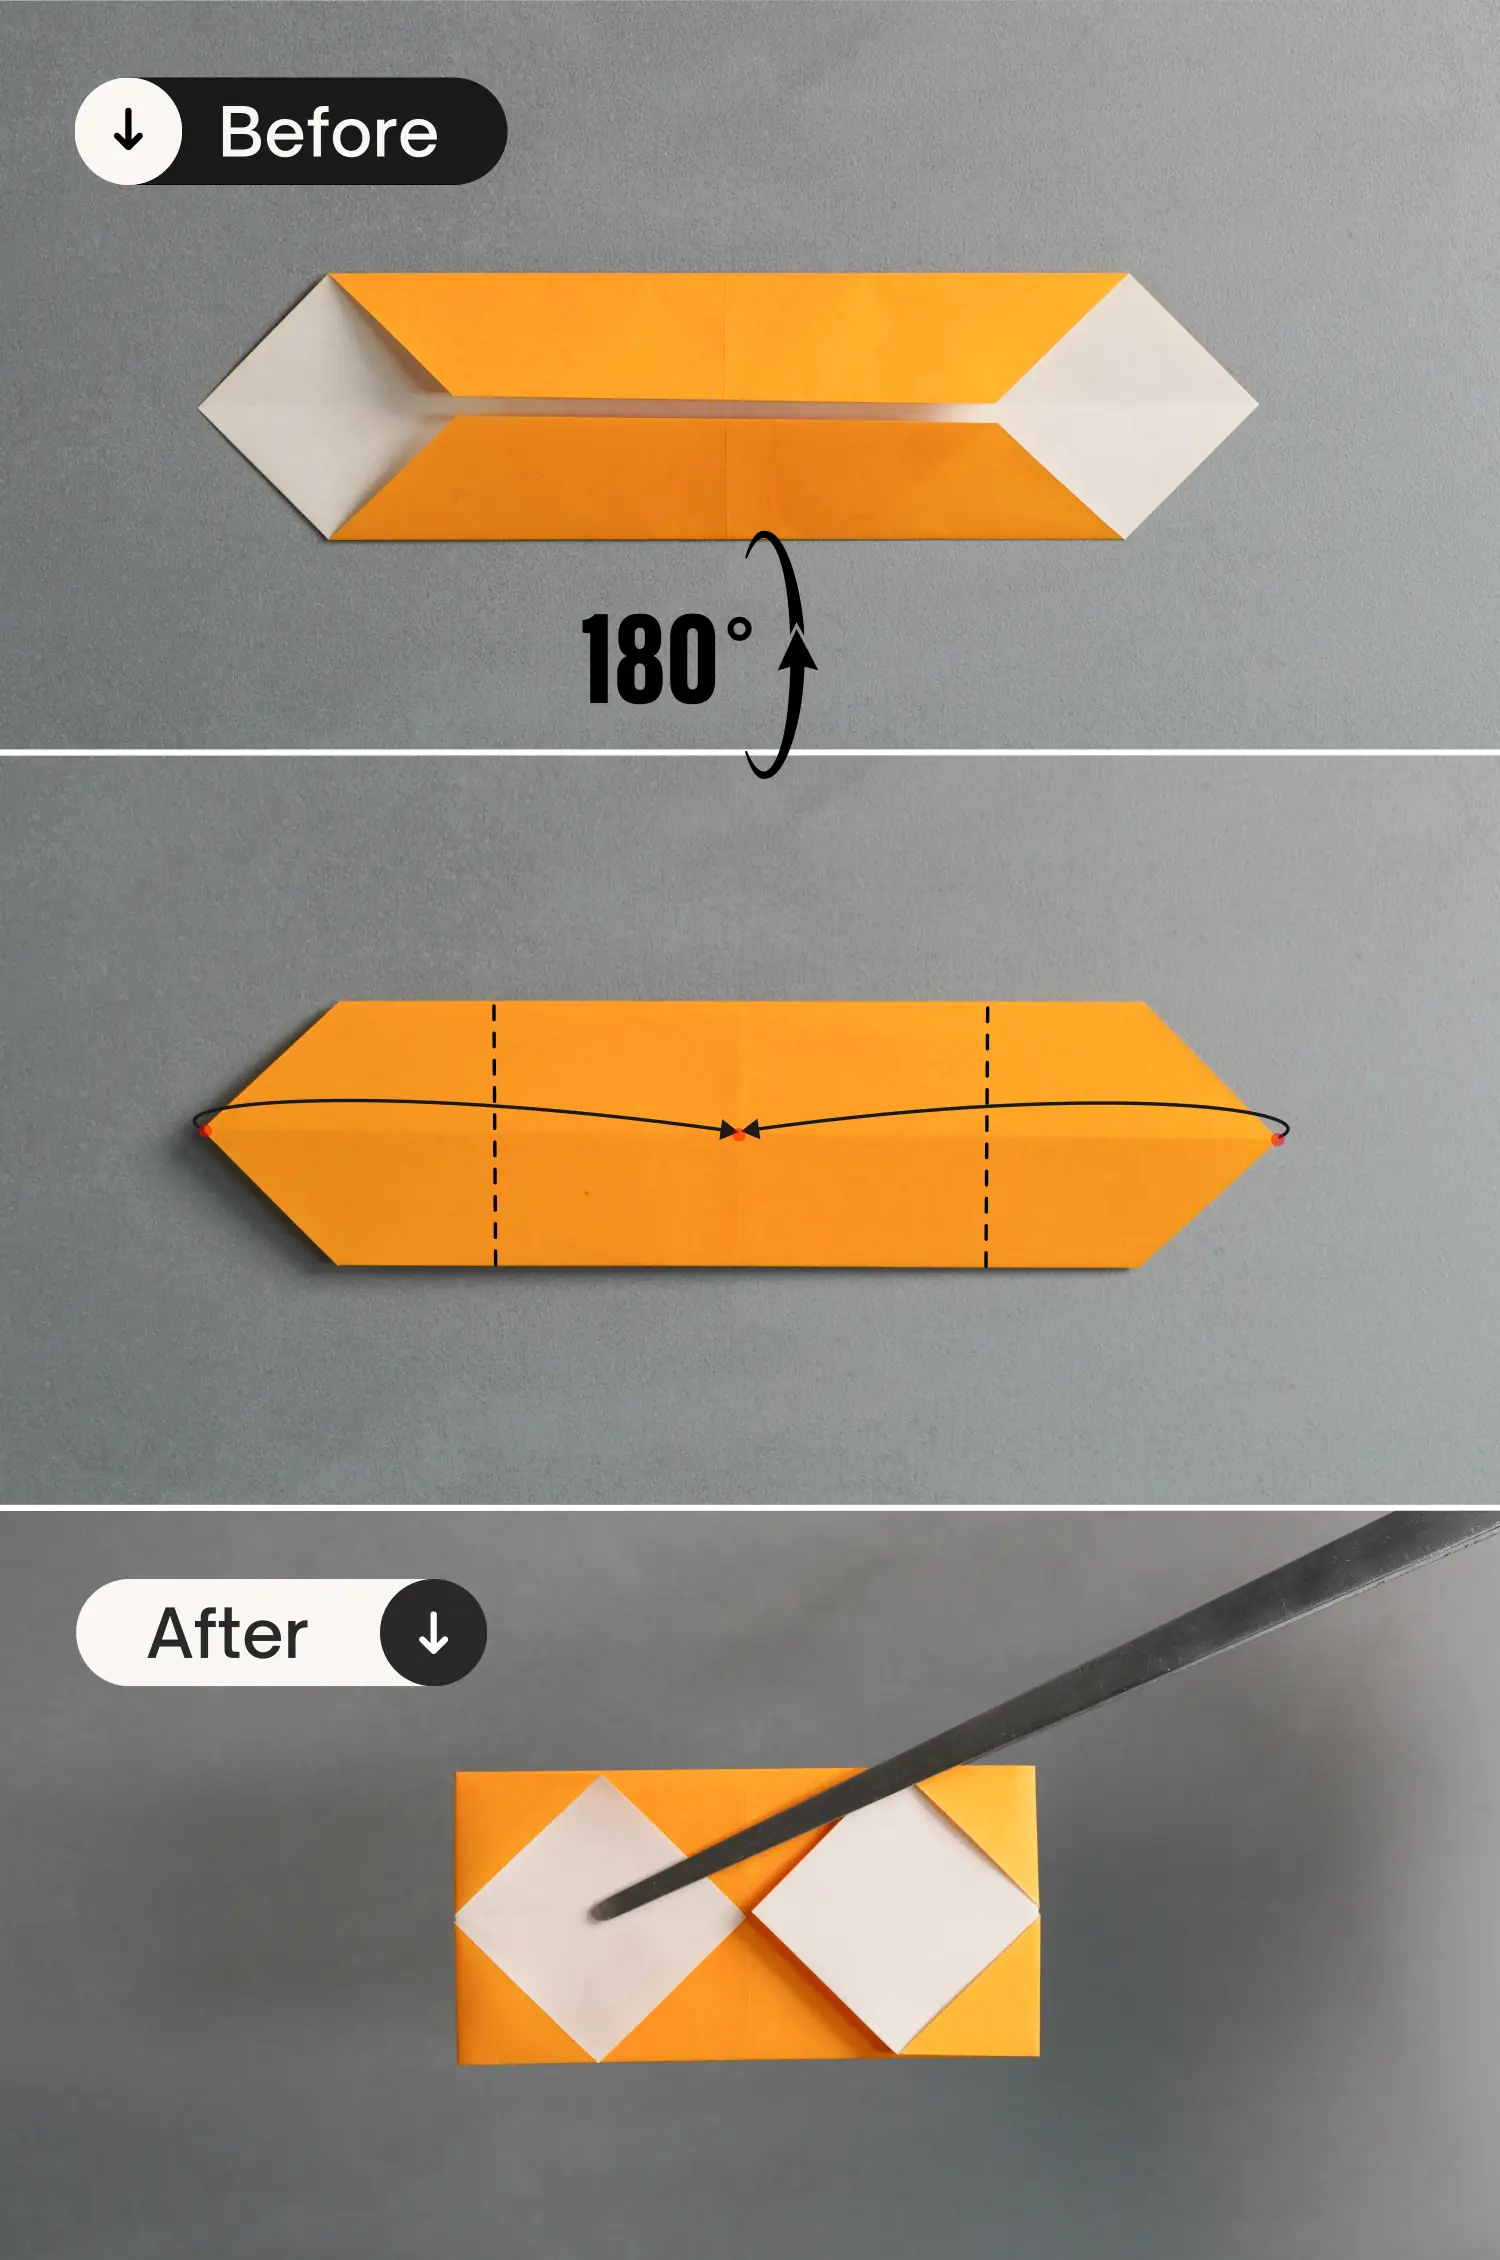
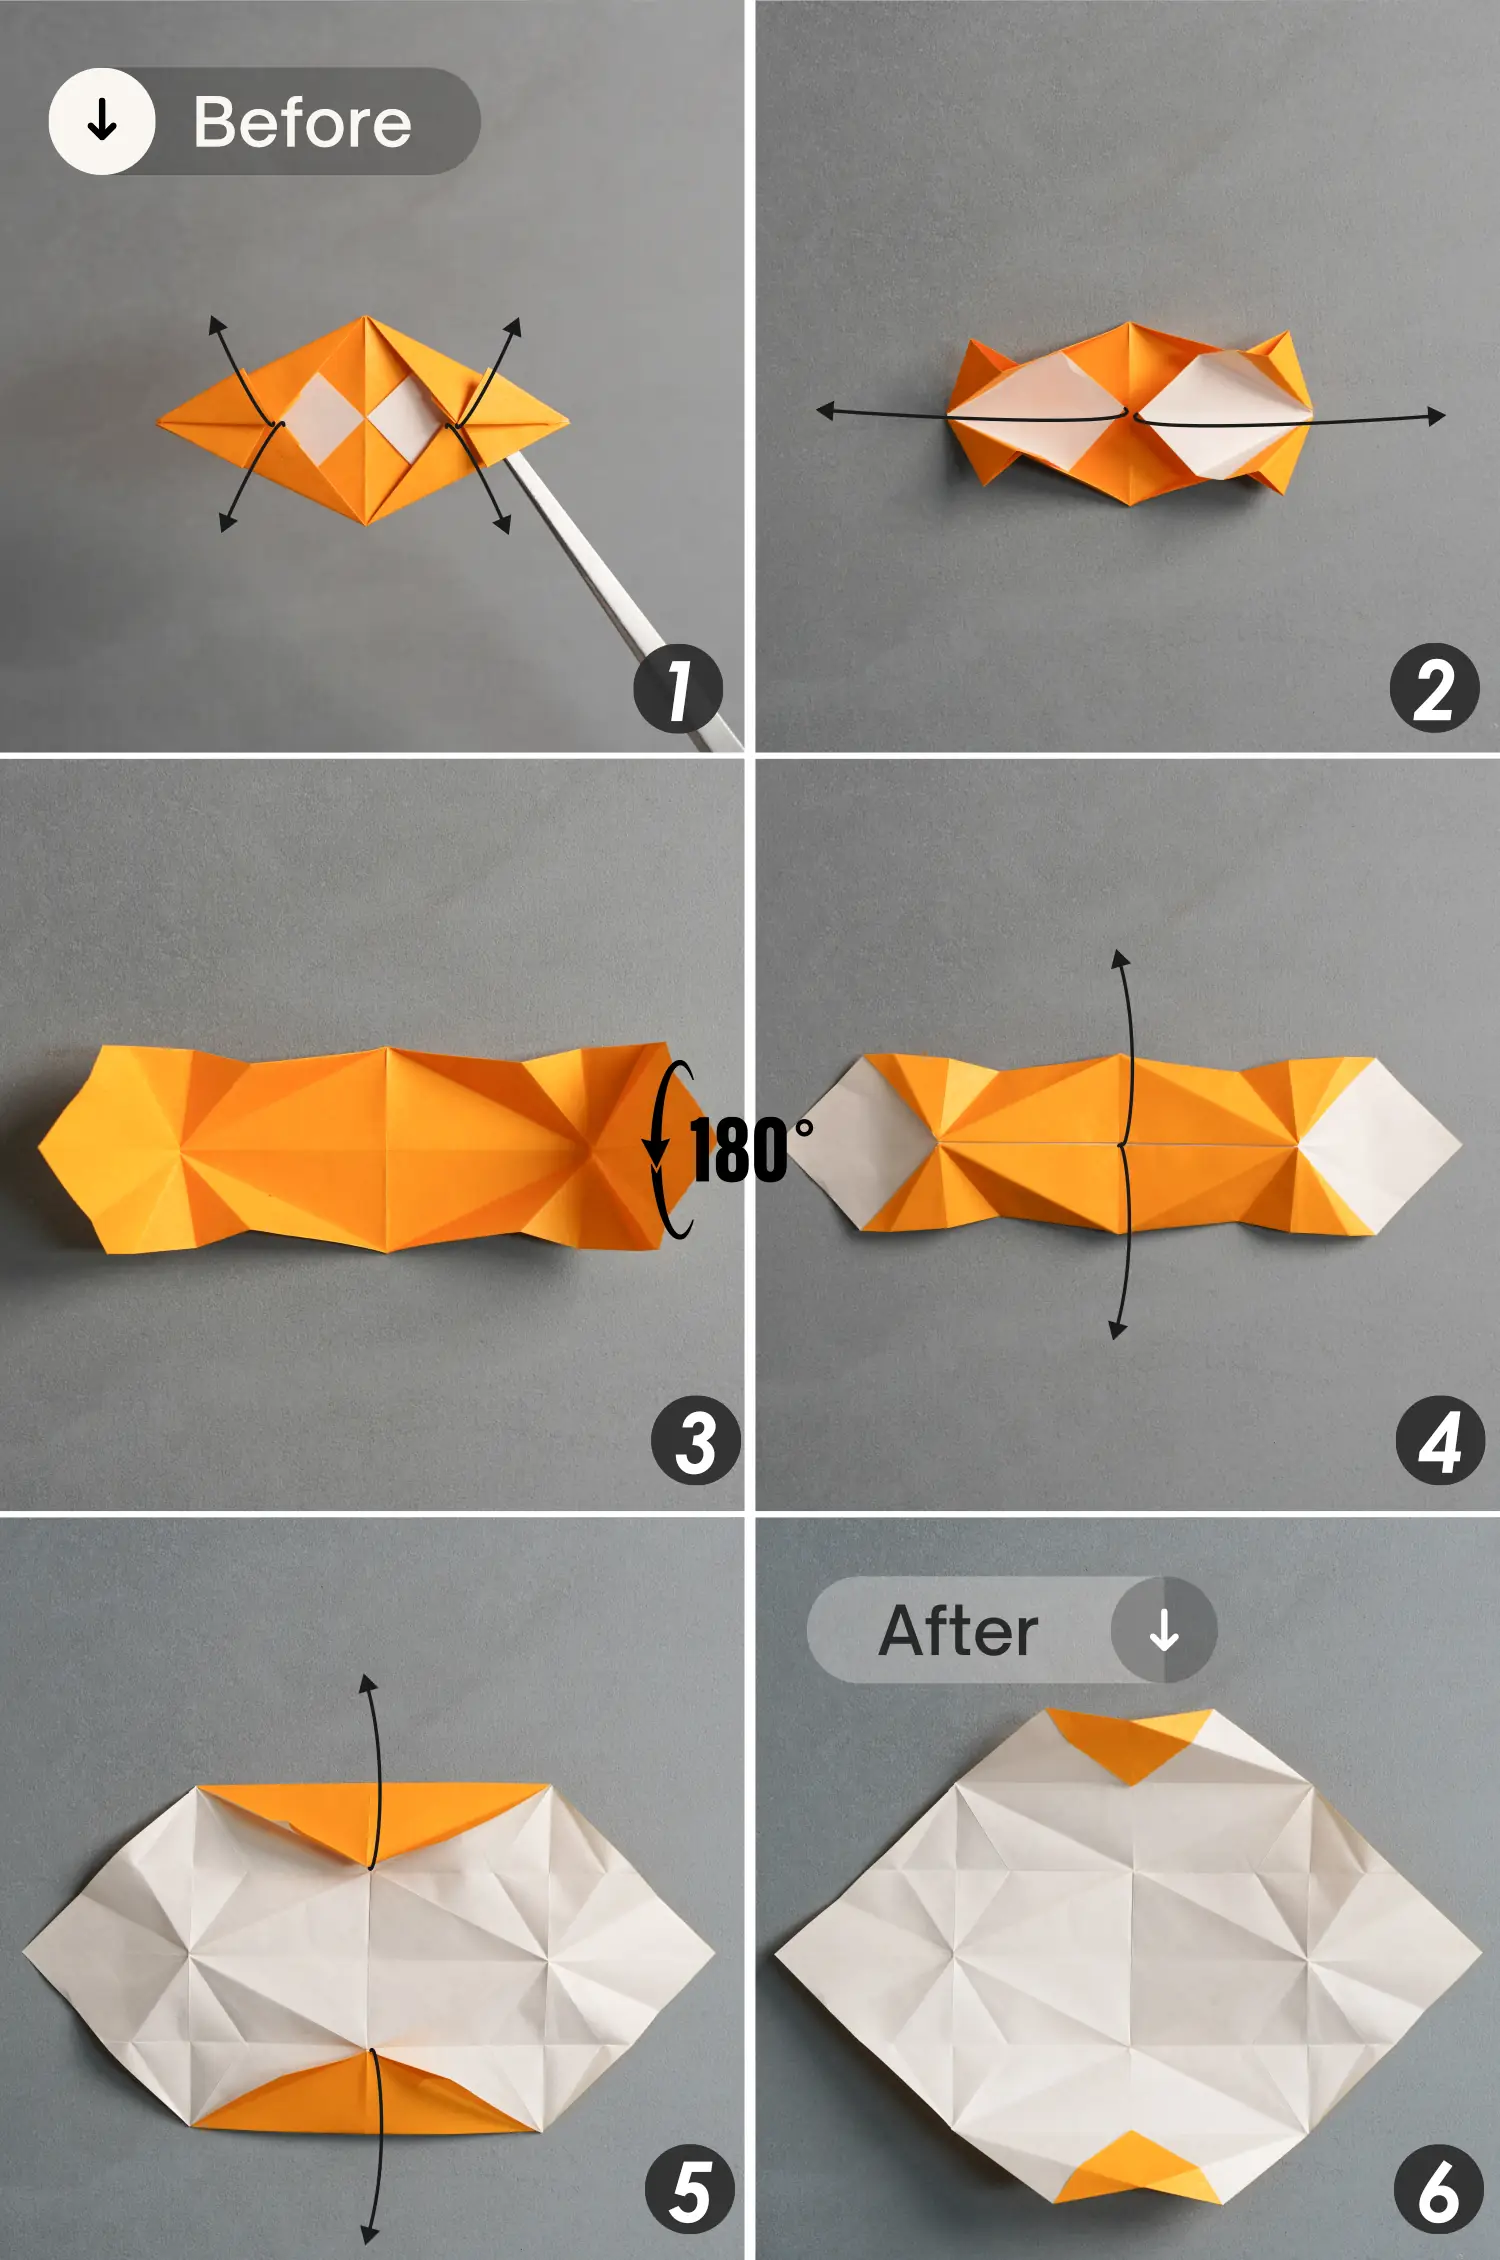
Step 5
Turn over the paper from back to front, then fold the left and right points to meet the center intersection point.
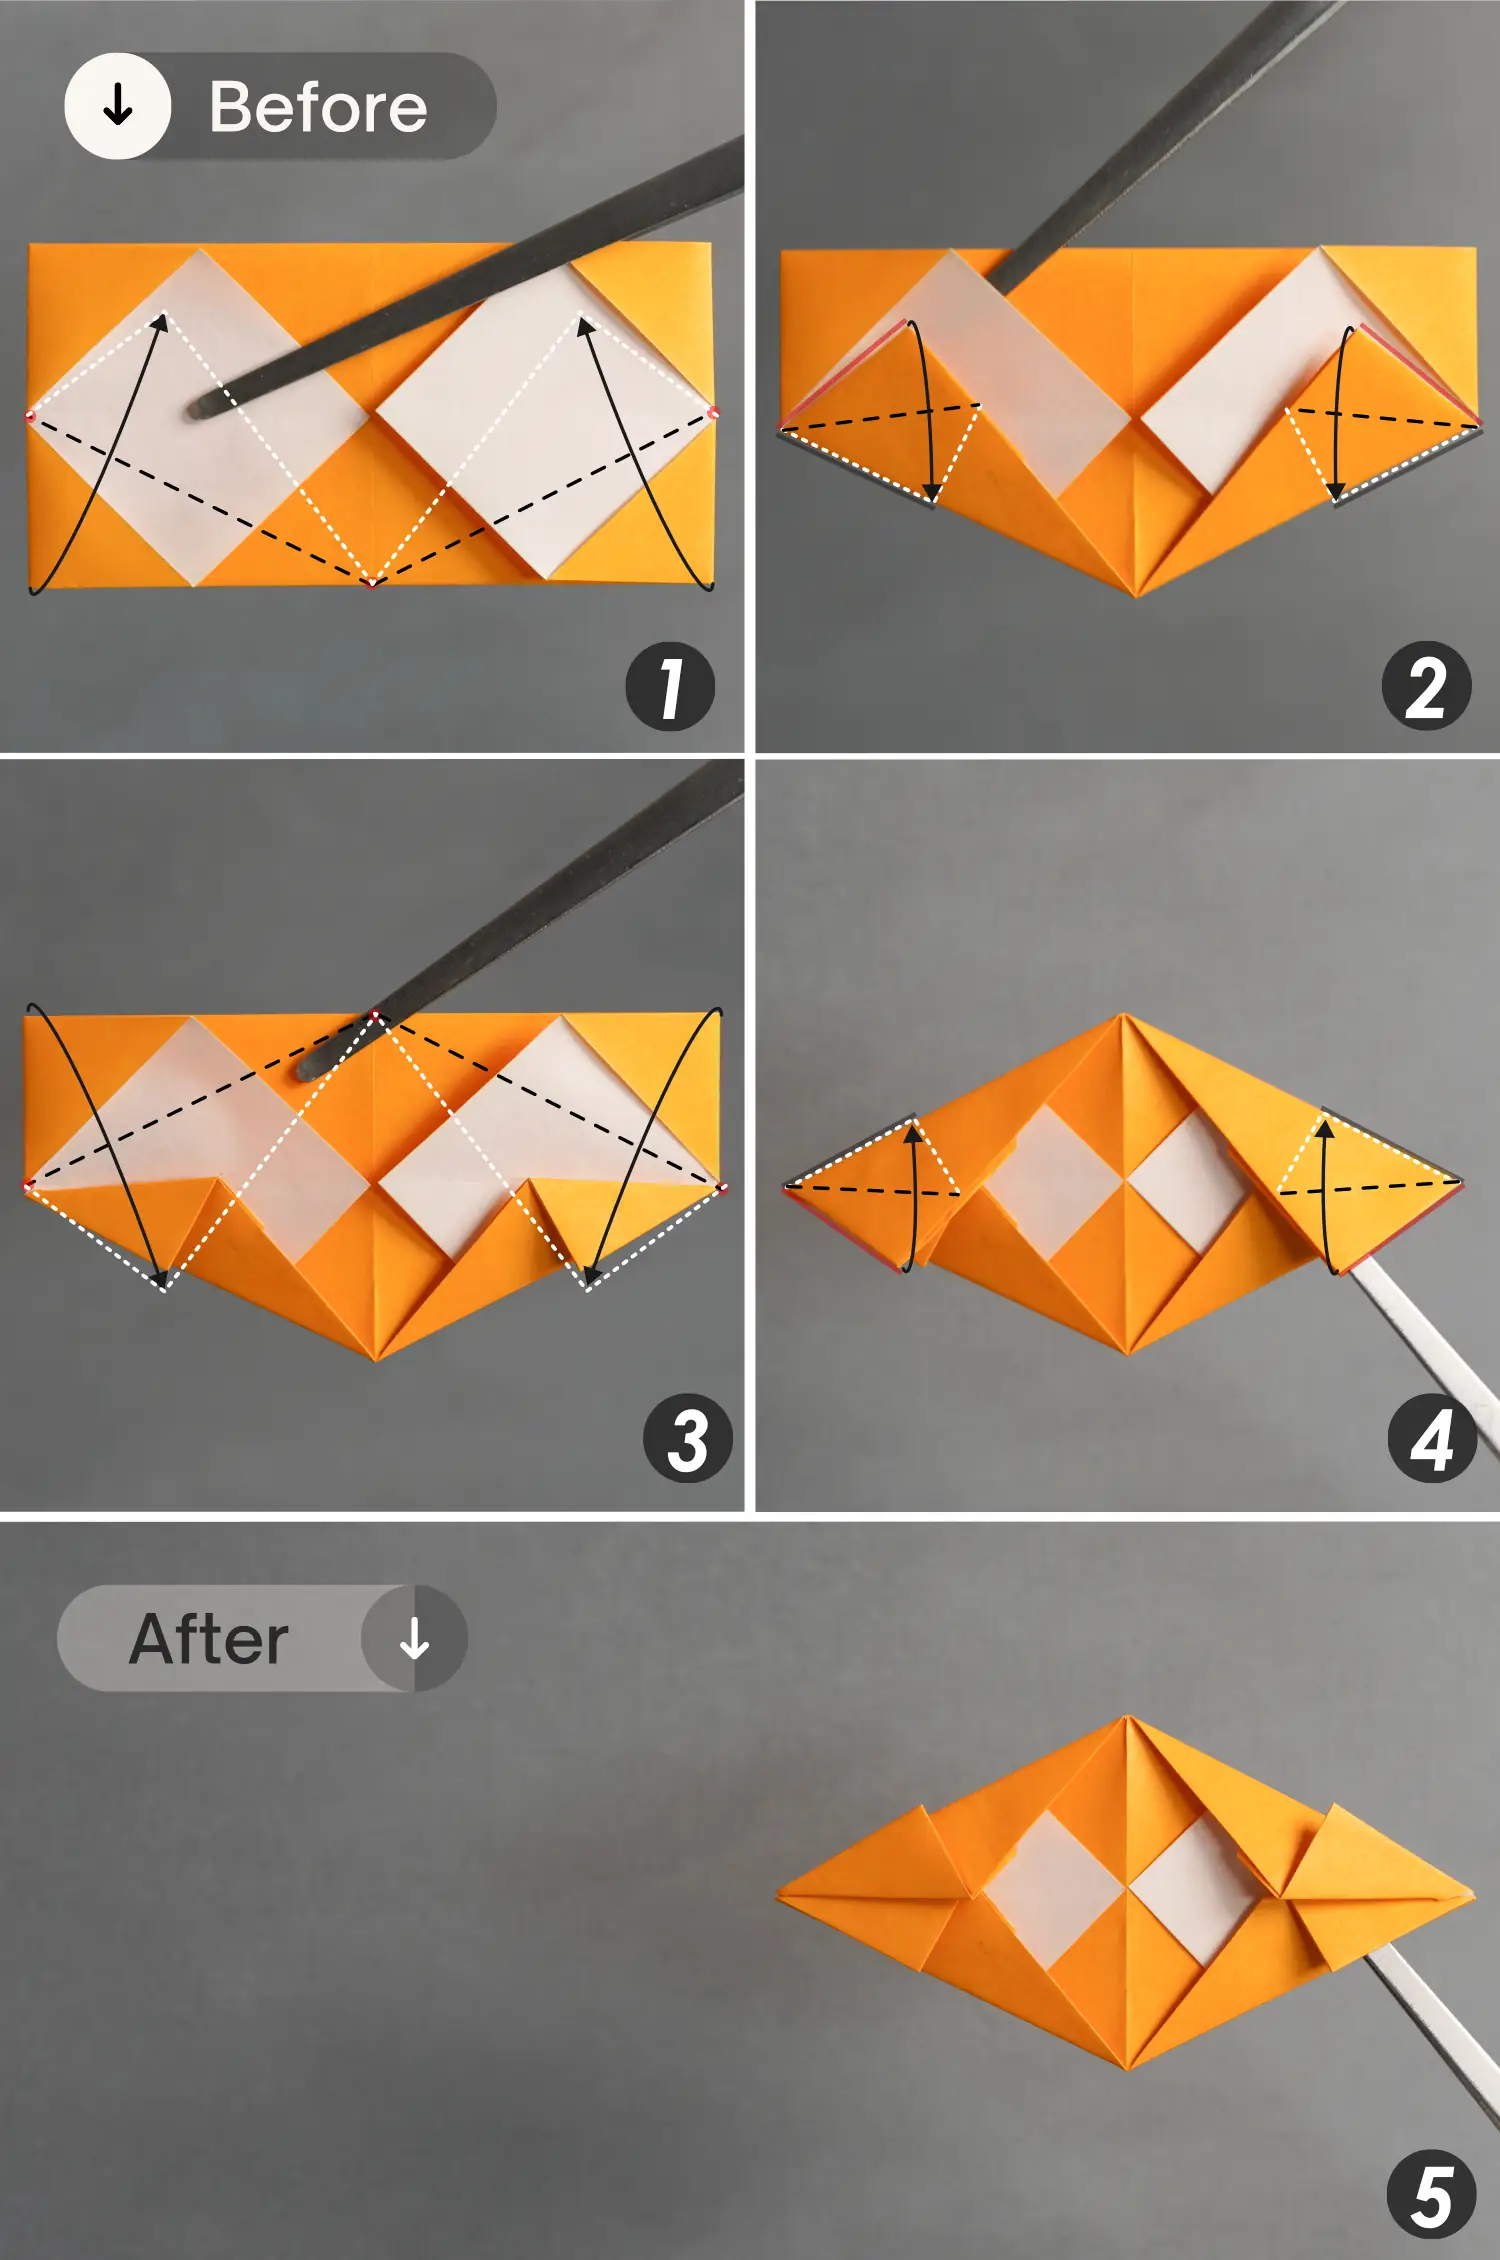
Step 6
Fold the lower left and right corners upward along the two dotted black lines that connect the midpoint of the bottom edge and the midpoints of the left and right edges[picture 1].
Fold the red edges of the two flaps to align with the black edges[picture 2].
The same goes for the top side. Fold the top left and right corners downward along the two dotted black lines that connect the midpoint of the top edge and the midpoints of the left and right edges[picture 3].
Fold the red edges of the two flaps to align with the black edges[picture 2].
Step 7
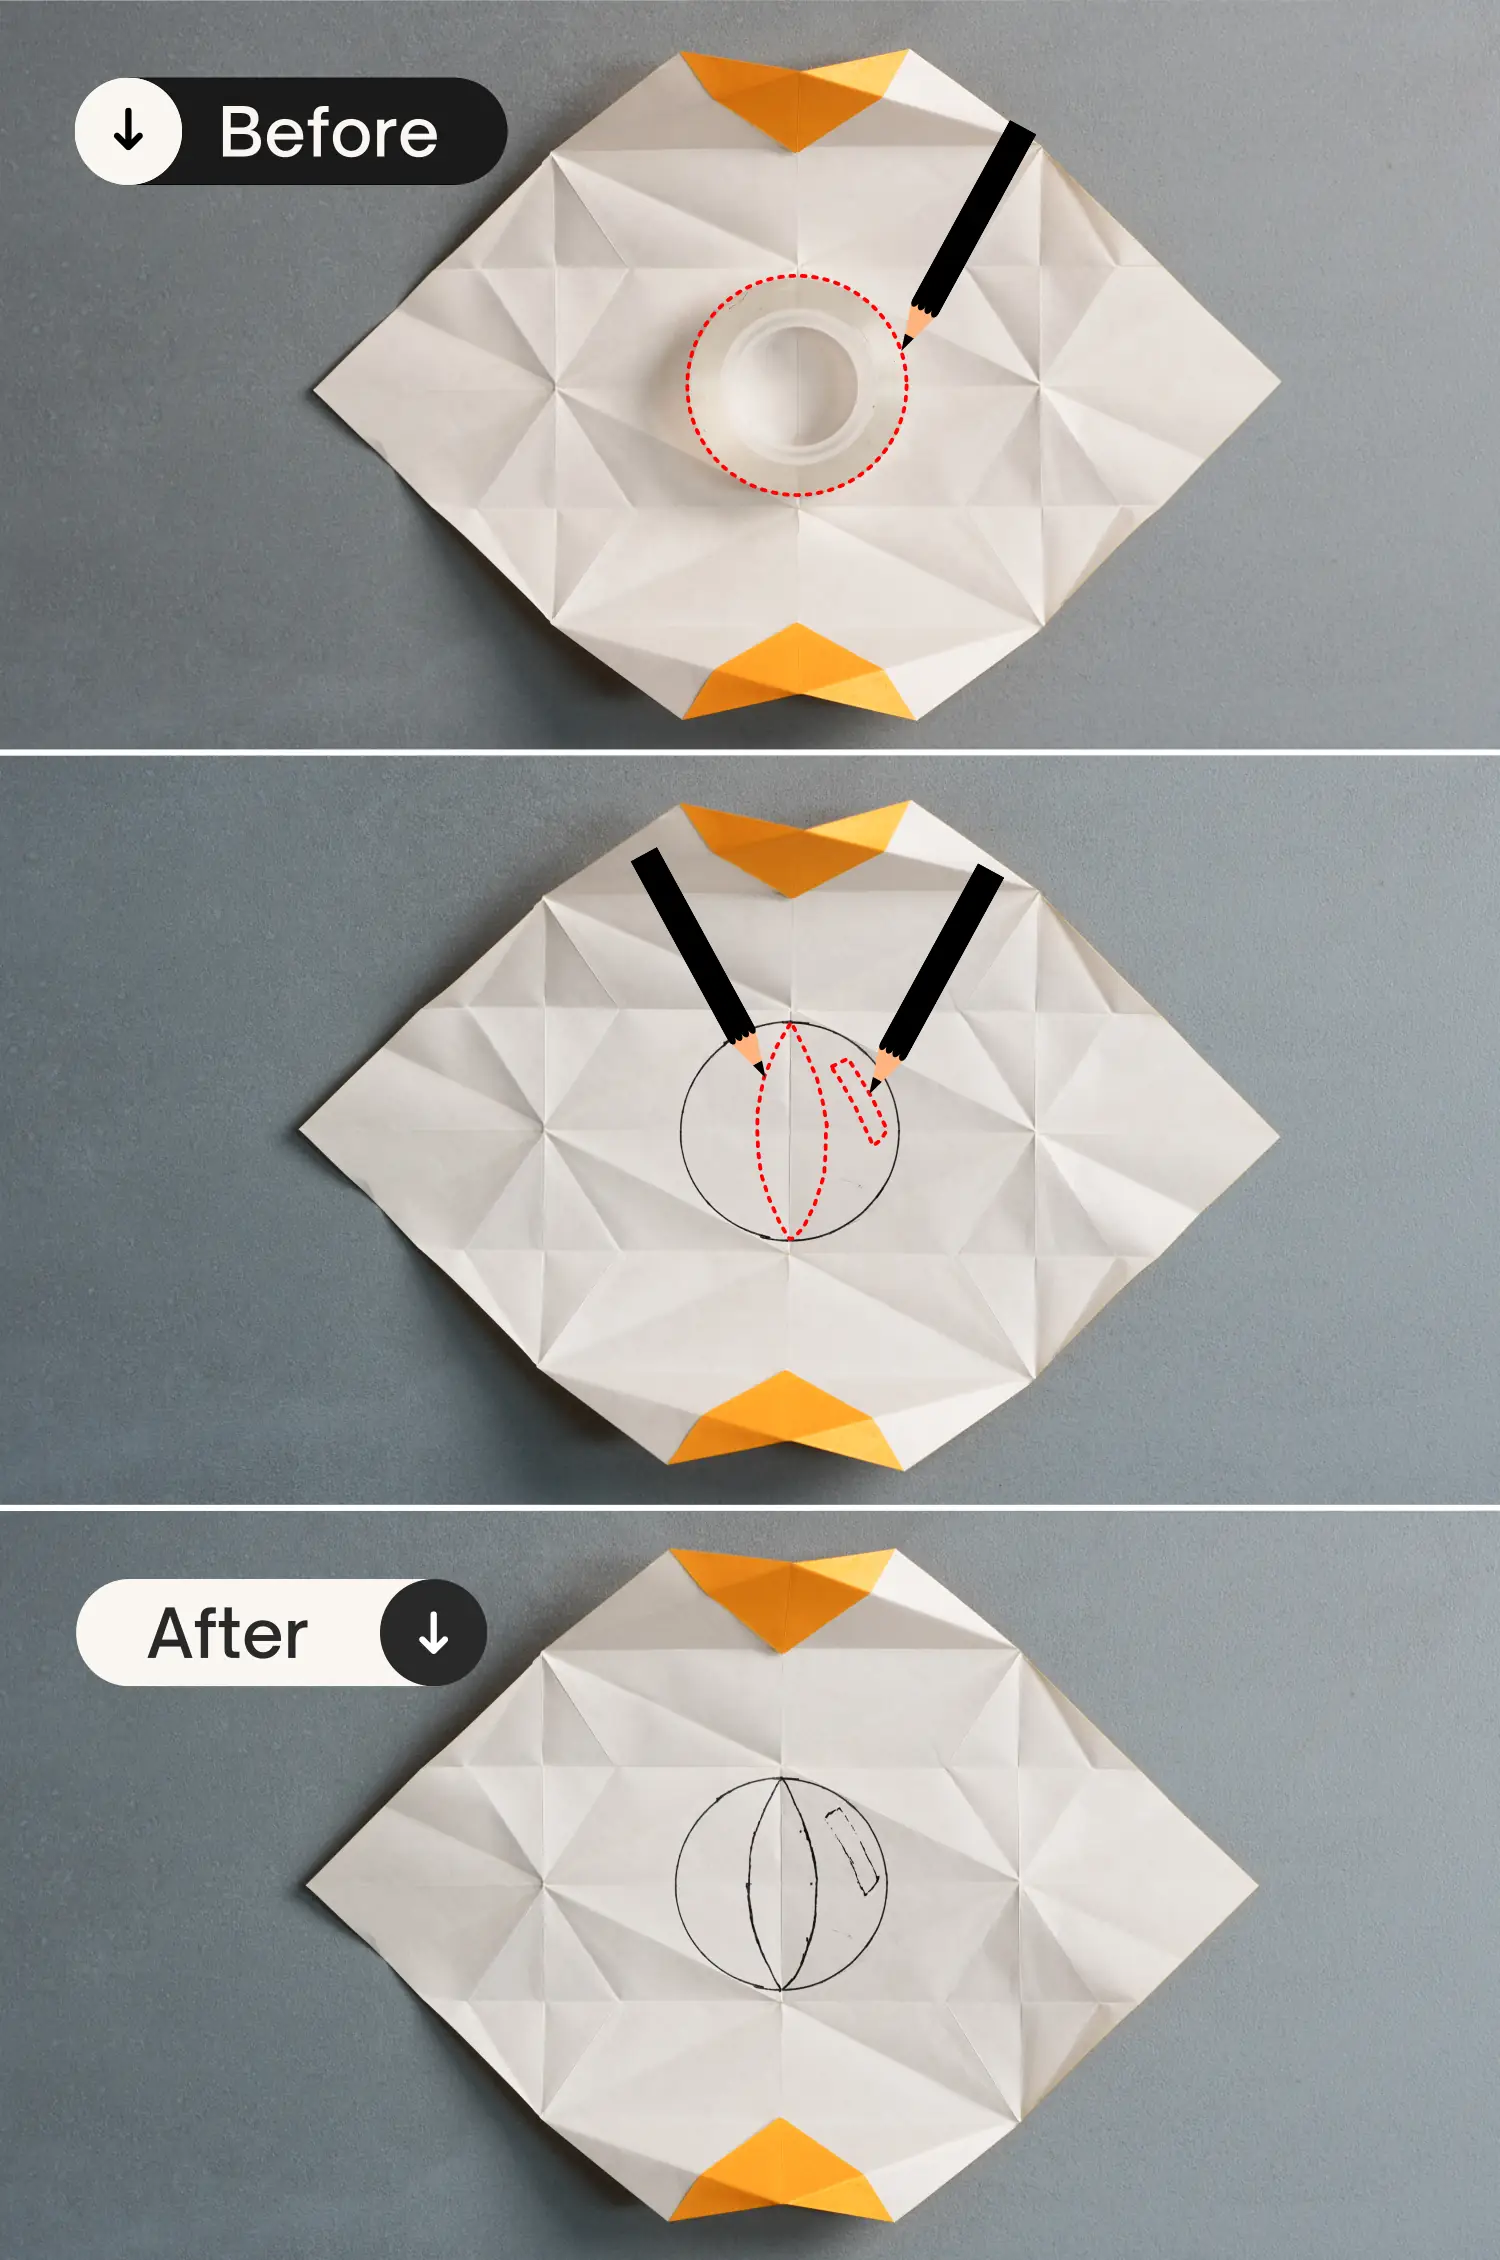
Follow the steps below to unfold and turn the paper.
Step 8
Use any tool to draw a circle in the middle of the paper, and I used a tape here.
Then, draw an olive shape in the middle of the circle for the pupil and a rectangle for the highlight.
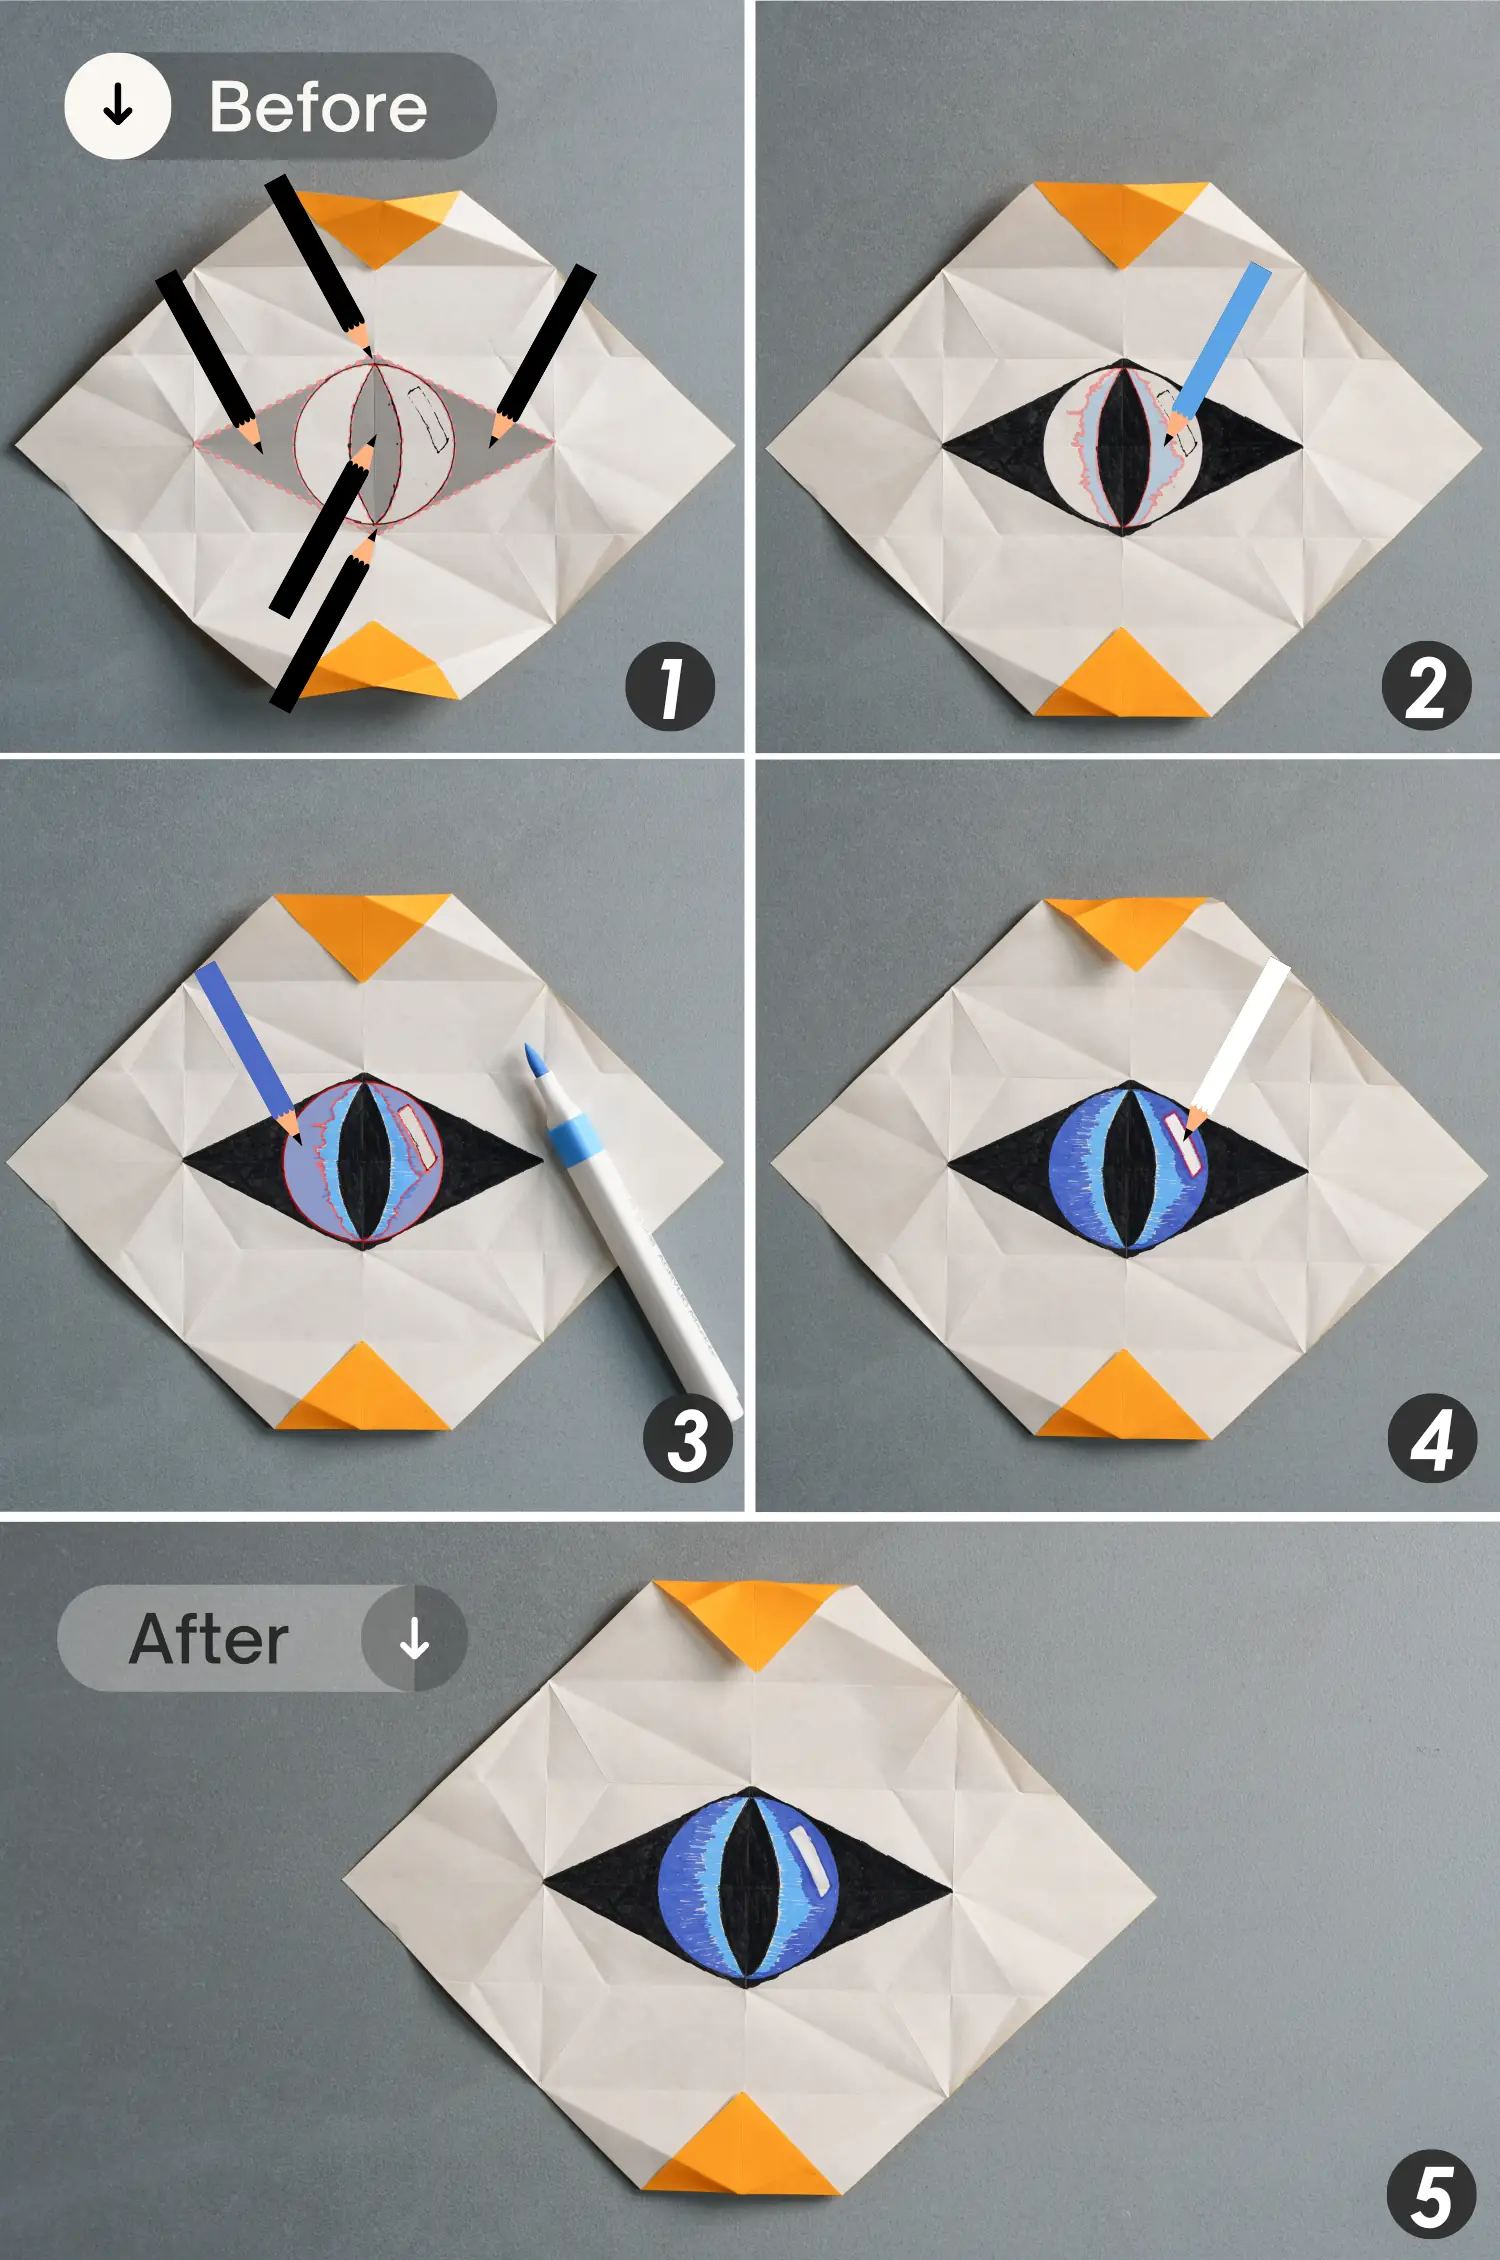
Step 9
Color this eye.
Step 10
Fold the top and bottom edges along the existing creases twice to get two symmetrical trapezoids in the middle.
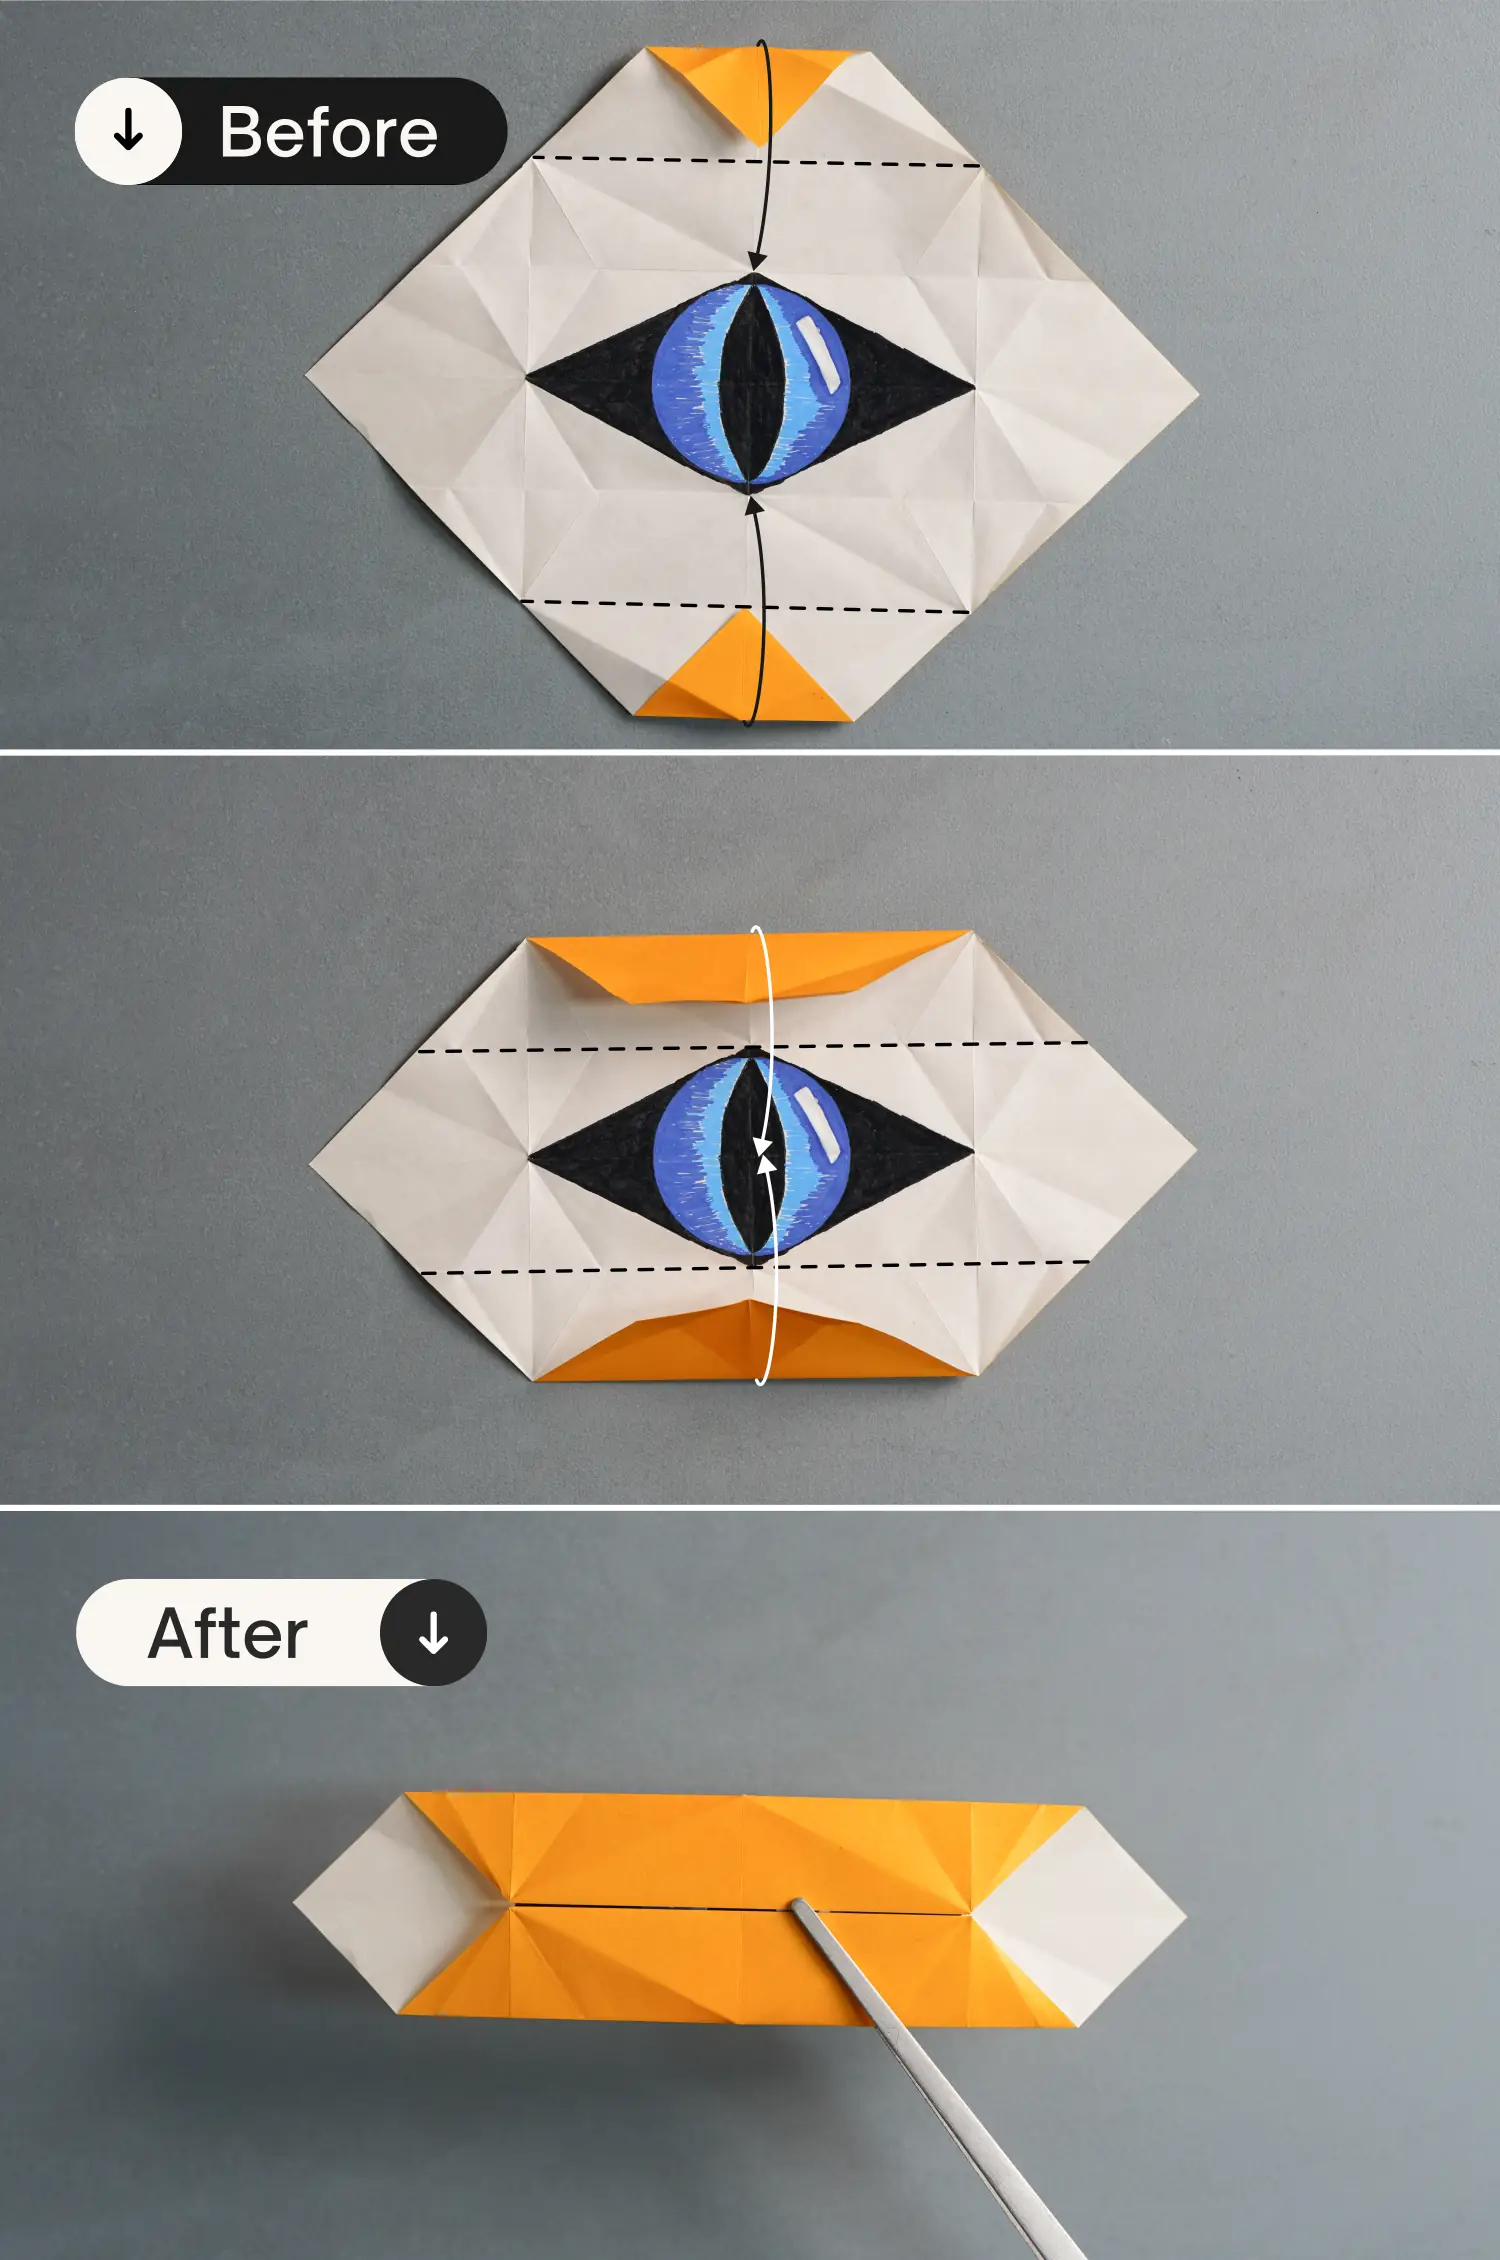
Step 11
Draw the pattern you like.
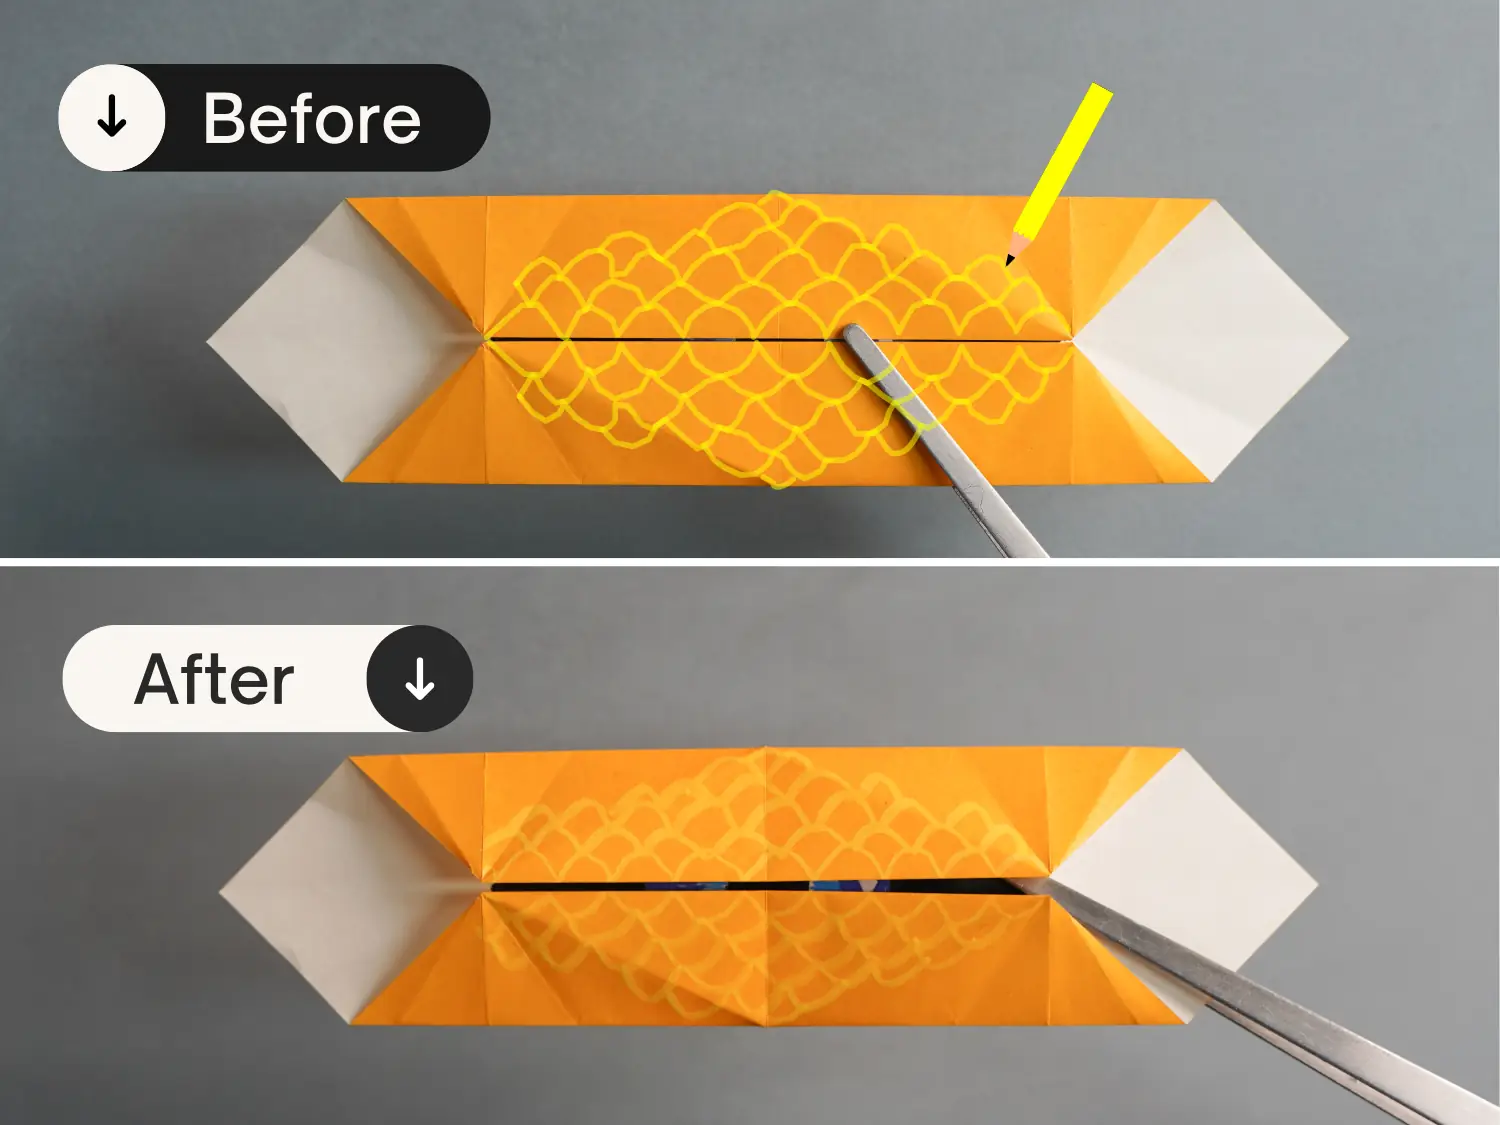
Step 12
Flip the paper from front to back, then fold it along the existing creases, and finally, flip it back.
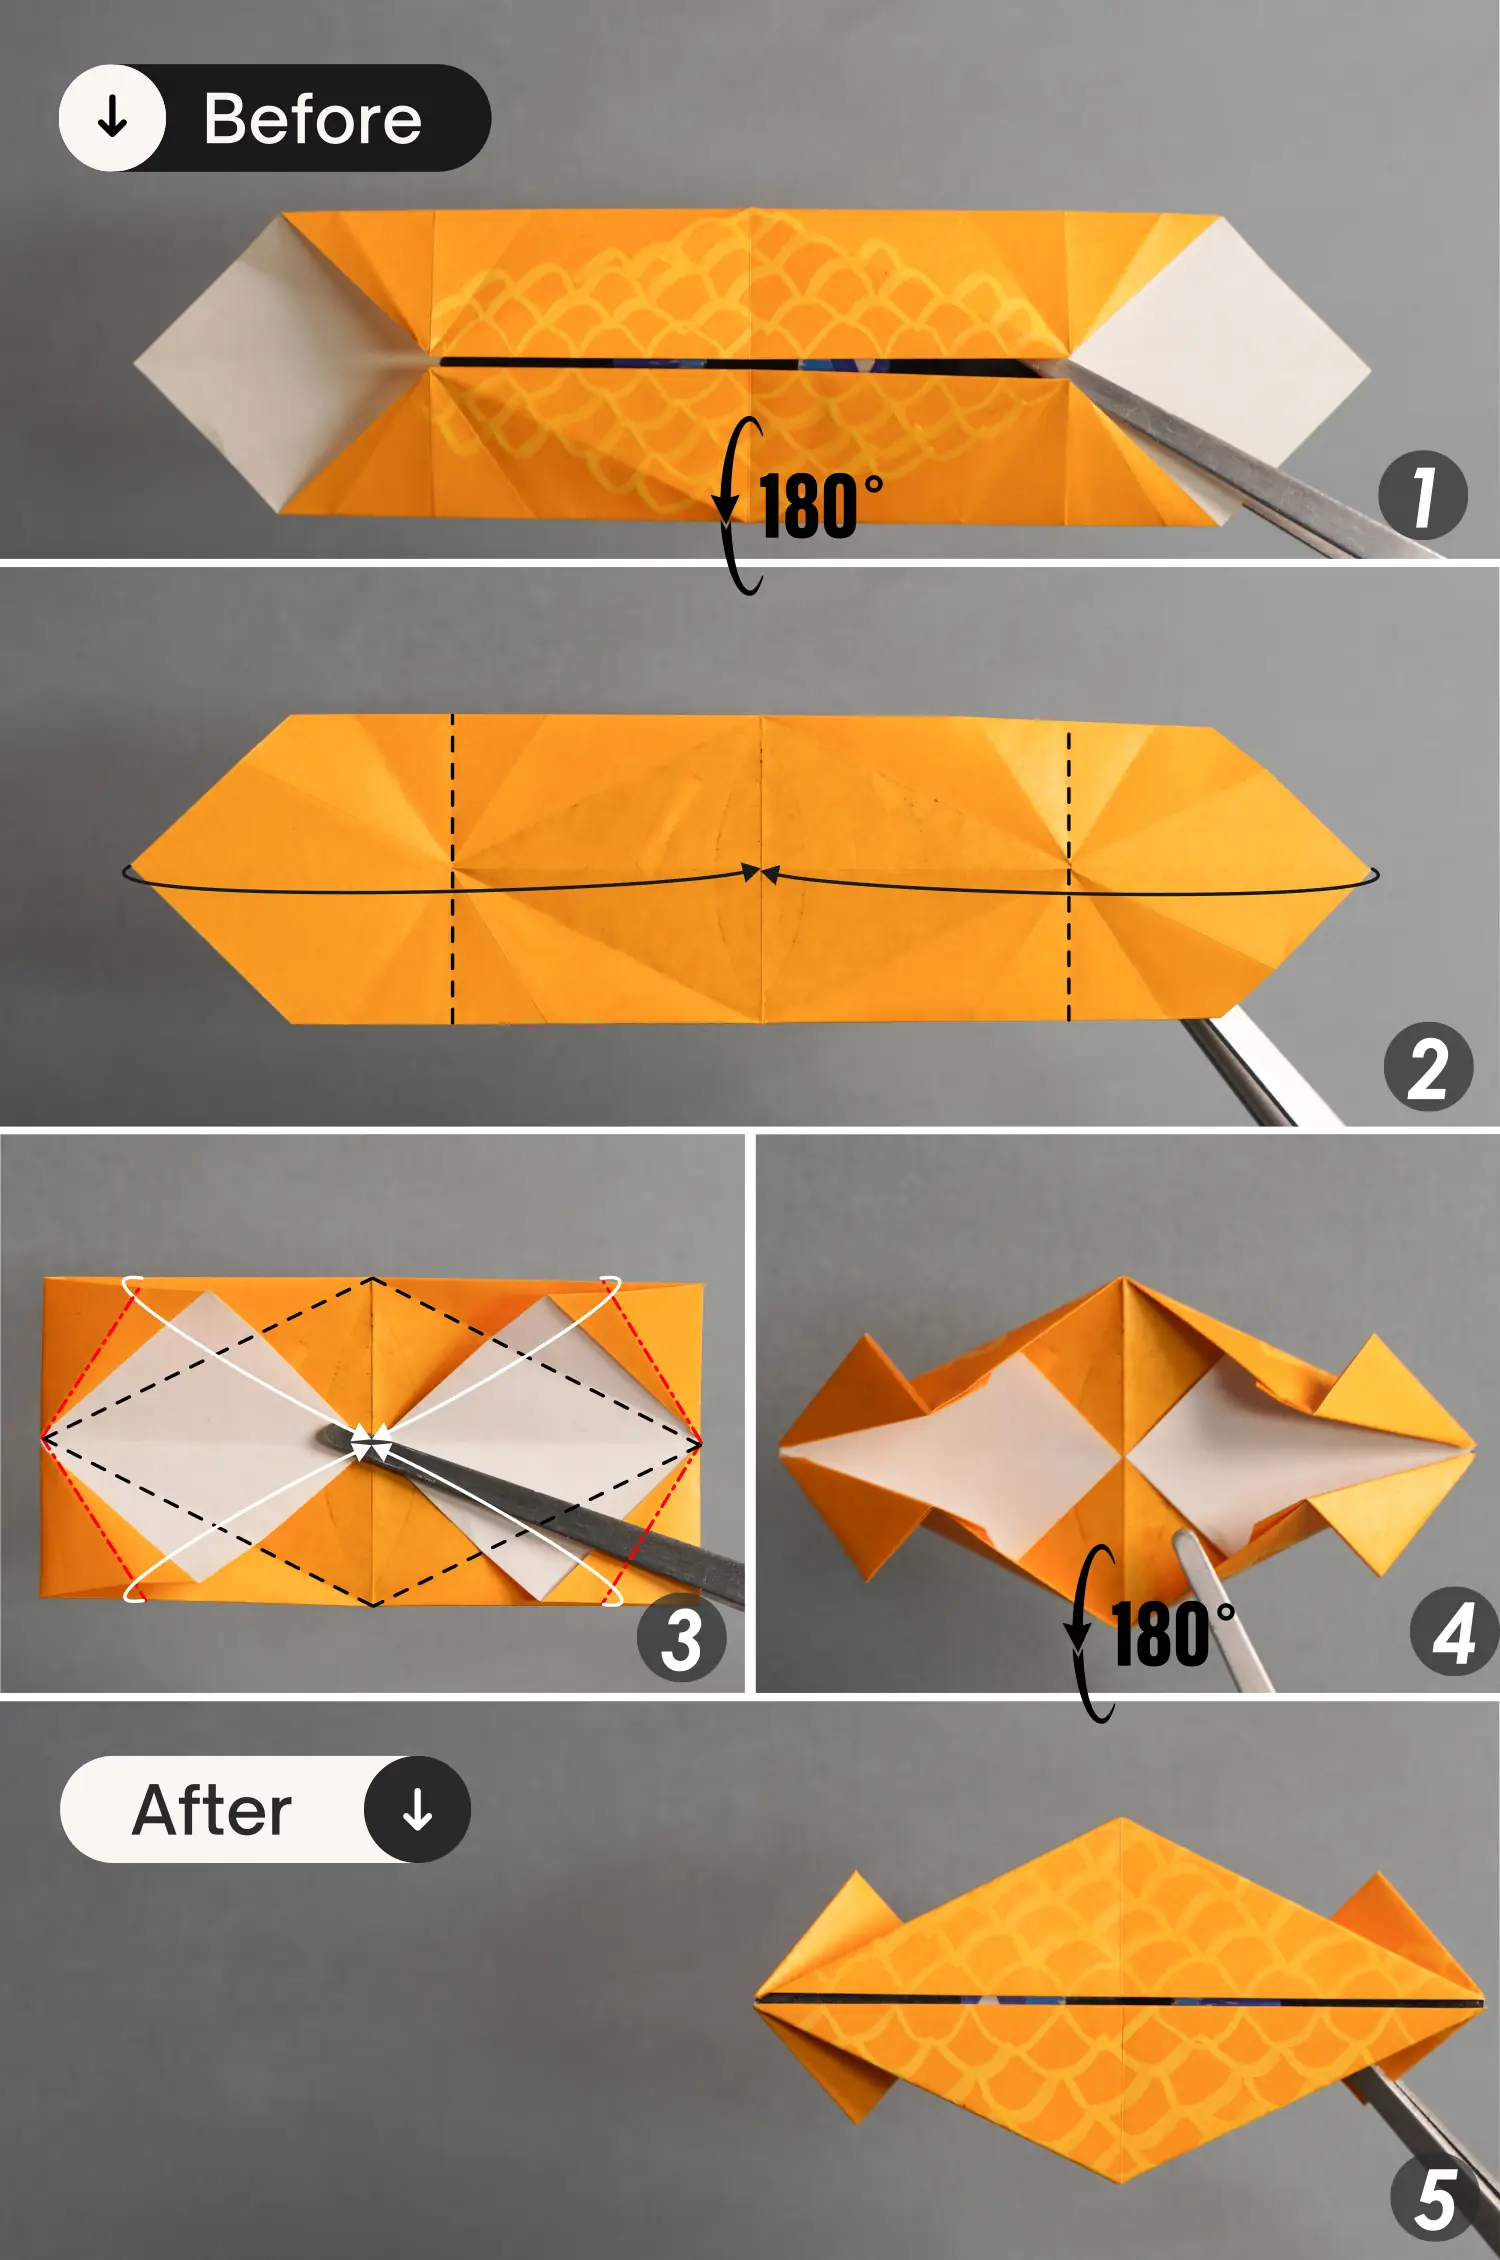
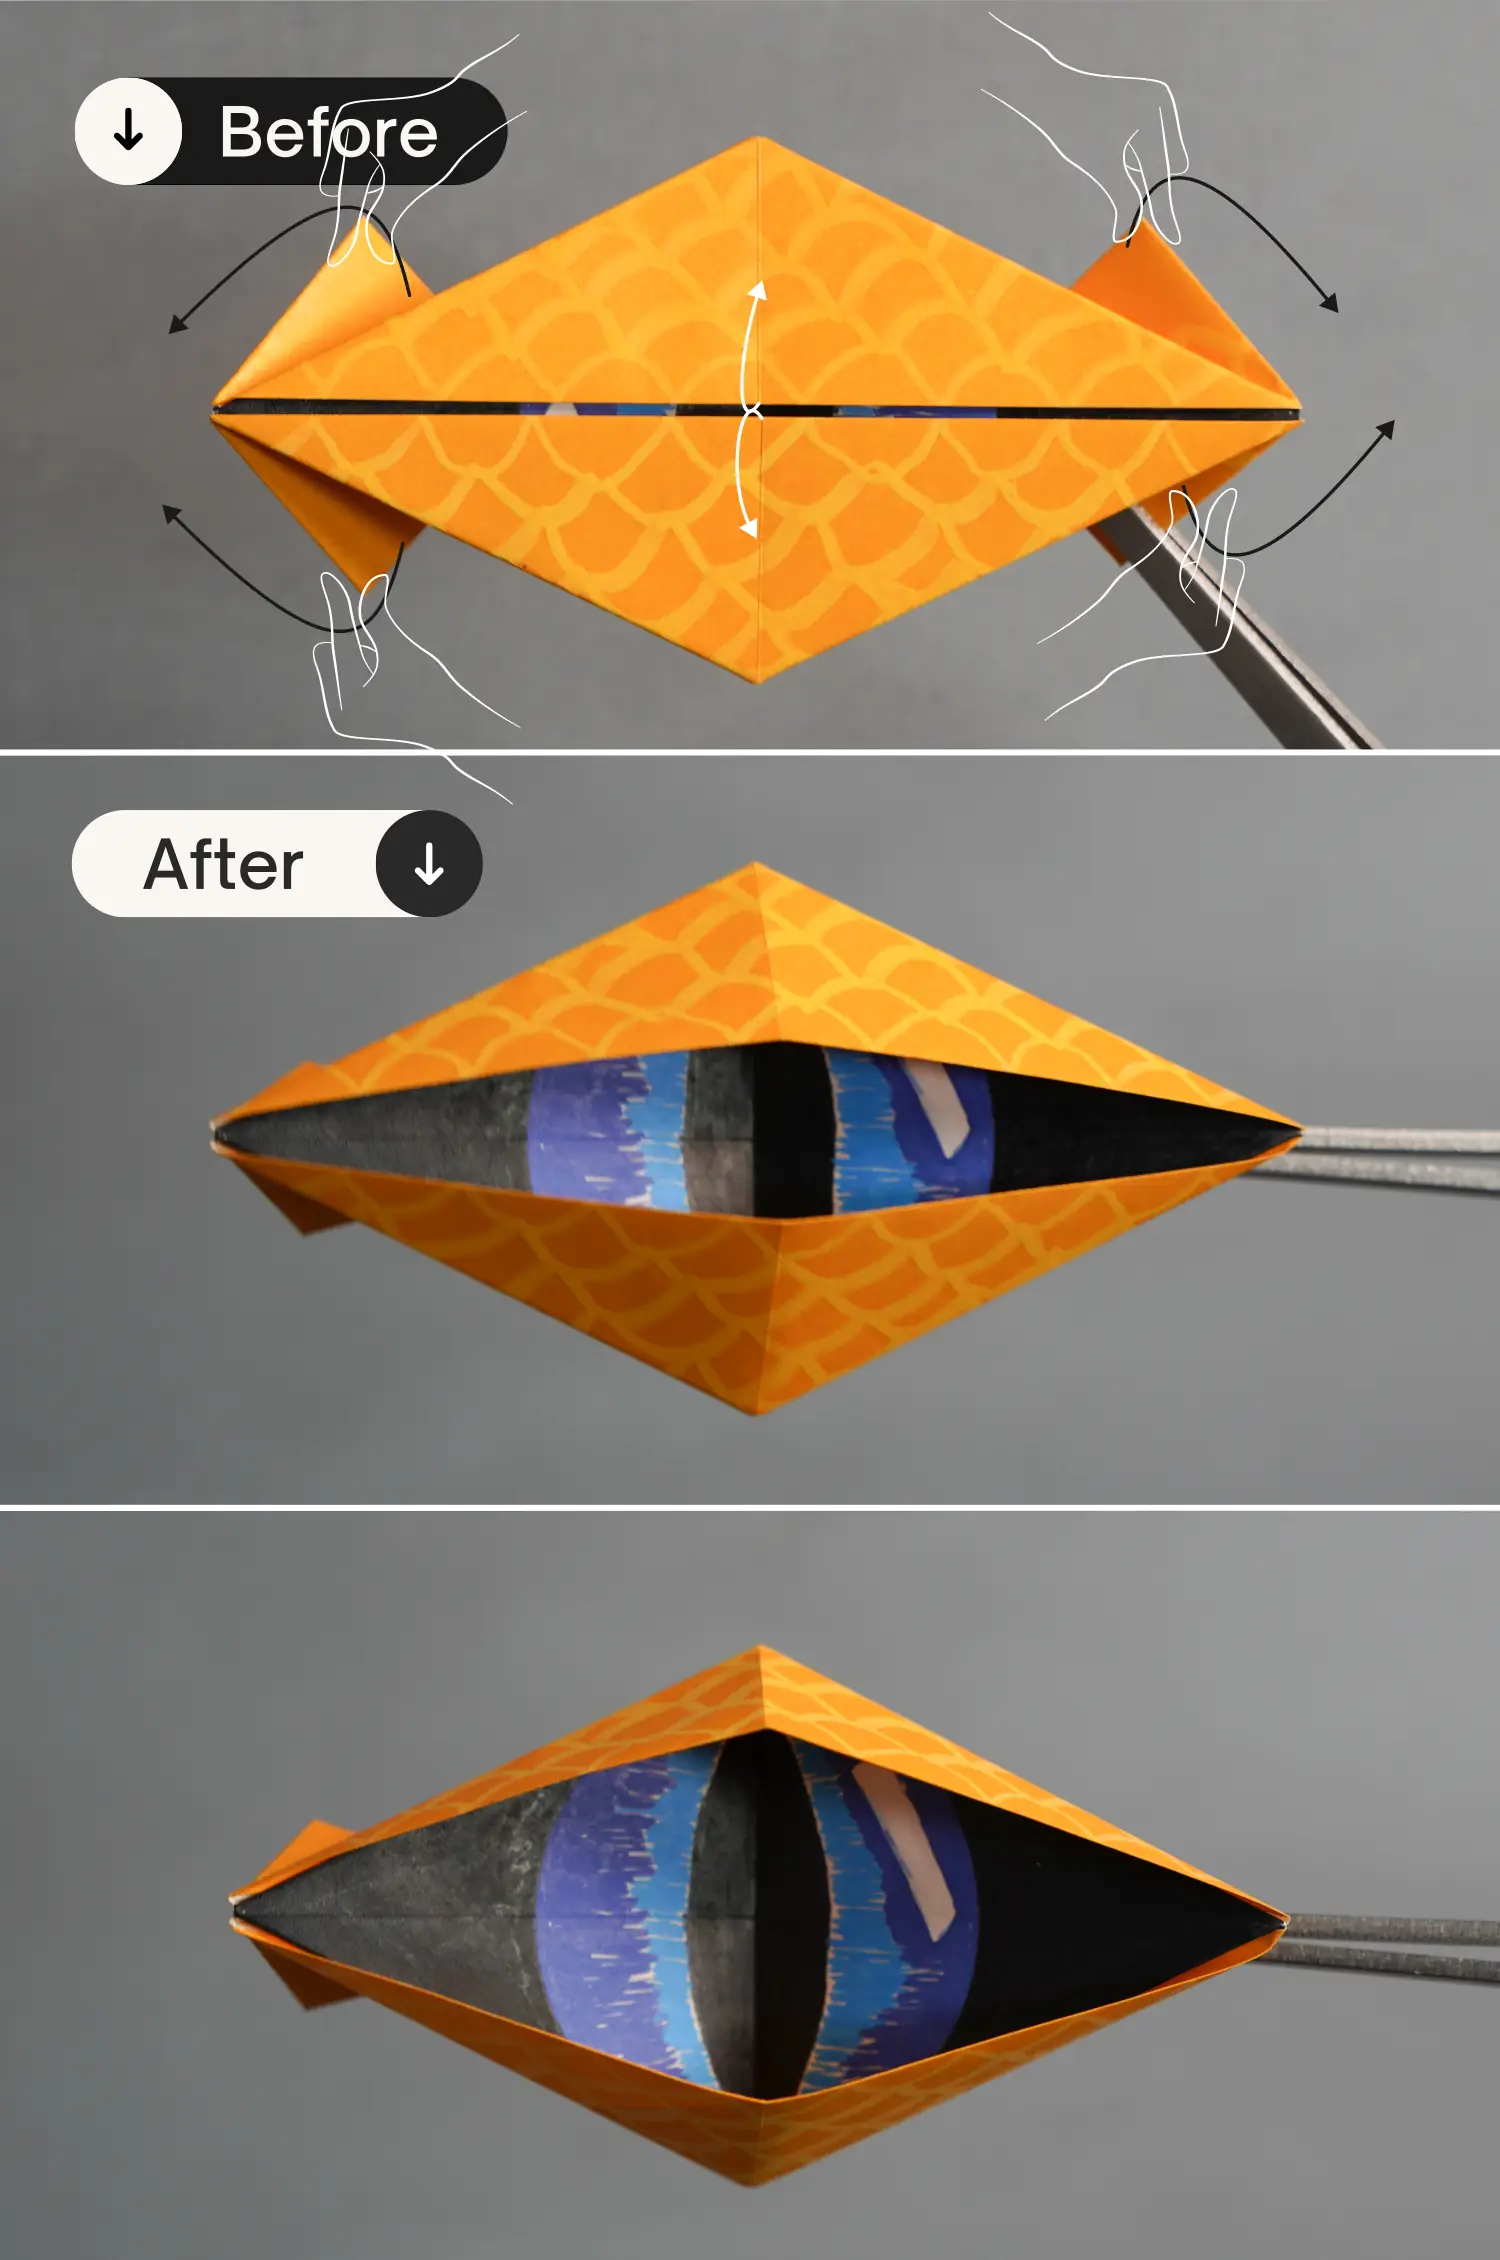
Step 13
To open the origami eye, pinch the left and right flaps together, then lift them up slightly.