How to Make an Origami Ninja Stars 8 Points
Step 1
Take out one piece of paper and place it with the desired display side facing down to begin folding. Fold and unfold it in half horizontally, then vertically.
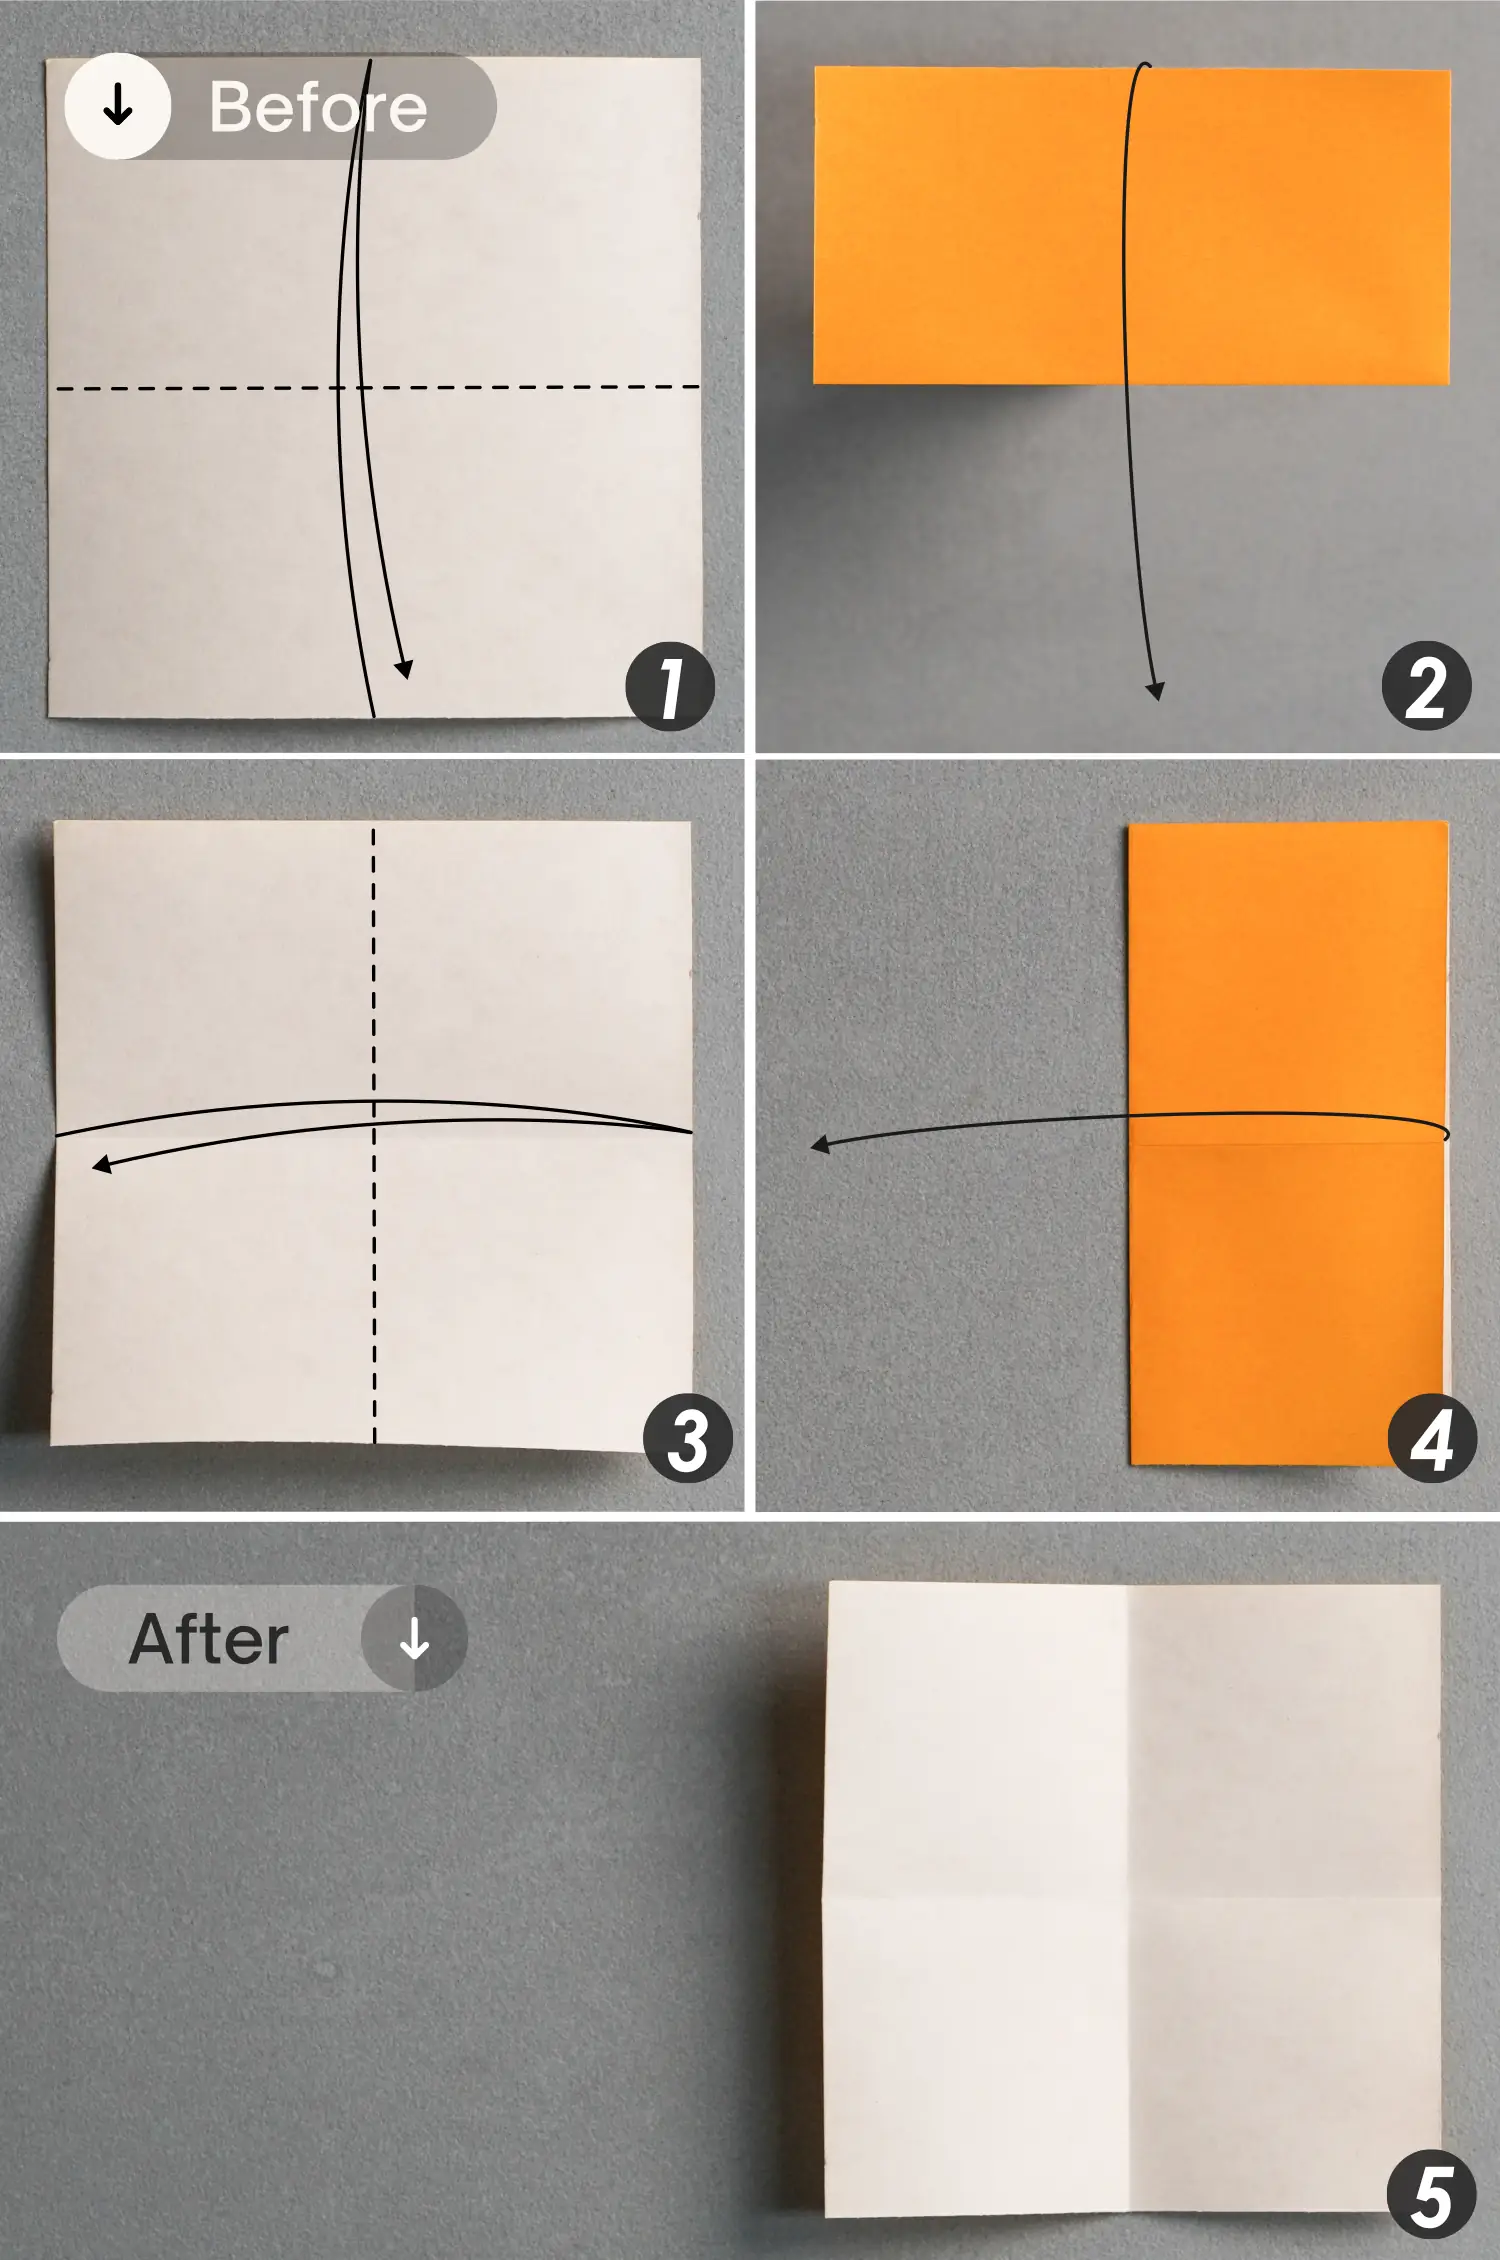
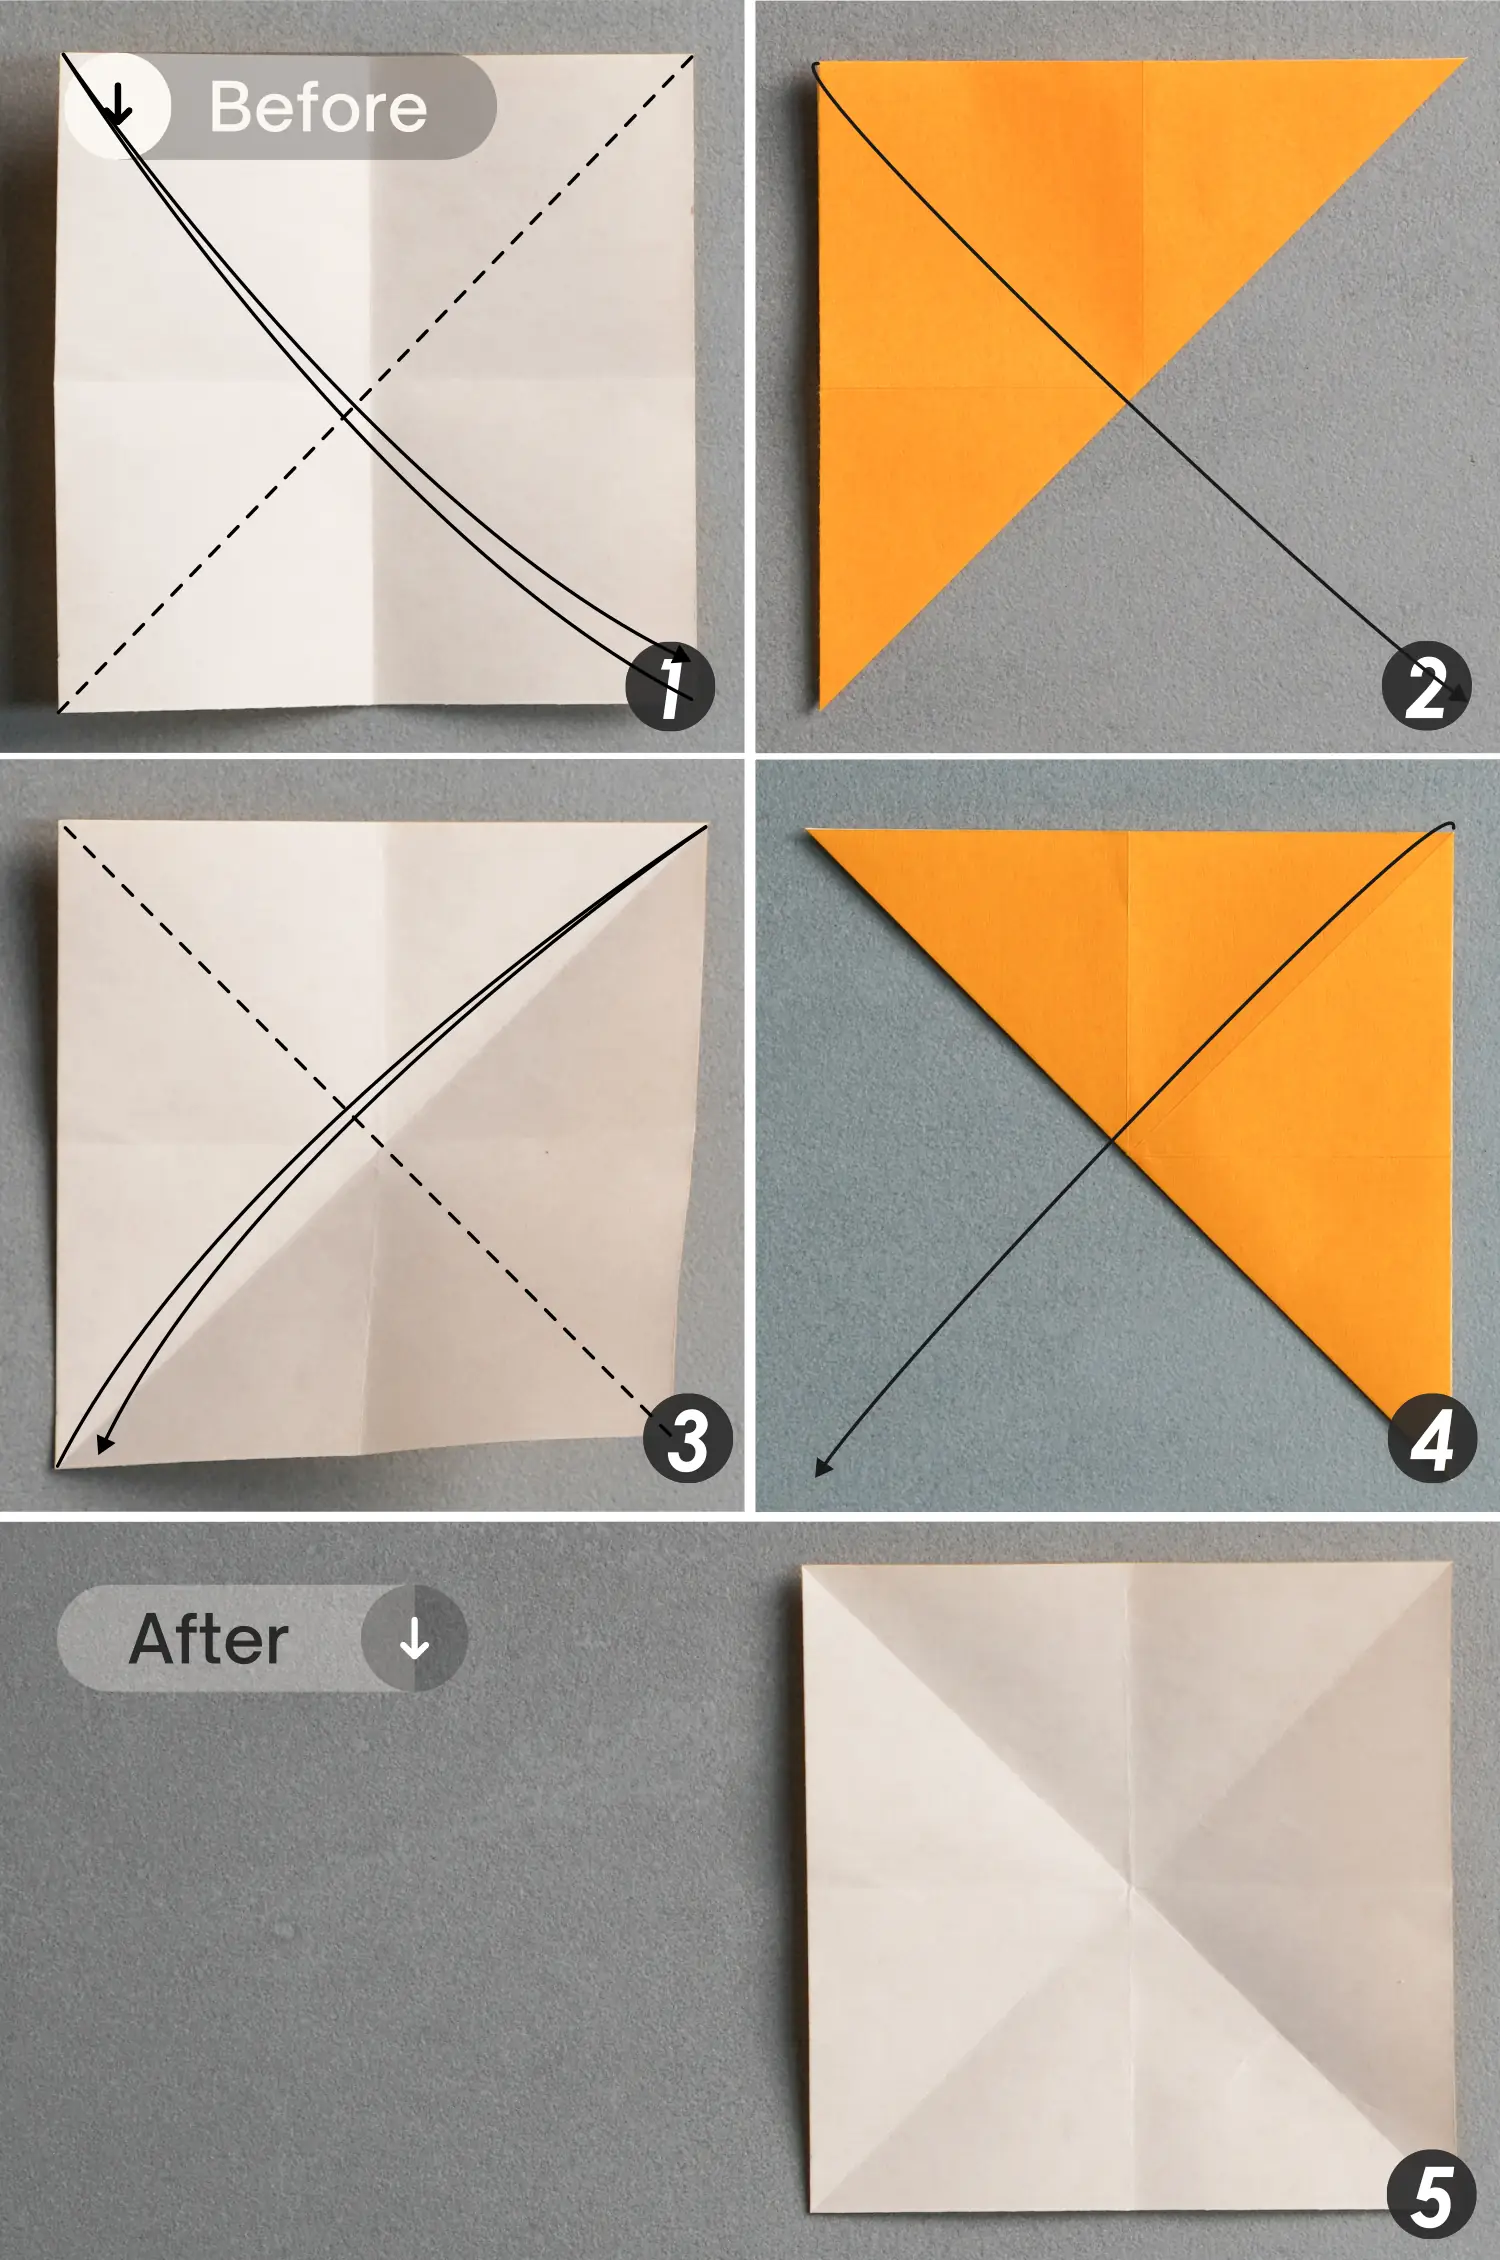
Step 2
Fold and unfold the paper in half diagonally from both sides.
Step 3
Fold the top and bottom left corners diagonally to meet the center intersection point, then mountain fold the horizontal crease indicated by the red dotted line, and valley fold the creases indicated by the black dotted lines, as you can see in the second and third pictures. Finally, lift the top and bottom edges along these creases, then, flatten the fold and rotate the paper 90 degrees from front to back.
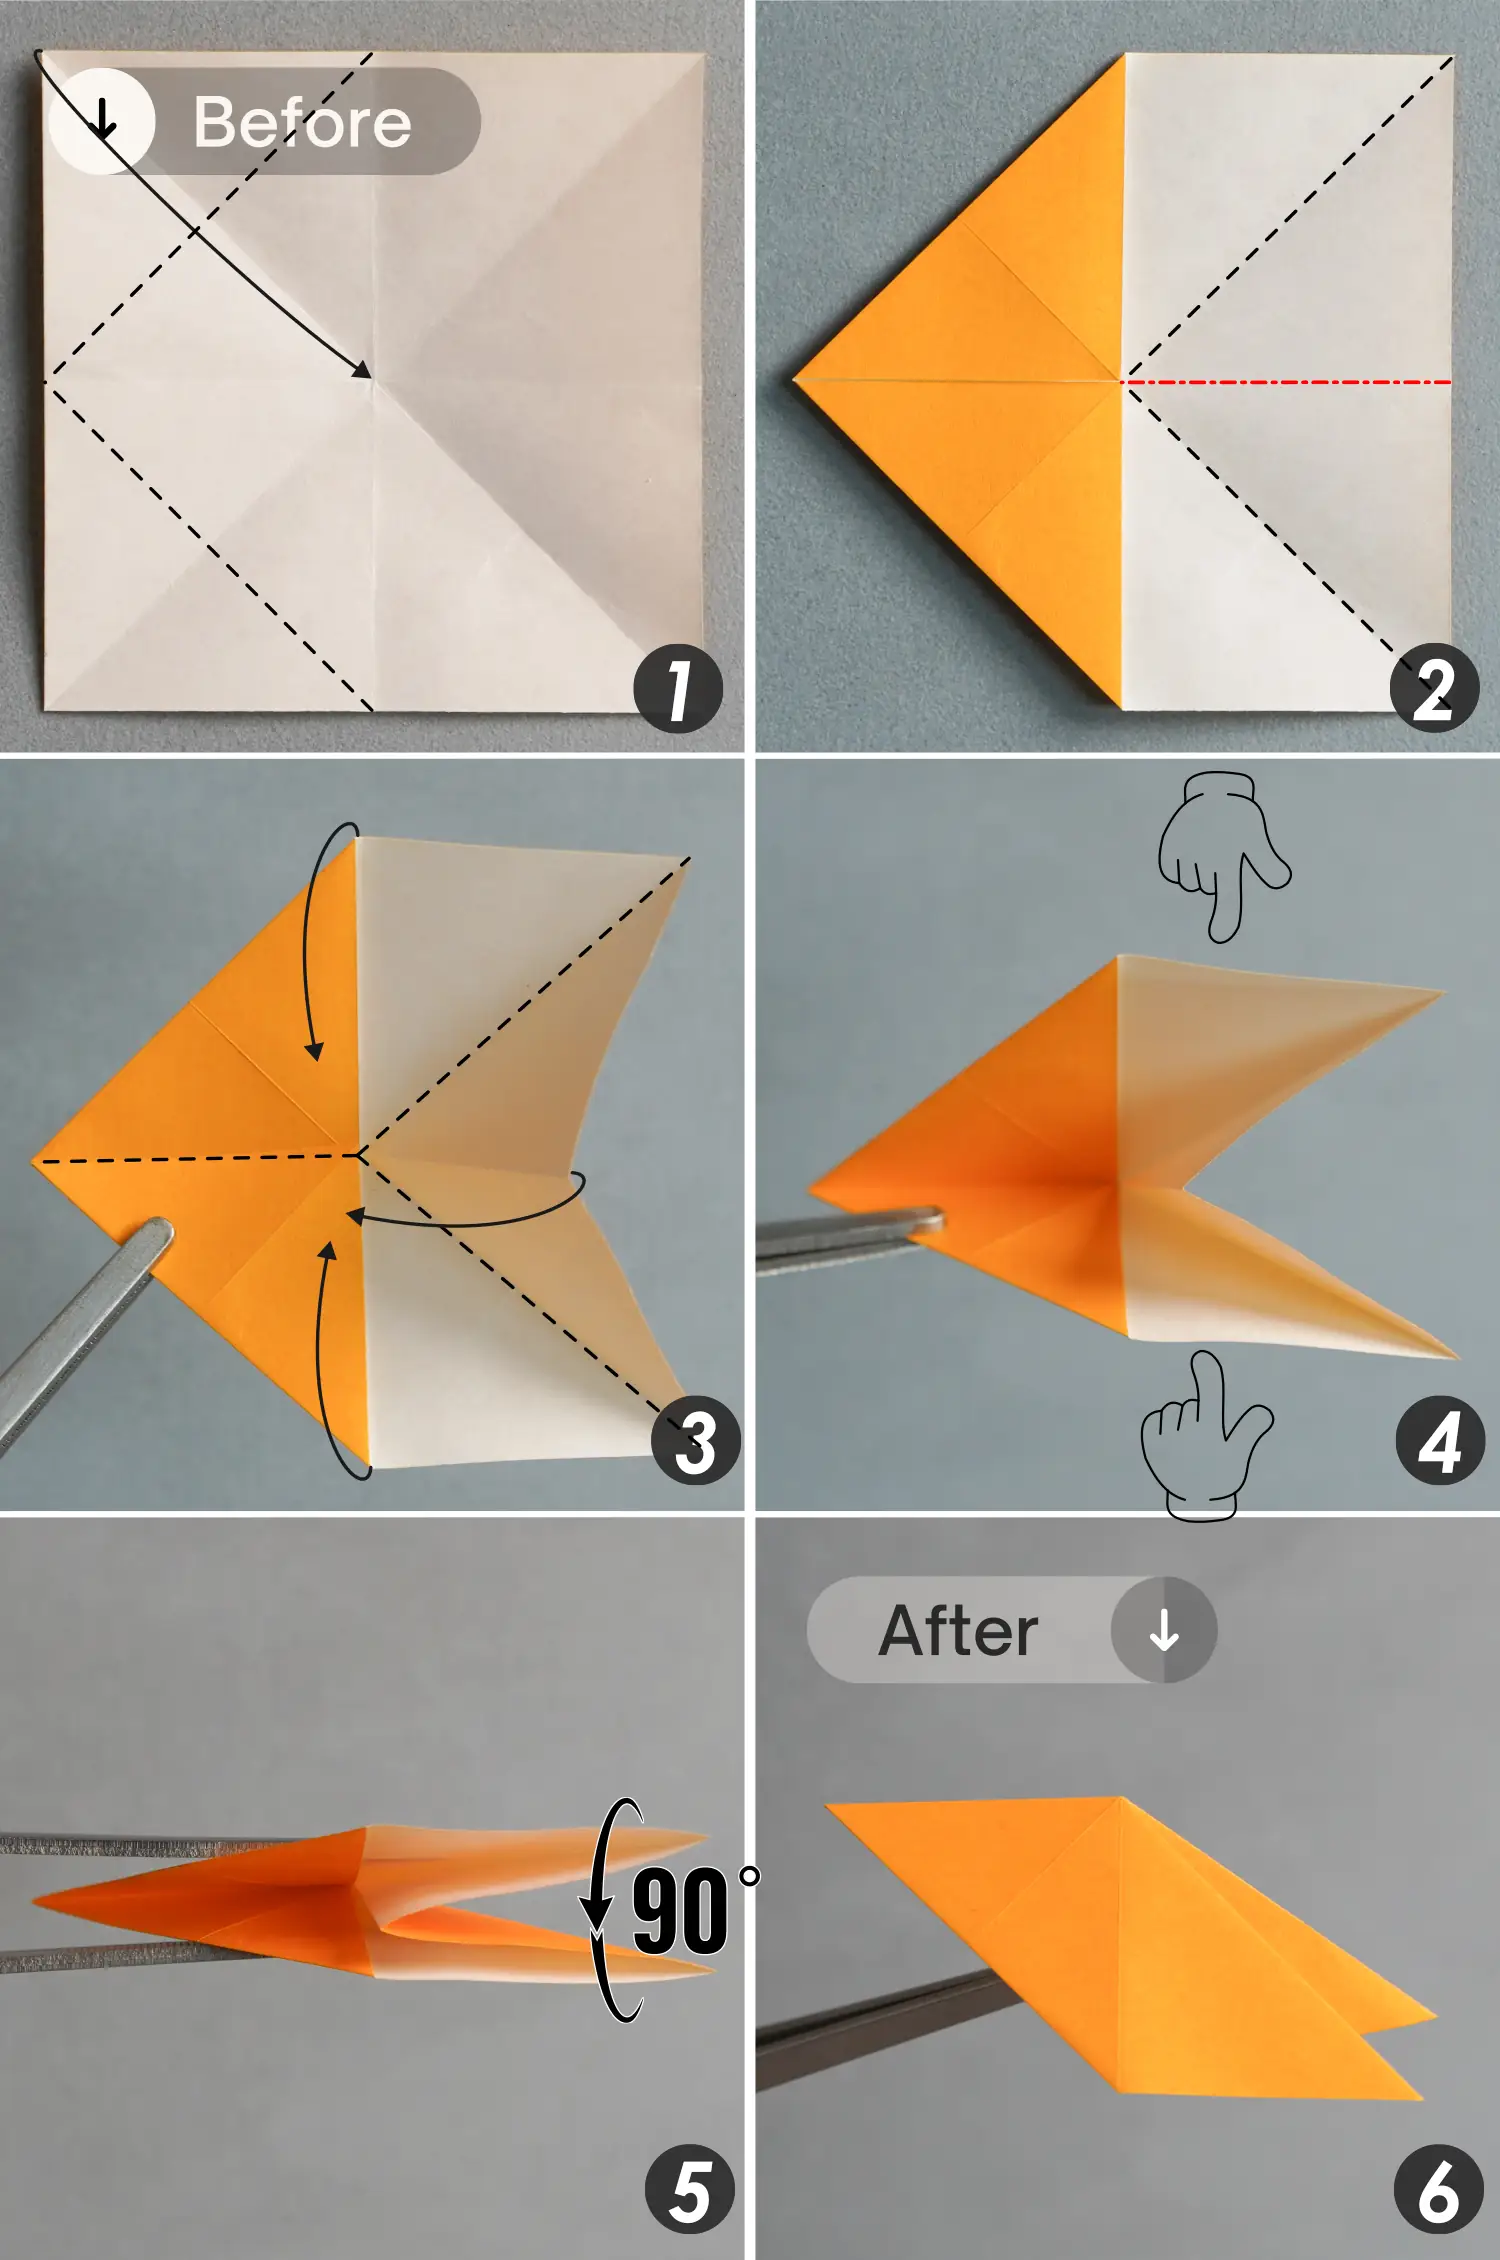
Step 4
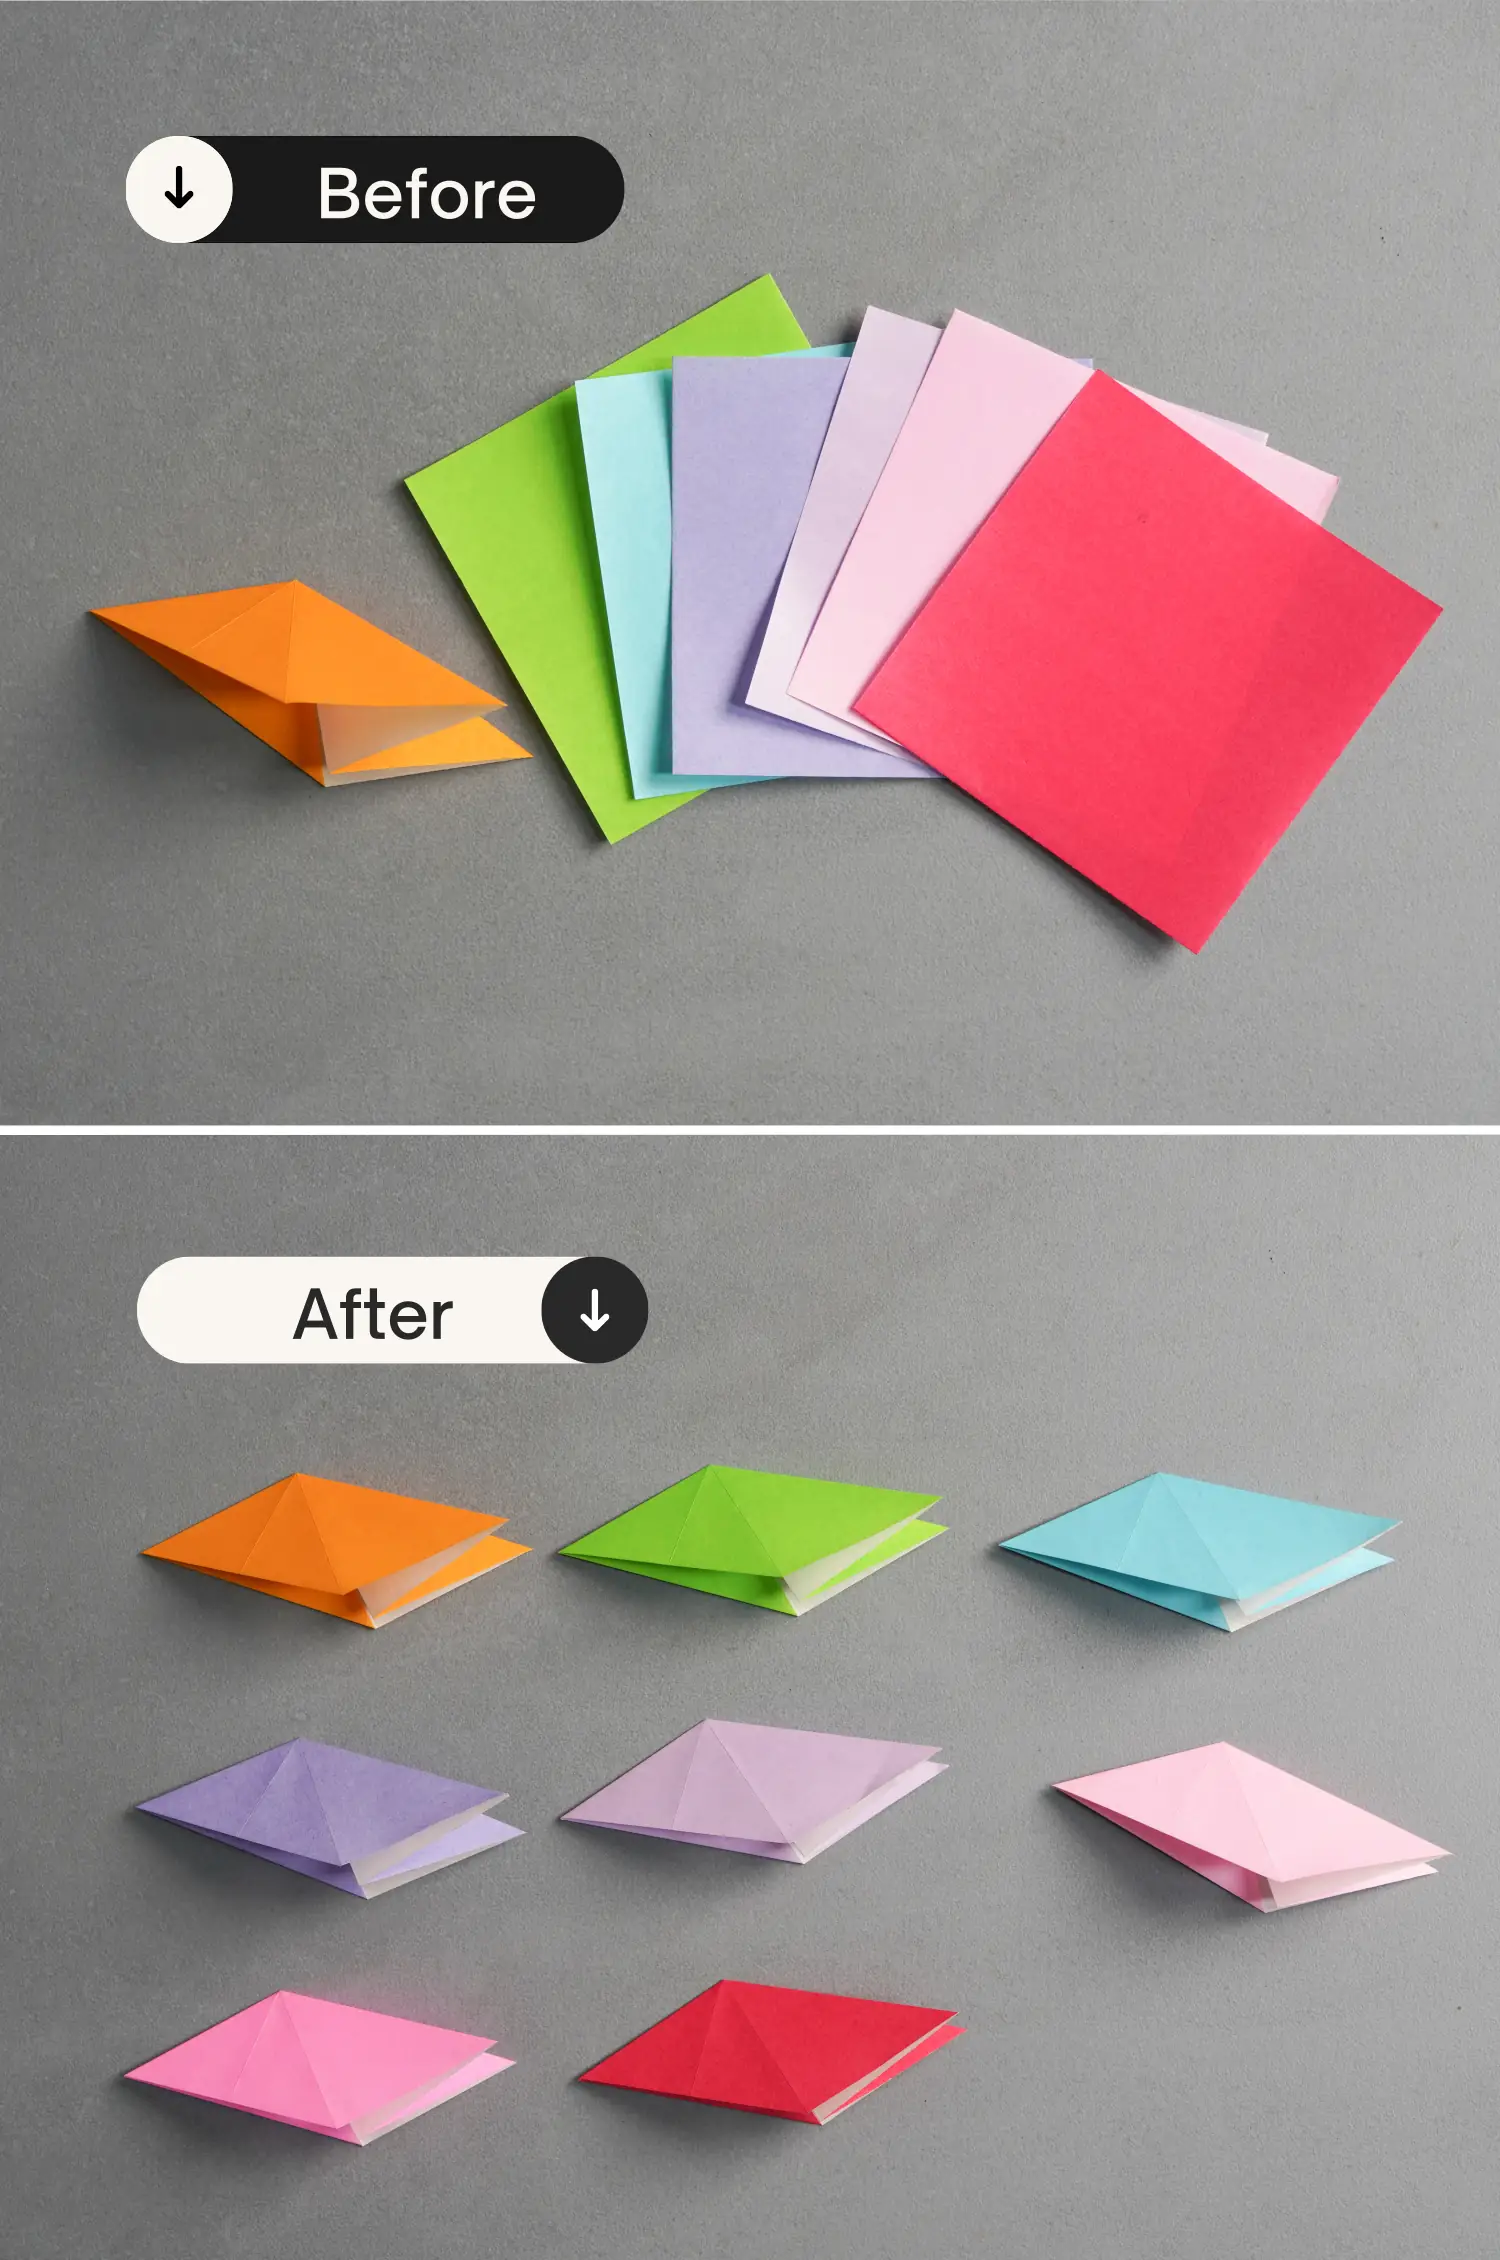
Follow the steps above to fold the remaining seven sheets of paper.
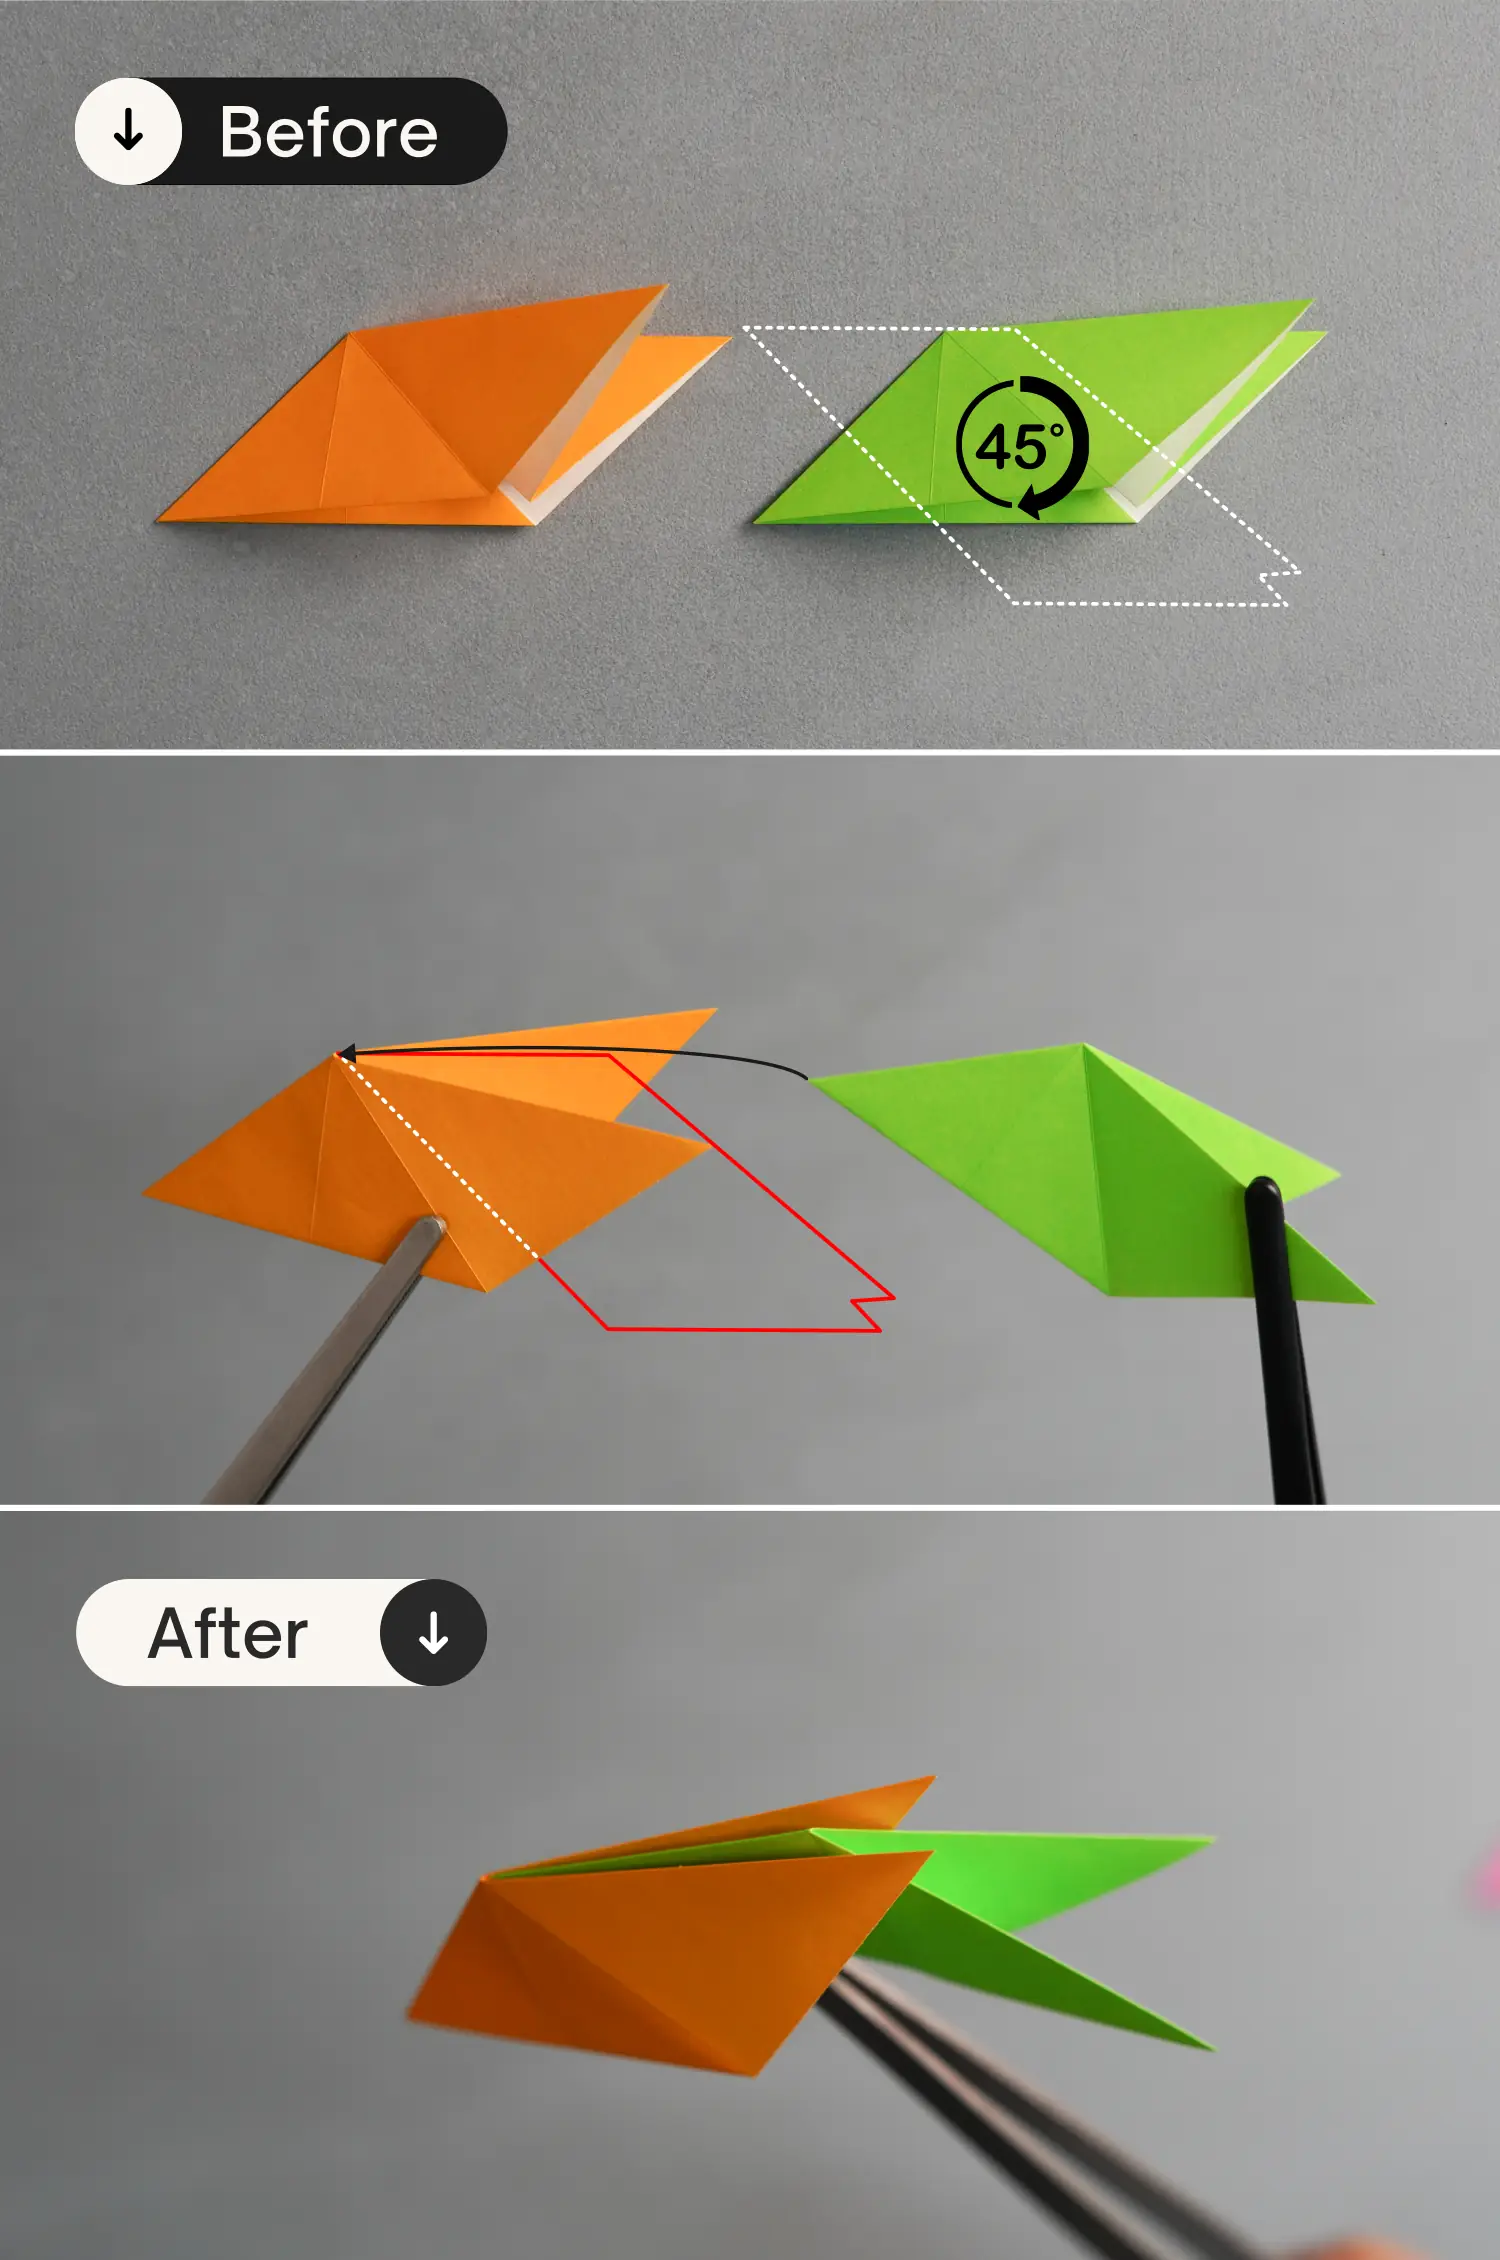
Step 5
Take out two units, rotate one of them 45 degrees clockwise, and then assemble the two units as shown in picture 2.
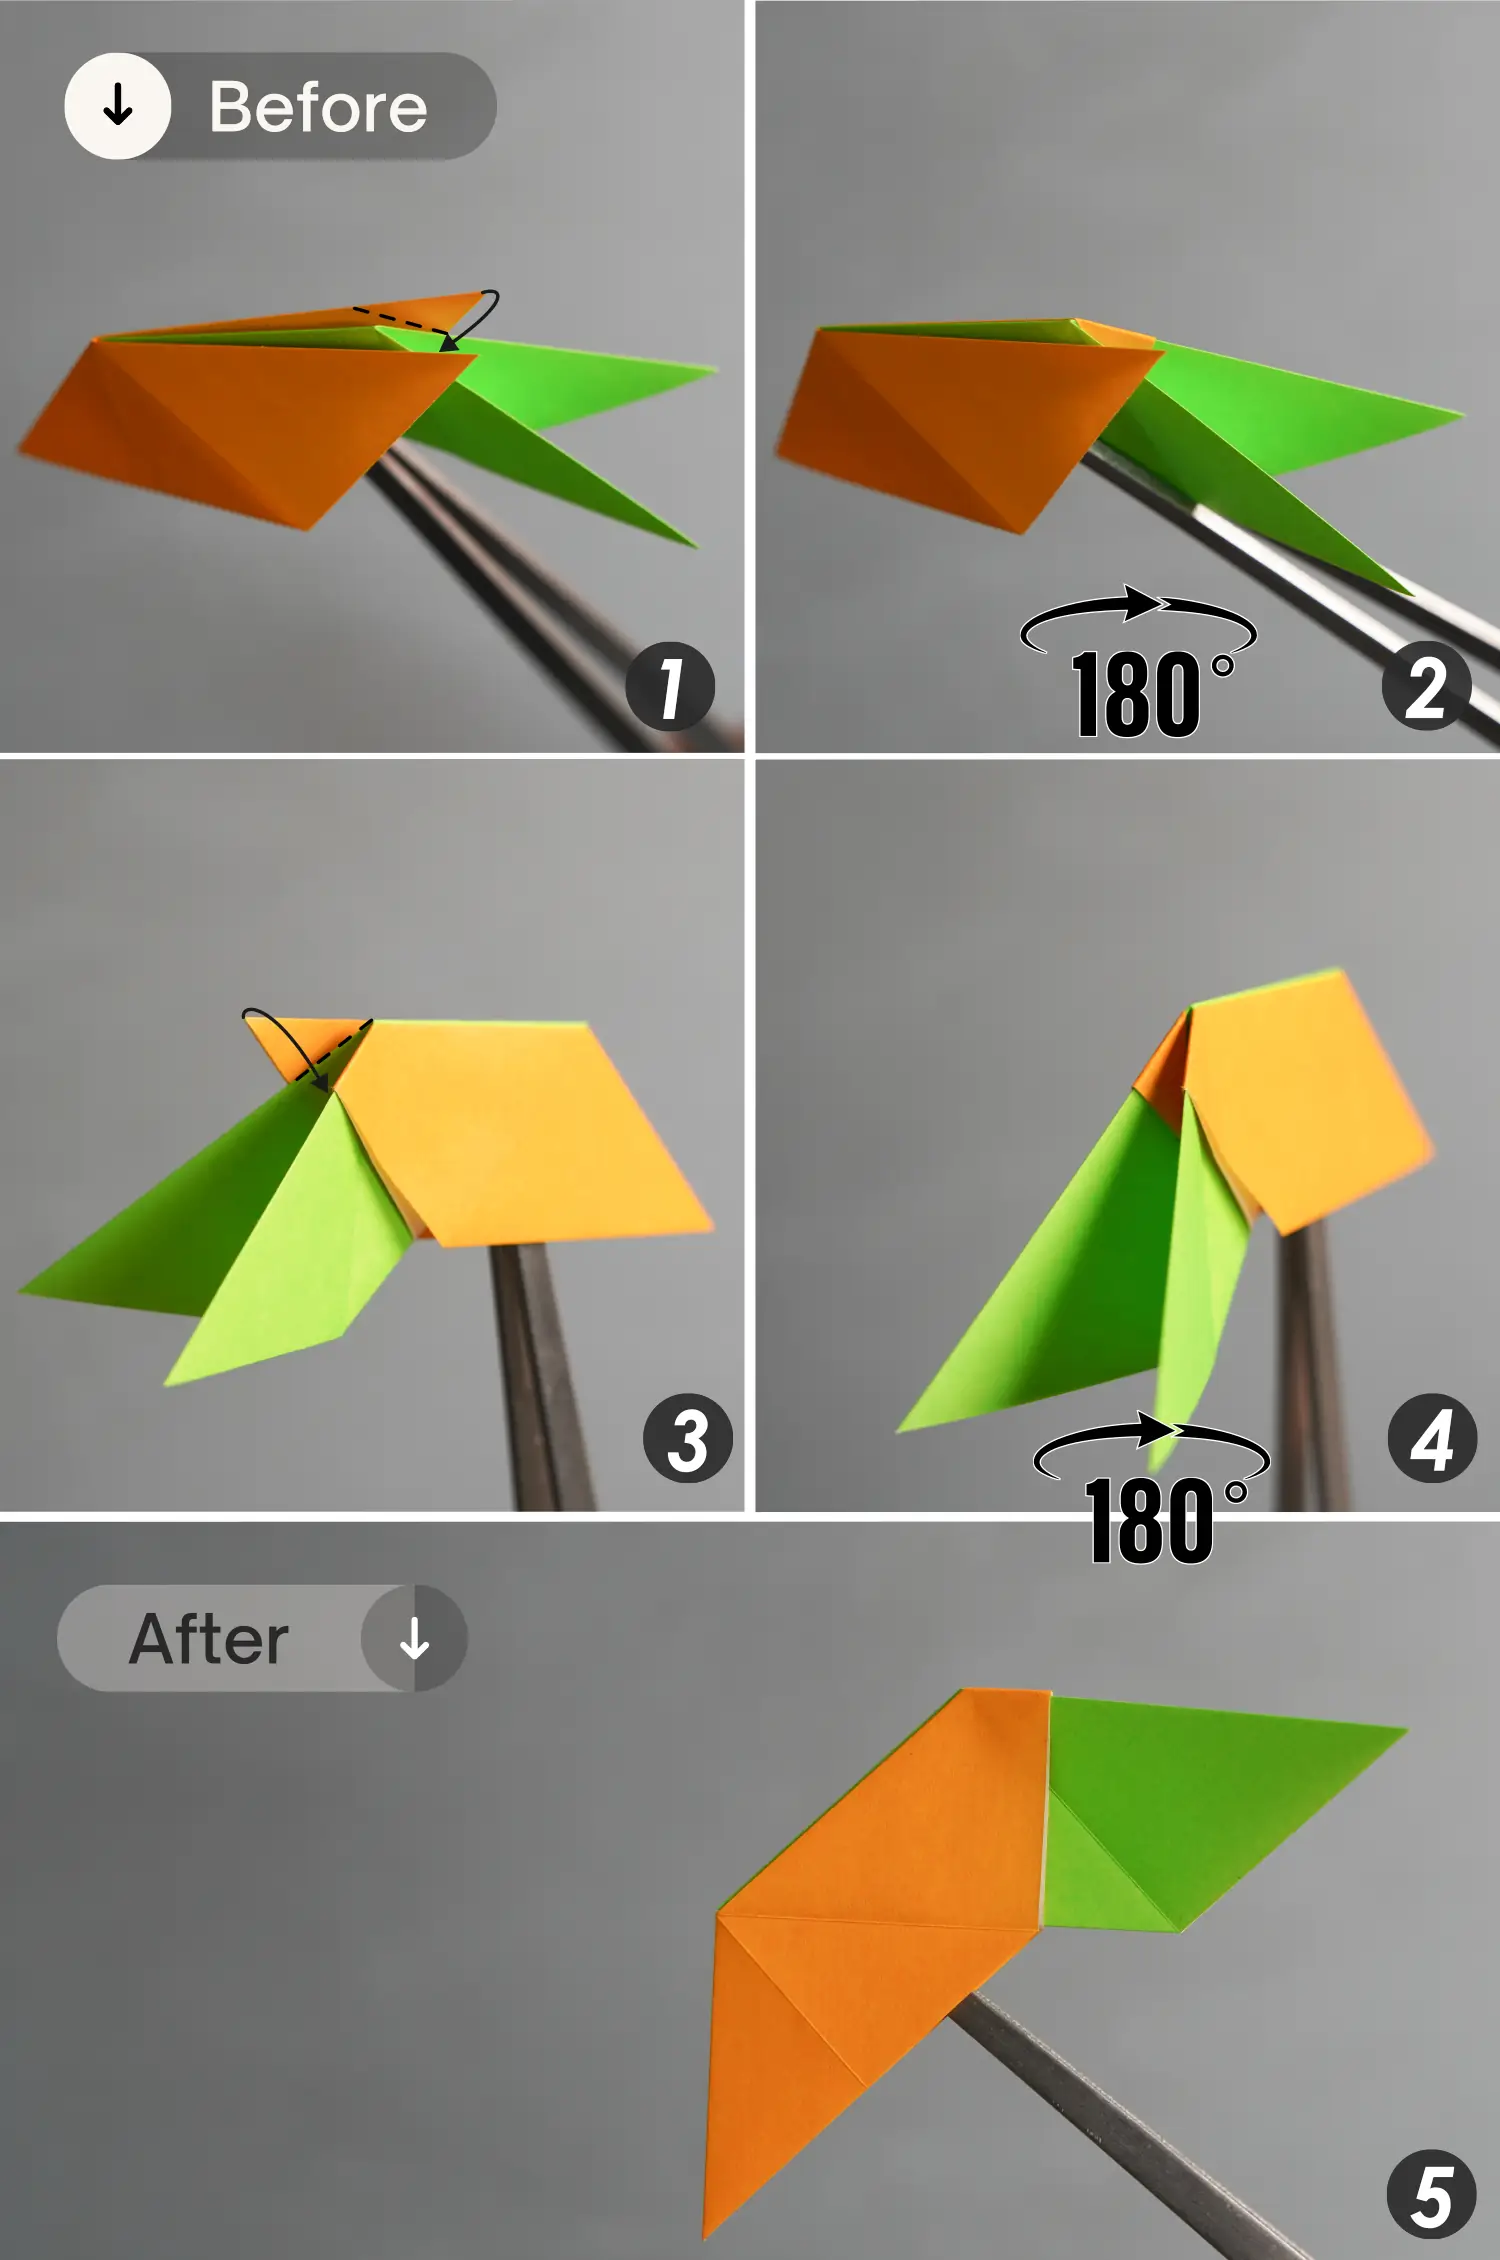
Step 6
Fold the right corner of the left unit’s bottom layer along the dotted line to wrap the left unit’s bottom layer, then rotate them 180 degrees from left to right, and similarly, fold the right unit’s left corner to wrap the left unit’s bottom layer. Then, the two units are firmly combined.
Finally, flip them over from left to right.
Step 7
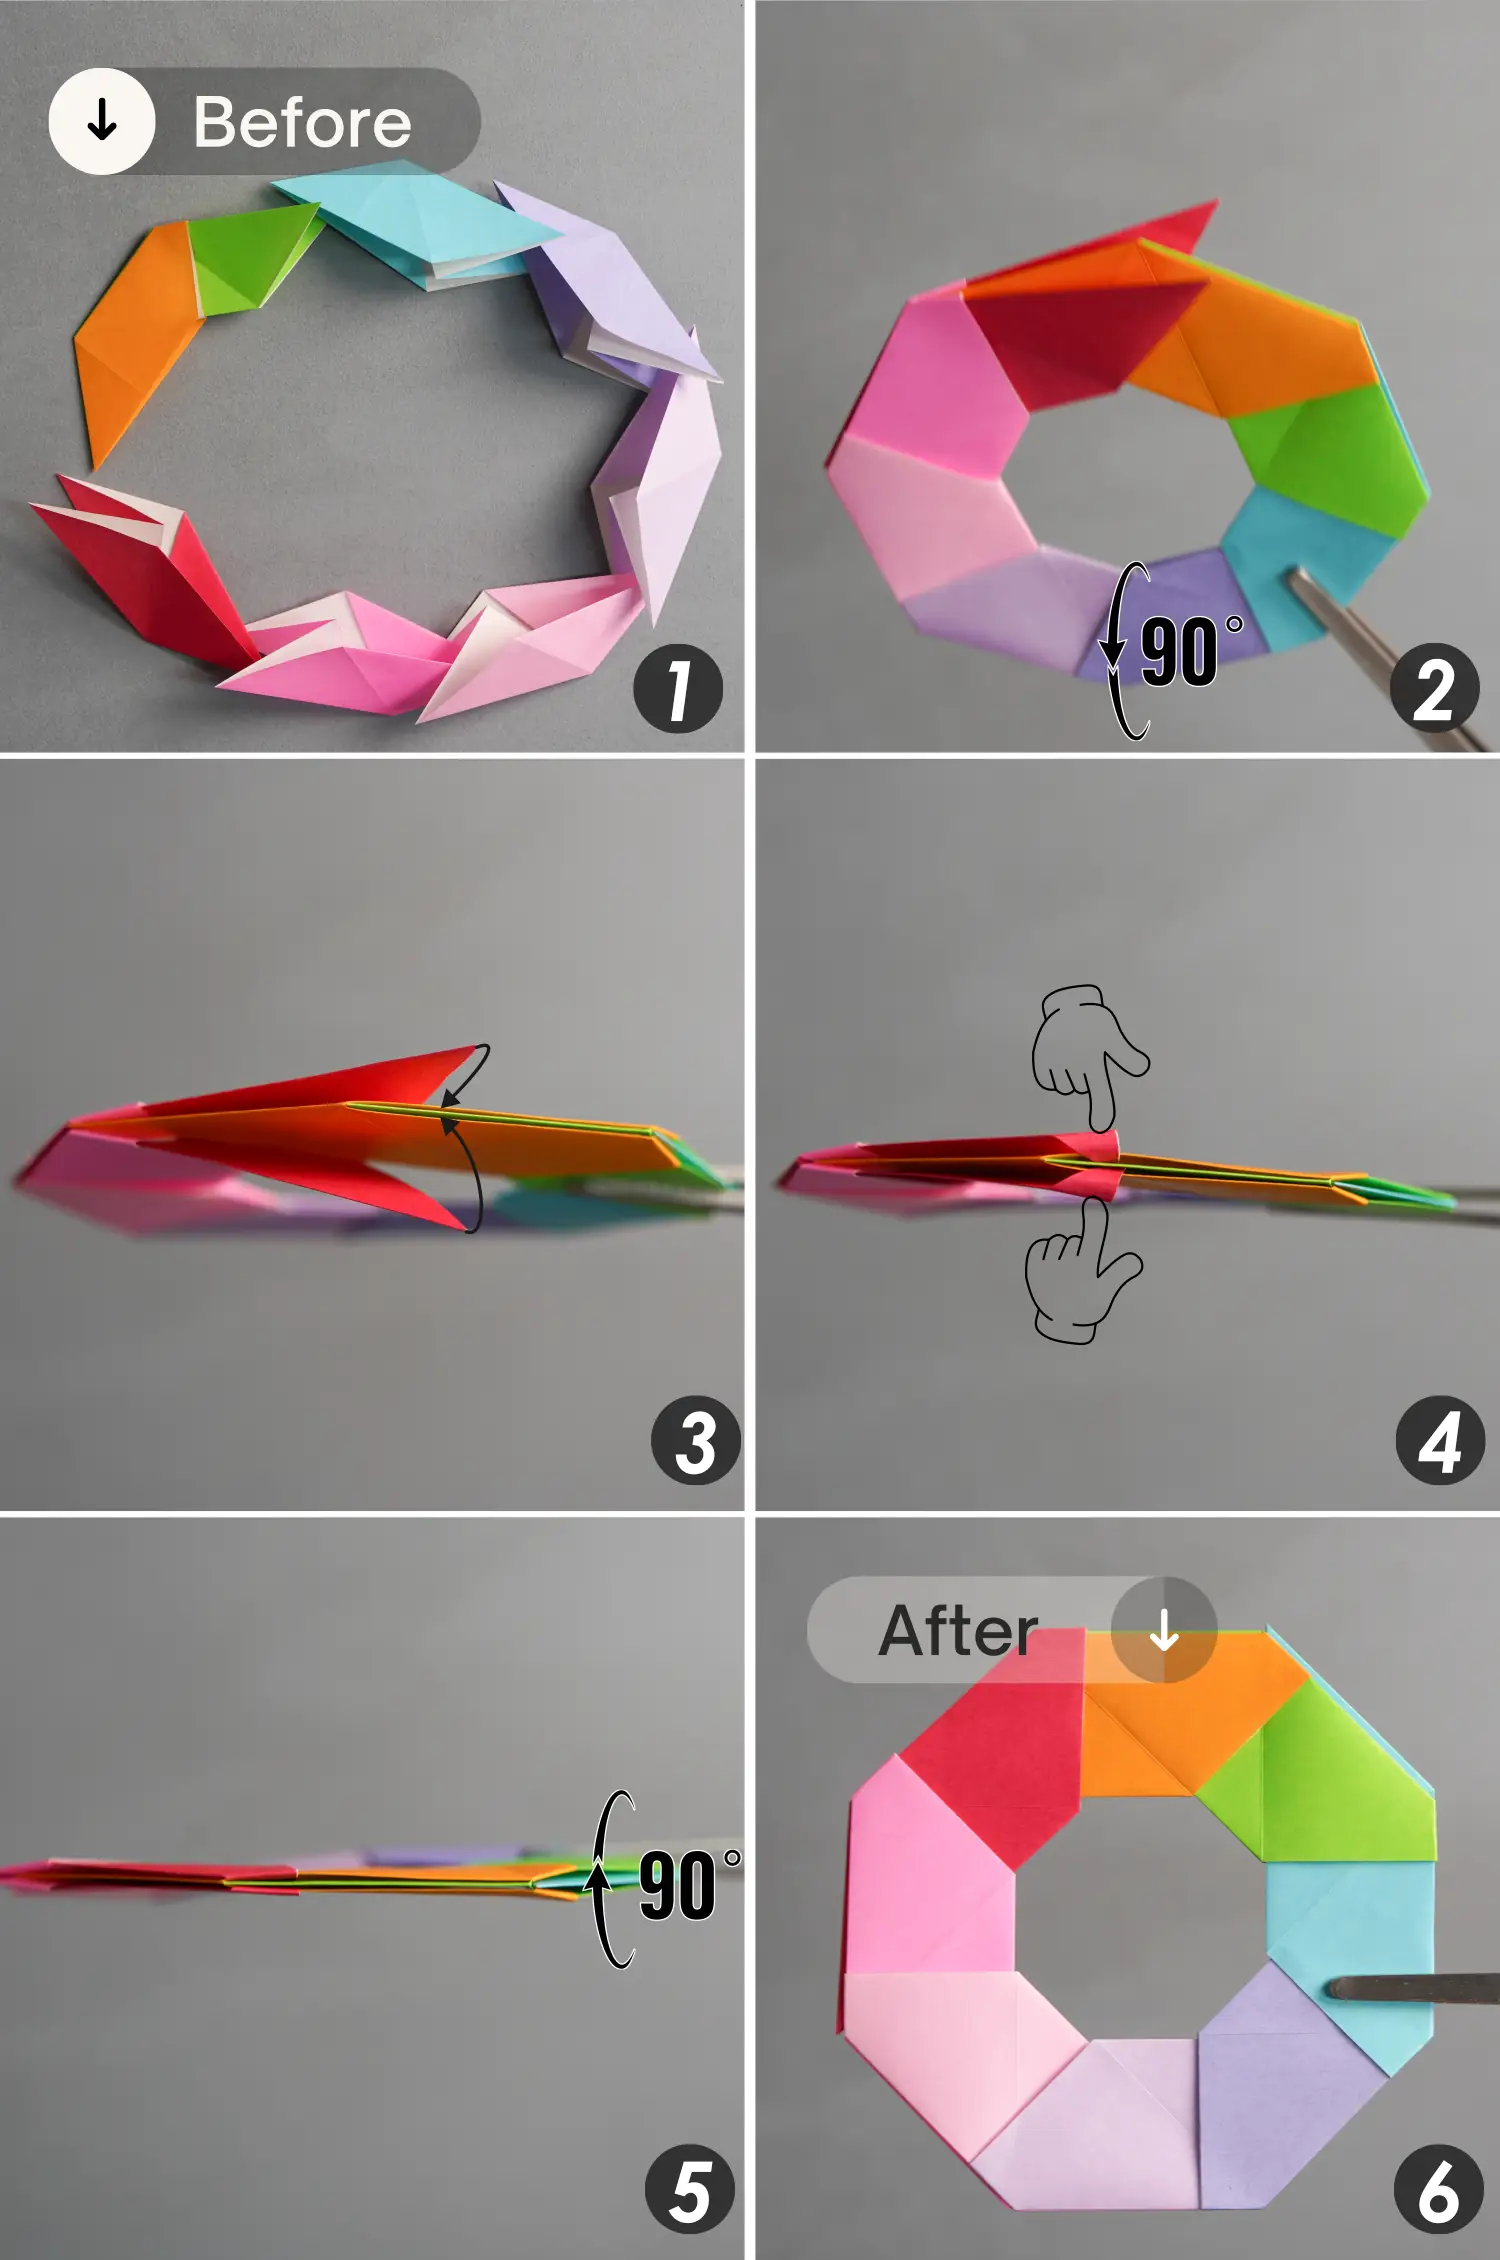
Assemble the remaining units in the same manner to get a circle, and secure the last one well as in the previous step.
Step 8
Shape it as shown below. Push each module towards the center so that they are firmly fixed and snap together.