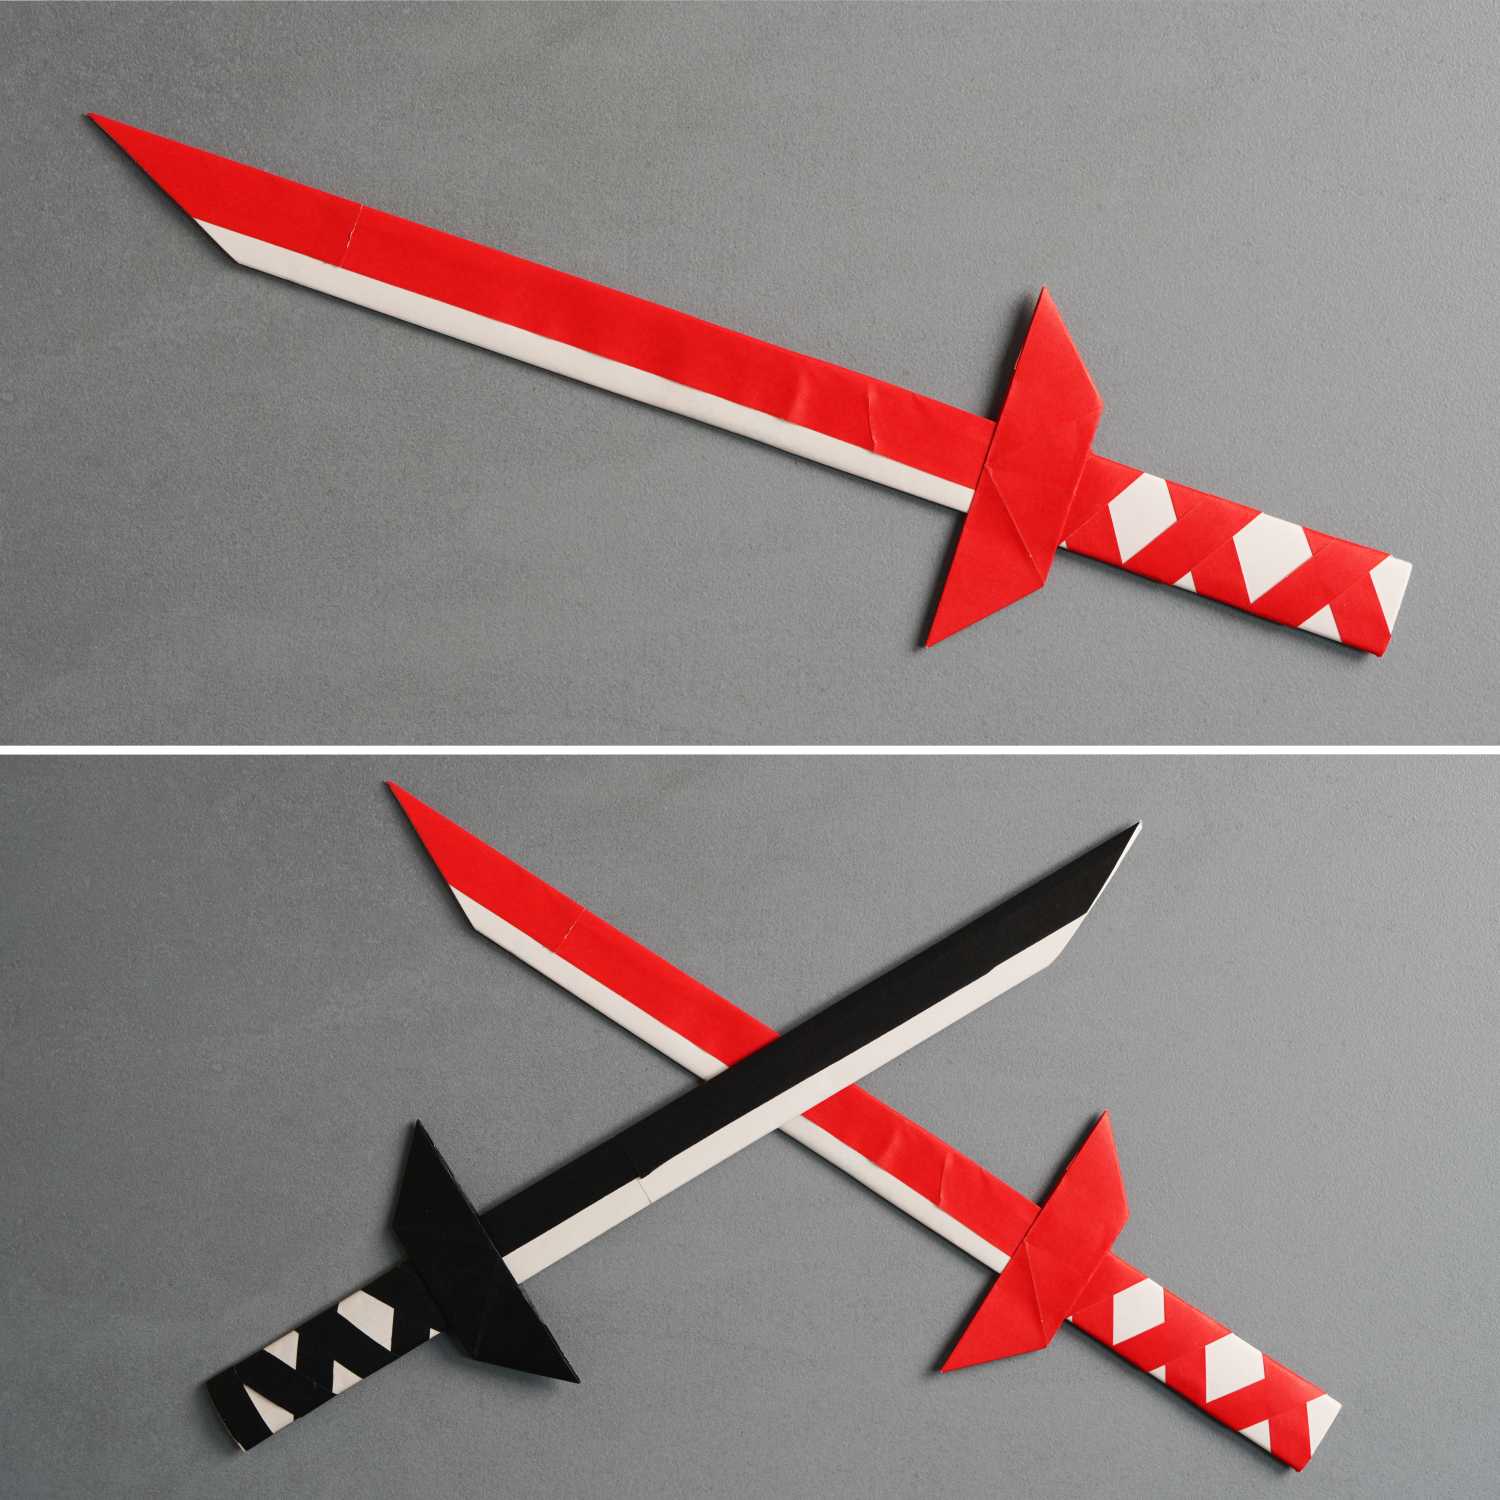
How to Fold an Origami Katana
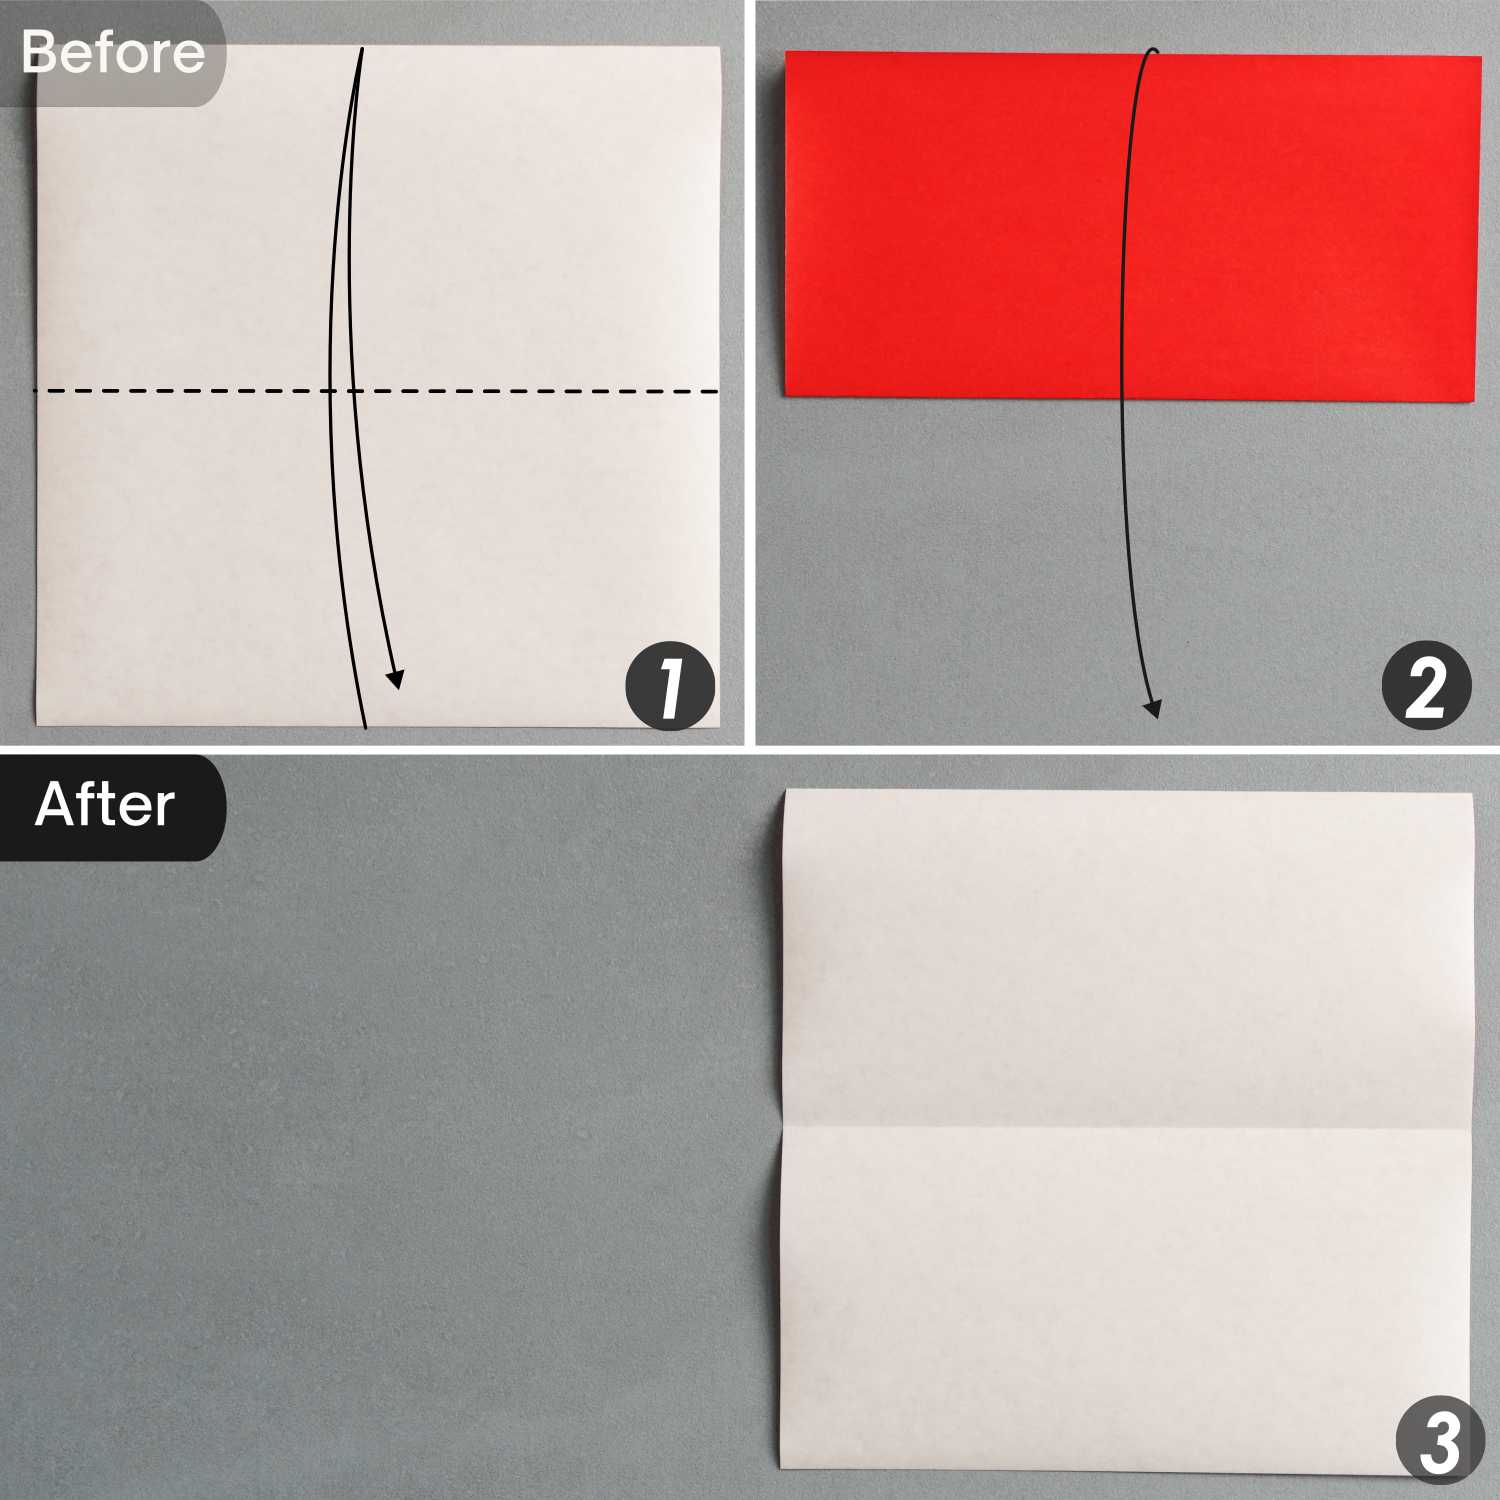
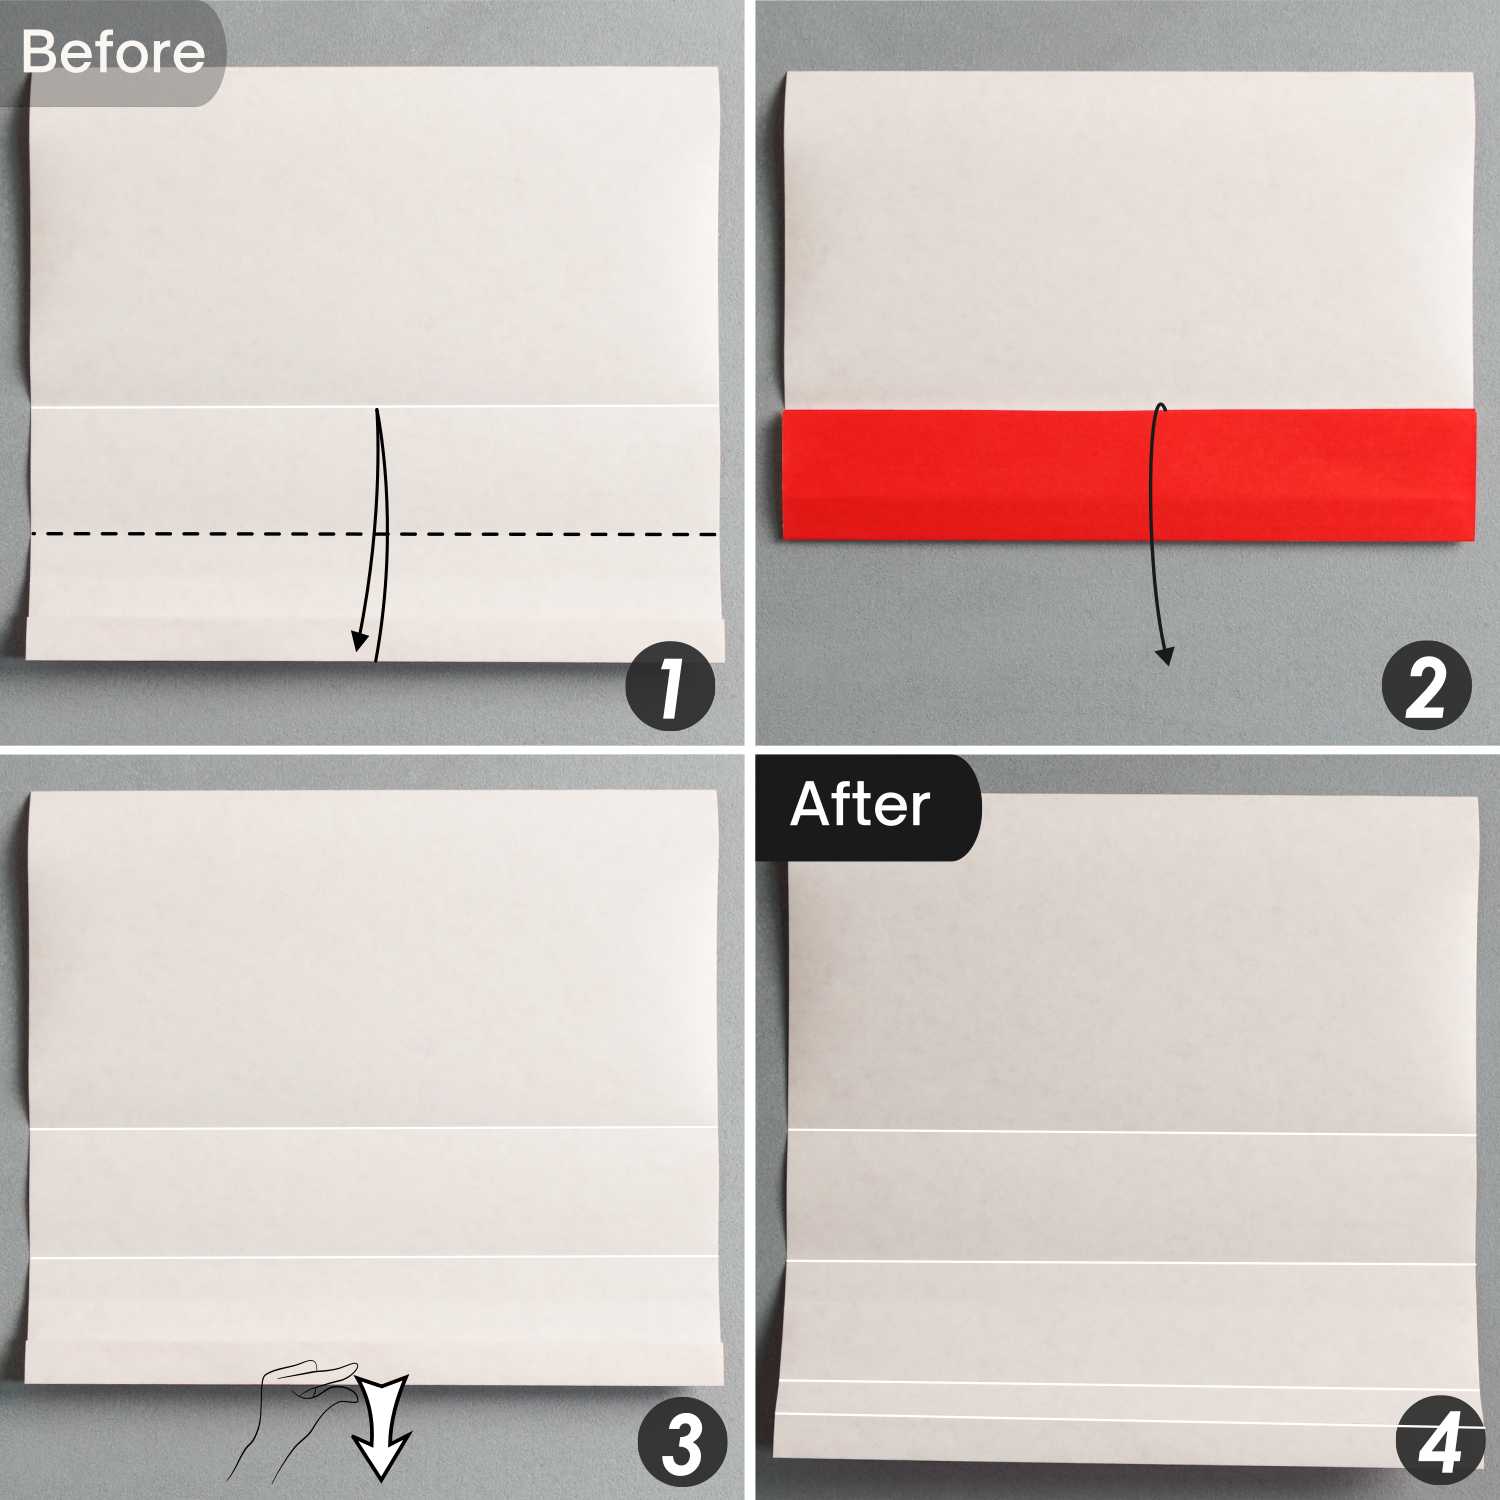
Step 1
Fold the paper in half horizontally, leaving a crease, and unfold it.
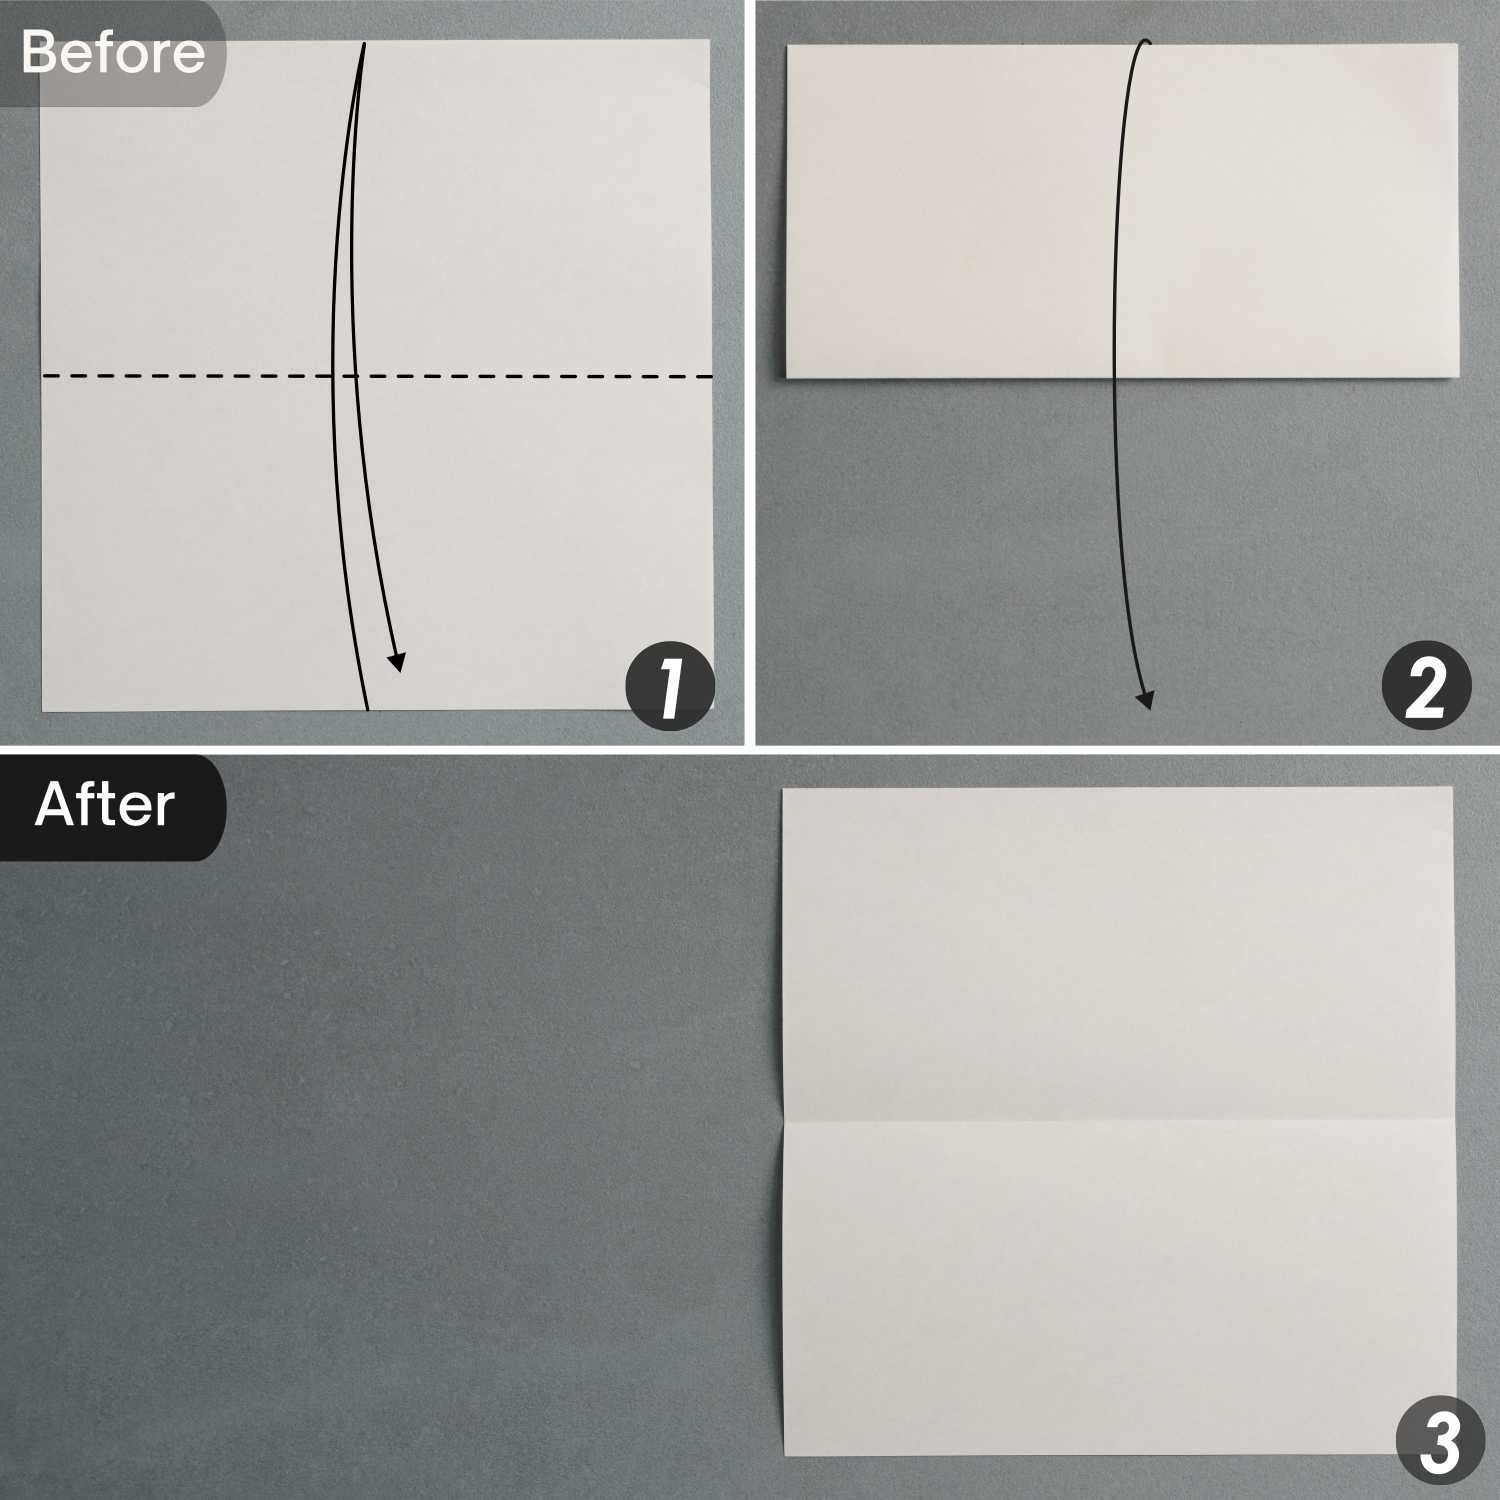
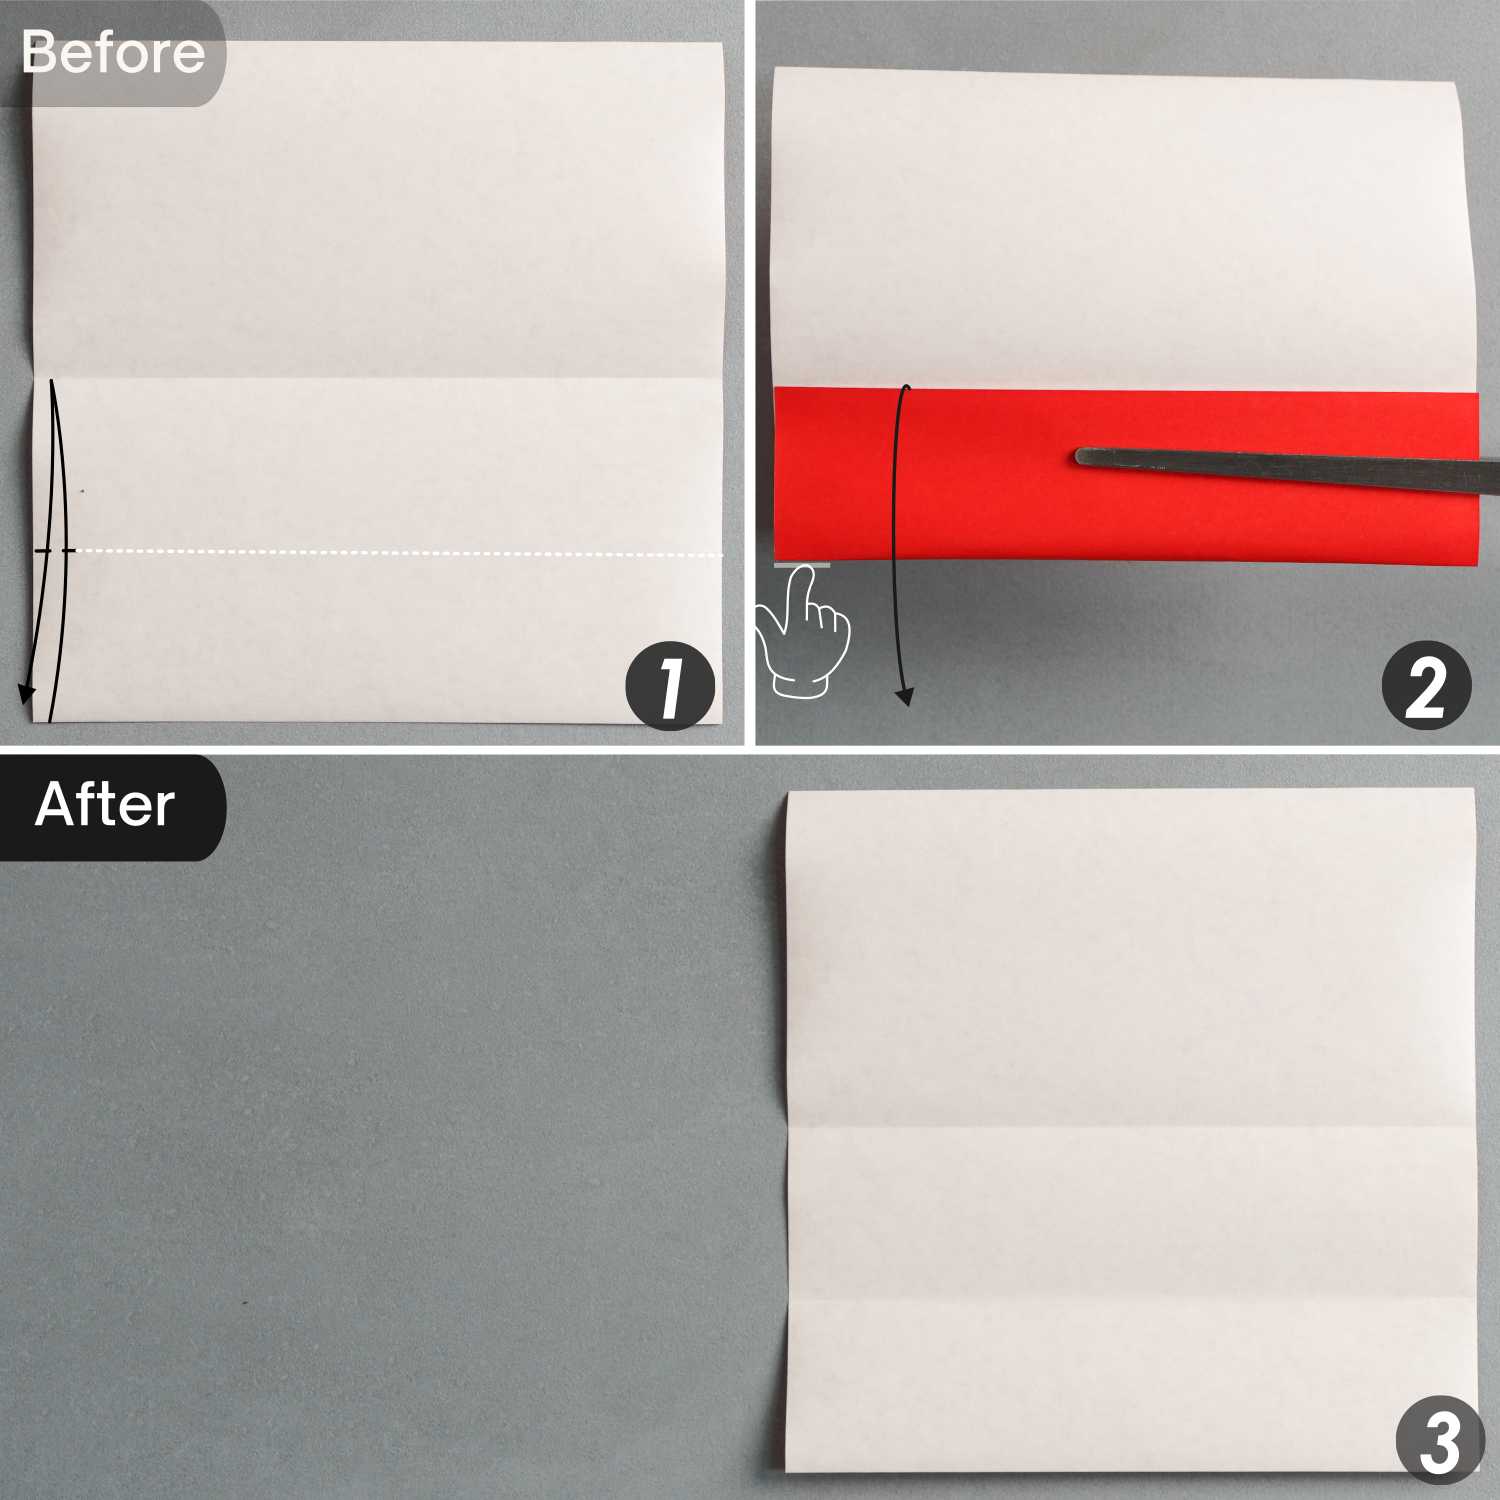
Fold the top and bottom edges to align with the horizontal crease. Repeat this step once more, and then fold the paper in half horizontally from bottom to top.
Step 2
Unfold the paper completely.
Step 3
Fold and unfold the other sheet of paper in the same way.

Step 4
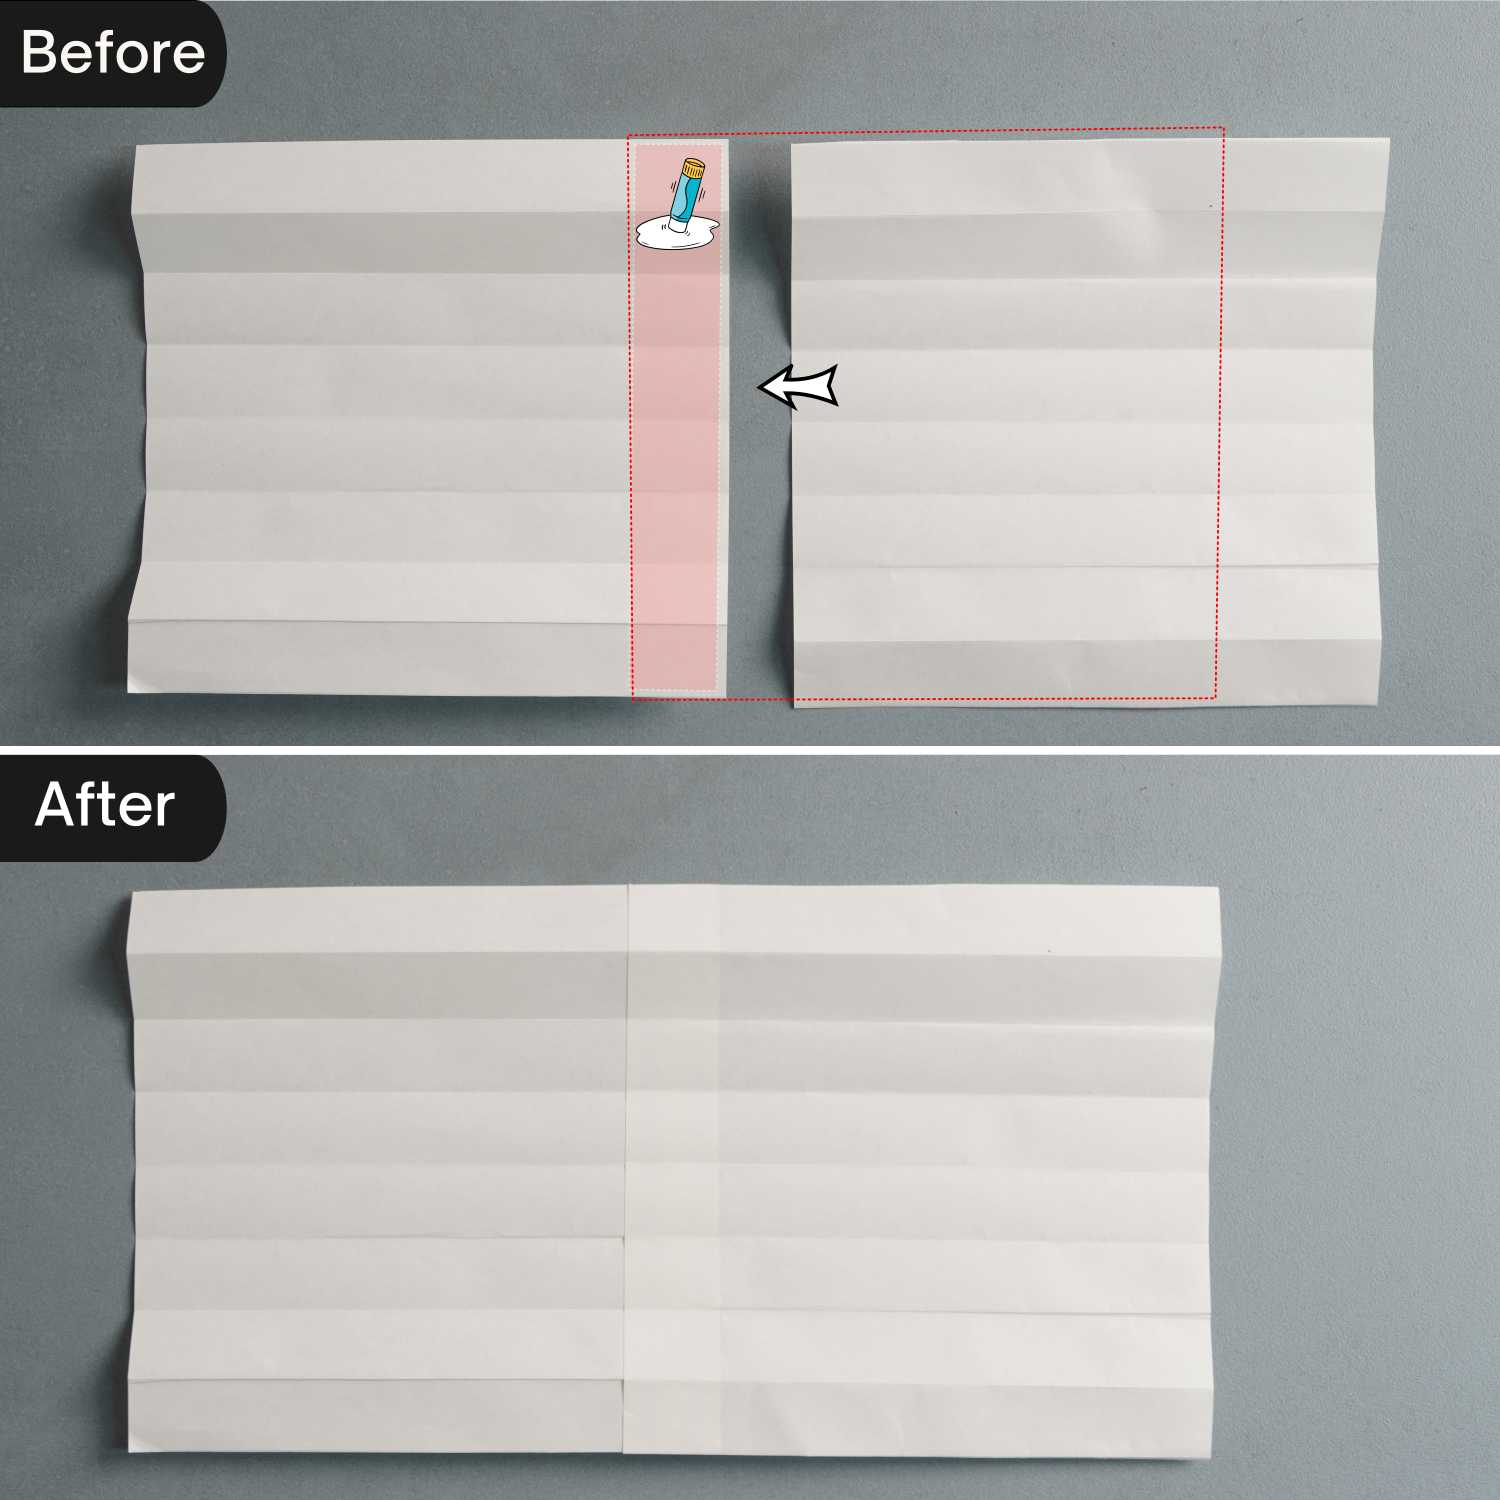
Apply glue to the right side of the left paper and then stick the other paper onto make a larger paper.
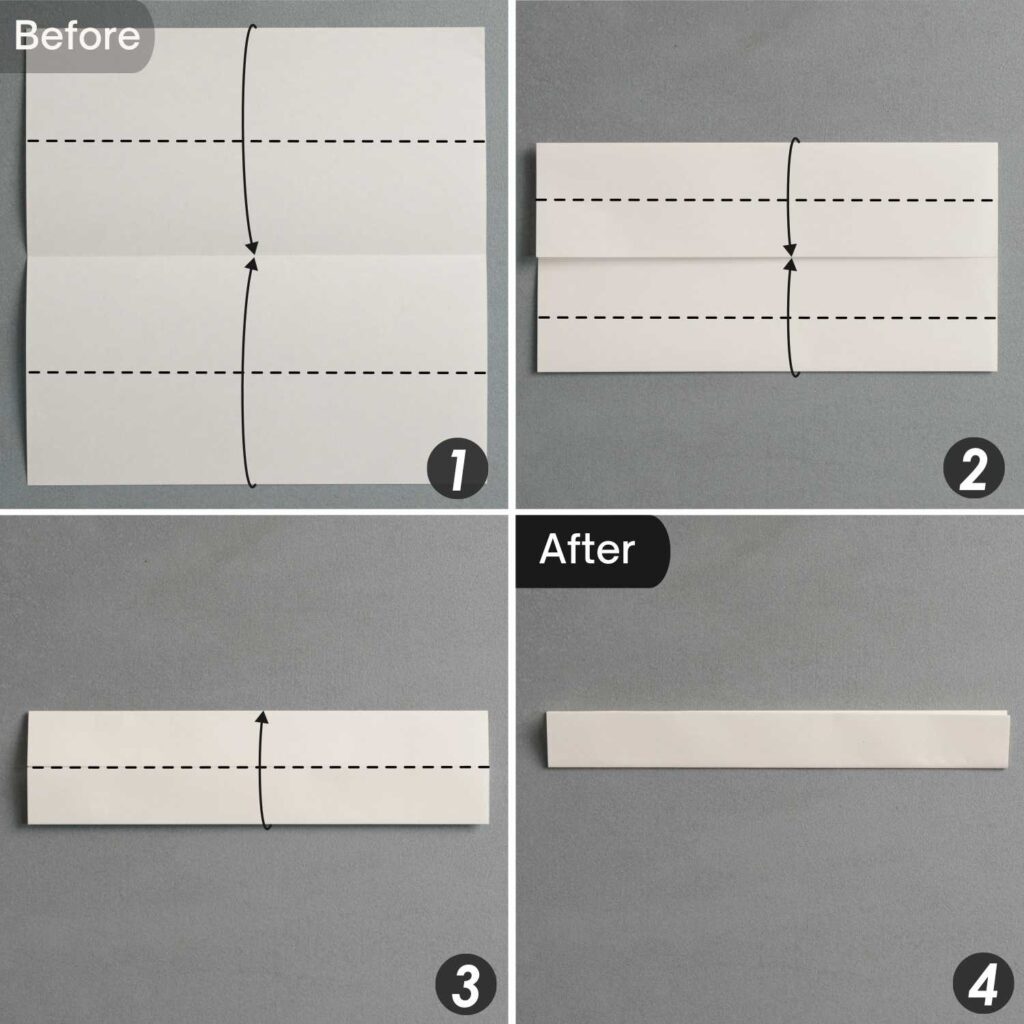
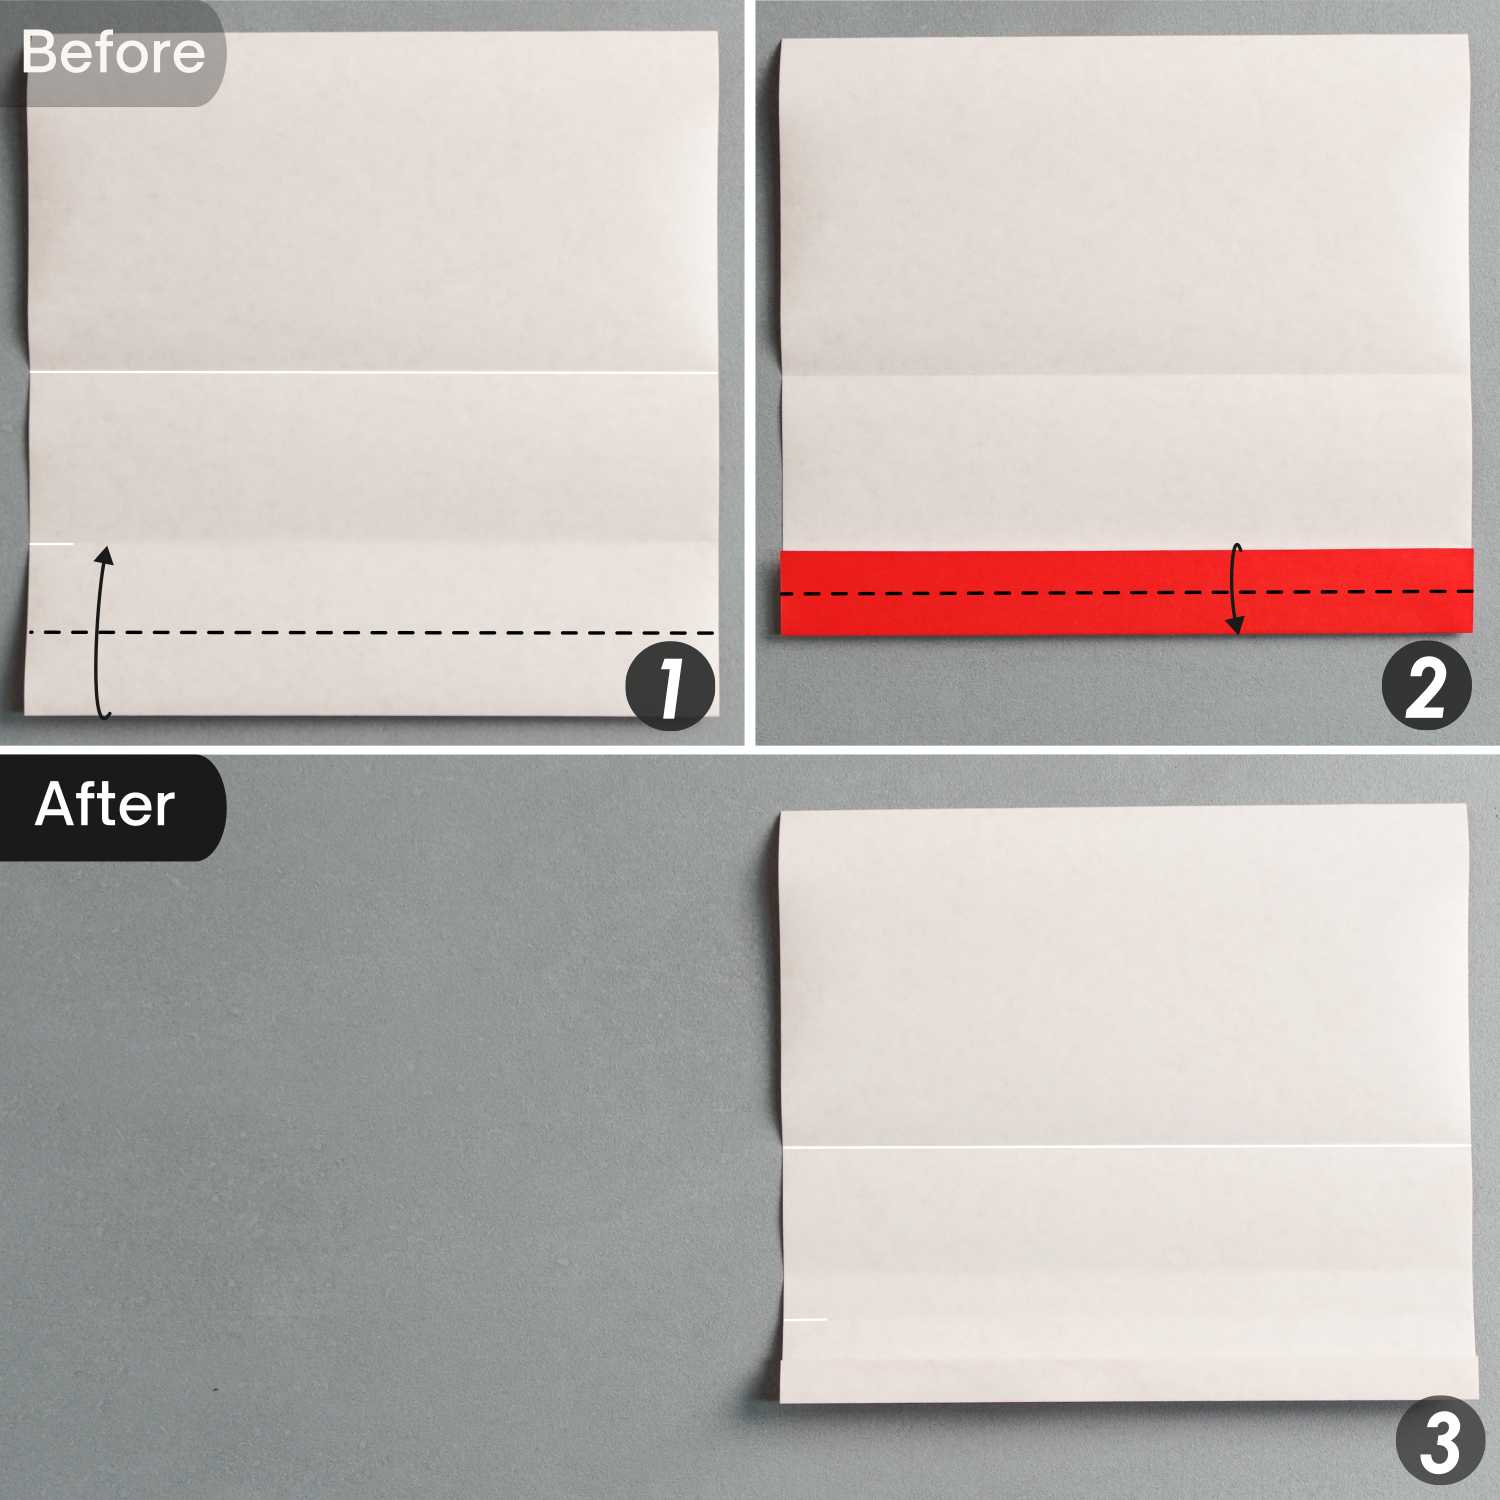
Step 5
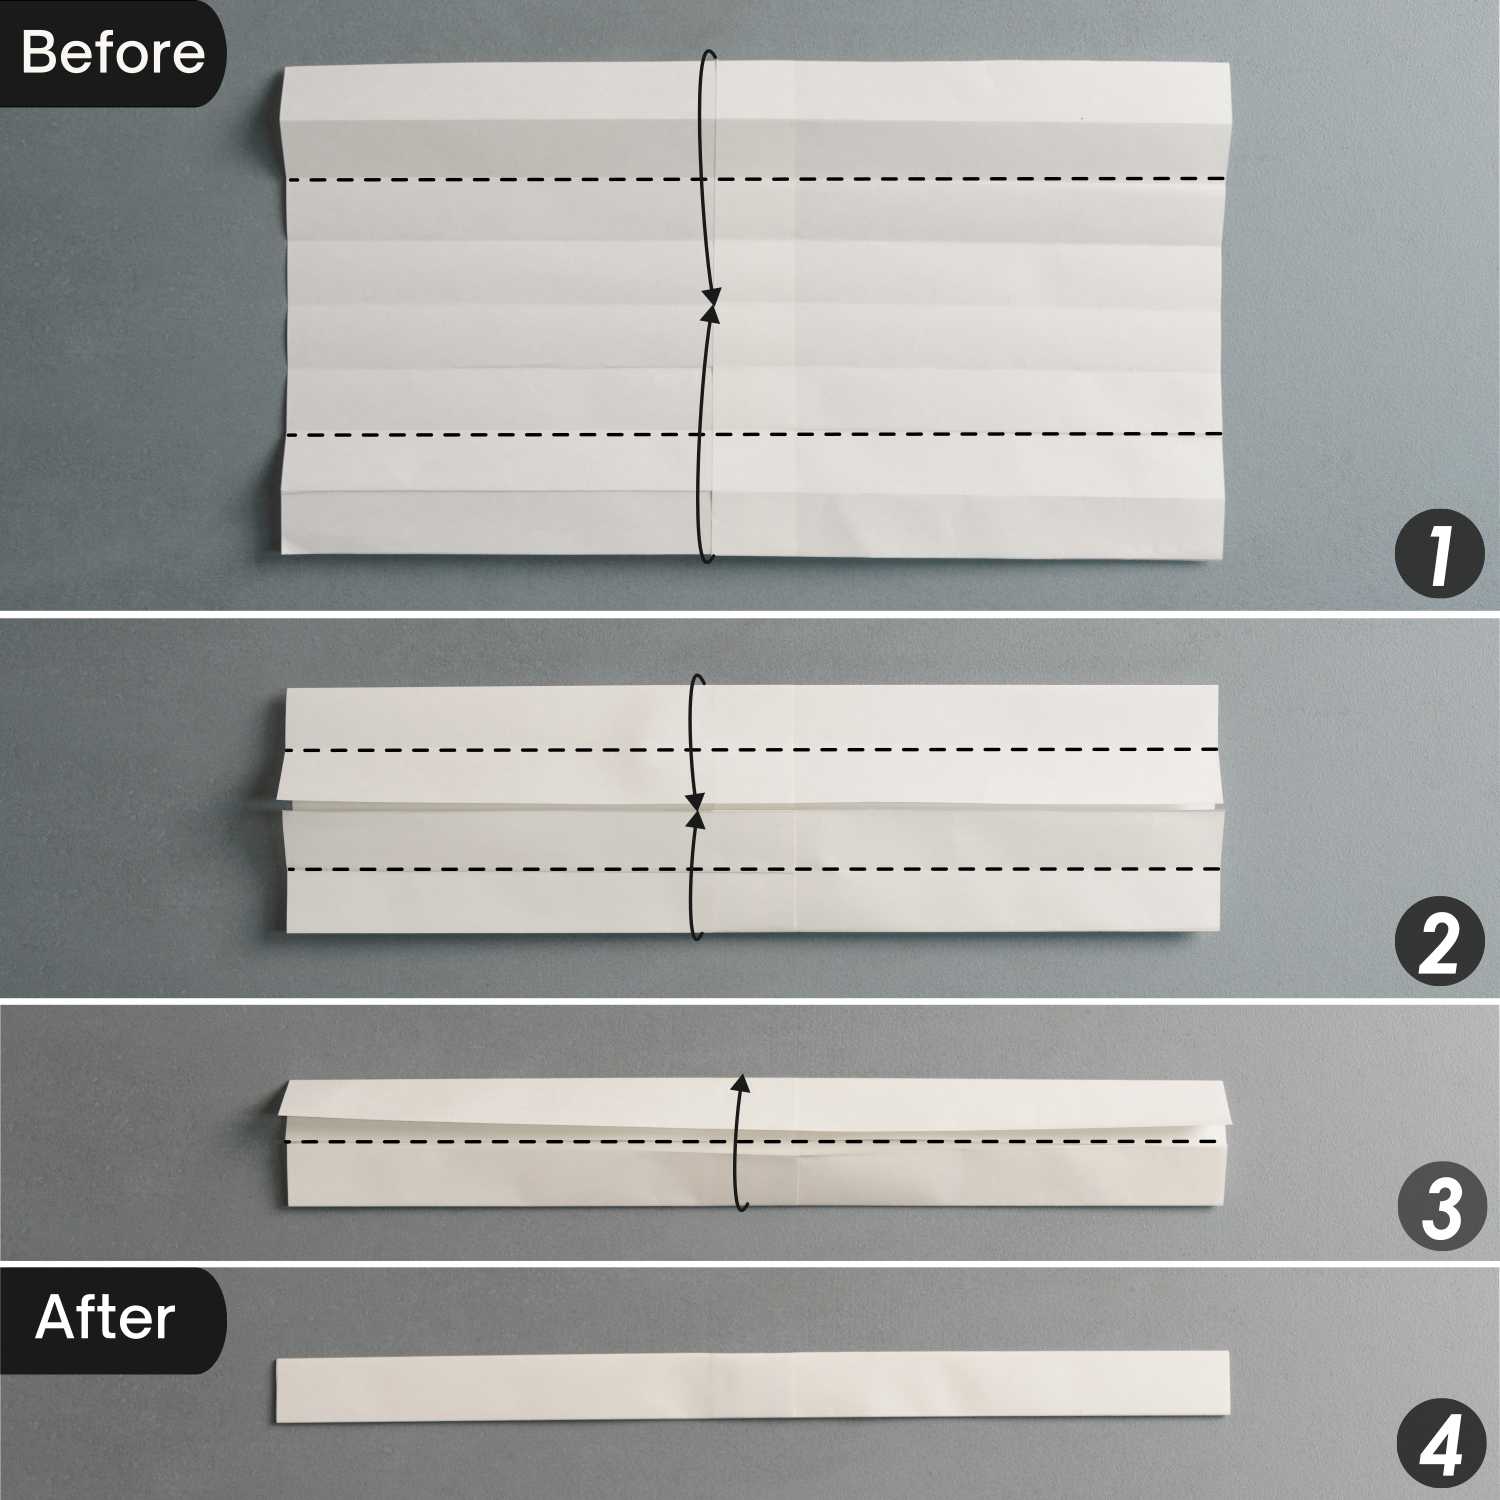
Fold the top and bottom edges along the creases indicated by the dotted lines. Repeat this step once more, and then fold the paper in half horizontally from bottom to top.
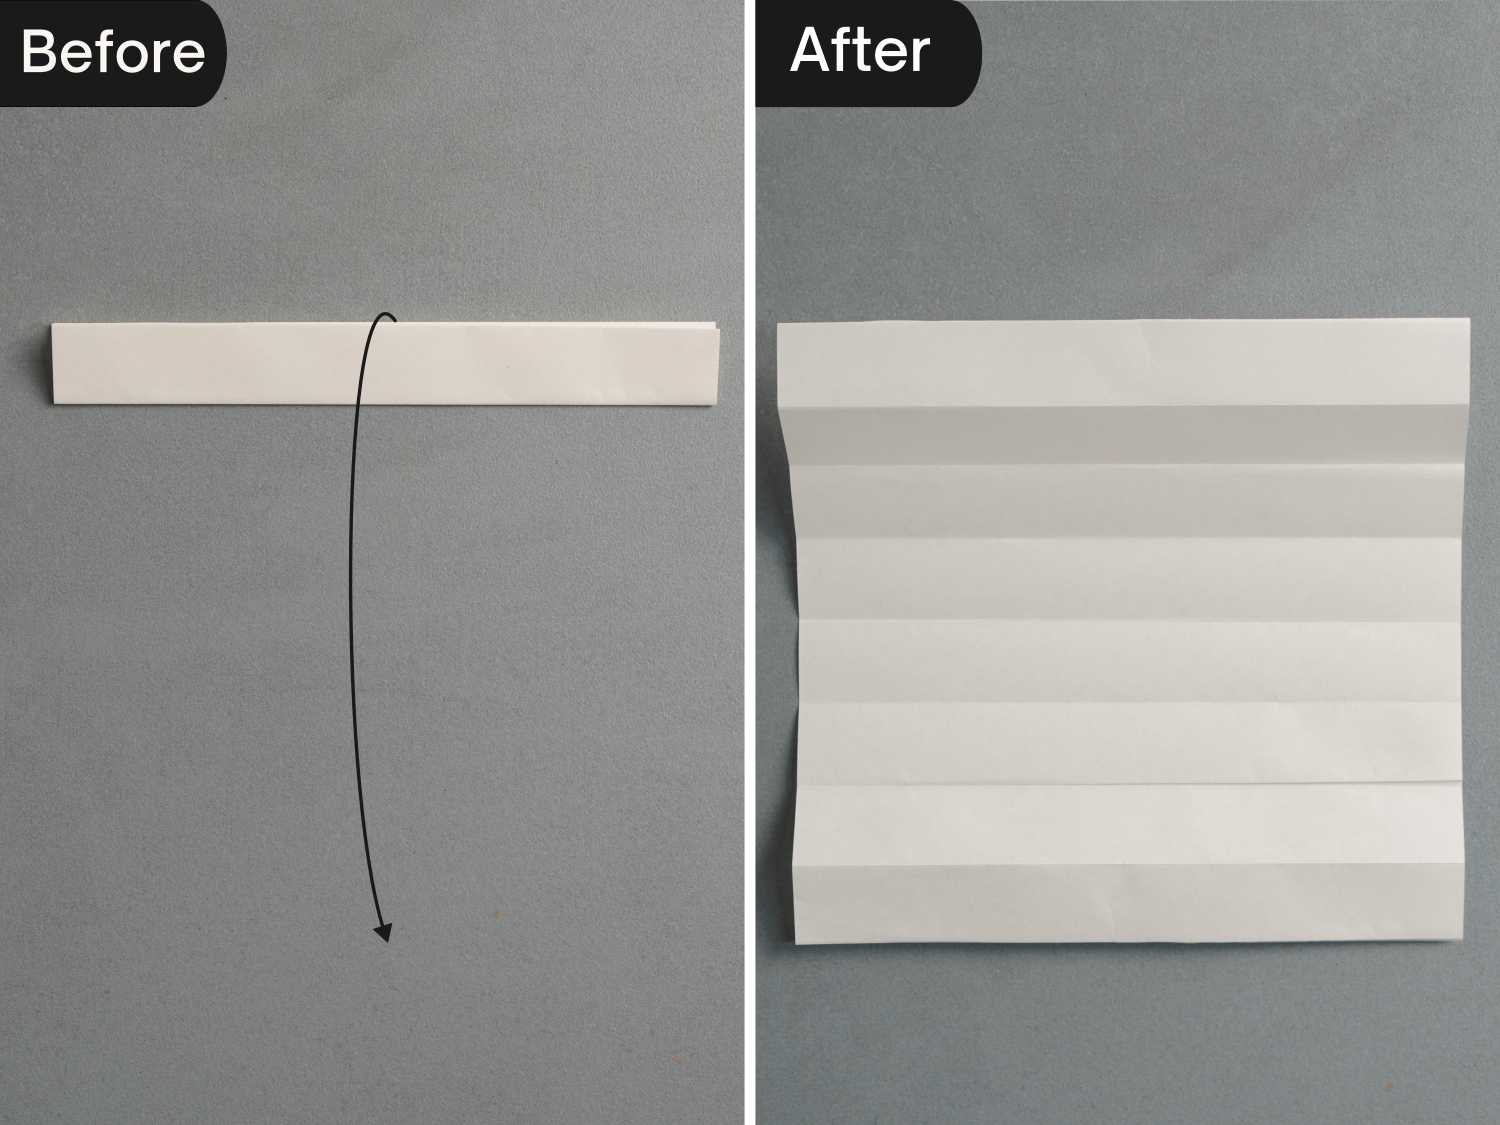
Step 6
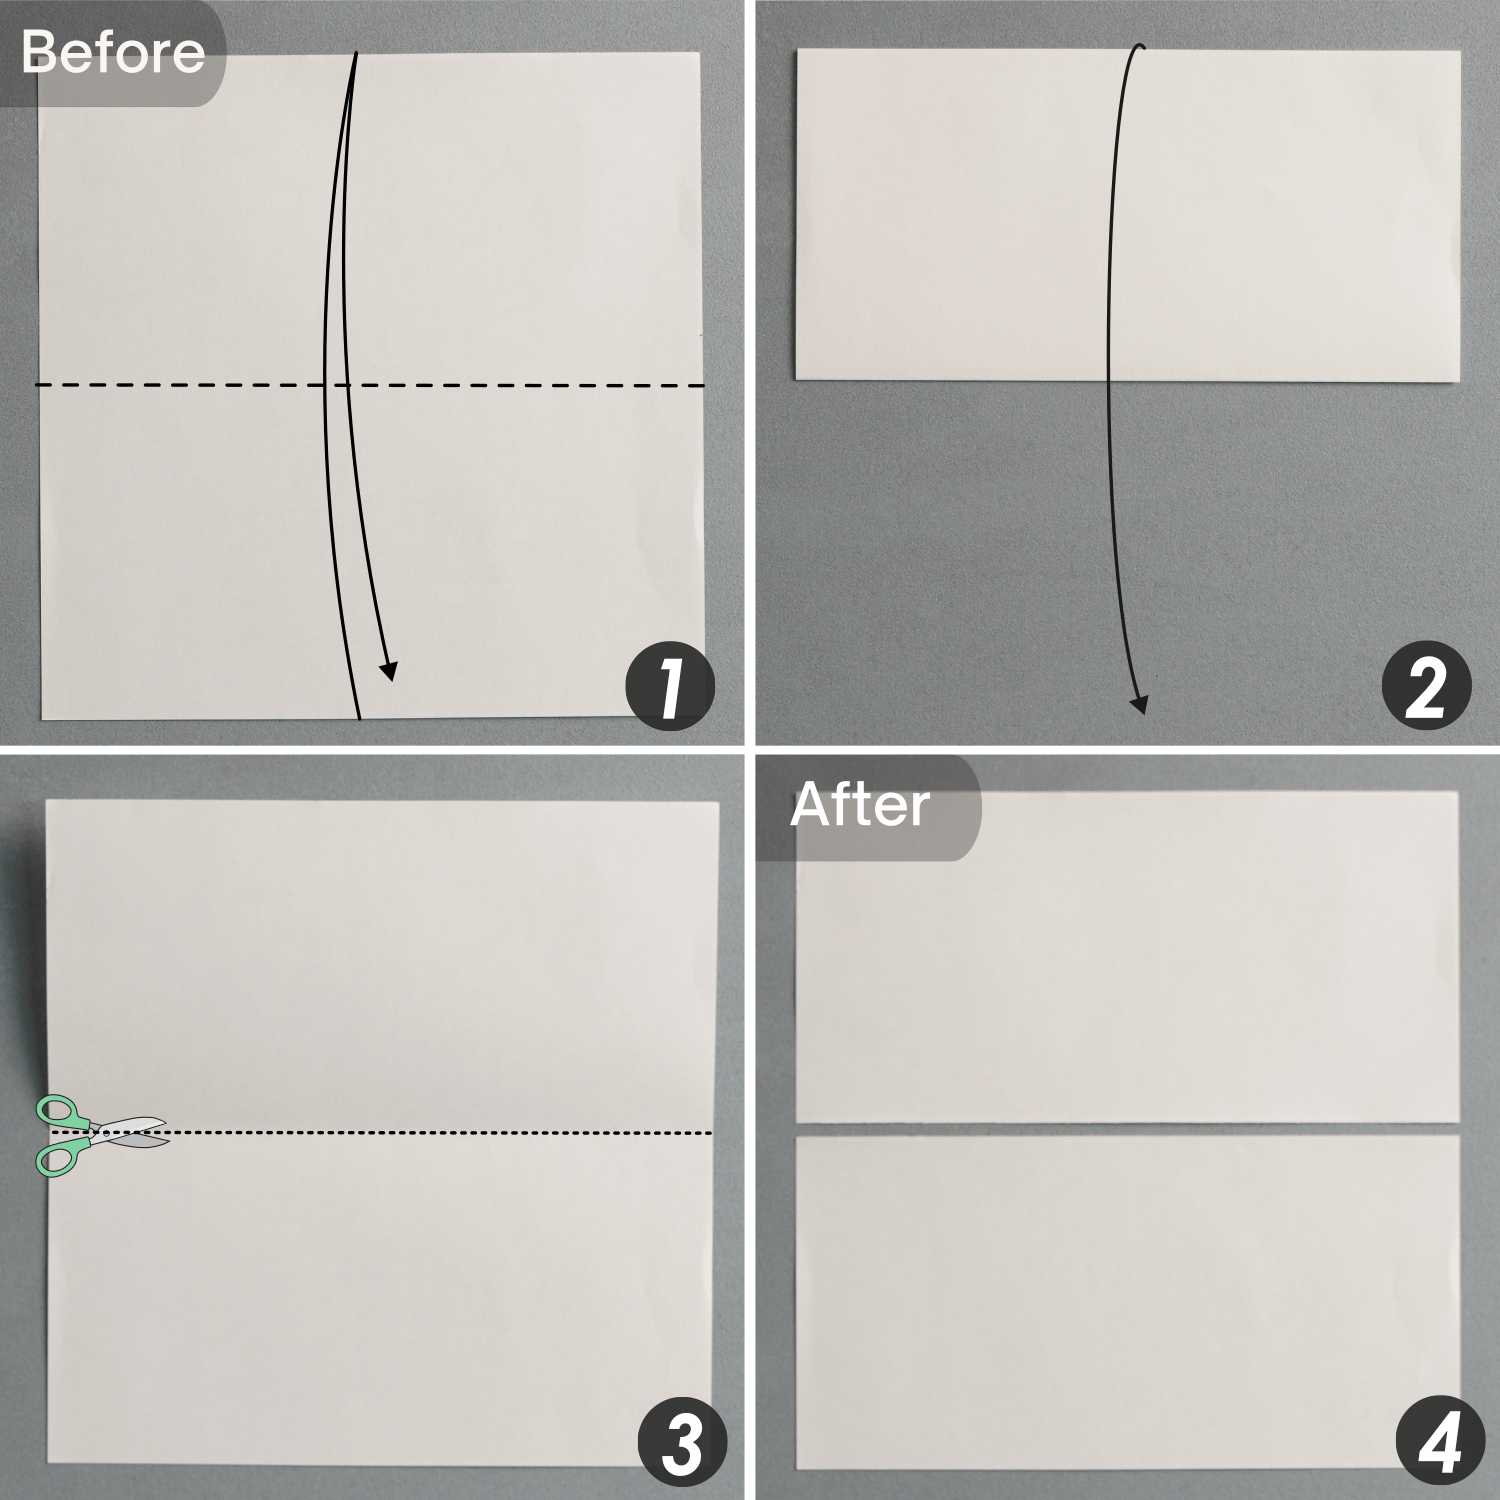
Take another piece of paper, fold it in half horizontally, leave a crease, unfold it, and then cut the paper along this crease.
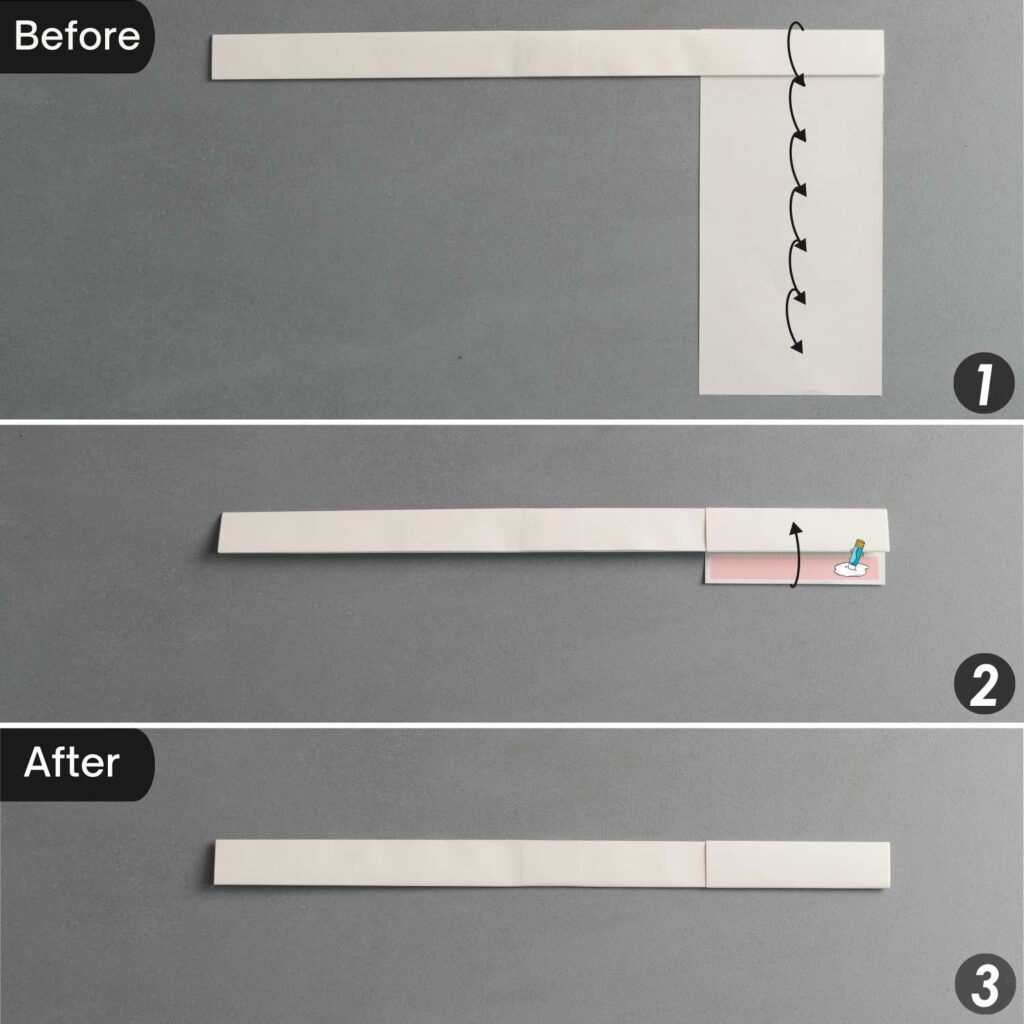
Step 7
Apply glue on the top side of the paper you cut.
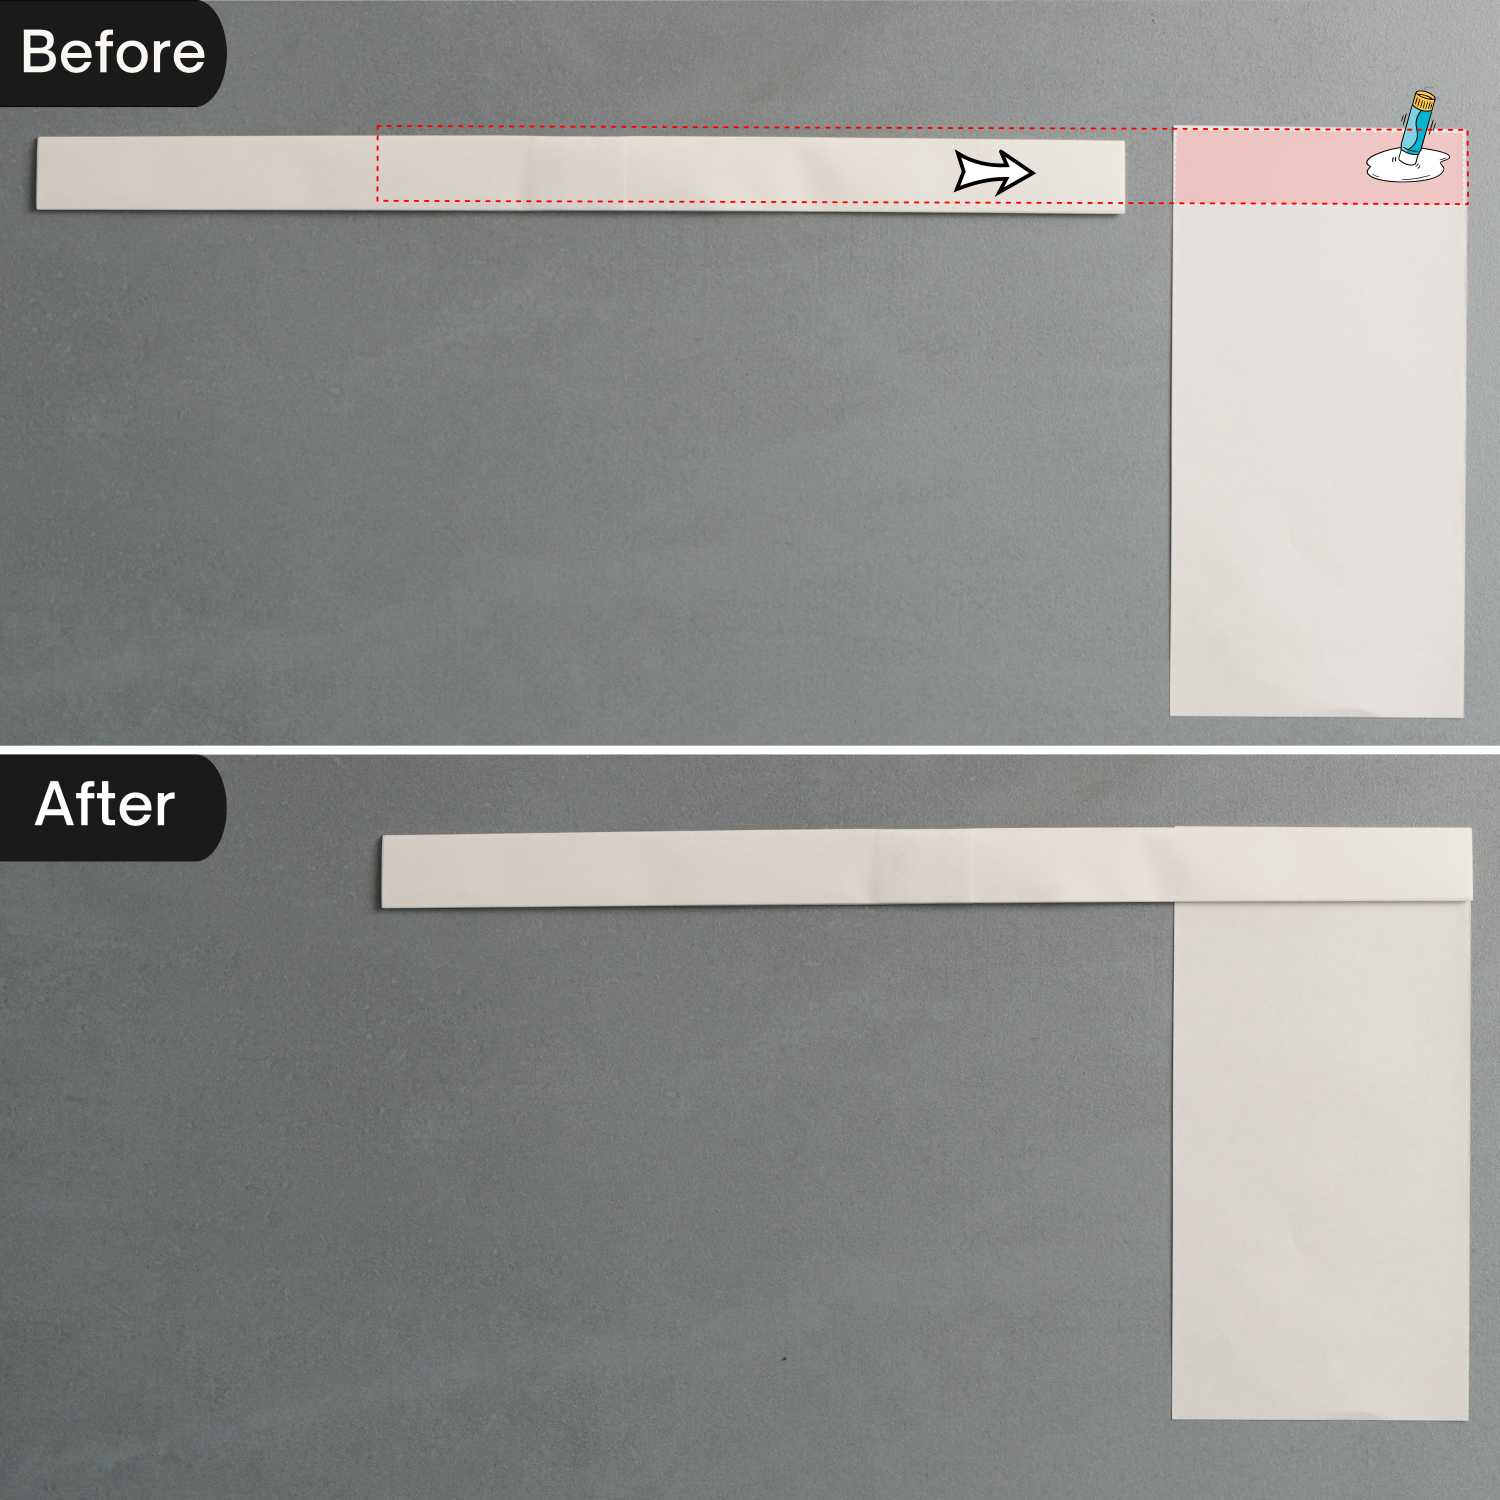
Roll the left strip down completely so that the right paper wraps around its right side. Finally, apply glue to secure it in place.
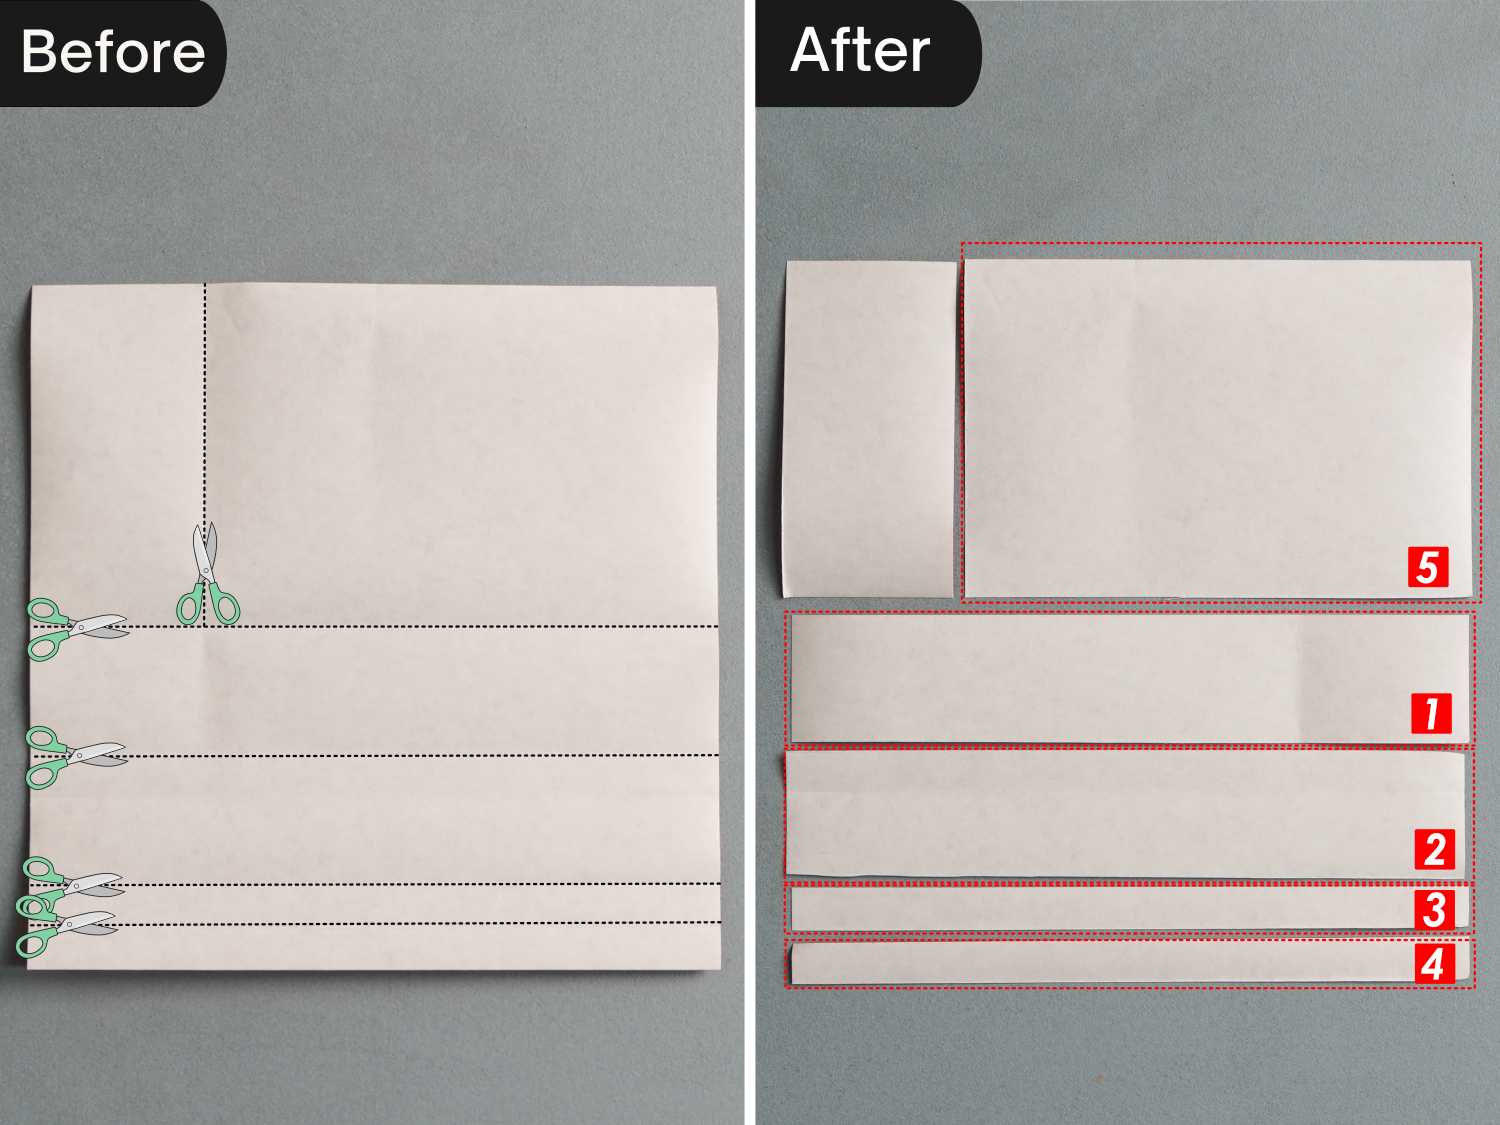
Origami Katana Material Preparation
I used a piece of red square paper to cut out the various sizes of paper needed for the rest of the production. I labeled each piece with a serial number, so you can easily choose the ones you need in the next steps.
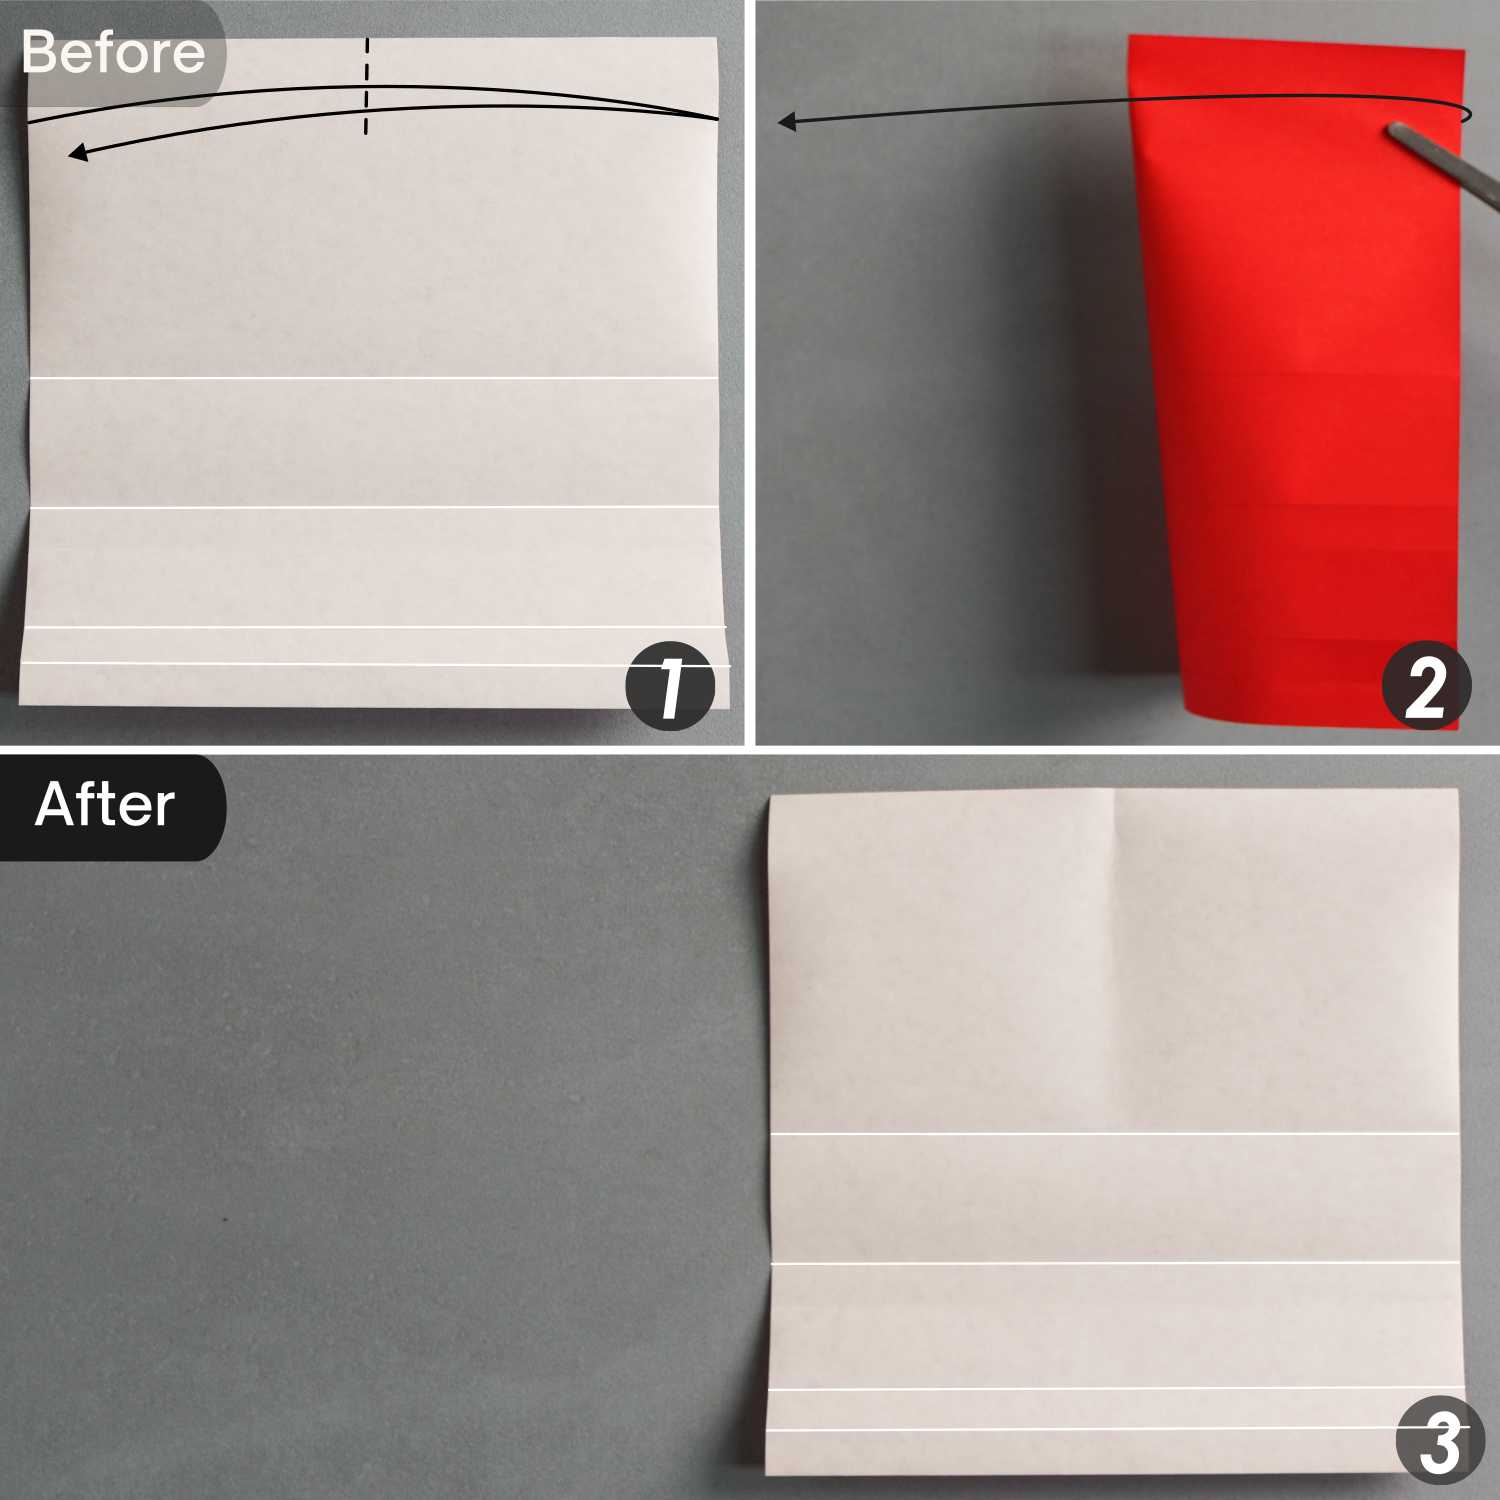
Step 1
Take out another piece of paper, and place it with the desired display side face down, then fold it in half horizontally, leave a crease, and unfold it.
Step 2
Fold the bottom edge to align with the horizontal crease, leaving a short crease indicated by the black dotted line, and unfold it.
Step 3
Fold the bottom edge of the paper to align with the horizontal extension of the short crease you just made, then fold it down to align with the bottom edge.
Step 4
Fold the bottom edge to align with the center horizontal crease, then unfold the paper completely.
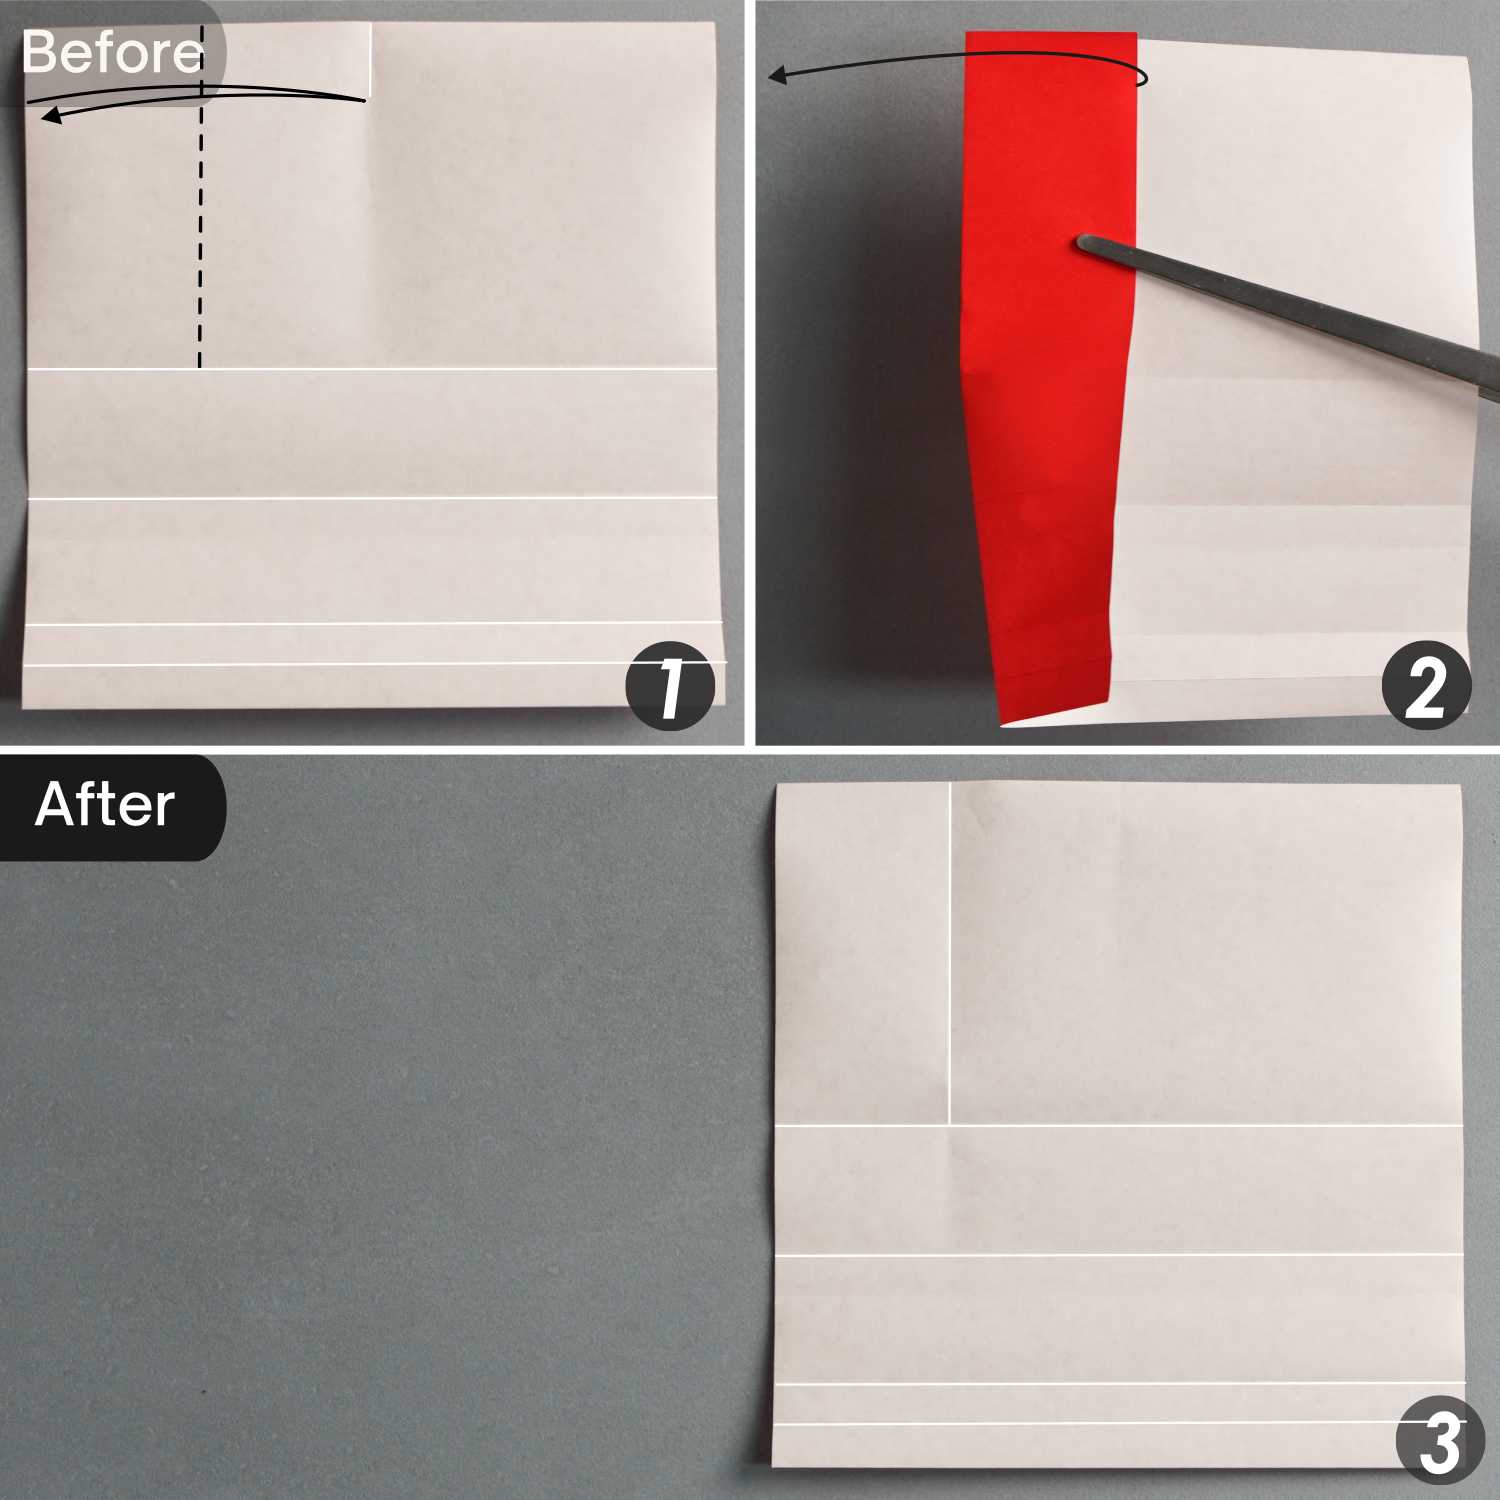
Step 5
Fold the paper in half vertically, leaving a short crease shown by the black dotted line, and unfold it.
Step 6
Fold the left edge along the dotted line to align with the vertical extension of the crease you made in the previous step, and unfold it.
Step 7
Cut the paper along the creases indicated by the dotted lines. The papers marked with a number are all you need.
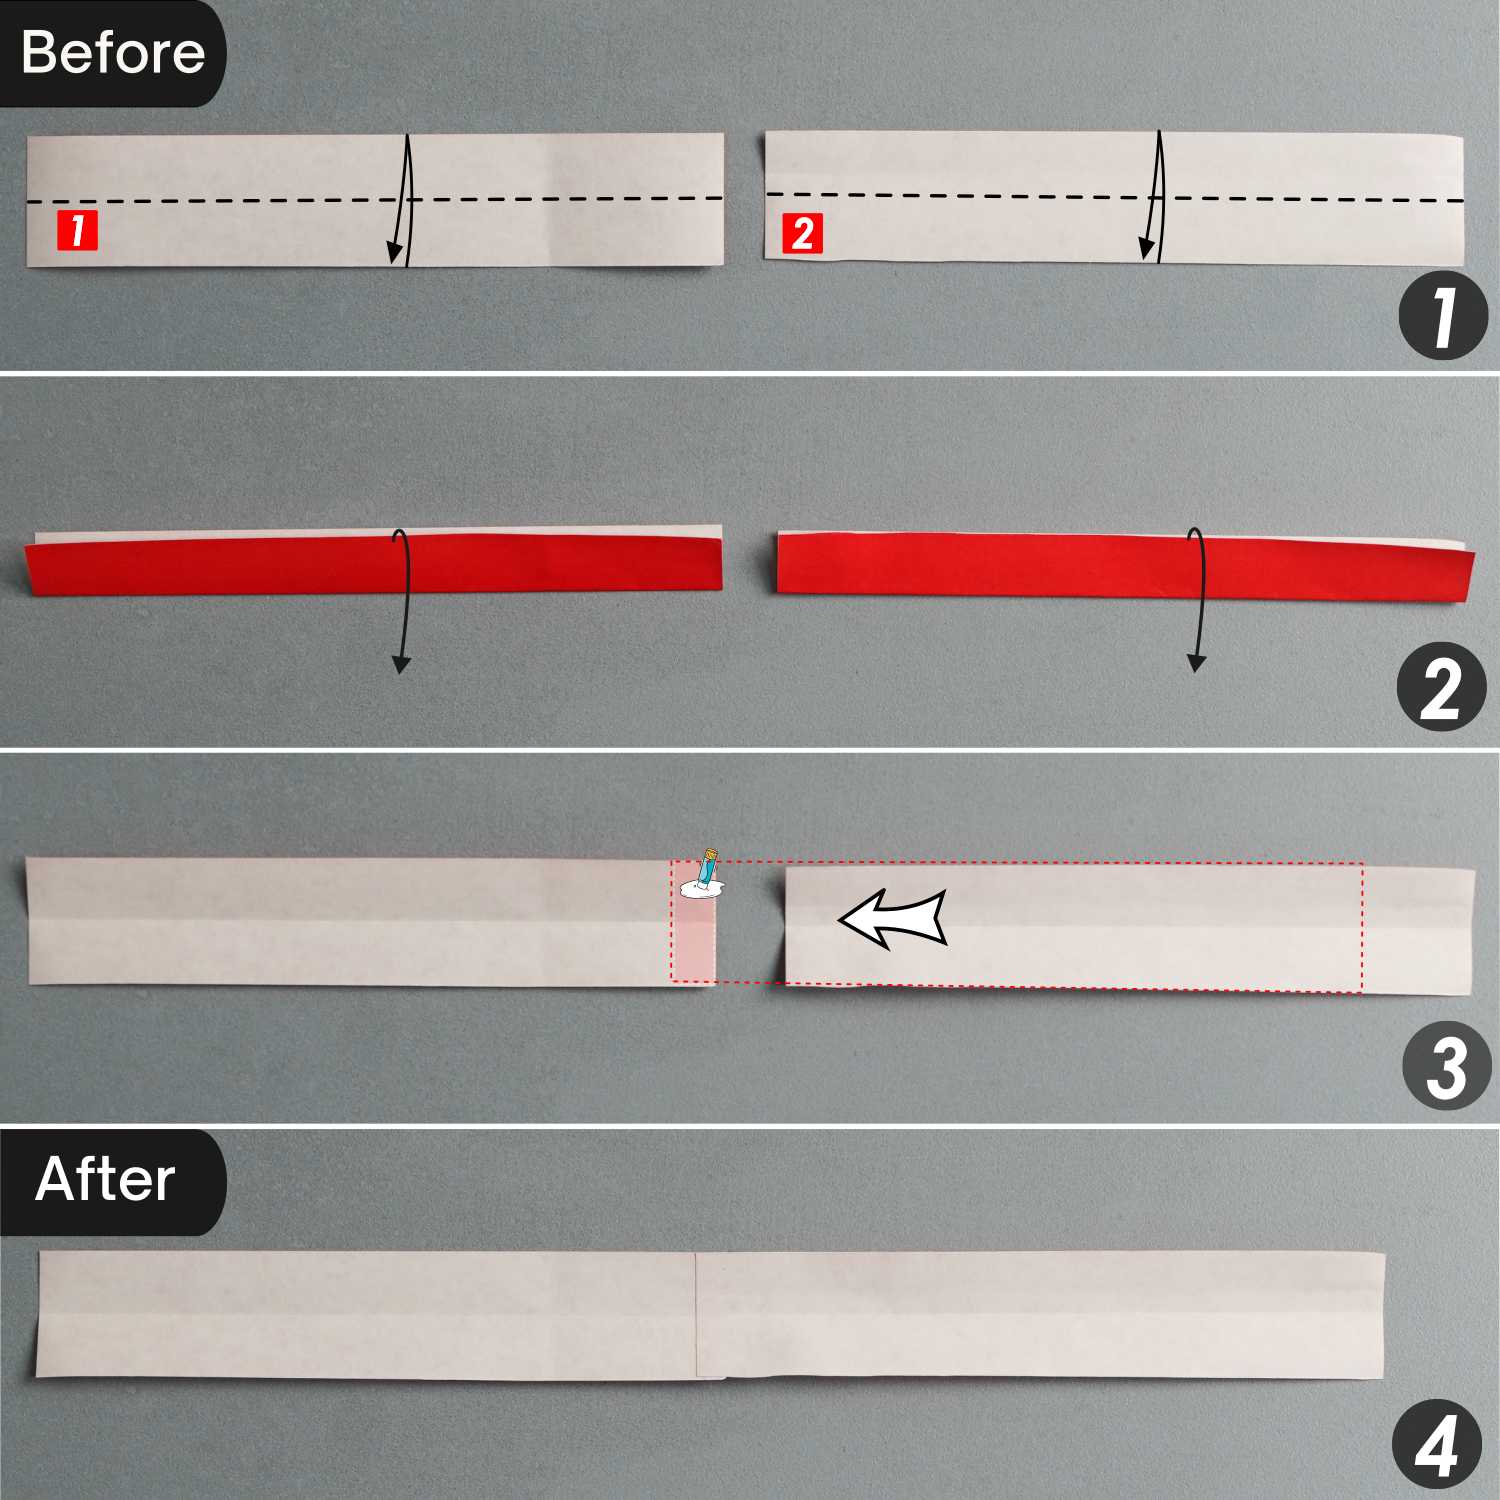
Decorated Blade and Hilt
Step 1
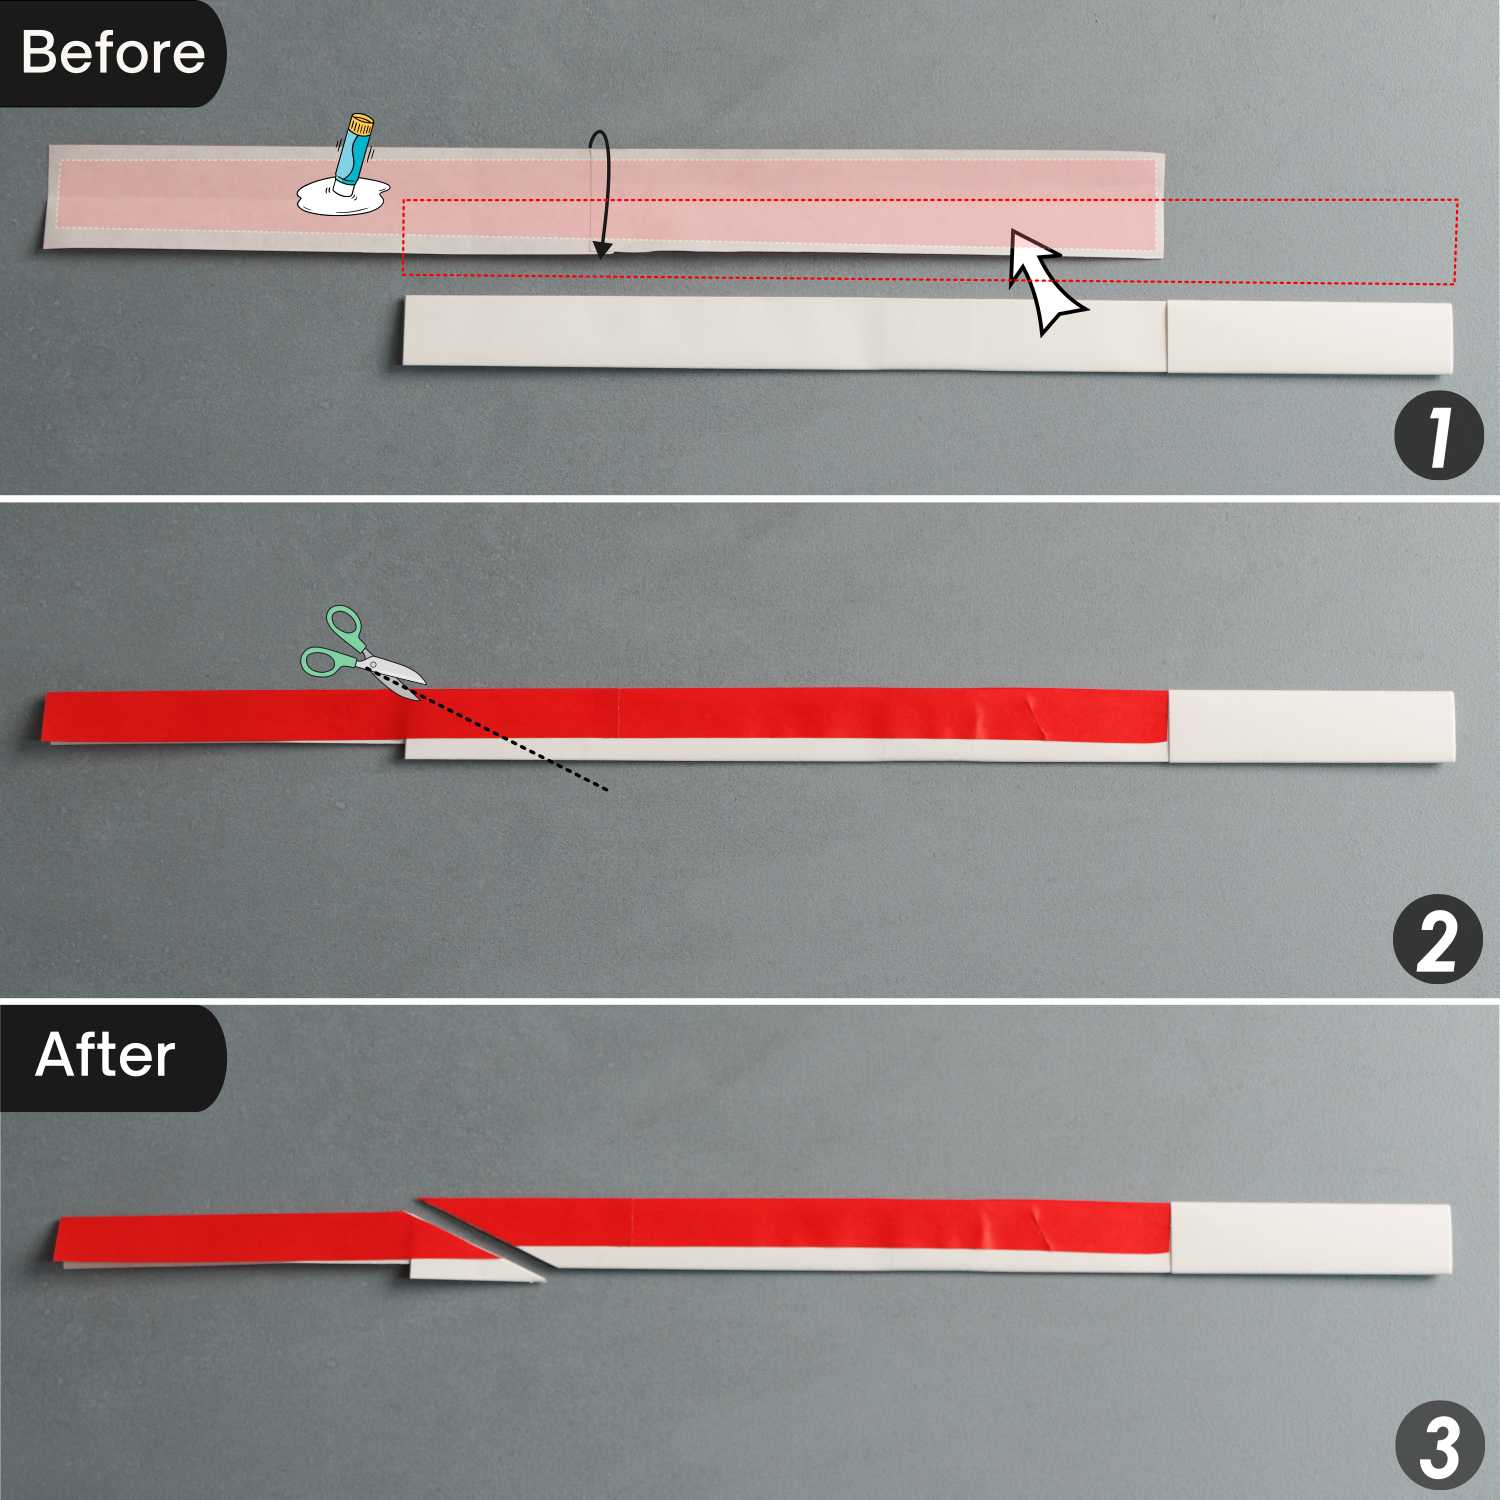
Take out the papers marked number 1 and 2, fold them in half horizontally, leave a crease, and unfold them. Then, glue them together as the third and fourth pictures show.
Step 2
Use this paper to wrap the blade, then cut a portion of the left end to get a pointed tip.
Step 3
Wrap the paper marked with the number 3 in a spiral pattern around the hilt.
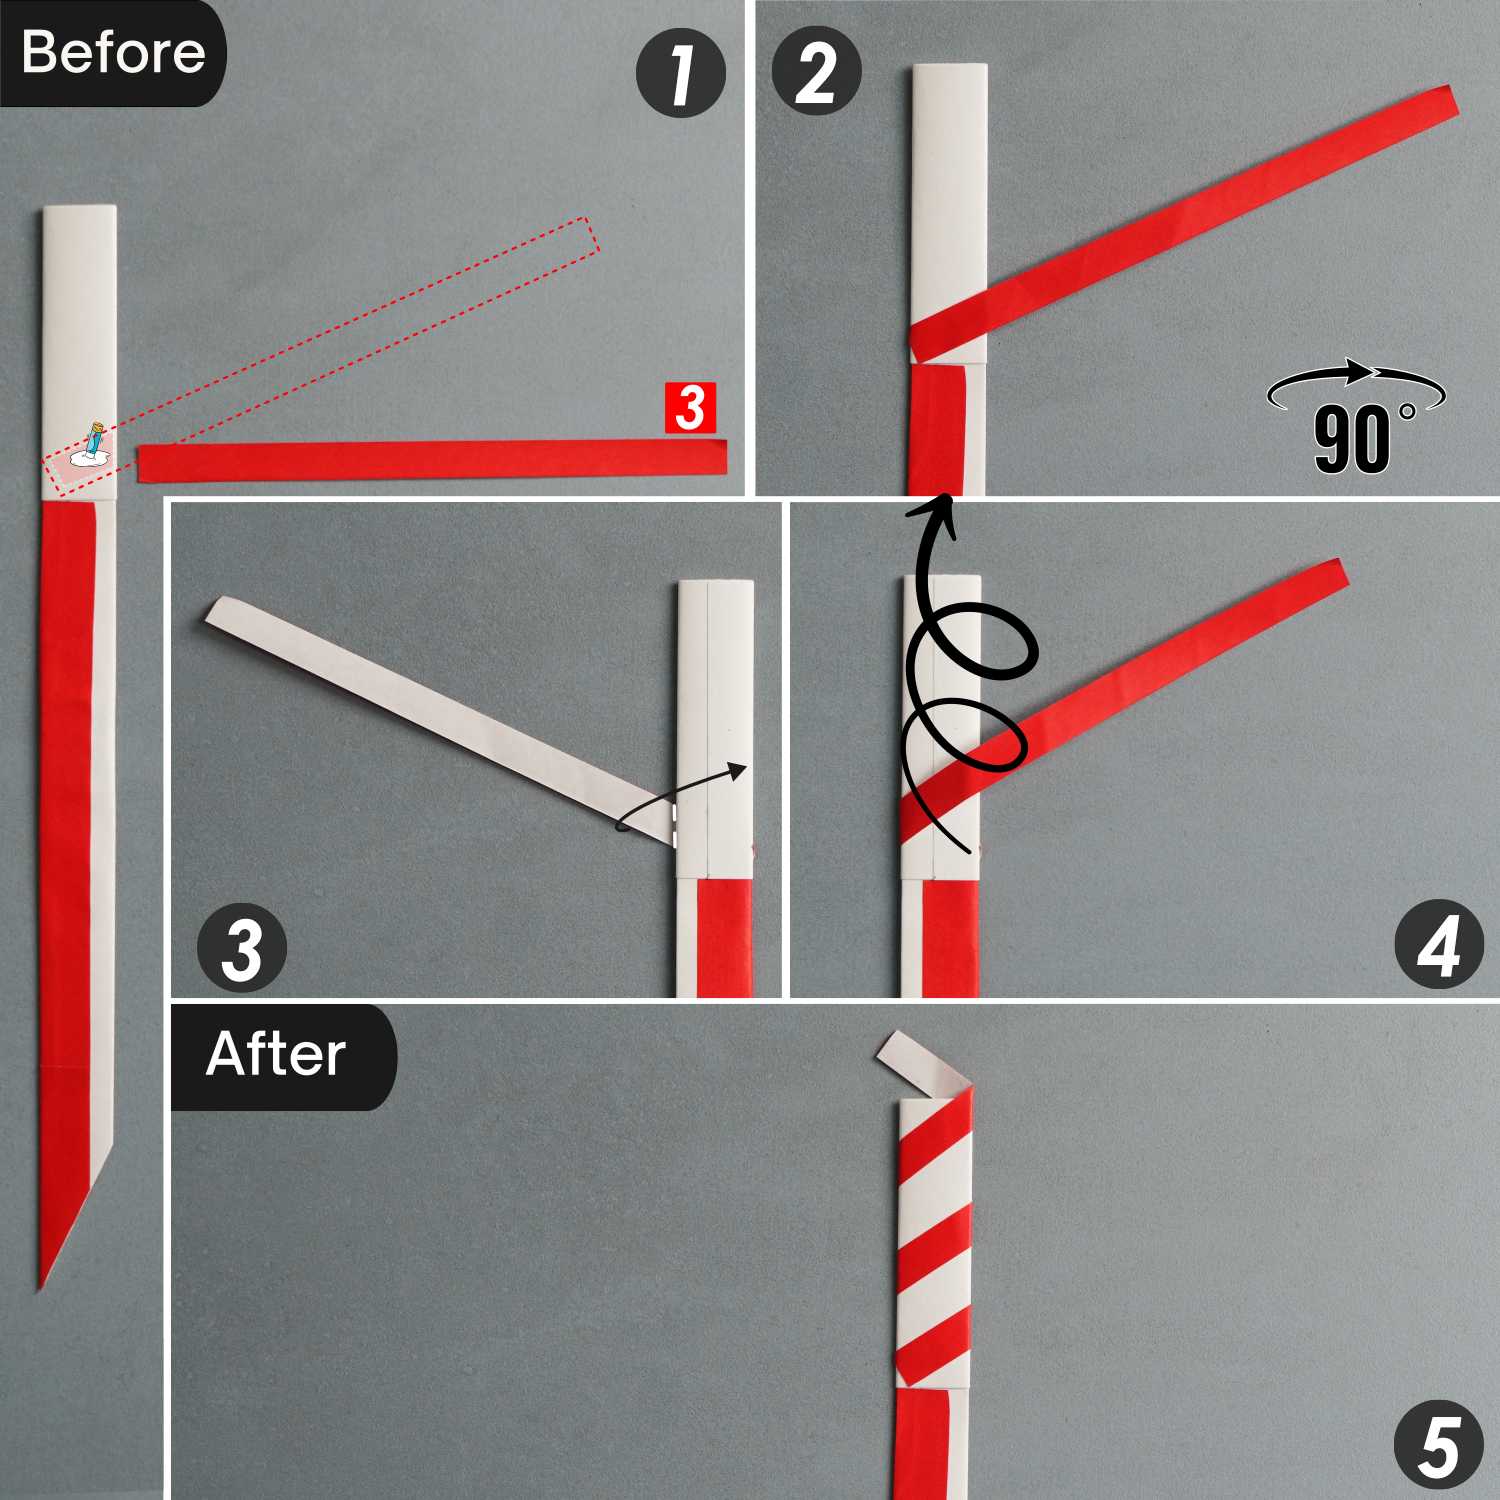
Step 4
Wrap the hilt in a spiral fashion from the other direction with the paper marked with the number 4. Finally, cut off the excess at the end of both paper strips.

Making Origami Katana Crossguard
I made a crossguard for the katana, which is actually an origami boat, yes, the kind that are in the water. If you don’t make the Origami Katana Blade according to the size of paper I provided, then the size of the paper used to make the crossguard is very important.
The tutorial in this link https://origamiok.com/origami-boat/ provides an introduction to determining what size boat can be made from different sizes of paper, allowing you to measure accurately and choose the right size. If you have made the Origami Katana Blade following my previous tutorial, please use the paper labeled as number 5 to begin this project.
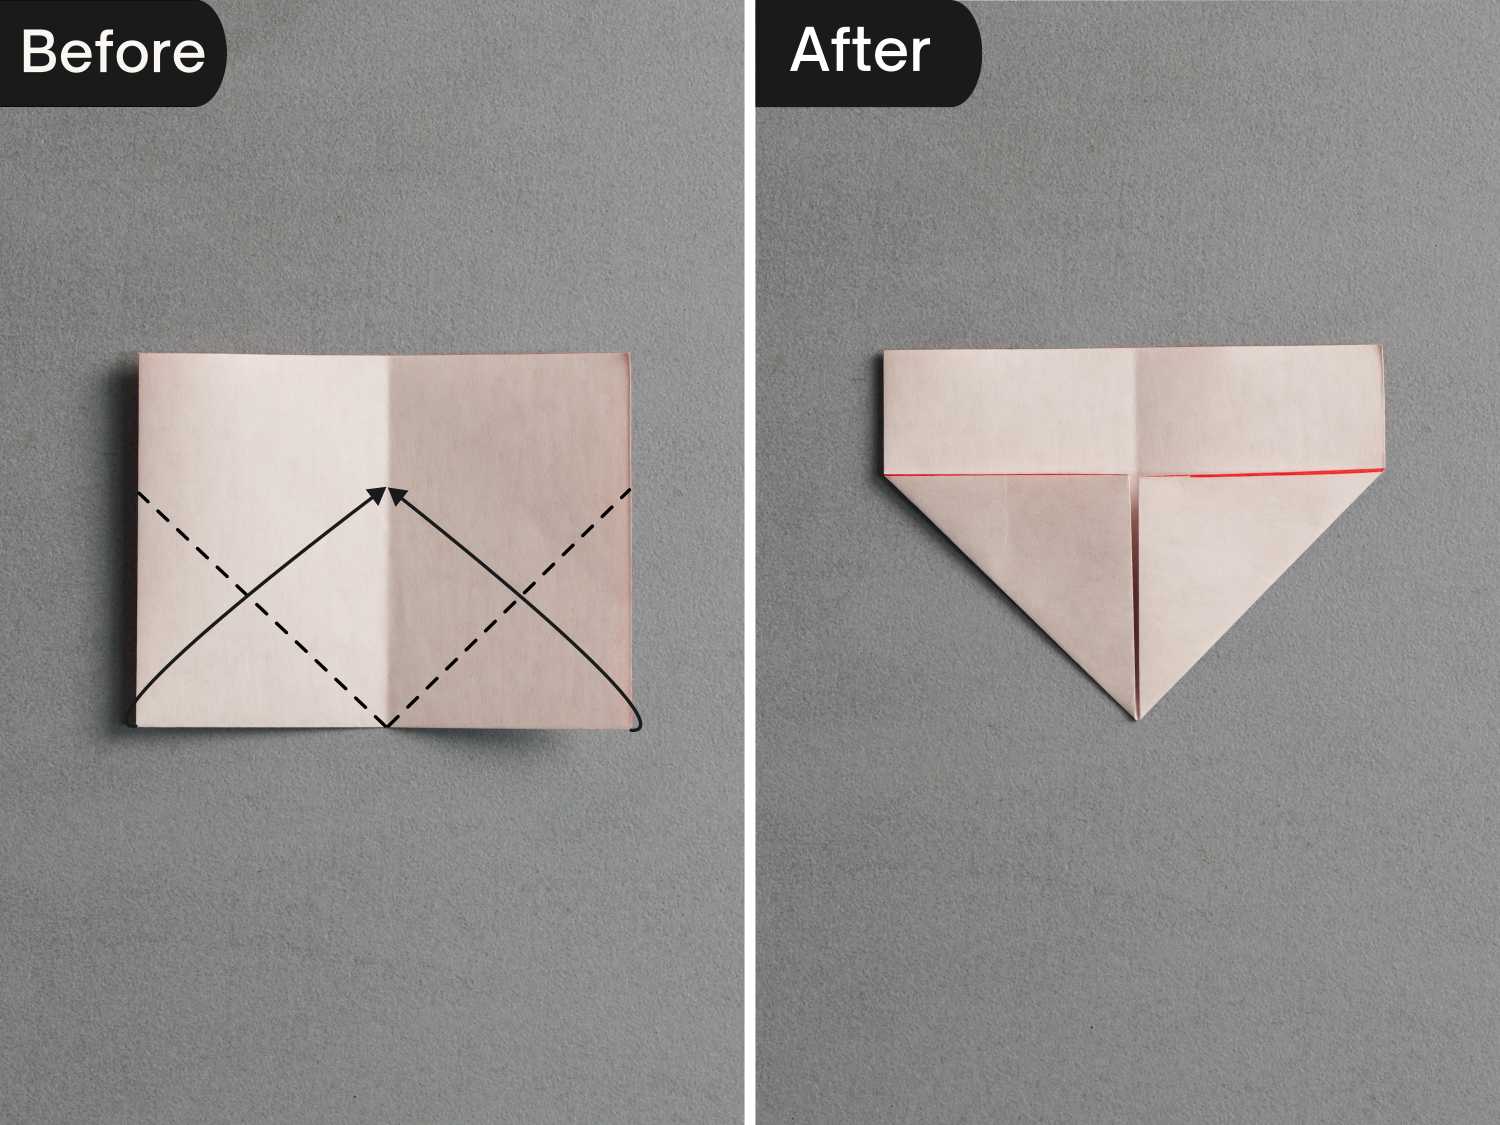
Step 1
Fold the the paper marked number 5 in half horizontally from bottom to top, then fold it in half vertically, and unfold it.
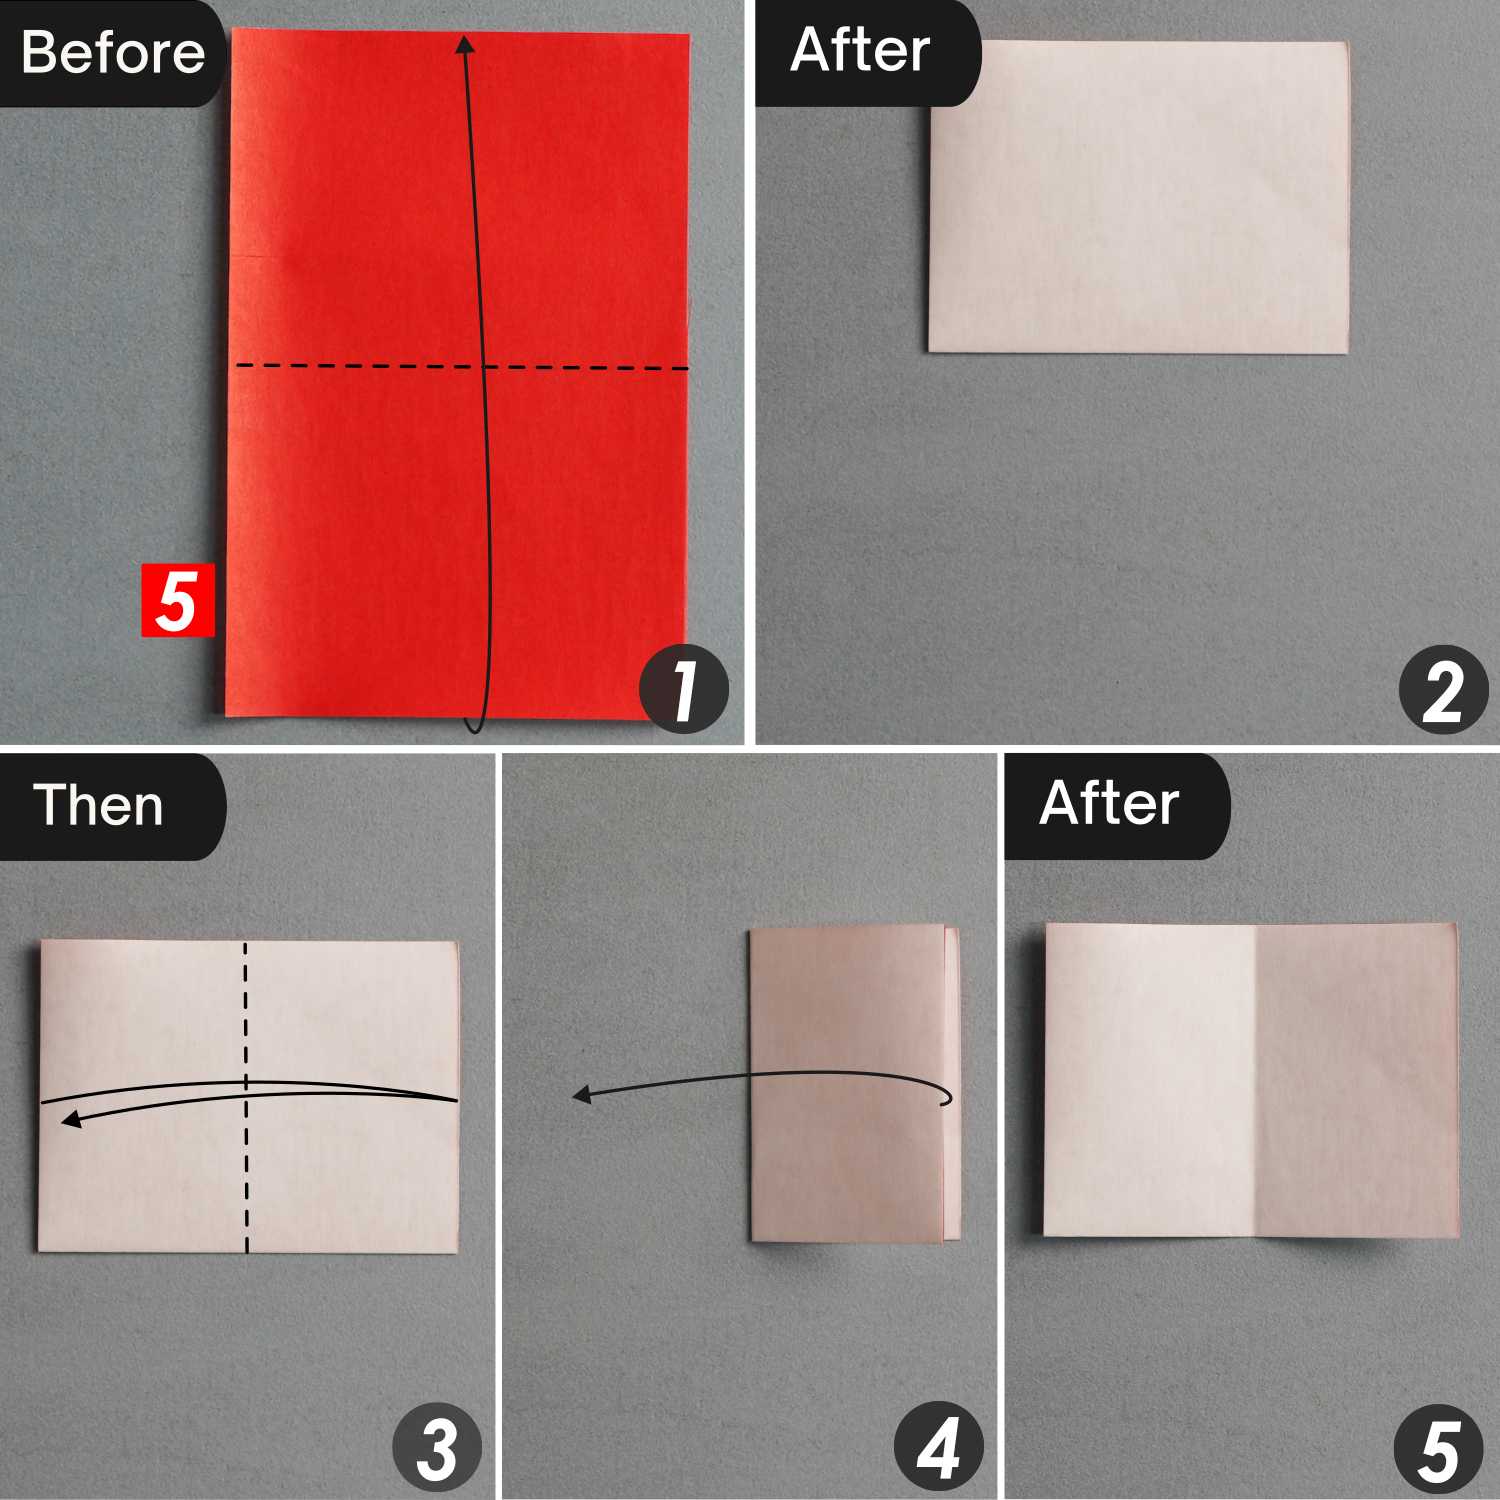
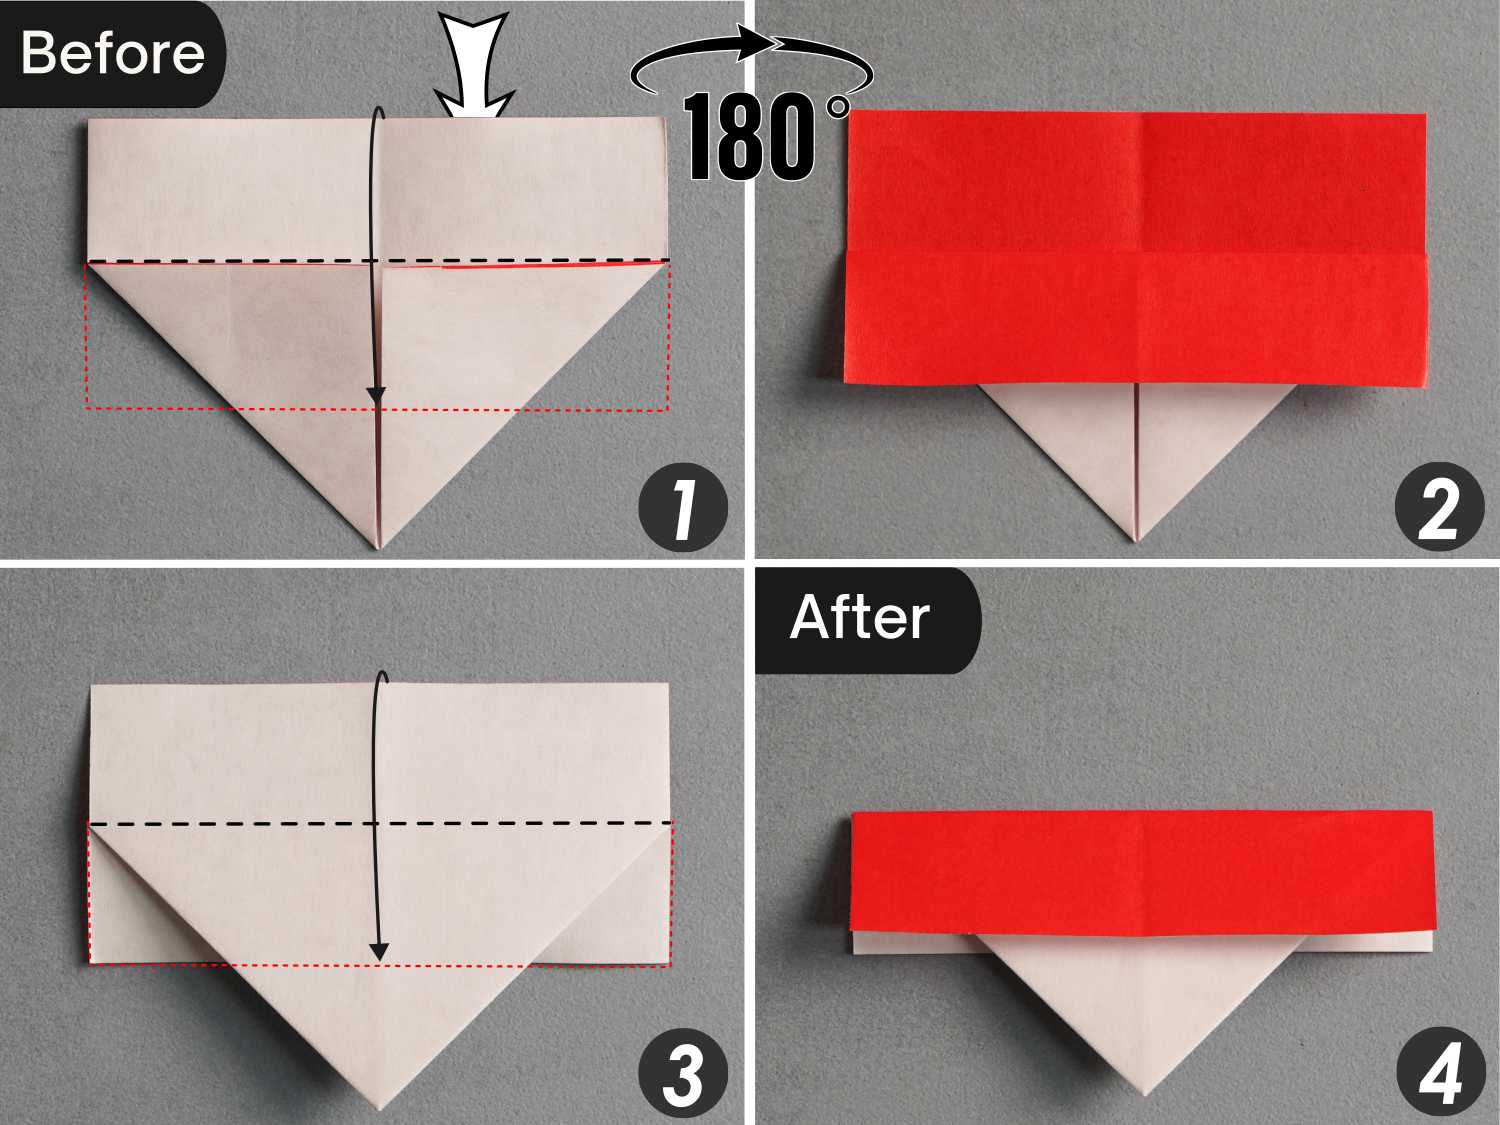
Step 2
Fold the bottom left and right corners along the black dotted lines.
Step 3
Fold down the top rectangle, then flip the paper from left to right, and fold down the top rectangle on this side.
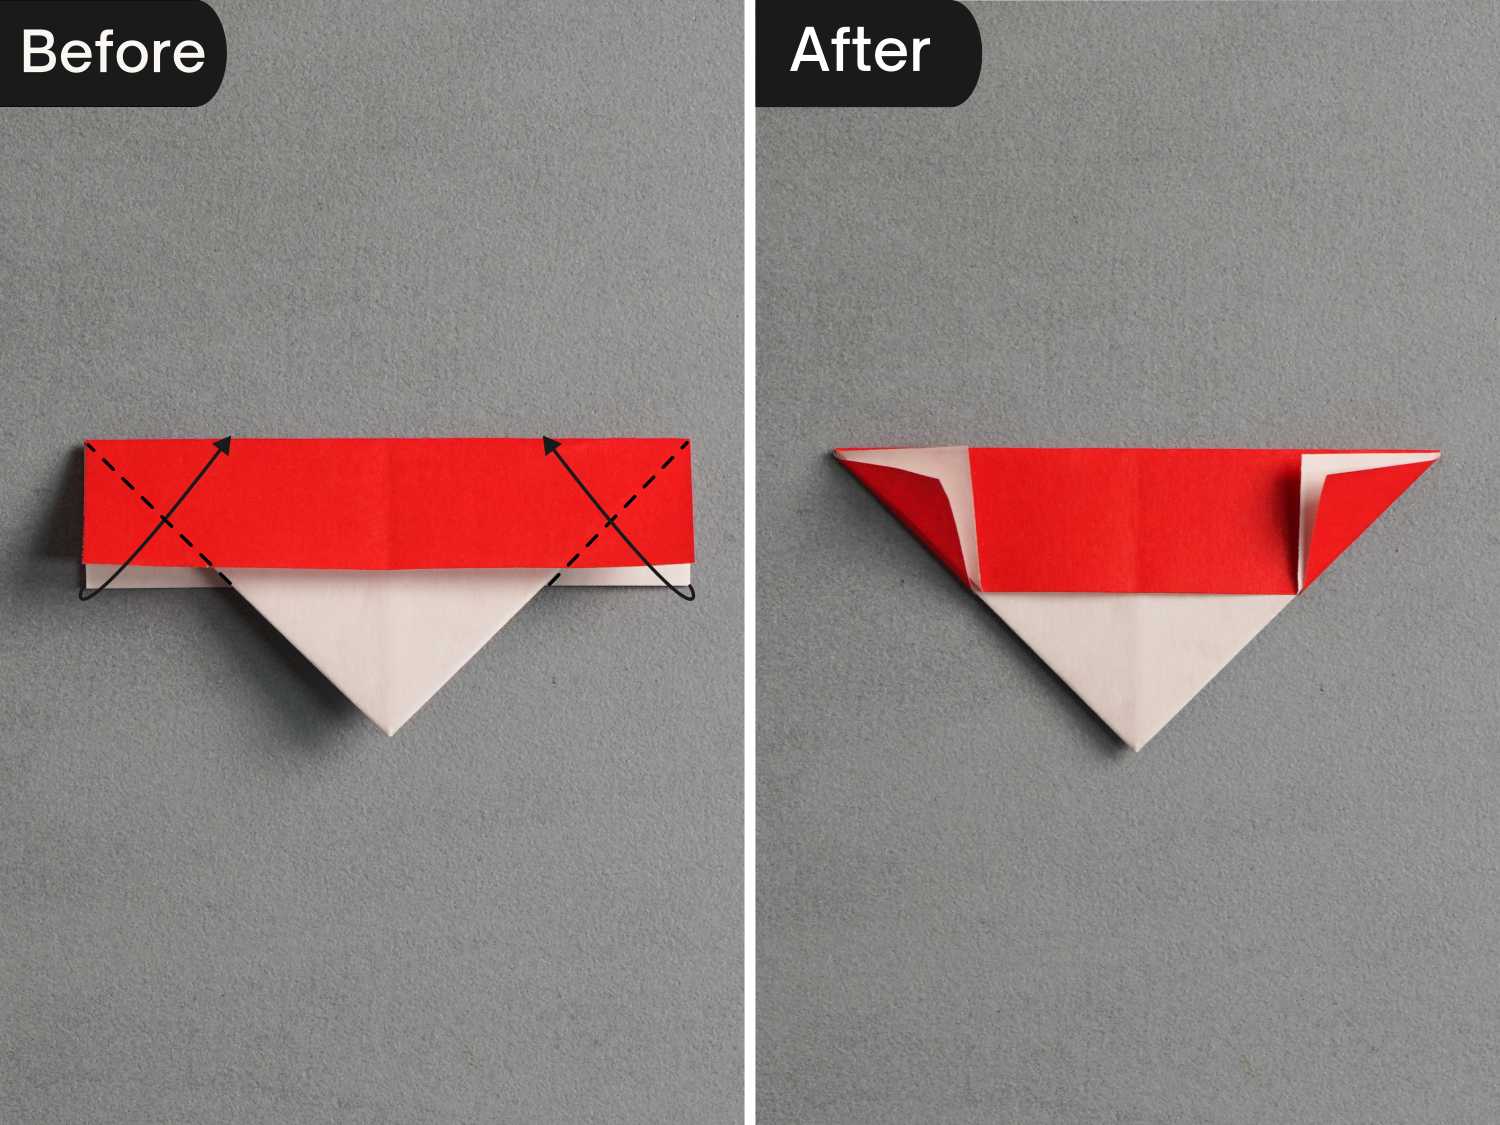
Step 4
Fold the bottom left and right corners of these two layers along the dotted lines.
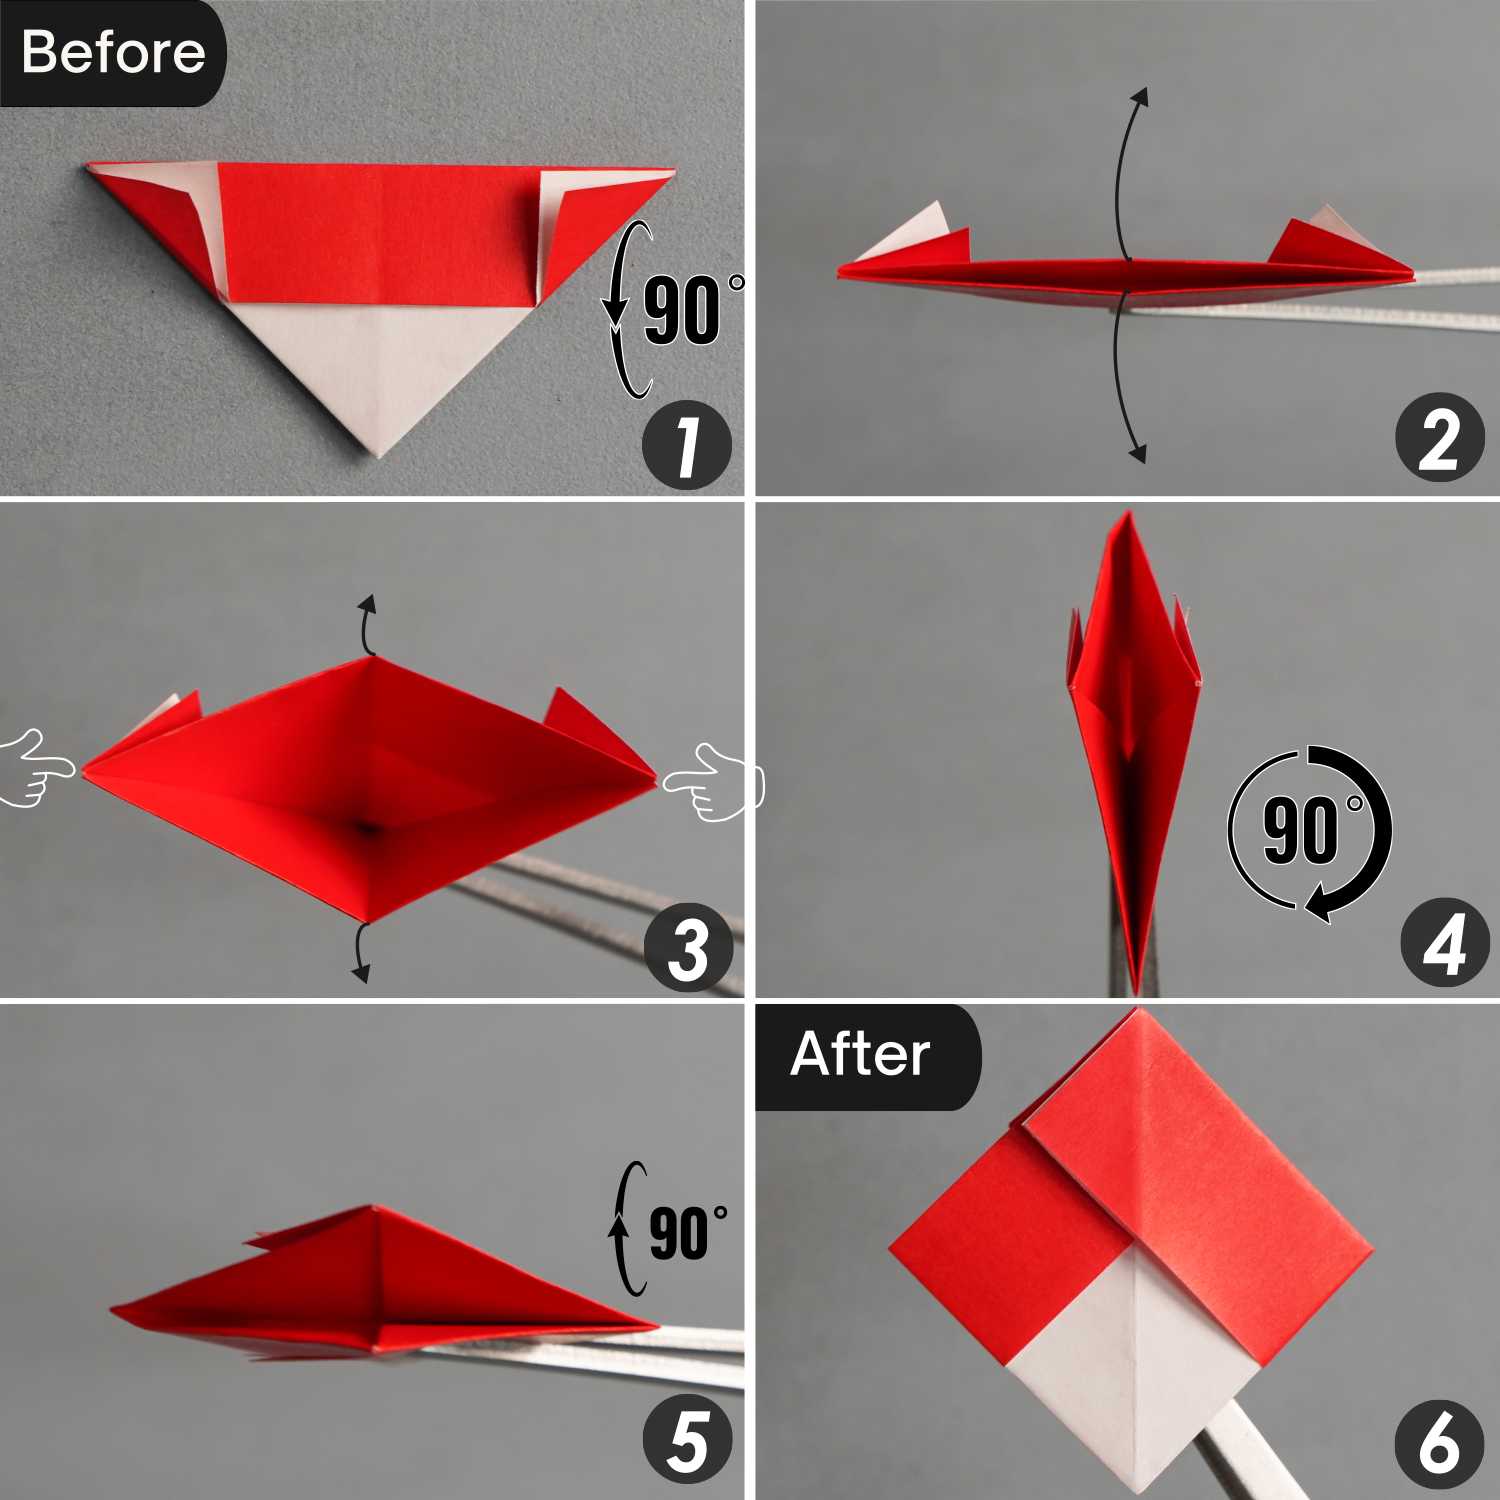
Step 5
Rotate the paper 90 degrees from front to back, open the opening, then push the left and right corners toward the center to close this opening. Next, rotate the paper 90 degrees clockwise, and then perform another 90 degrees rotation from the back to front.
Step 6
Fold the top layer’s top corner to meet the bottom corner, then turn over the paper from left to right, and fold down the top corner to meet the bottom corner.
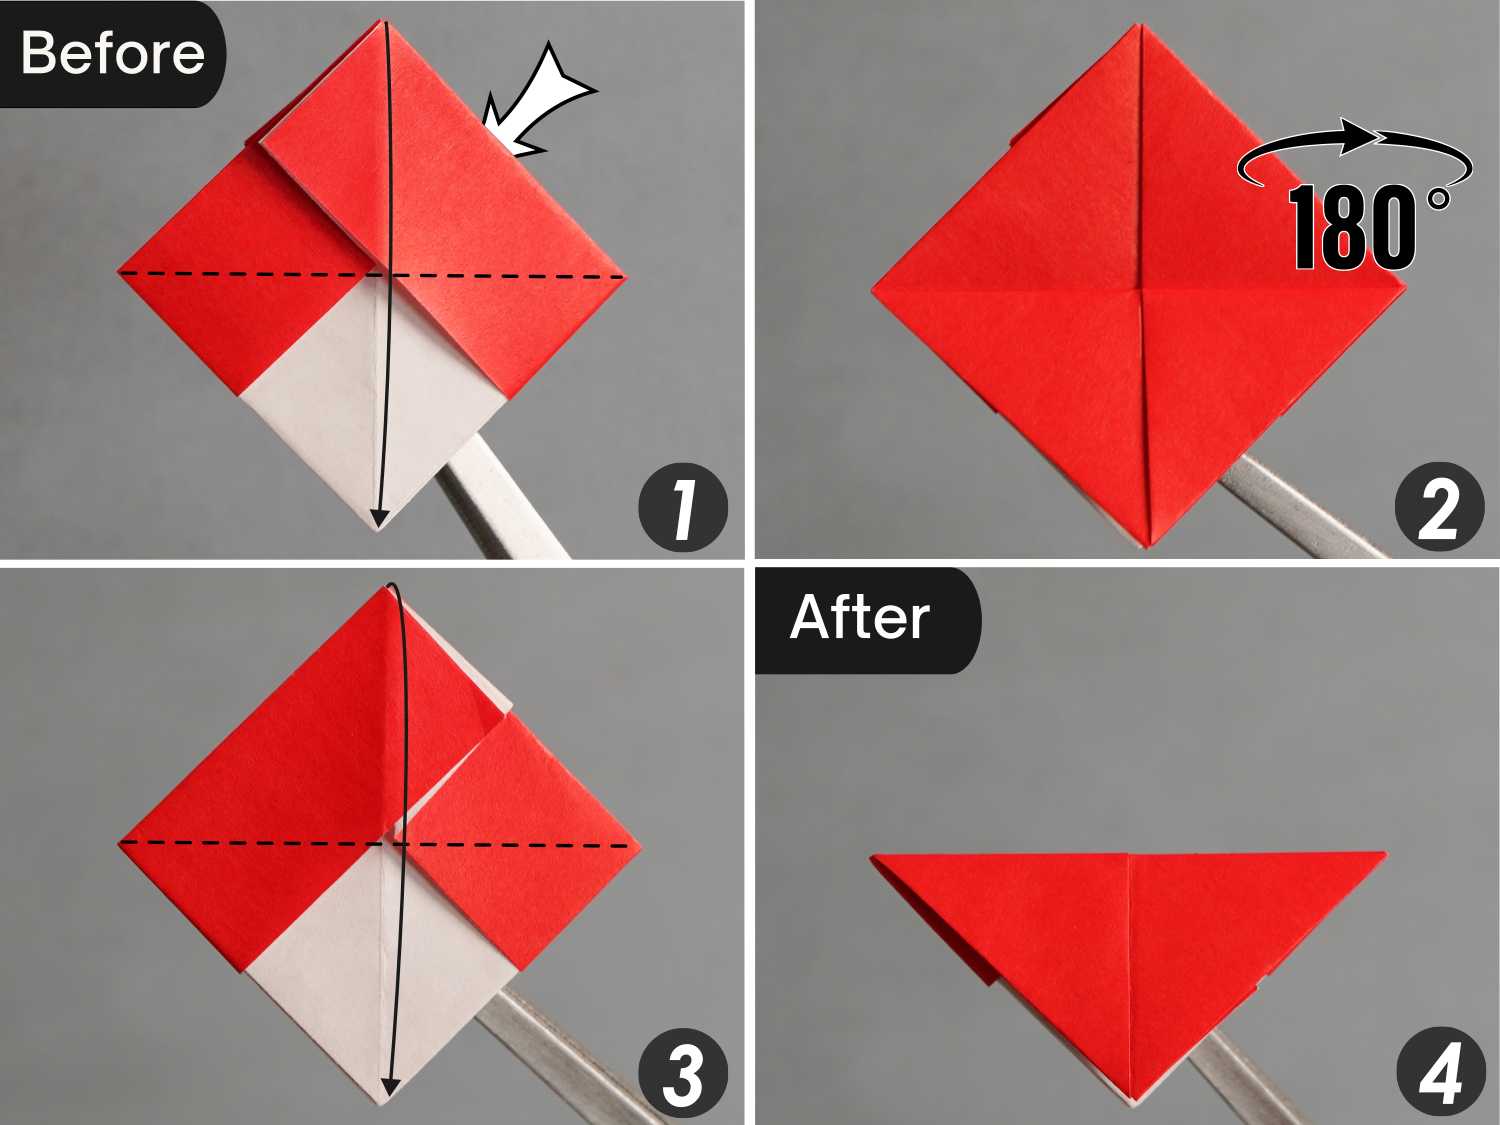
Step 7
Rotate the paper 90 degrees from front to back, open the opening, then push the left and right corners toward the center to close this opening. Next, rotate the paper 90 degrees clockwise, and then perform another 90 degrees rotation from the back to the front.
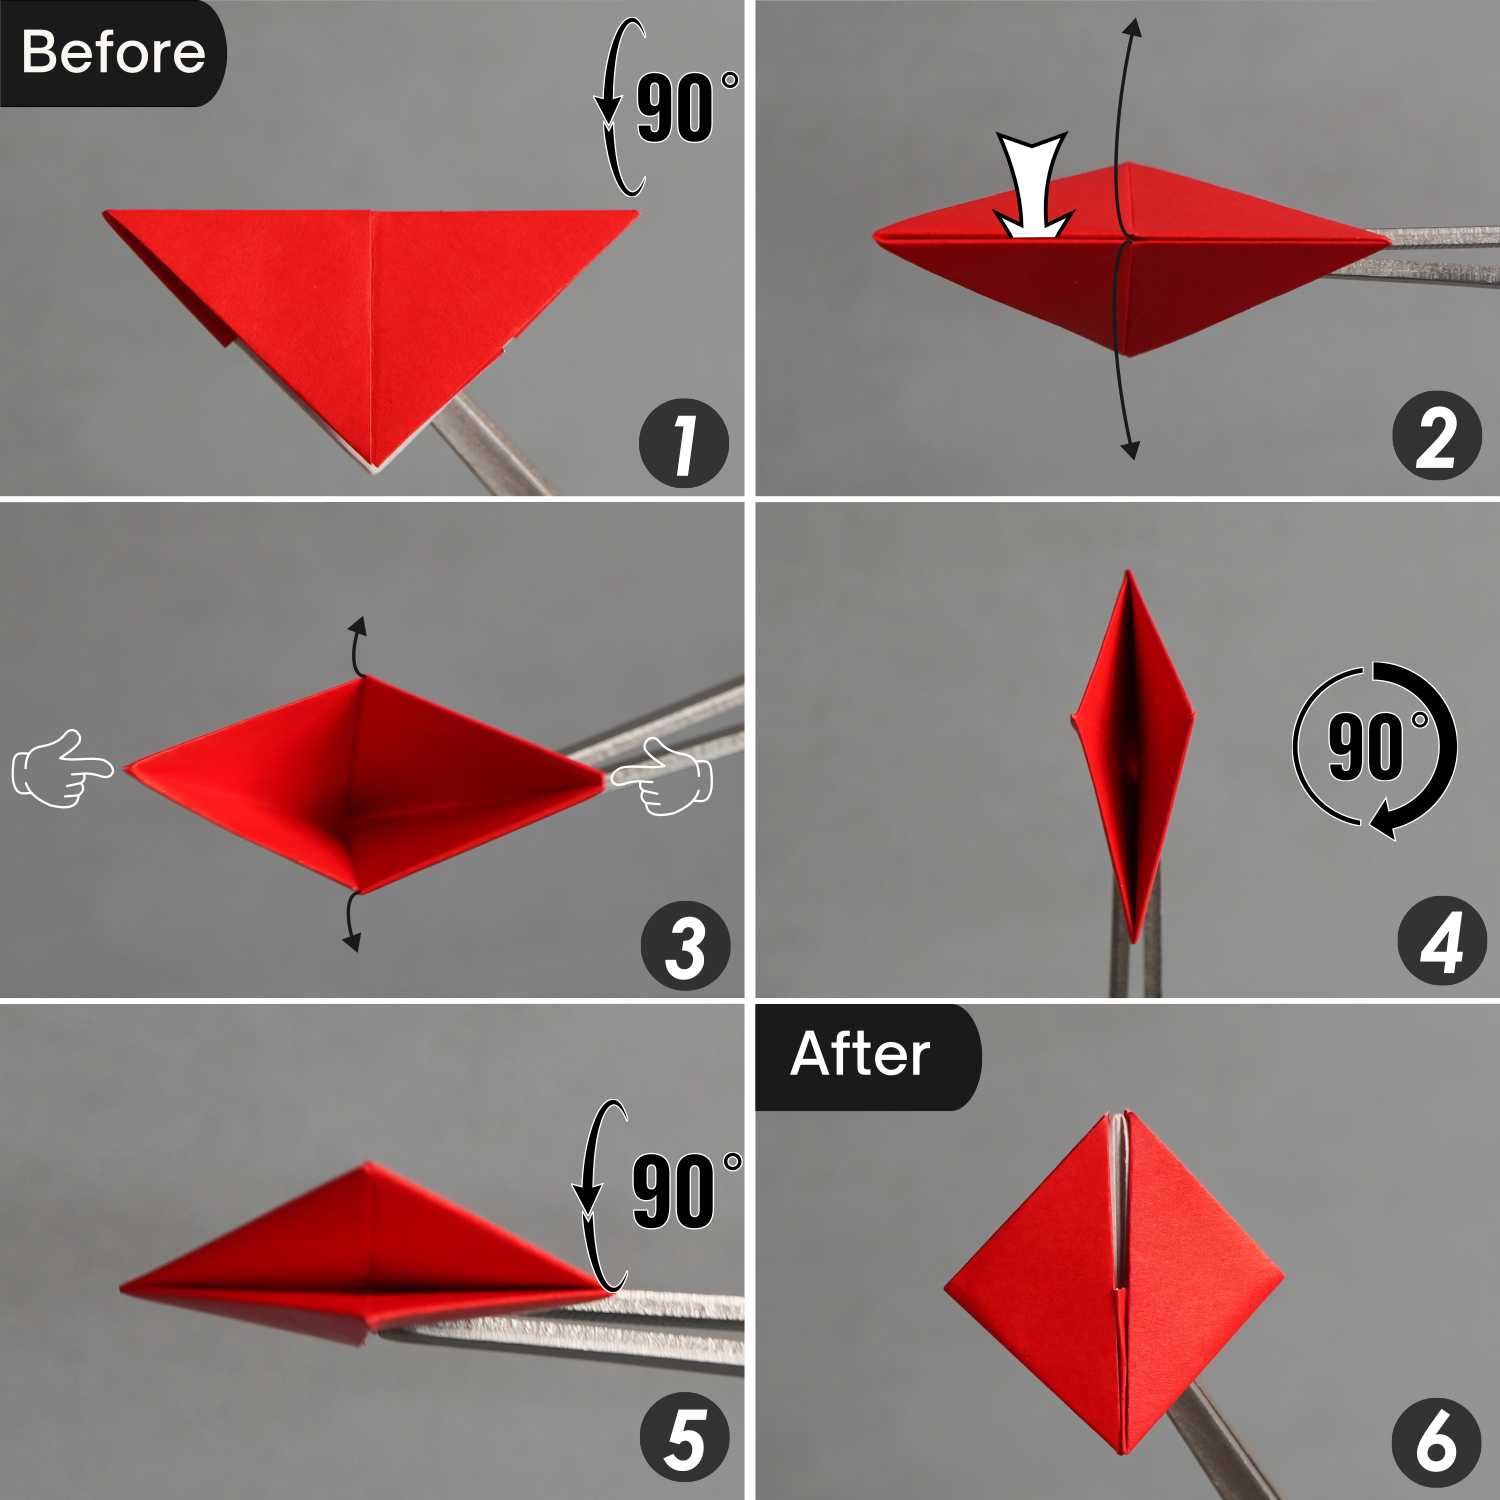
Step 8
Rotate the paper 90 degrees from front to back, then pull the two corners toward the sides to turn the paper into a boat.

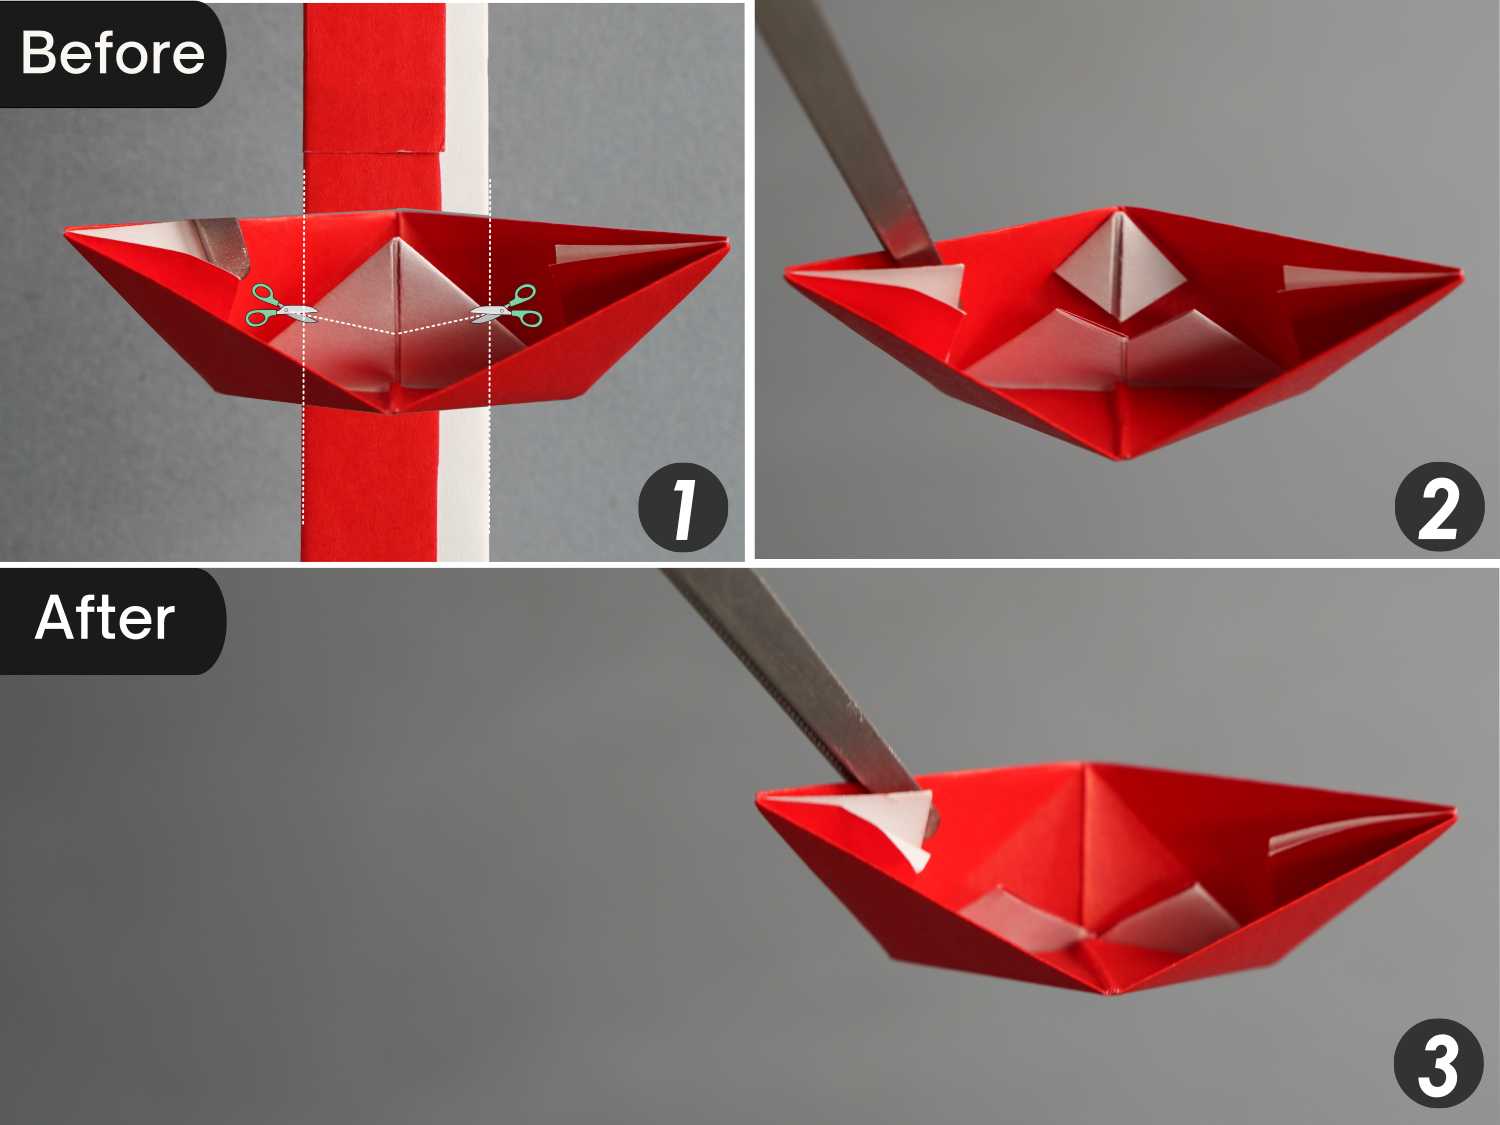
Step 9
Cut a little off the top of the triangle in the center of the boat.
Combine Origami Katana
Step 1
Insert the blade from the bottom of the “boat”. You can adjust the size of the boat opening at any time for better assembly.
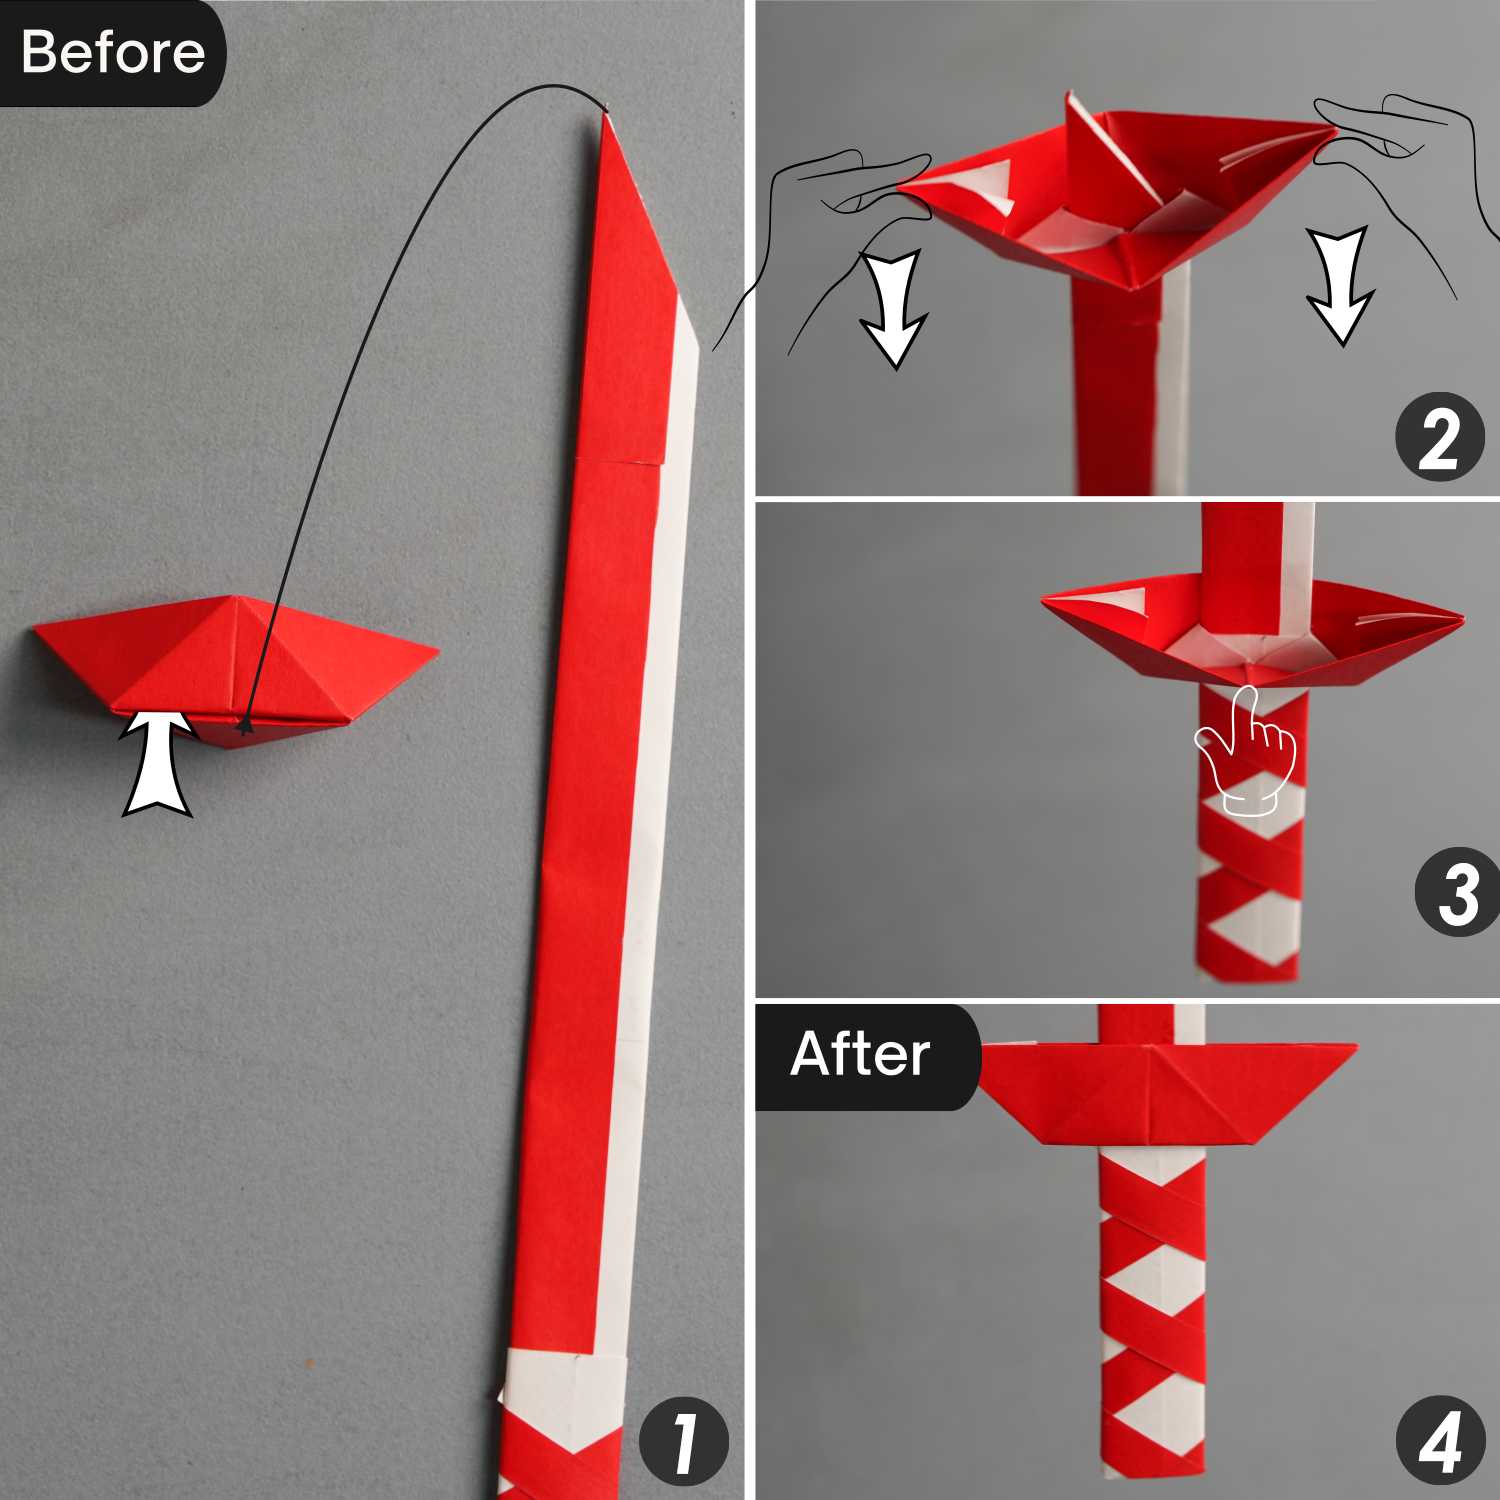
Step 2
That’s your cool origami katana.