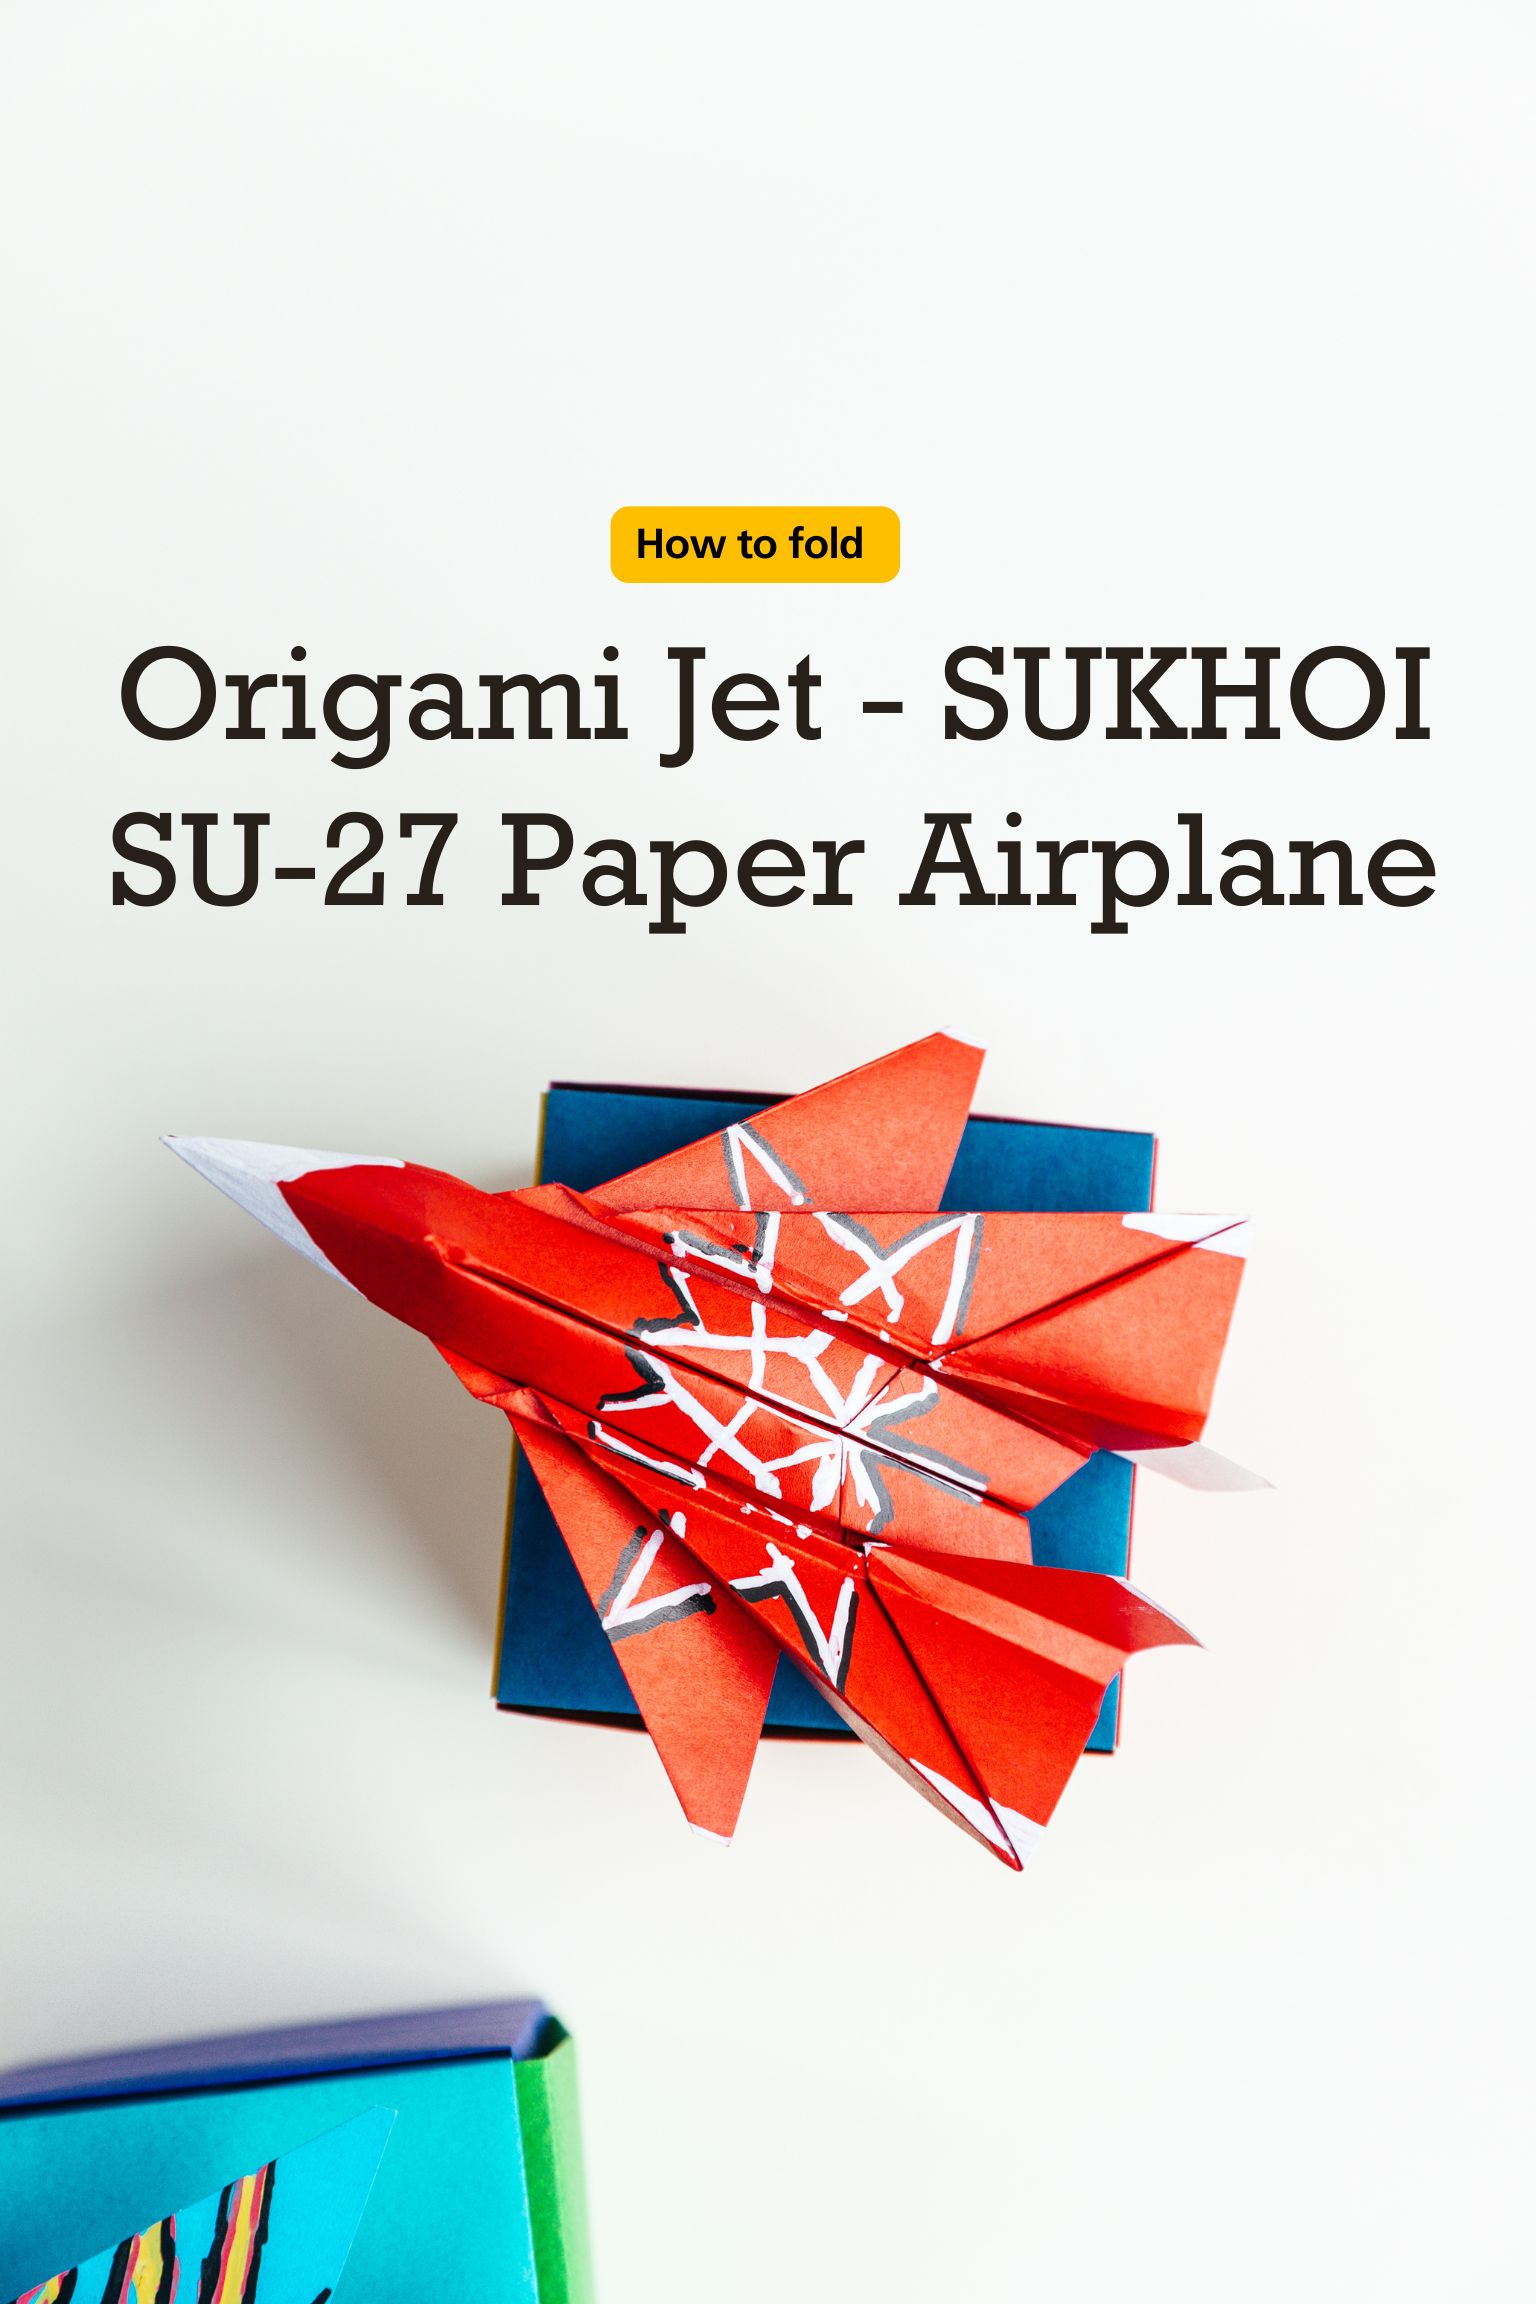
Origami Jet – SUKHOI SU-27 Paper Airplane
Step 1
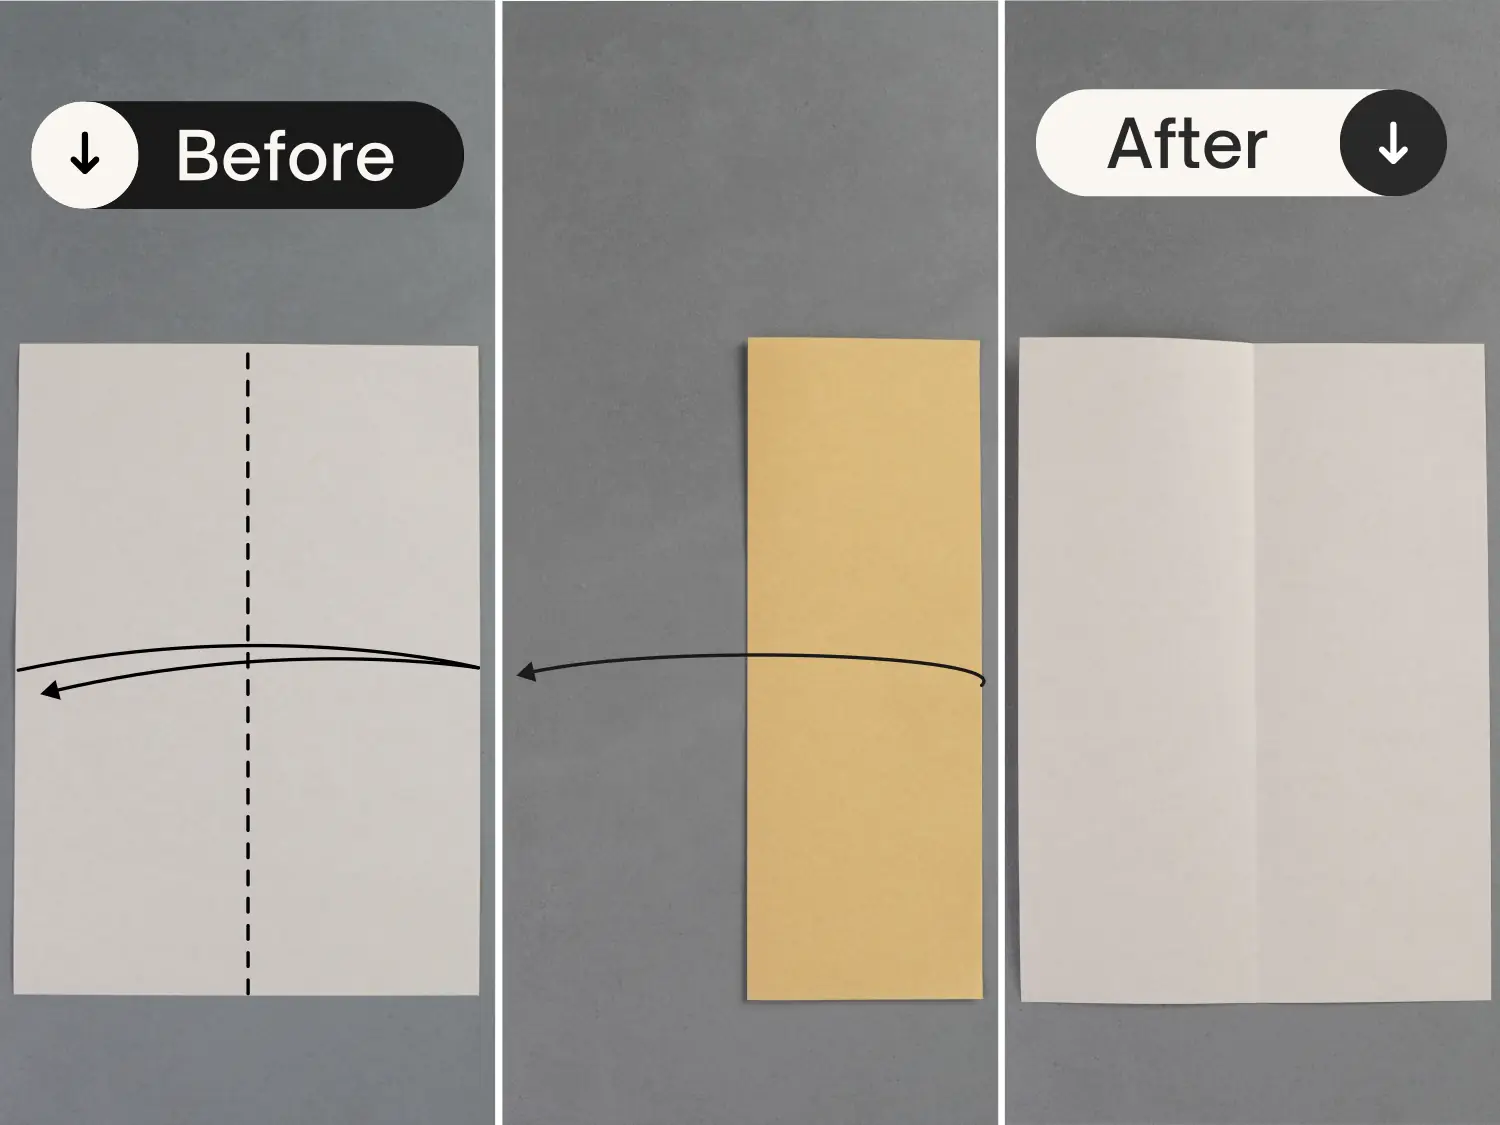
Place the paper with the desired display side face down, fold it in half vertically, leaving a crease, and unfold it.
Step 2
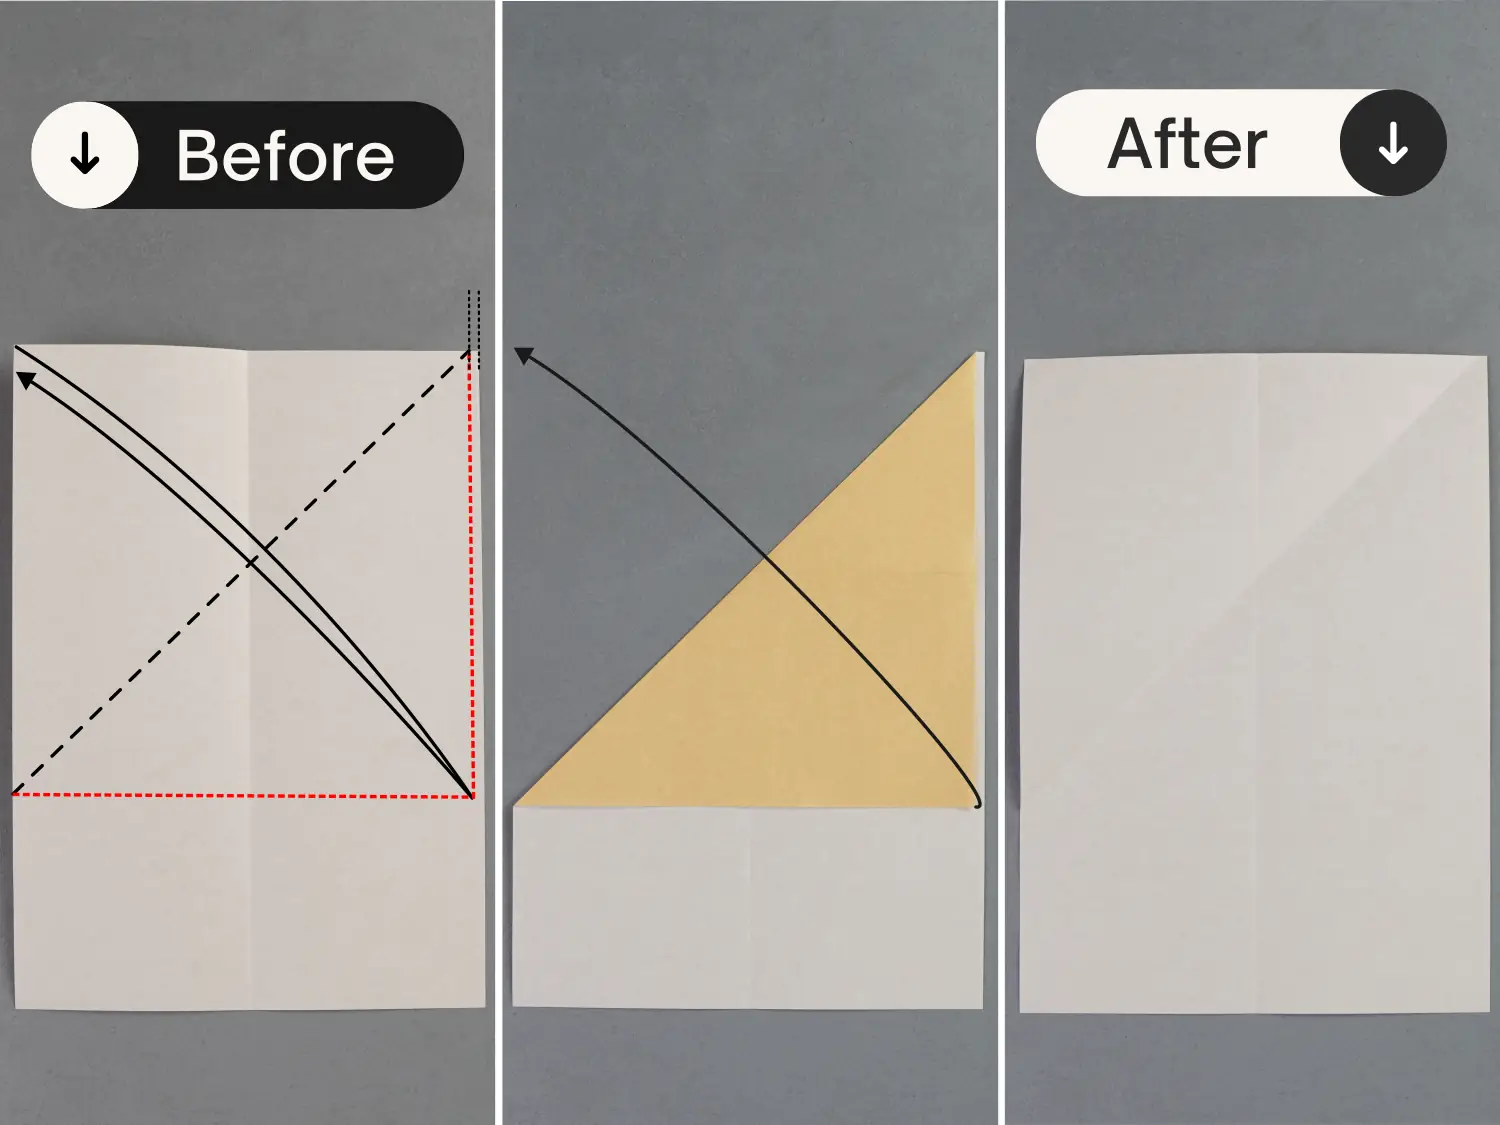
Fold the top edge to align with the right edge, leave a crease, and unfold it.
Step 3
Fold the top edge to align with the left edge, and unfold it.
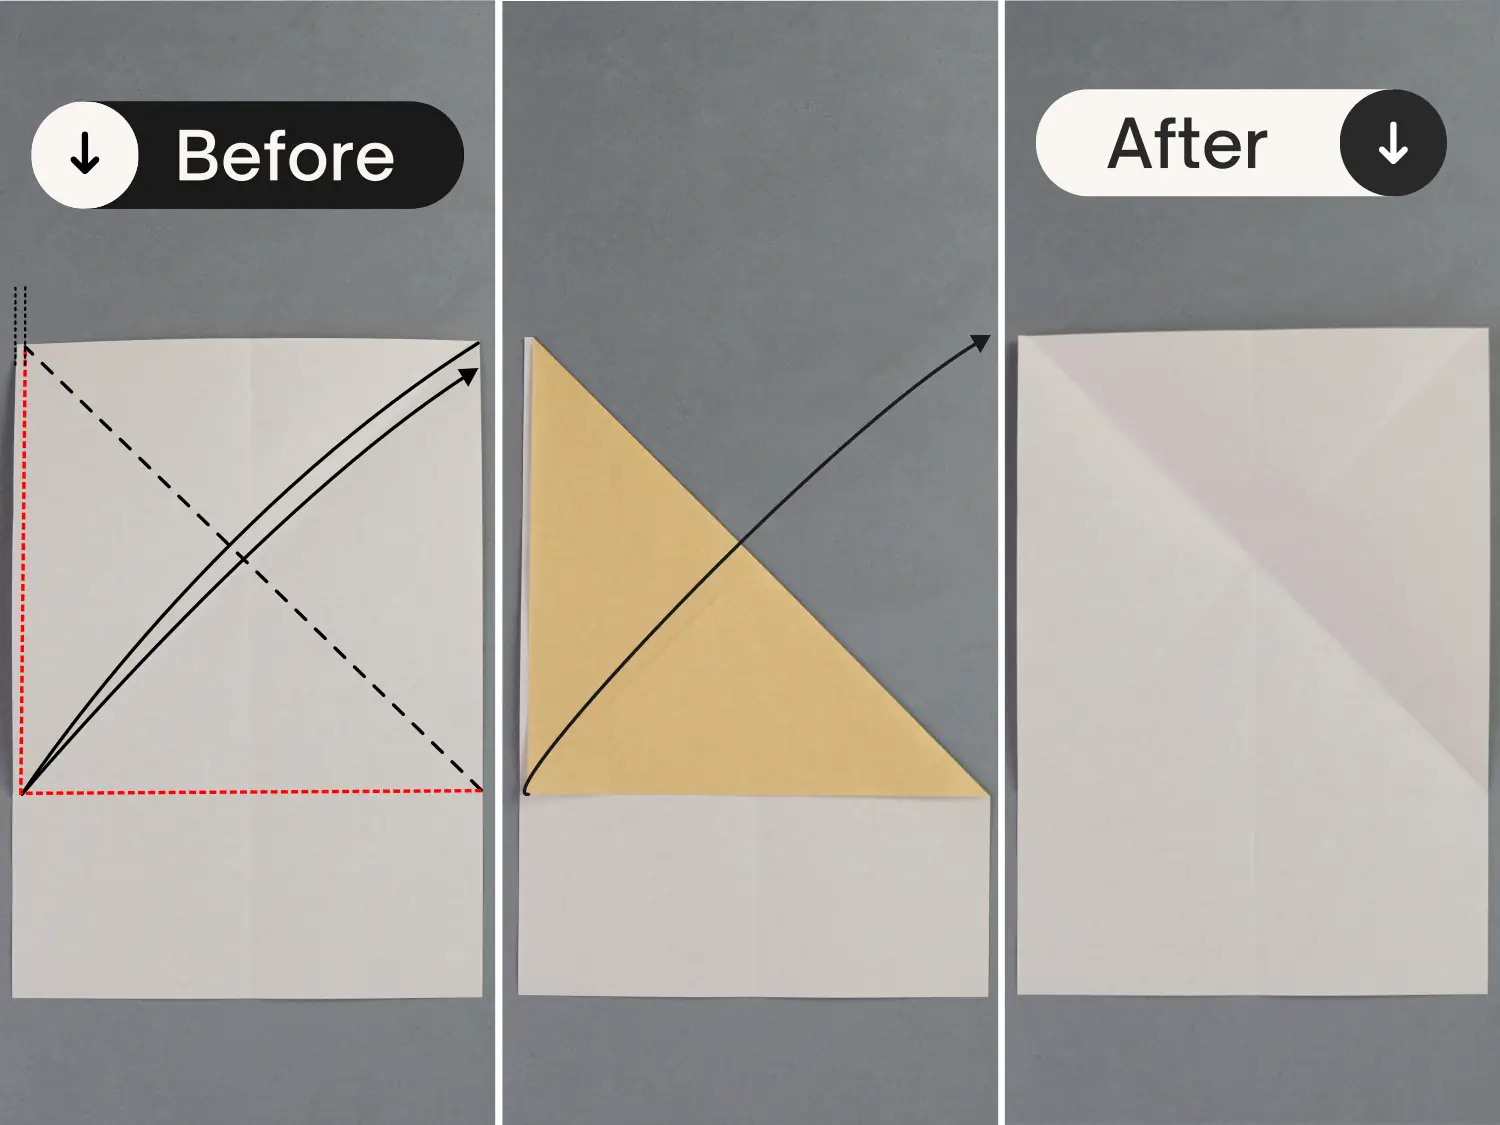
Step 4
Flip the paper from left to right.
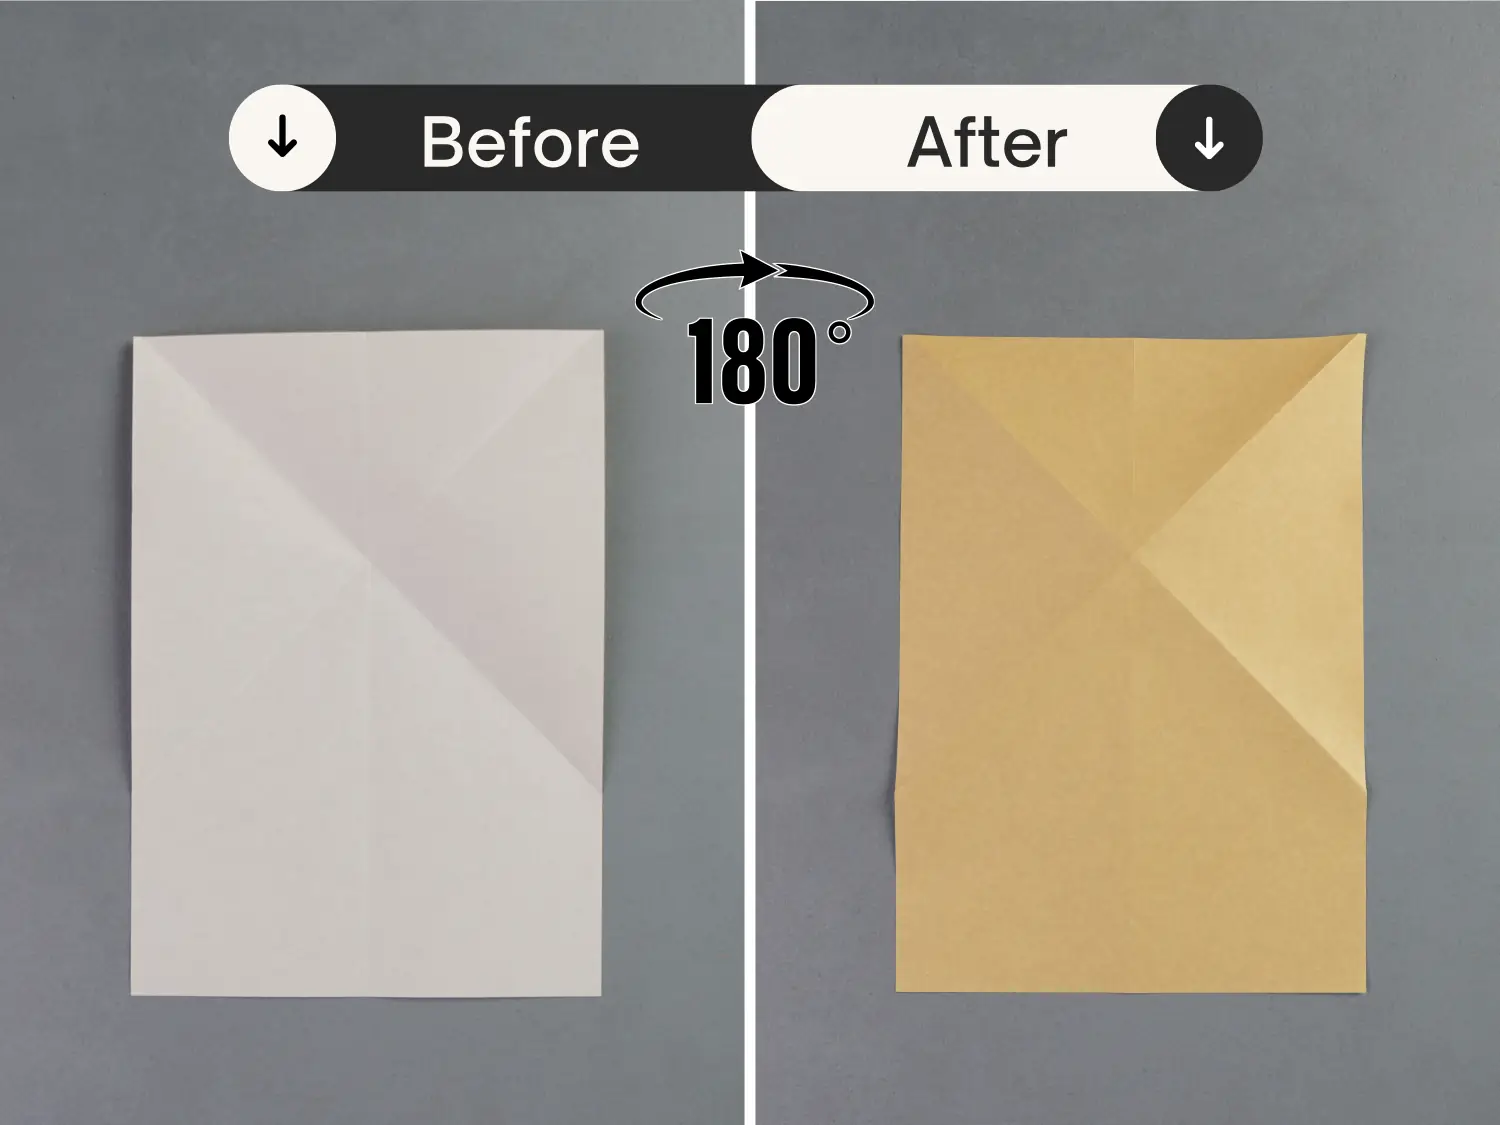
Step 5
Fold down the top edge along the dotted line, which extends horizontally from the intersection point created by the creases you made. Leave a crease and then unfold it.
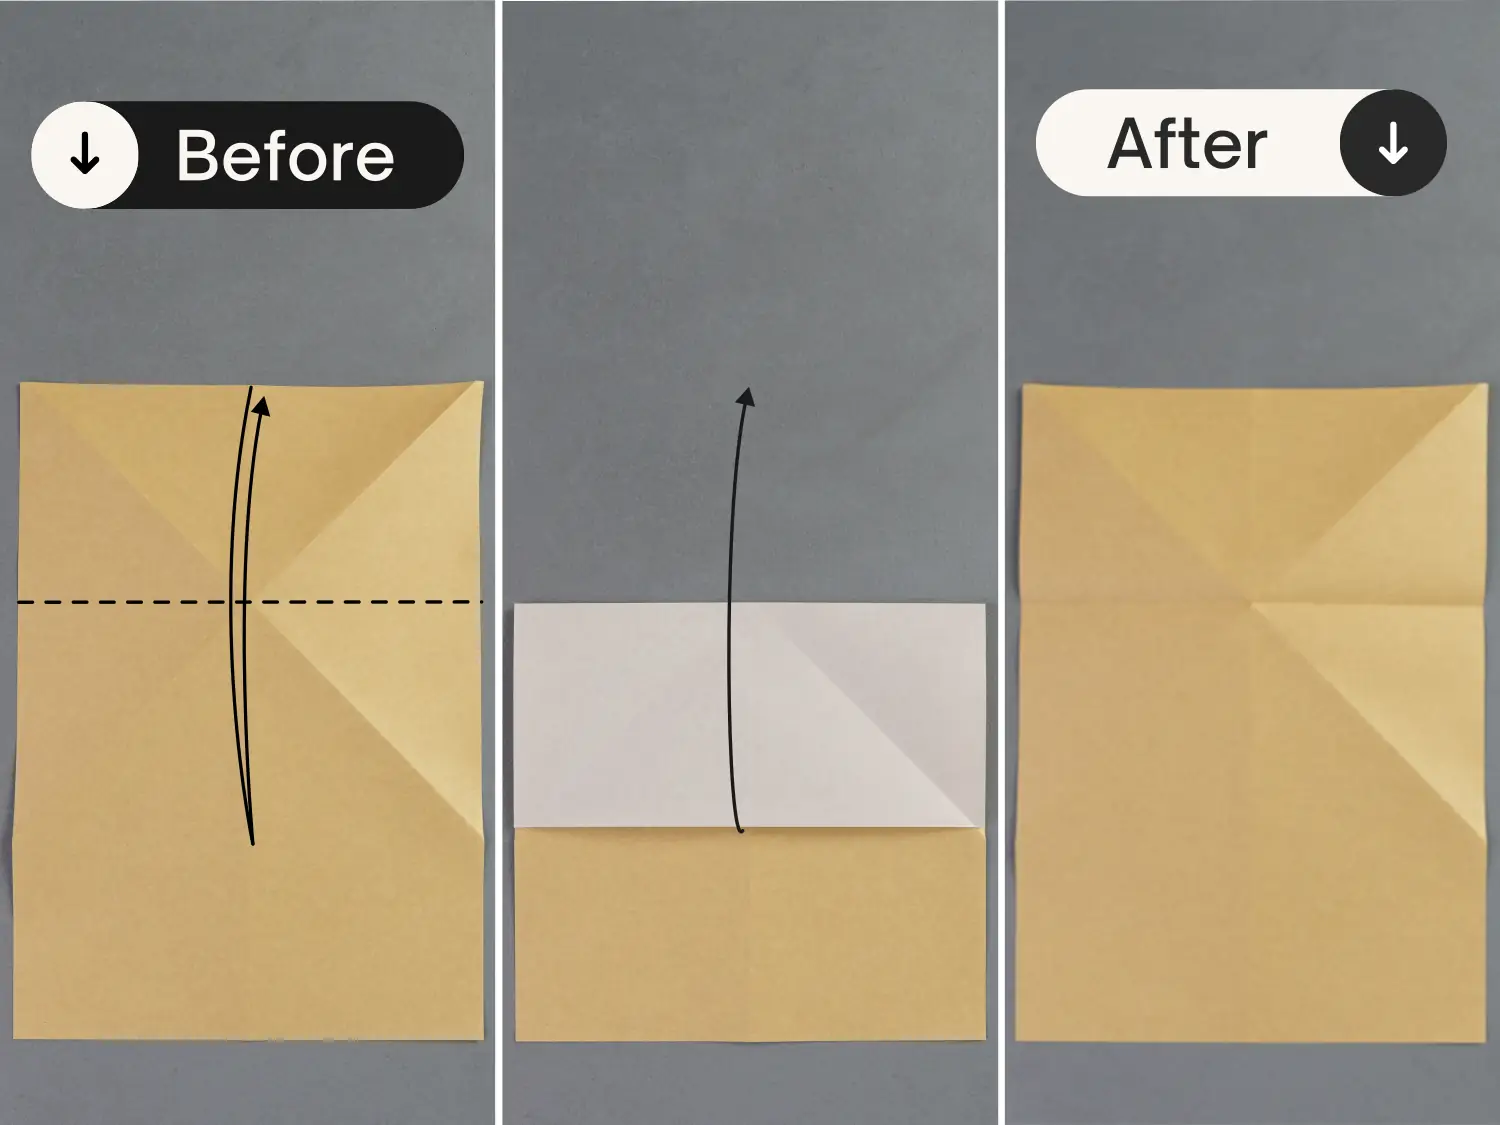
Step 6
Turn over the paper from left to right.
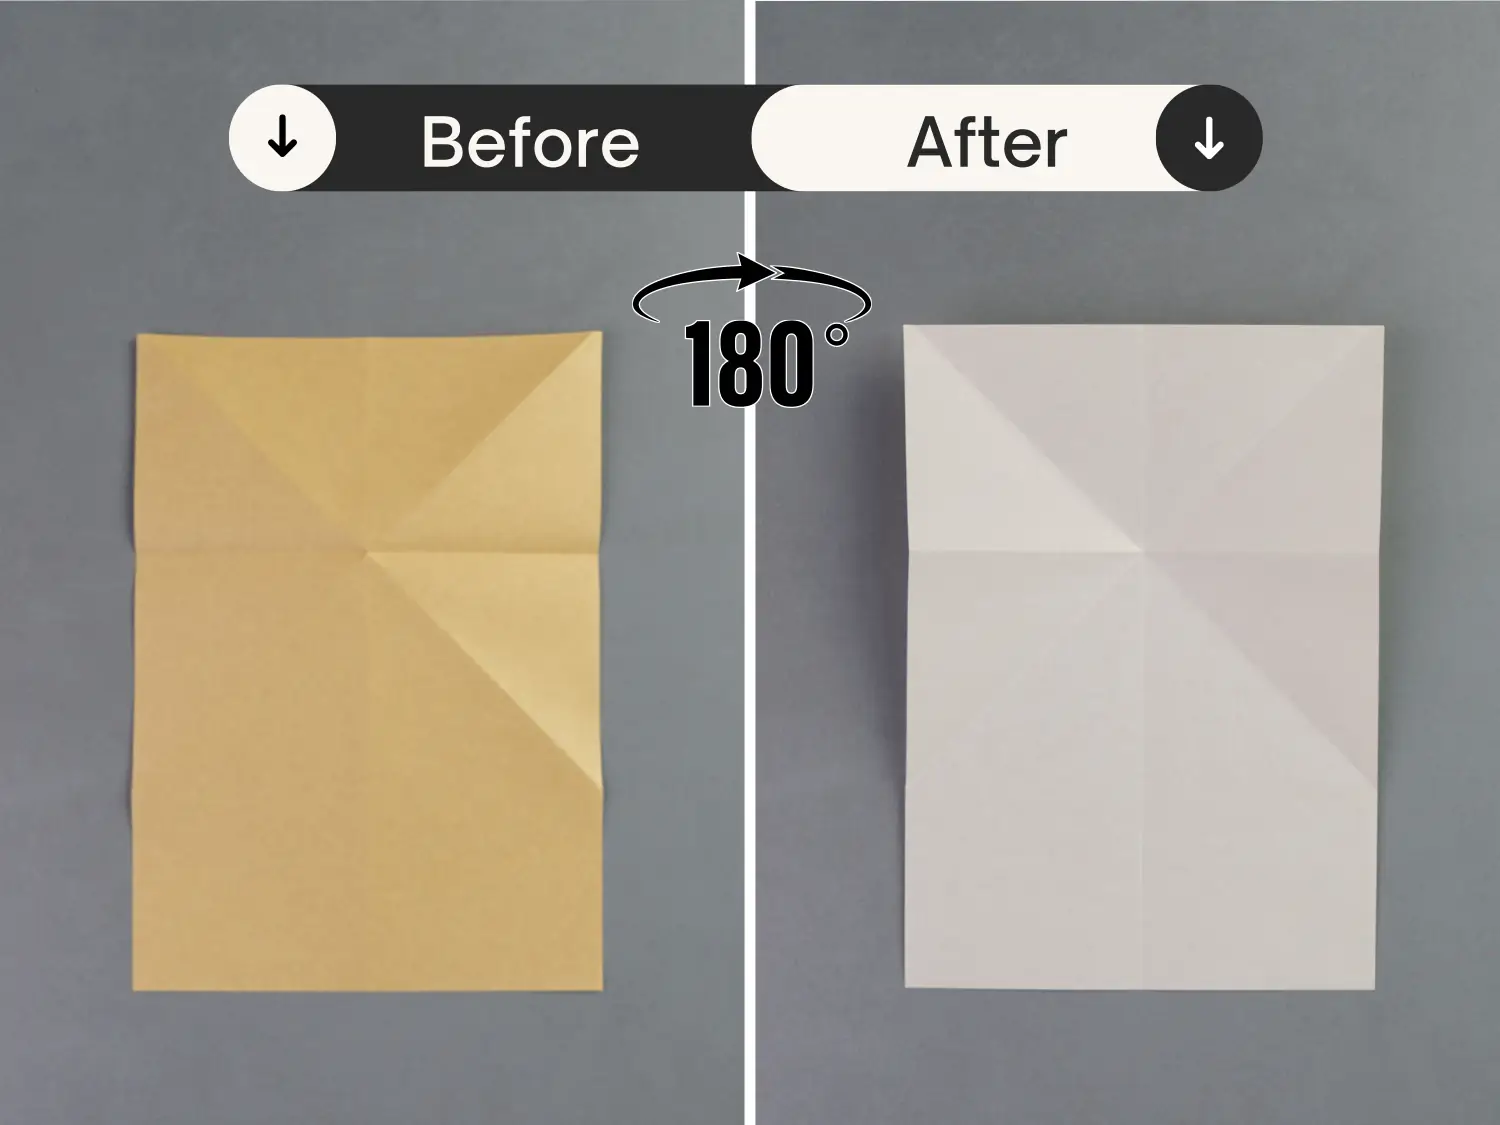
Step 7
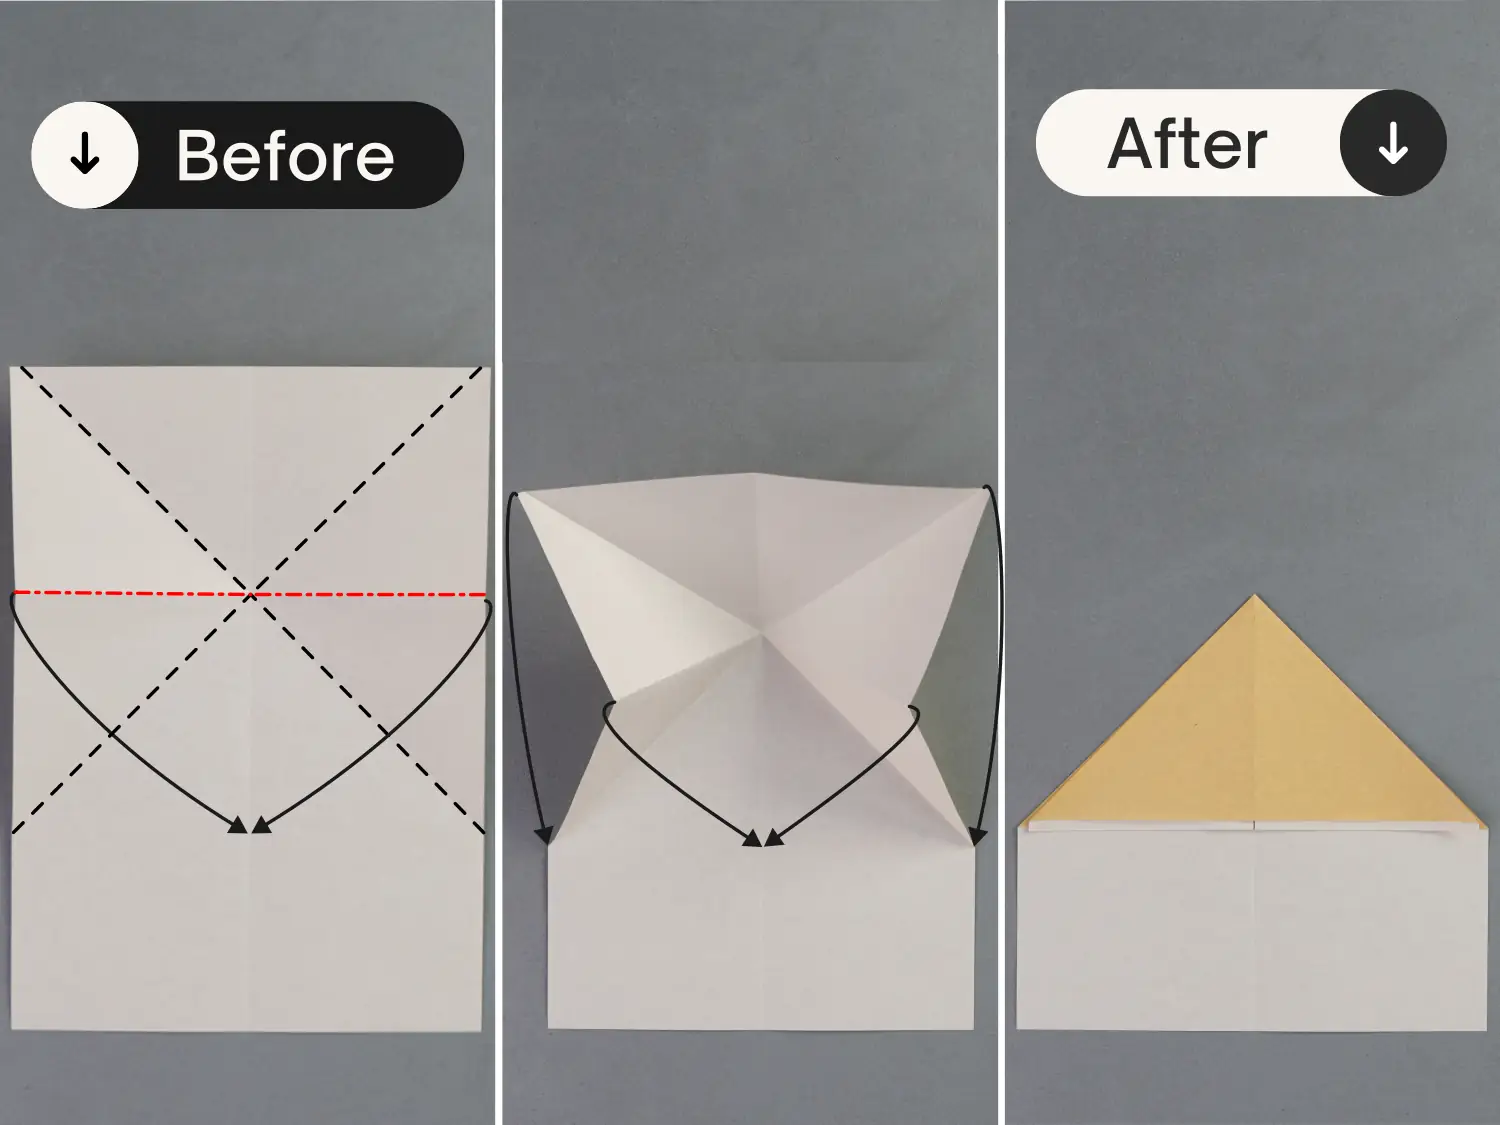
Mountain fold the crease indicated by the red dotted line, then lift these mountain creases and fold down the top edge, flatten the fold to create a triangle.
Step 8
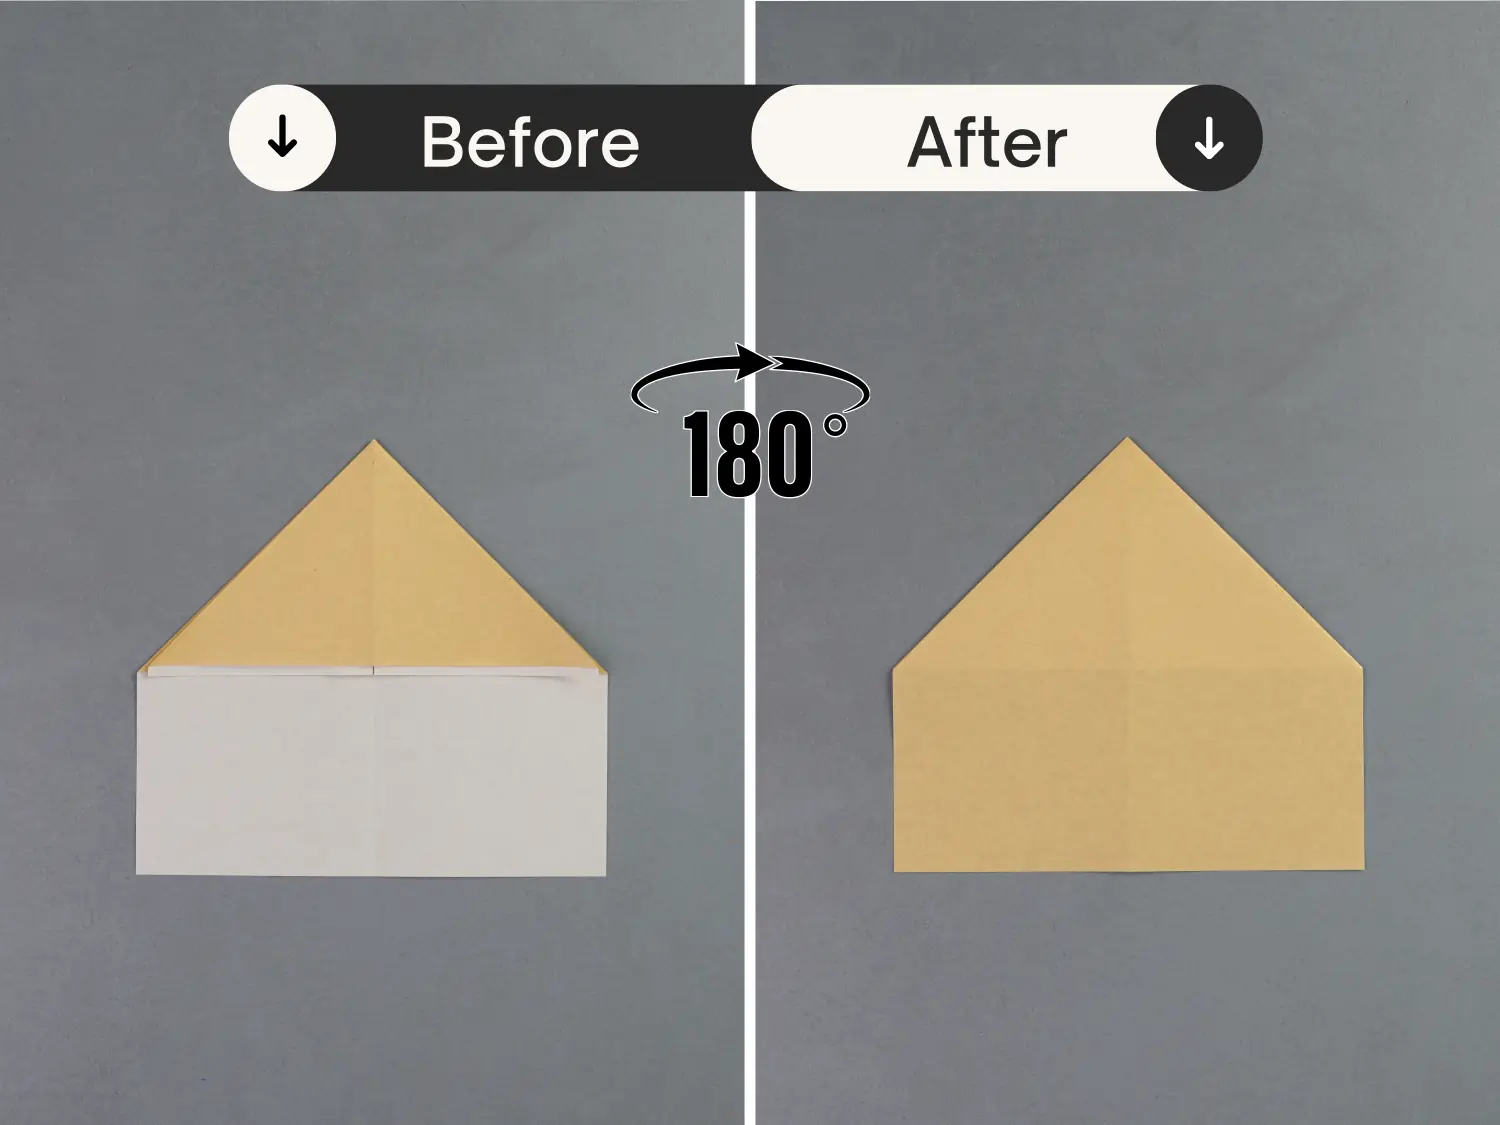
Flip the paper from left to right.
Step 9
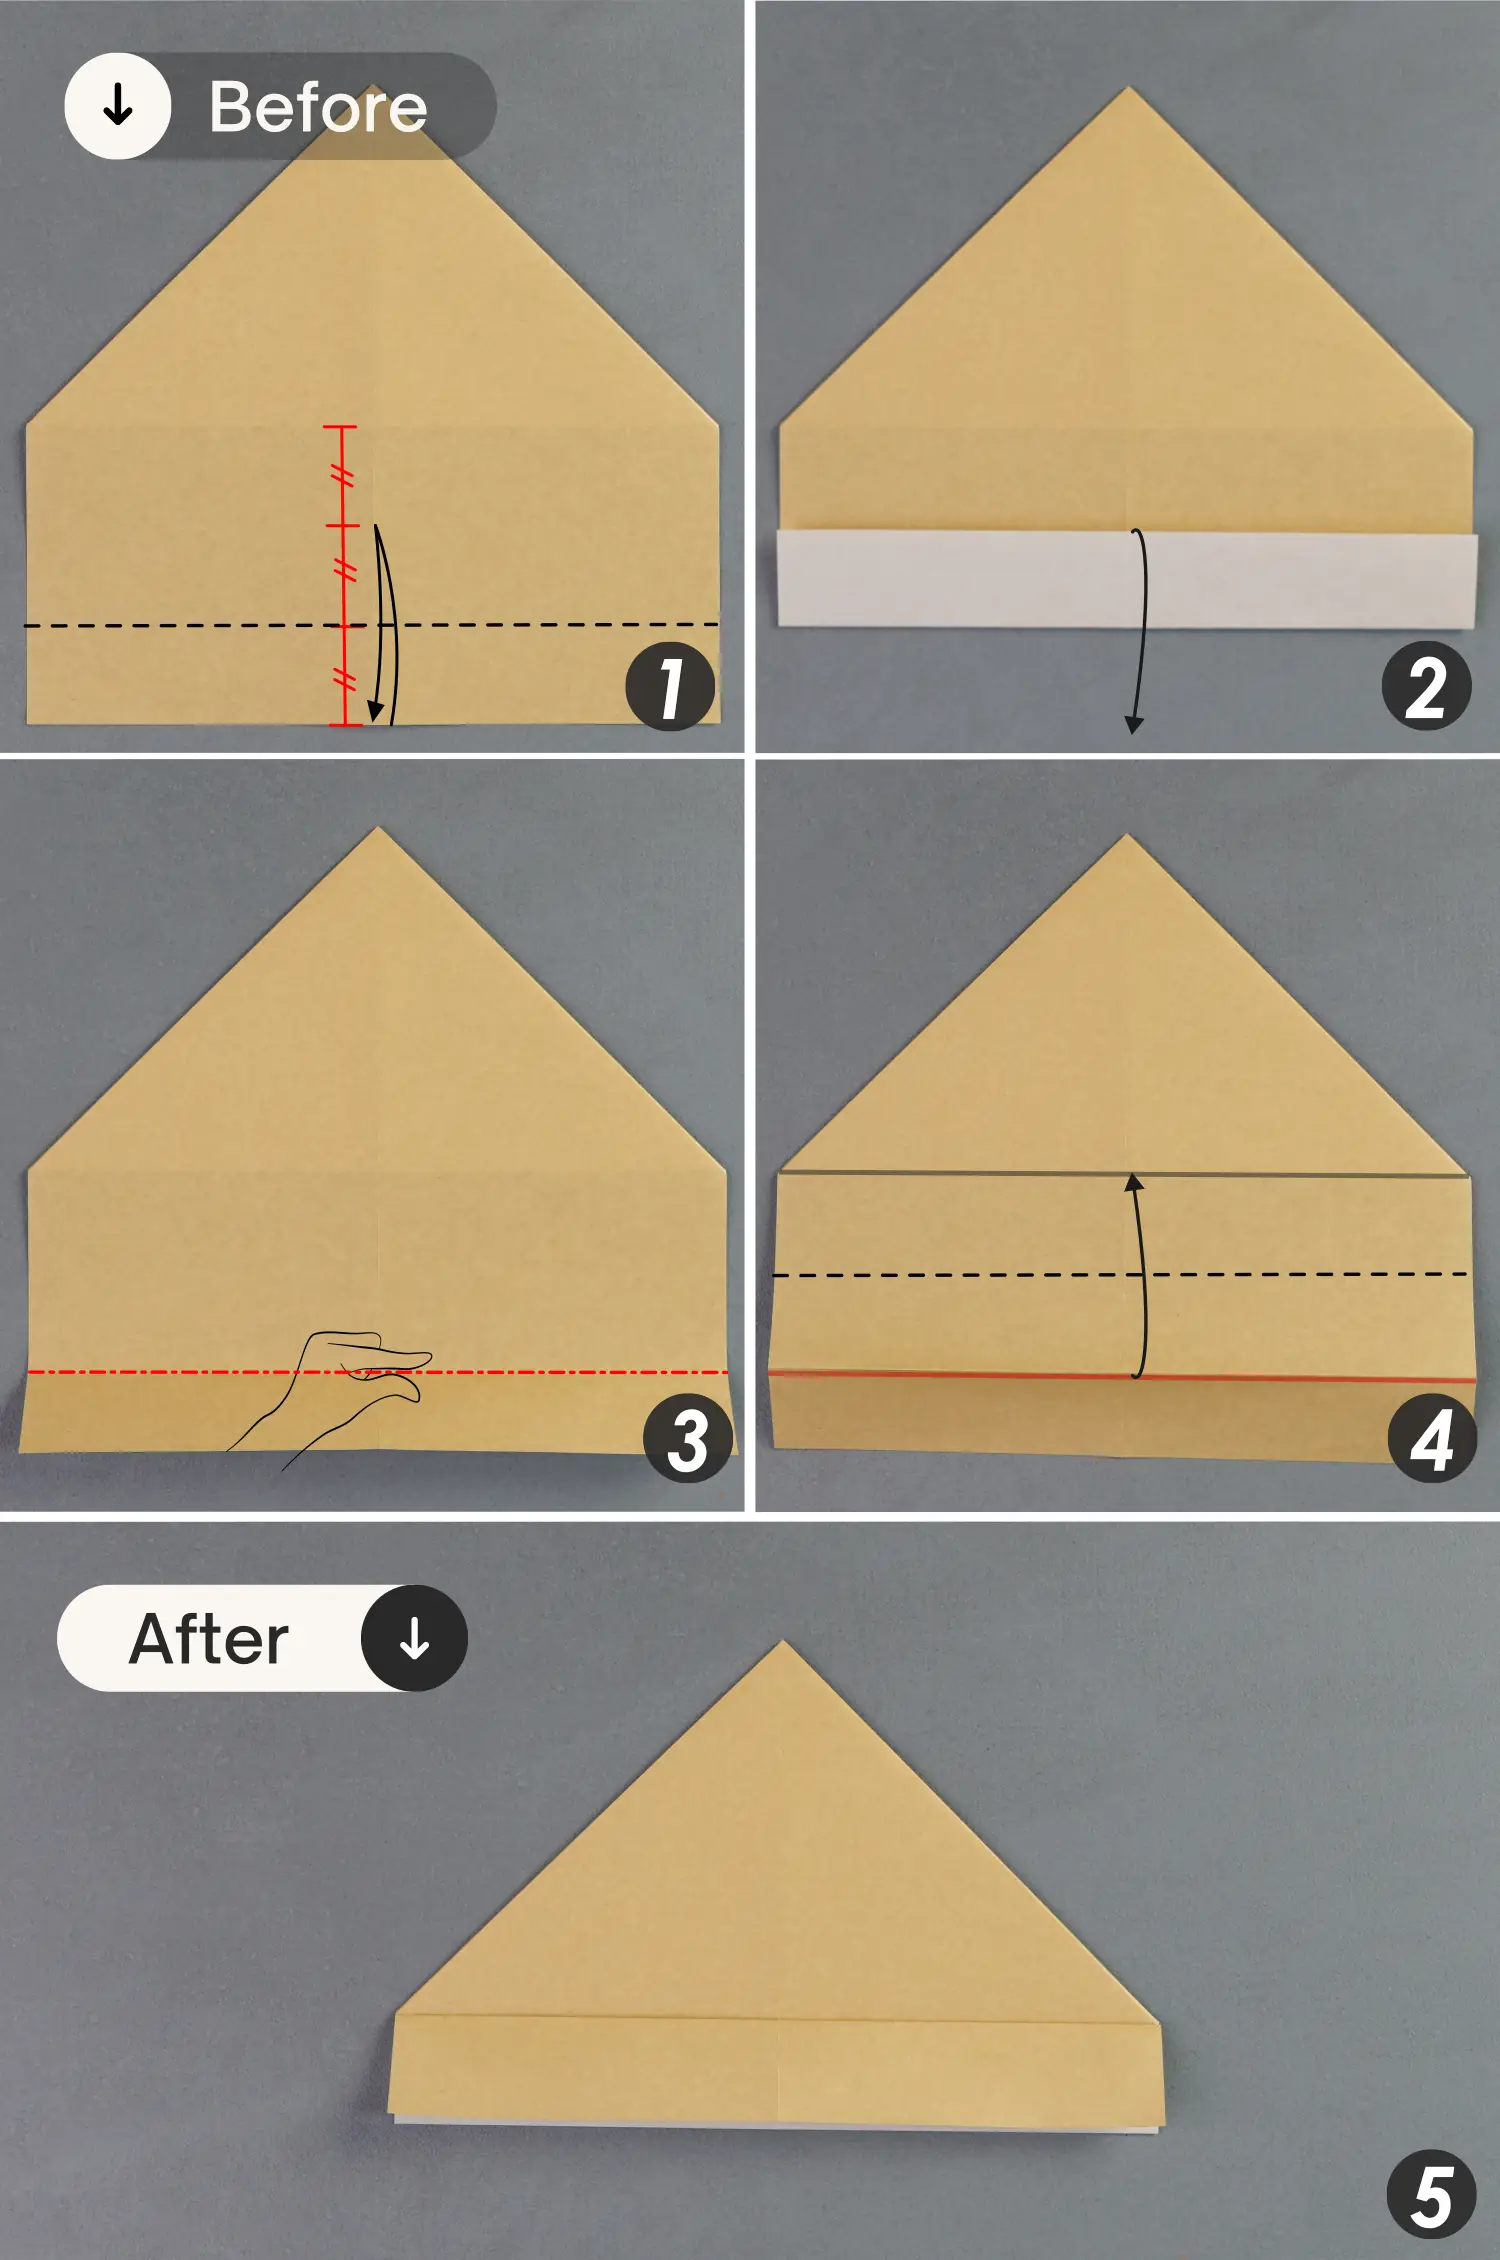
Mark two points to evenly divide the width of the bottom rectangle, then fold the bottom edge of the rectangle upward along the horizontal extension line of the bottom point, leaving a crease and unfold it. After that, mountain fold this crease and fold it to align with the top edge.
Step 10
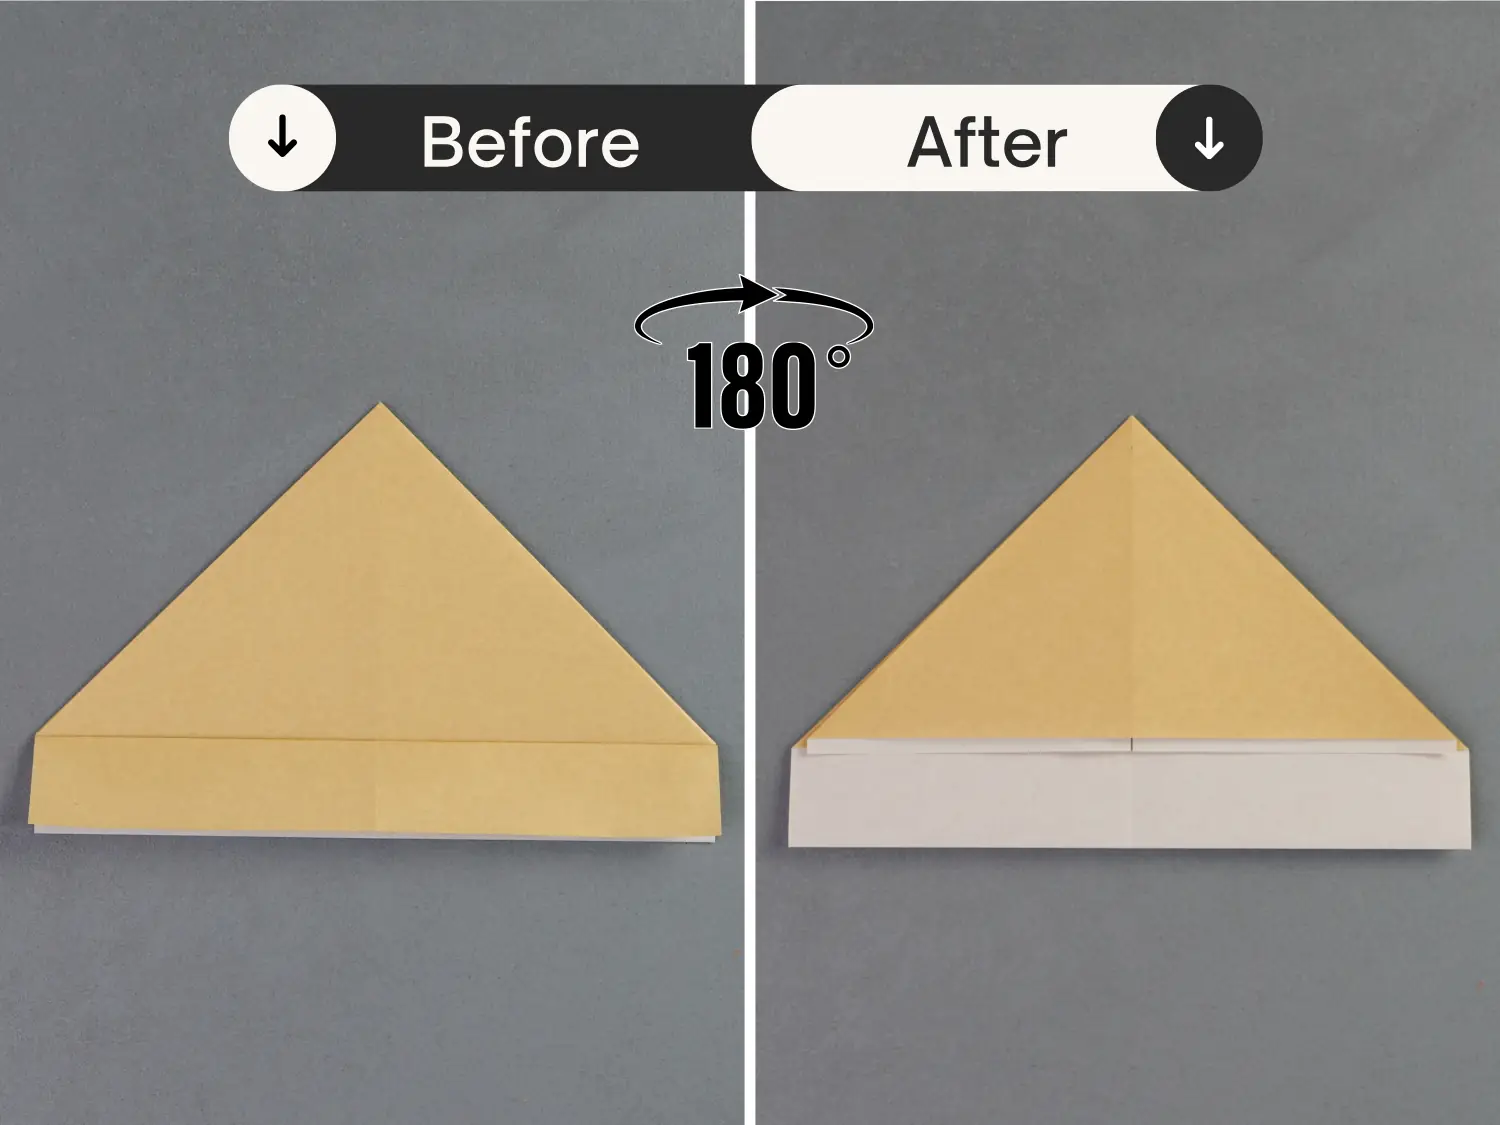
Flip the paper from left to right.
Step 11
Fold the top layer’s right edge to align with the left edge, then fold it to align with the middle vertical crease. Next, fold the right edge to align with the middle vertical crease, and finally, fold the flap on the left side to the right side.
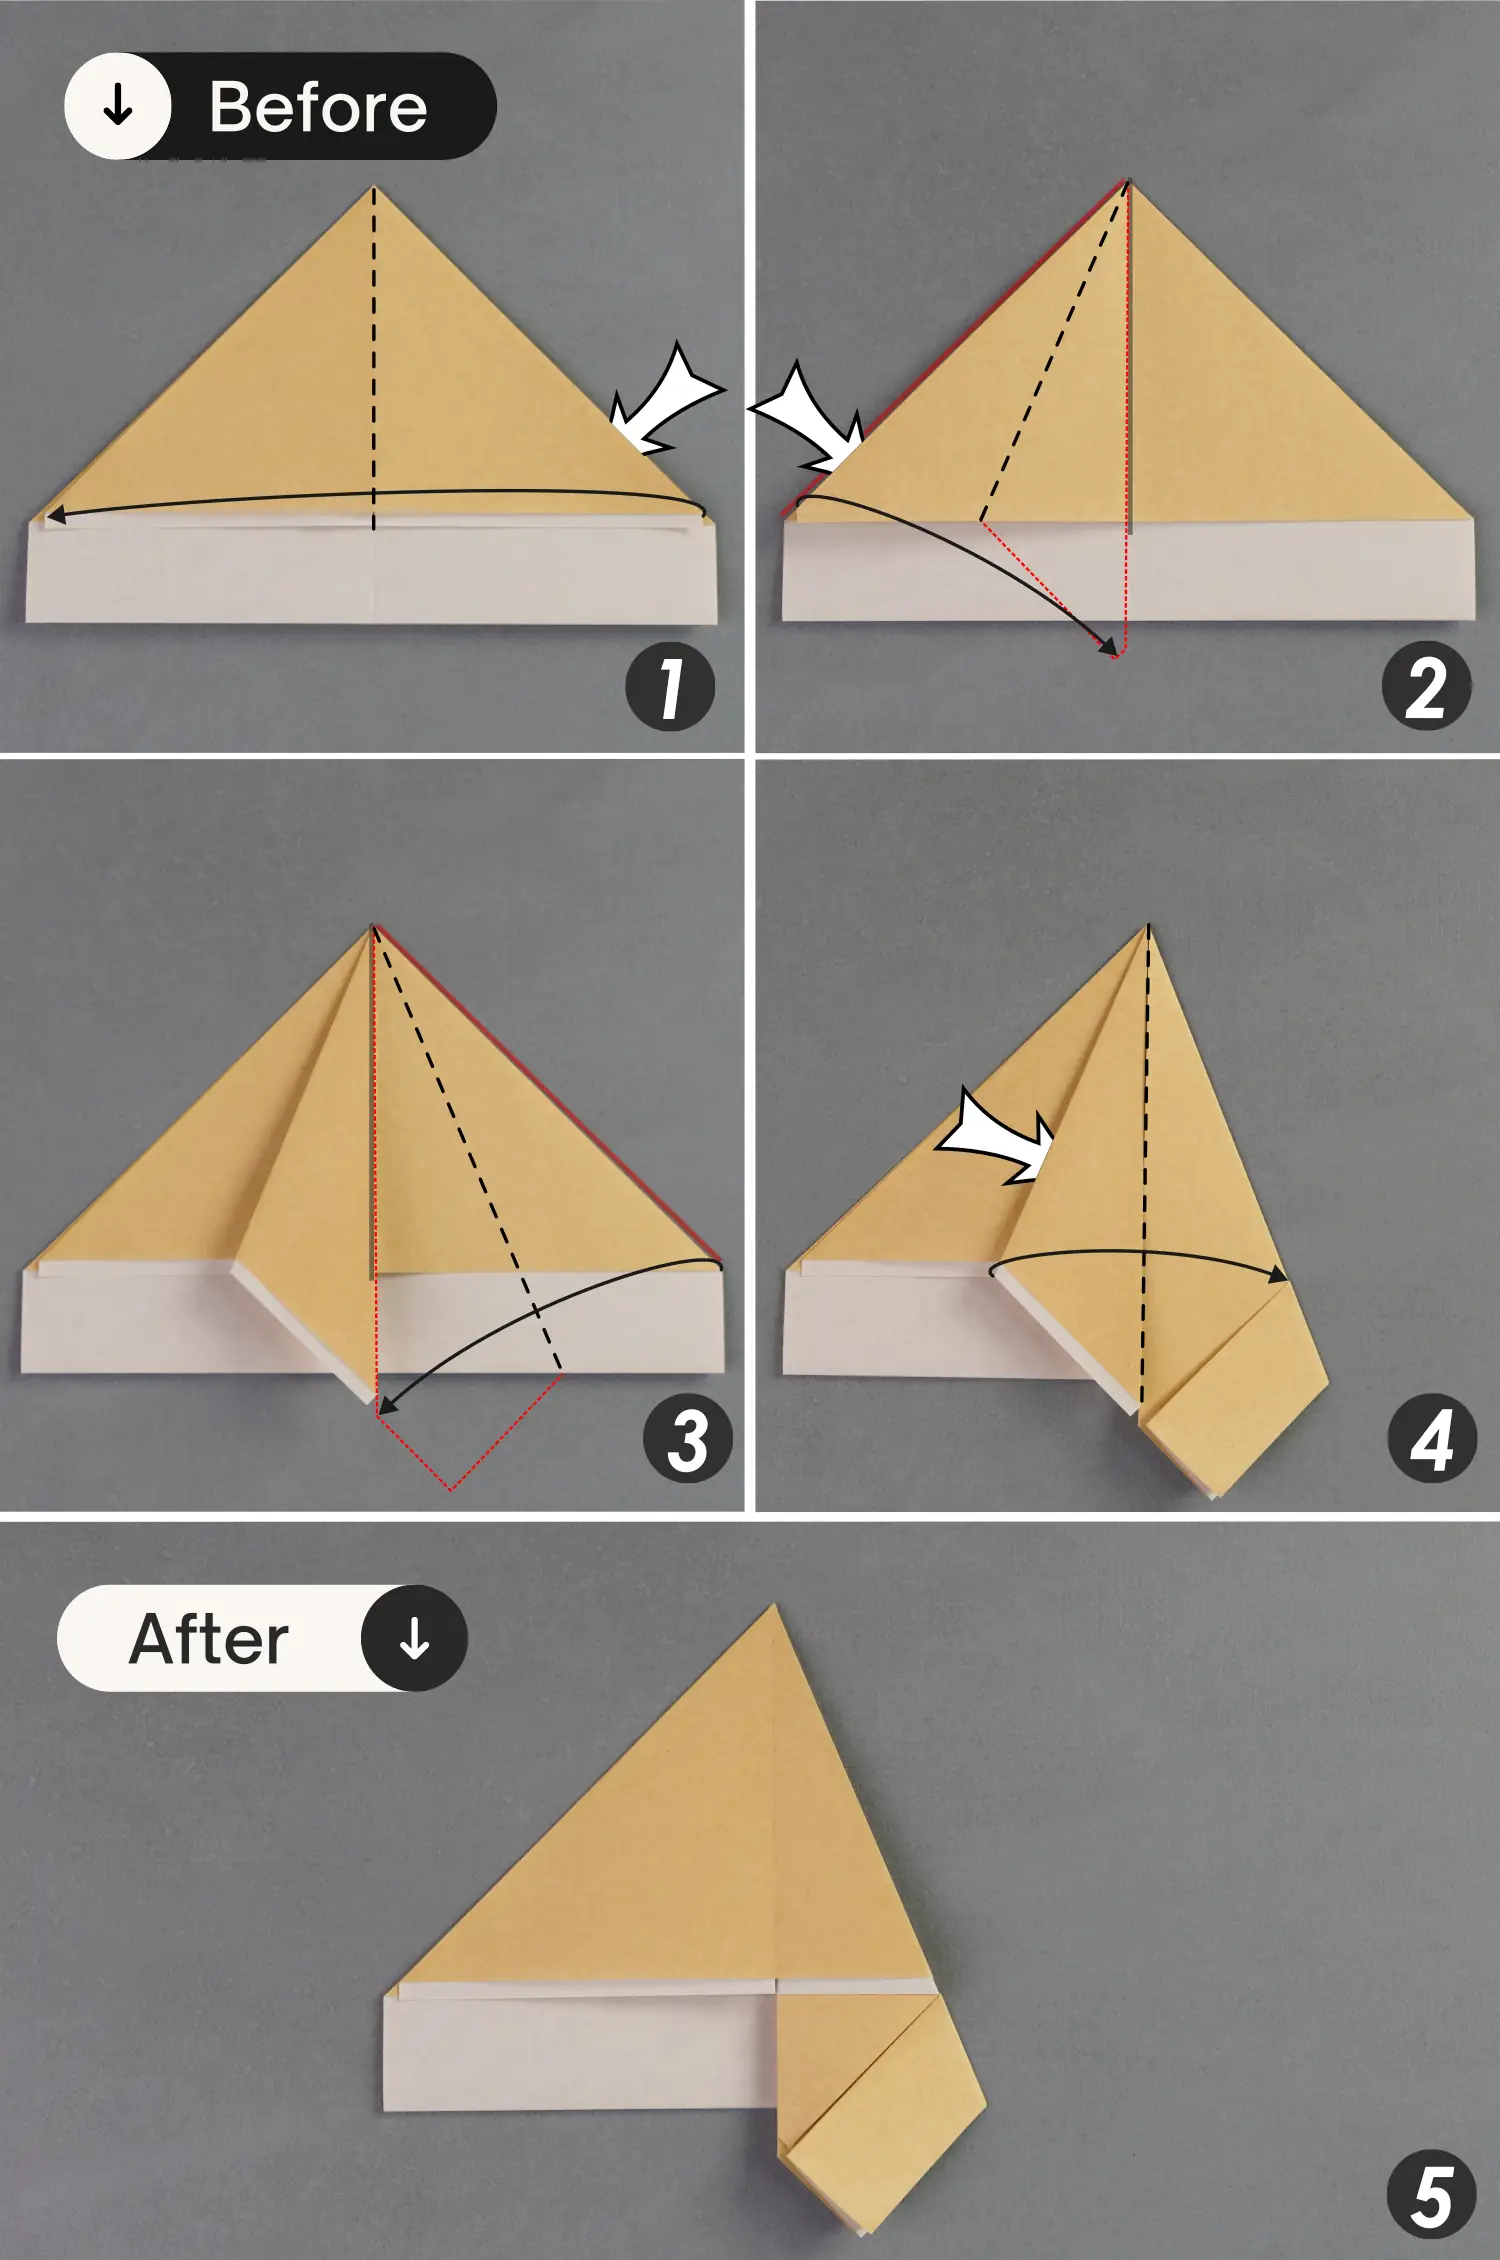
Step 12
The same to the left side.
Fold the top layer’s left edge to the right side along the vertical crease, then fold it to align with this vertical crease. Next, fold the left edge to align with the vertical crease, and finally, fold the flap on the right side to the left side.
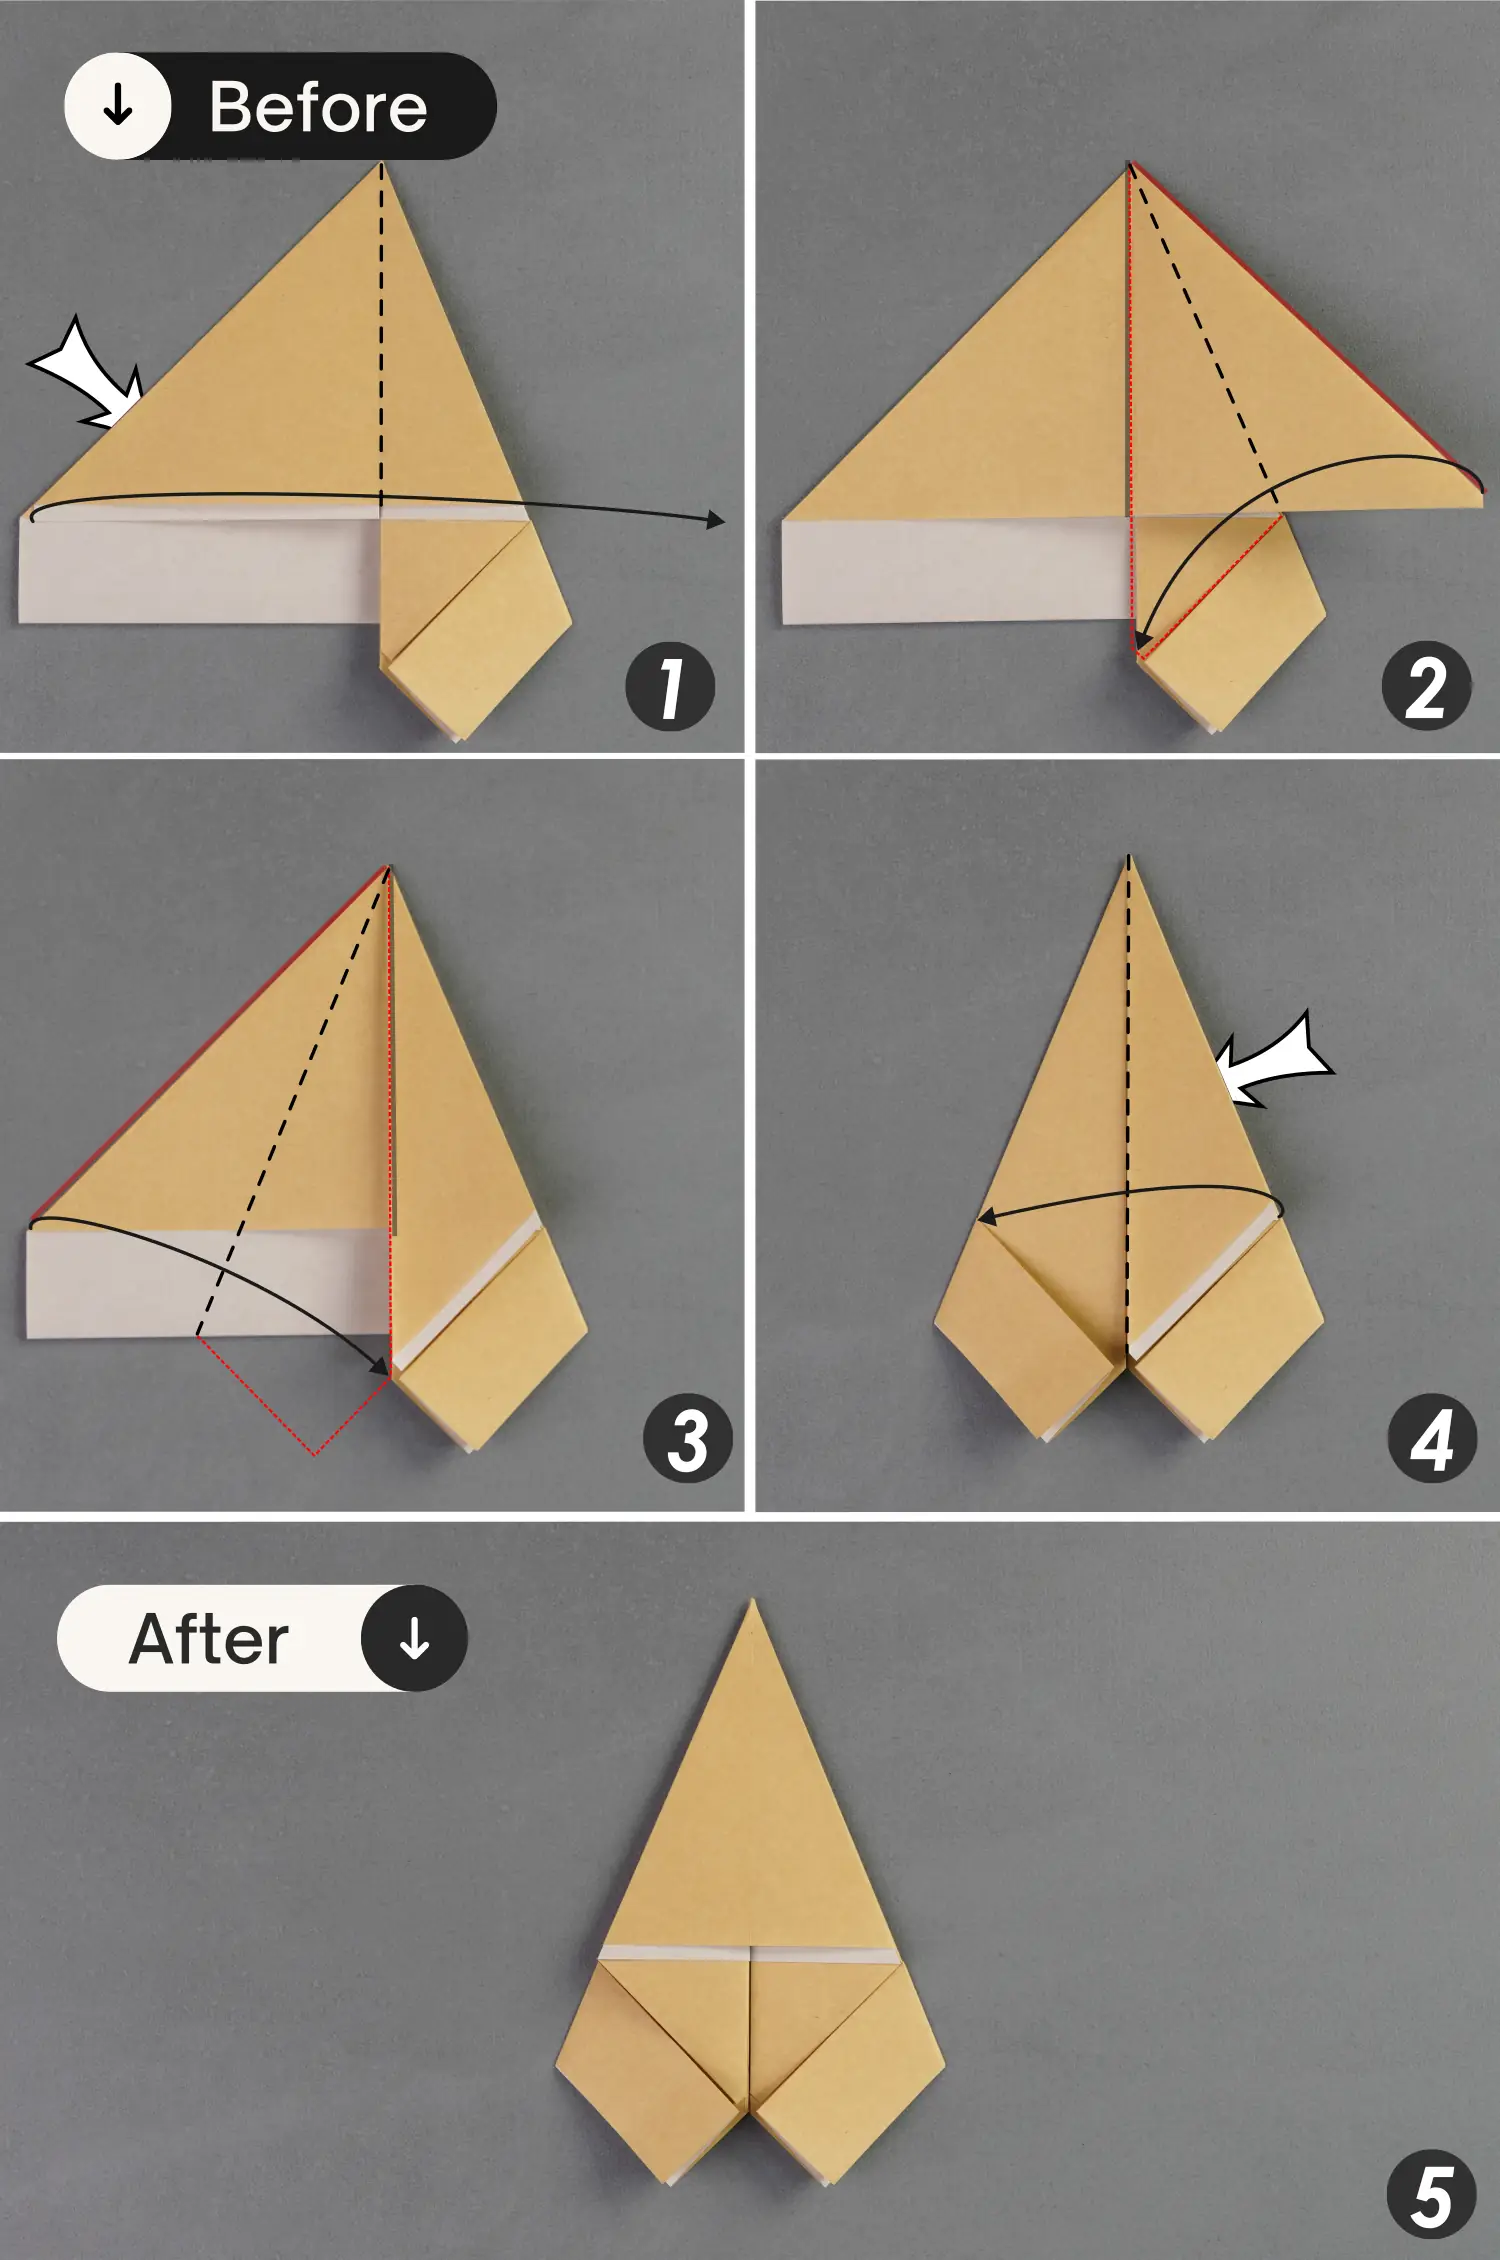
Step 13
Fold the top layer’s right edge to the left side along the middle vertical crease, then fold up the left triangle’s right edge along the black dotted line [picture 2], and fold up the right layer’s bottom left edge along the black dotted line [picture 3]

Step 14
Flip the paper from left to right.
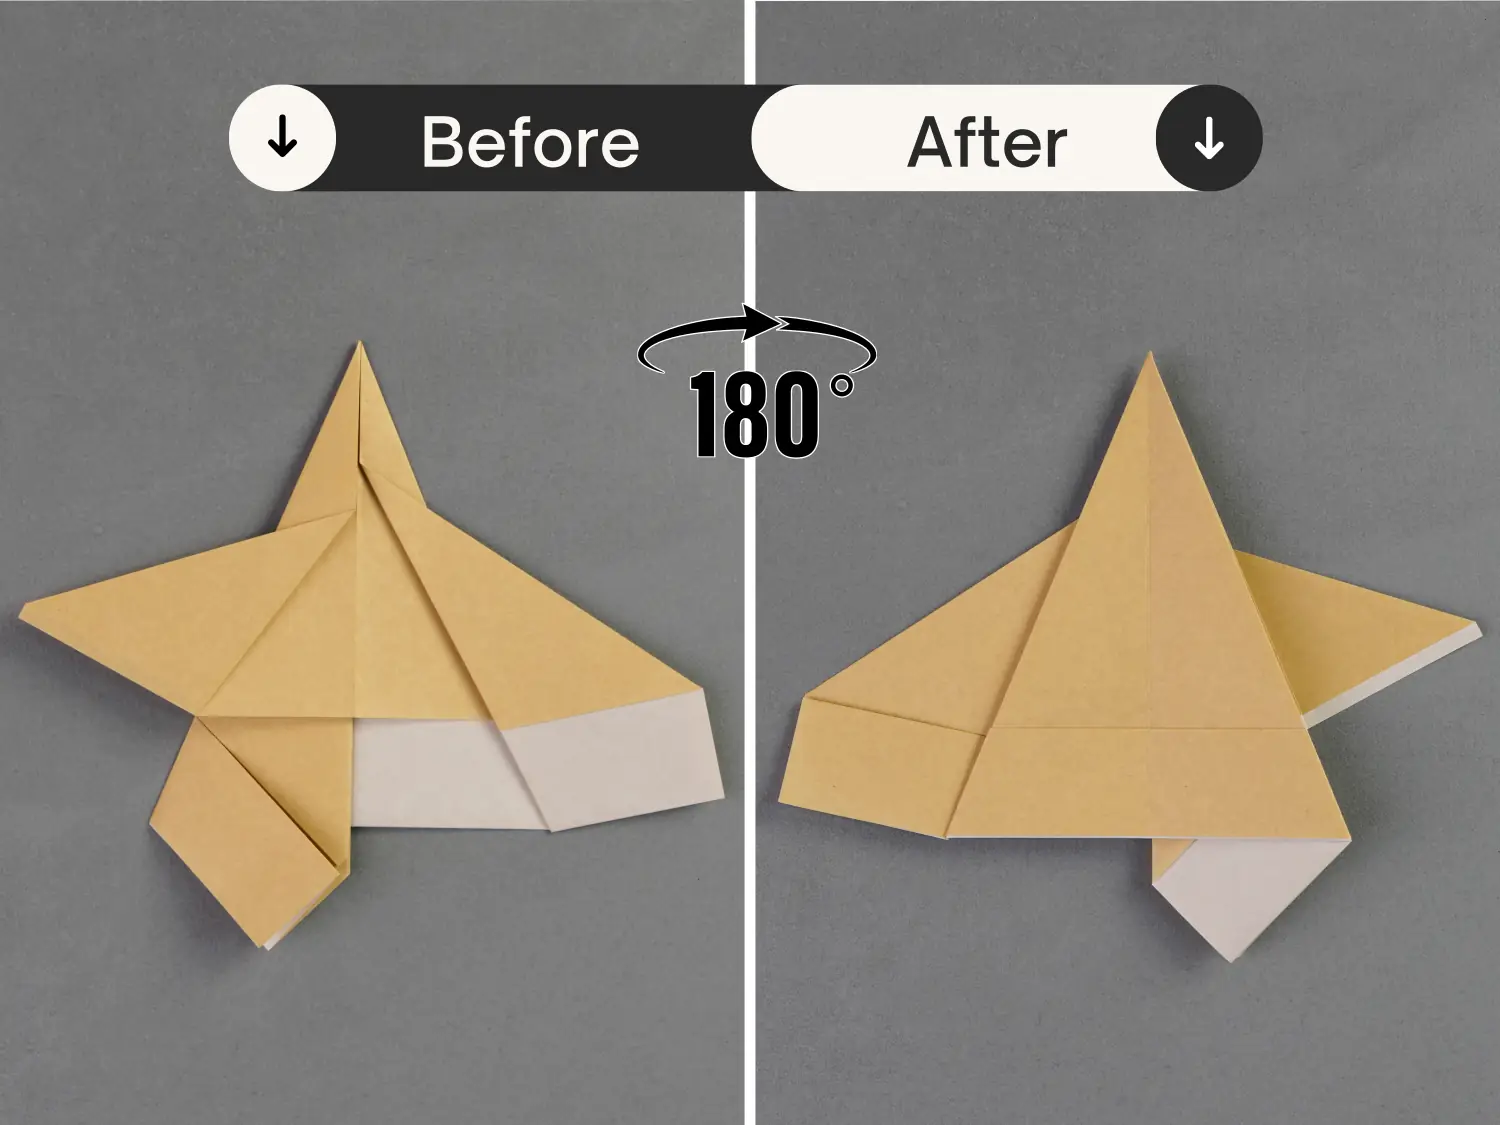
Step 15
Similar to step 13, but with the left and right folds reversed. You need to first fold the right side of the top layer to the left along the vertical crease, then fold the two top layers so they align with the two bottom layers you made in step 13 [pictures 1 and 2].
Next, fold the top layer on the left side to the right side, and turn over the paper from left to right [pictures 3 and 4]
Finally, fold the top layer on the left side to the right side [pictures 5 and 6]
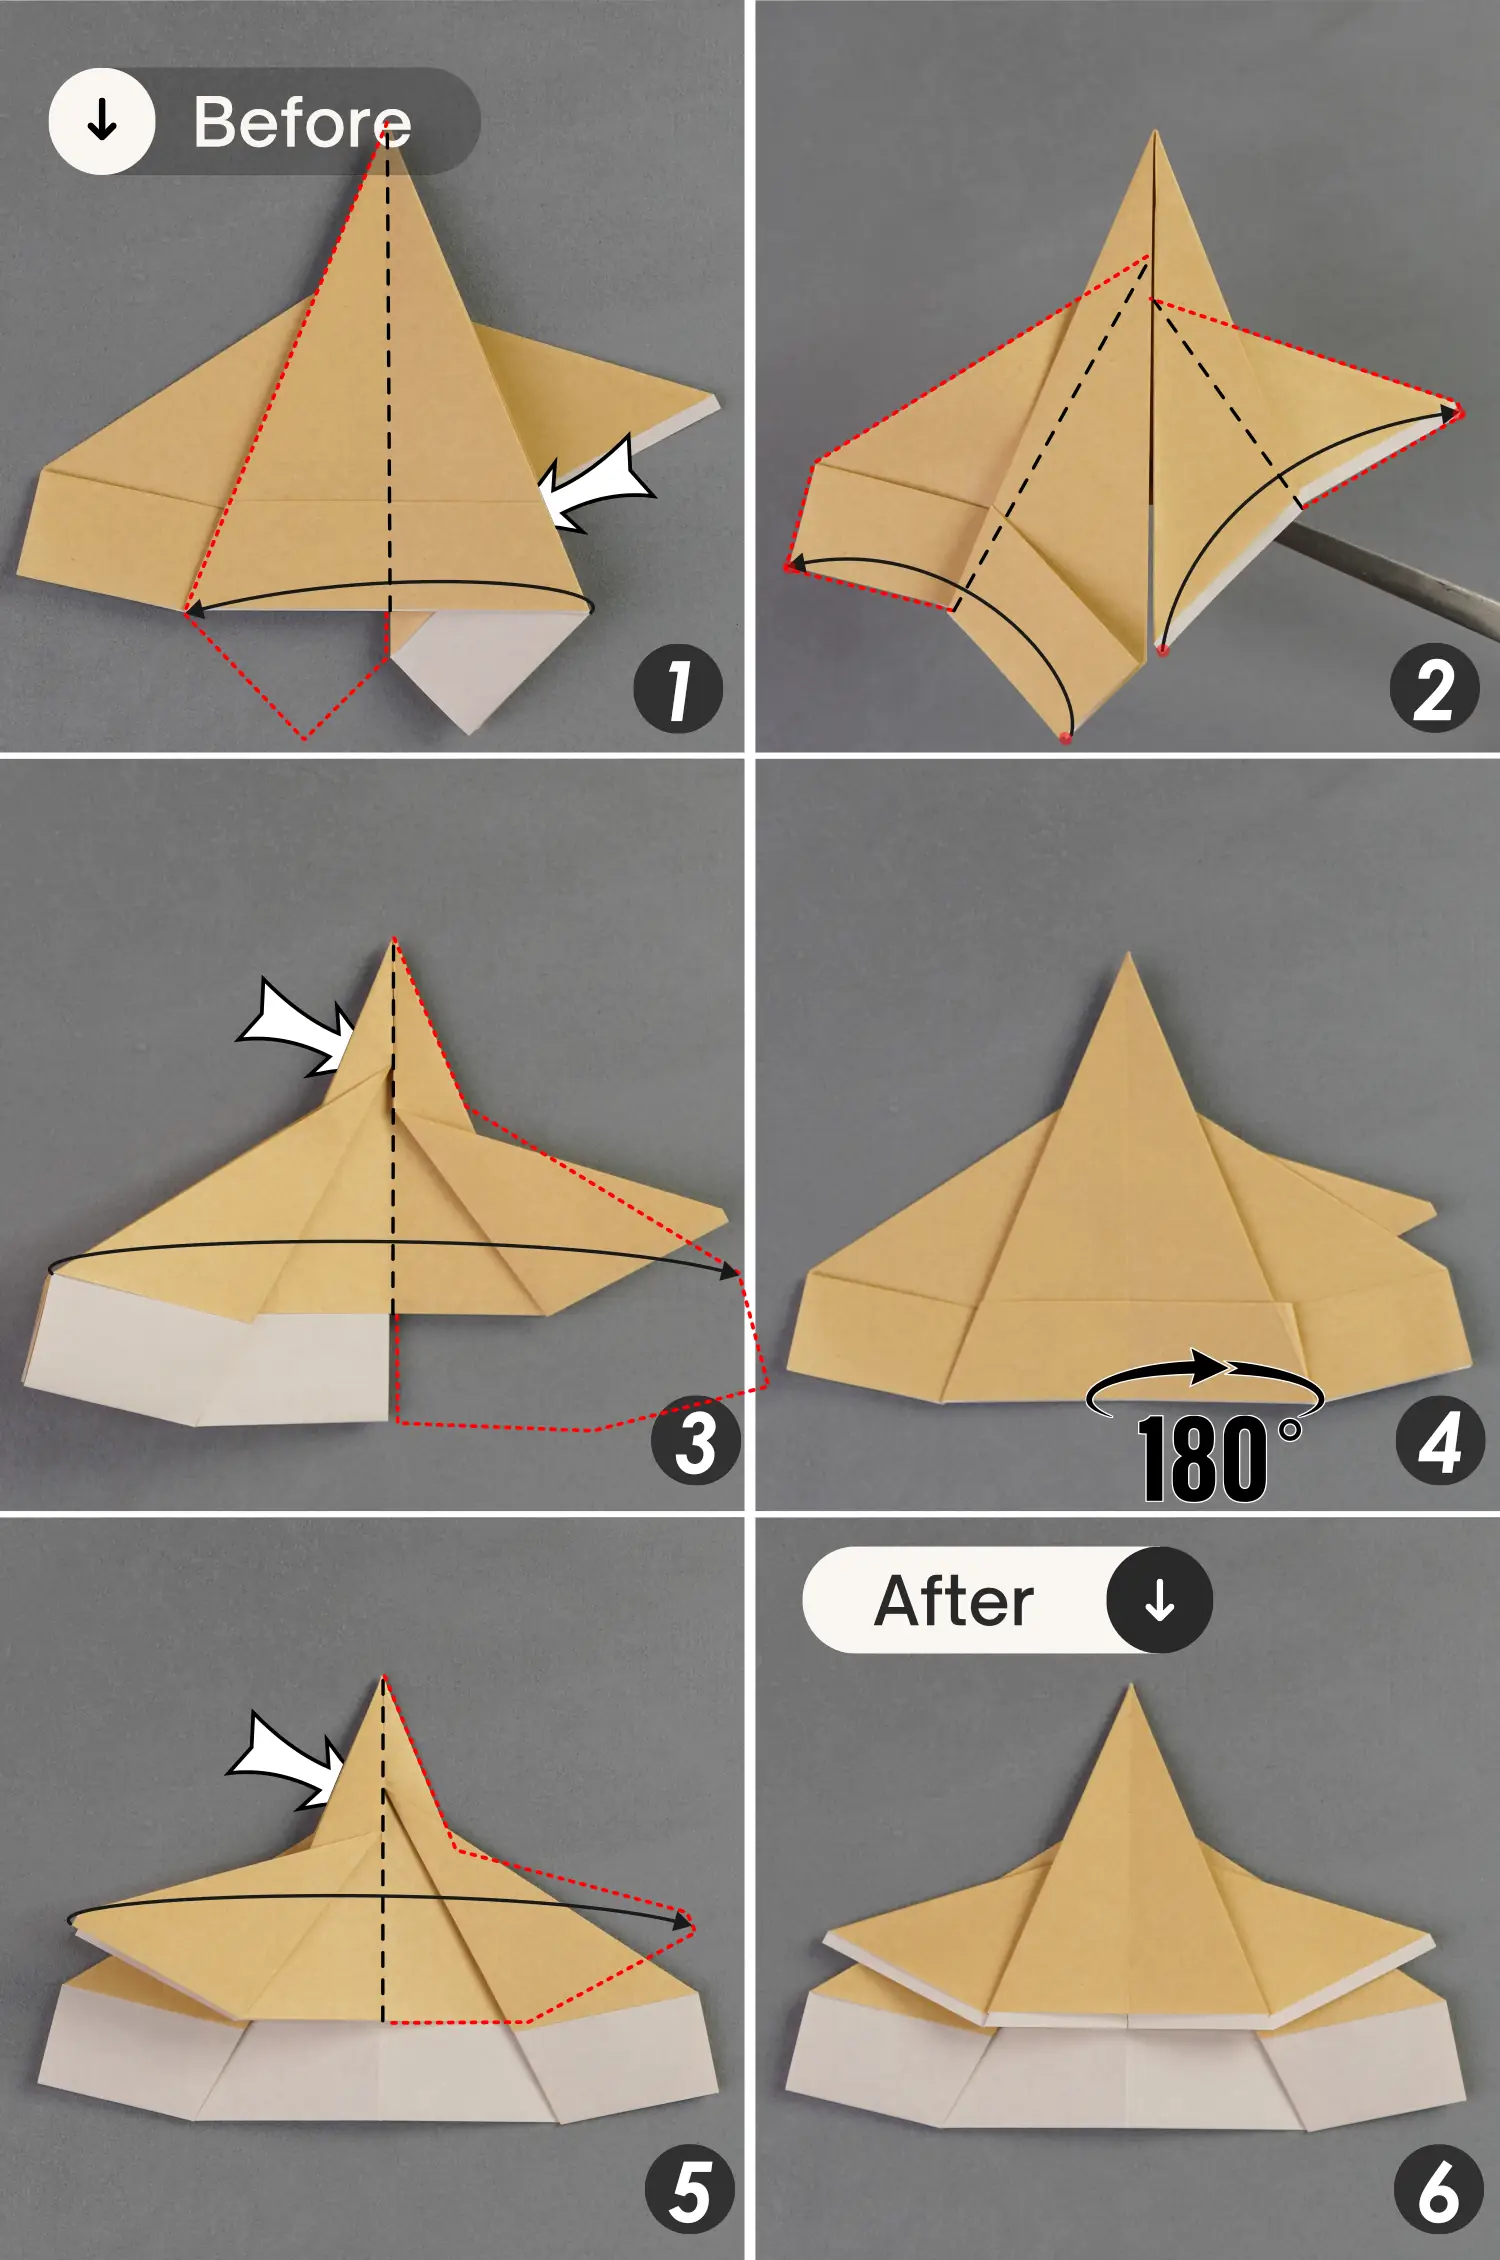
Step 16
Flip the paper from left to right.
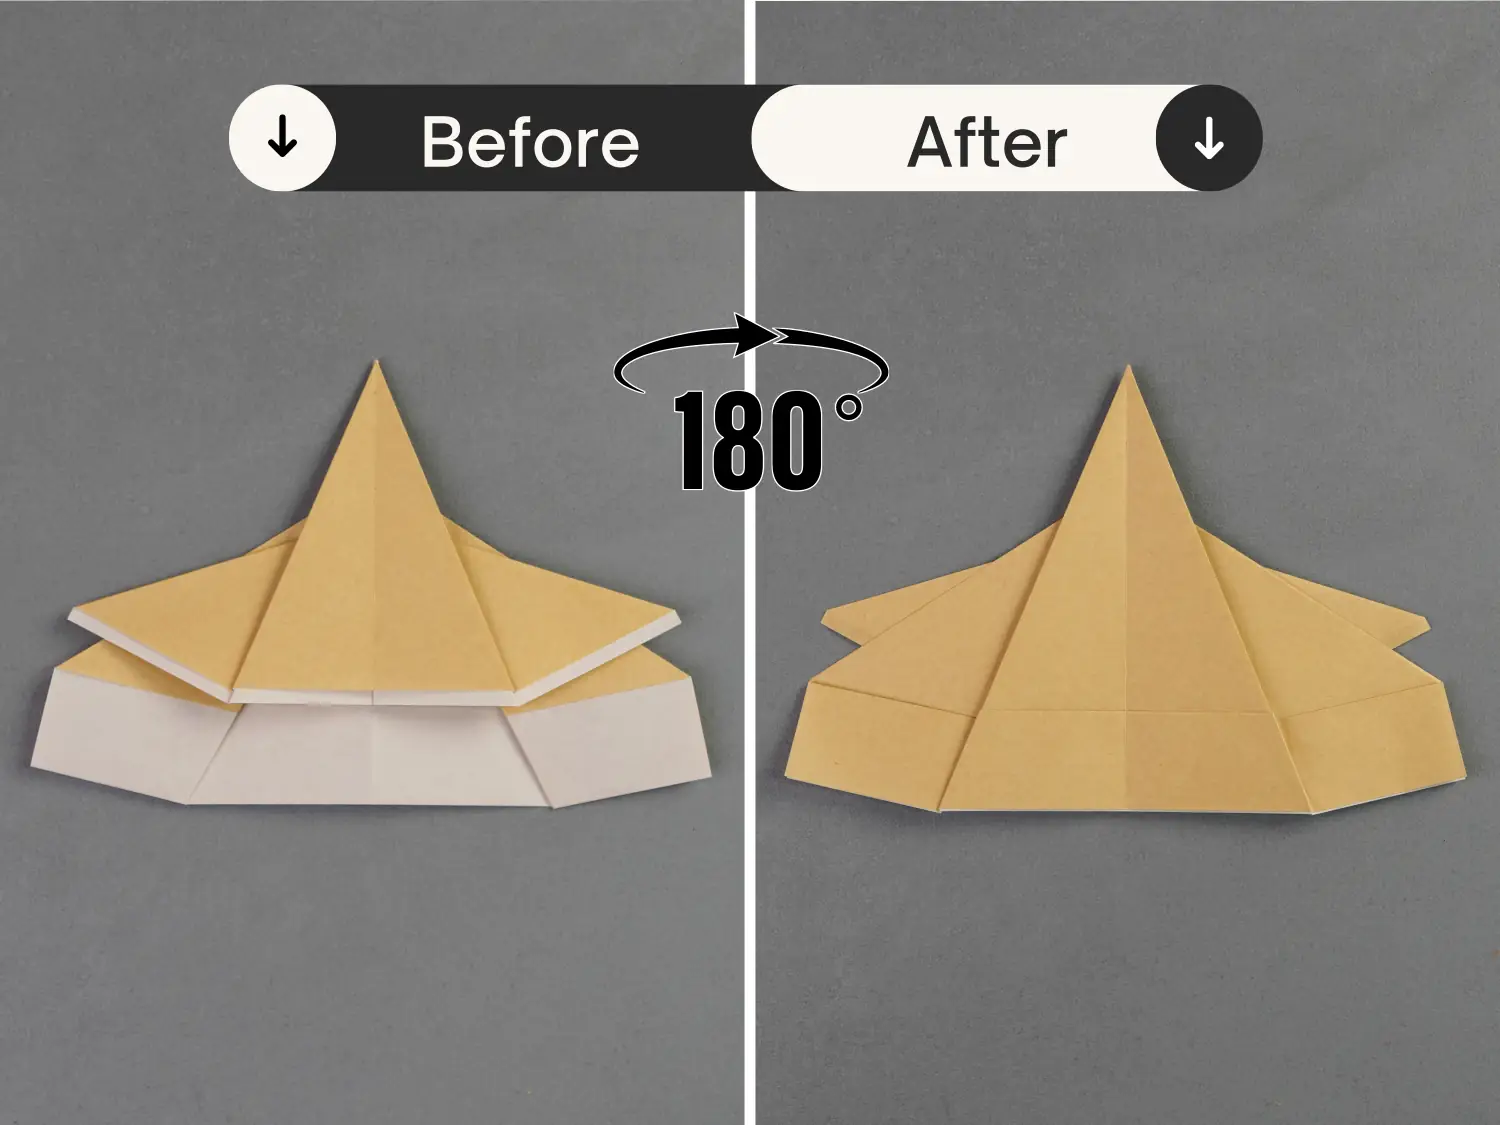
Step 17
Fold the upper flap on the right side toward the left side along the black dotted line, then fold it back to the right side to complete a pleat fold.
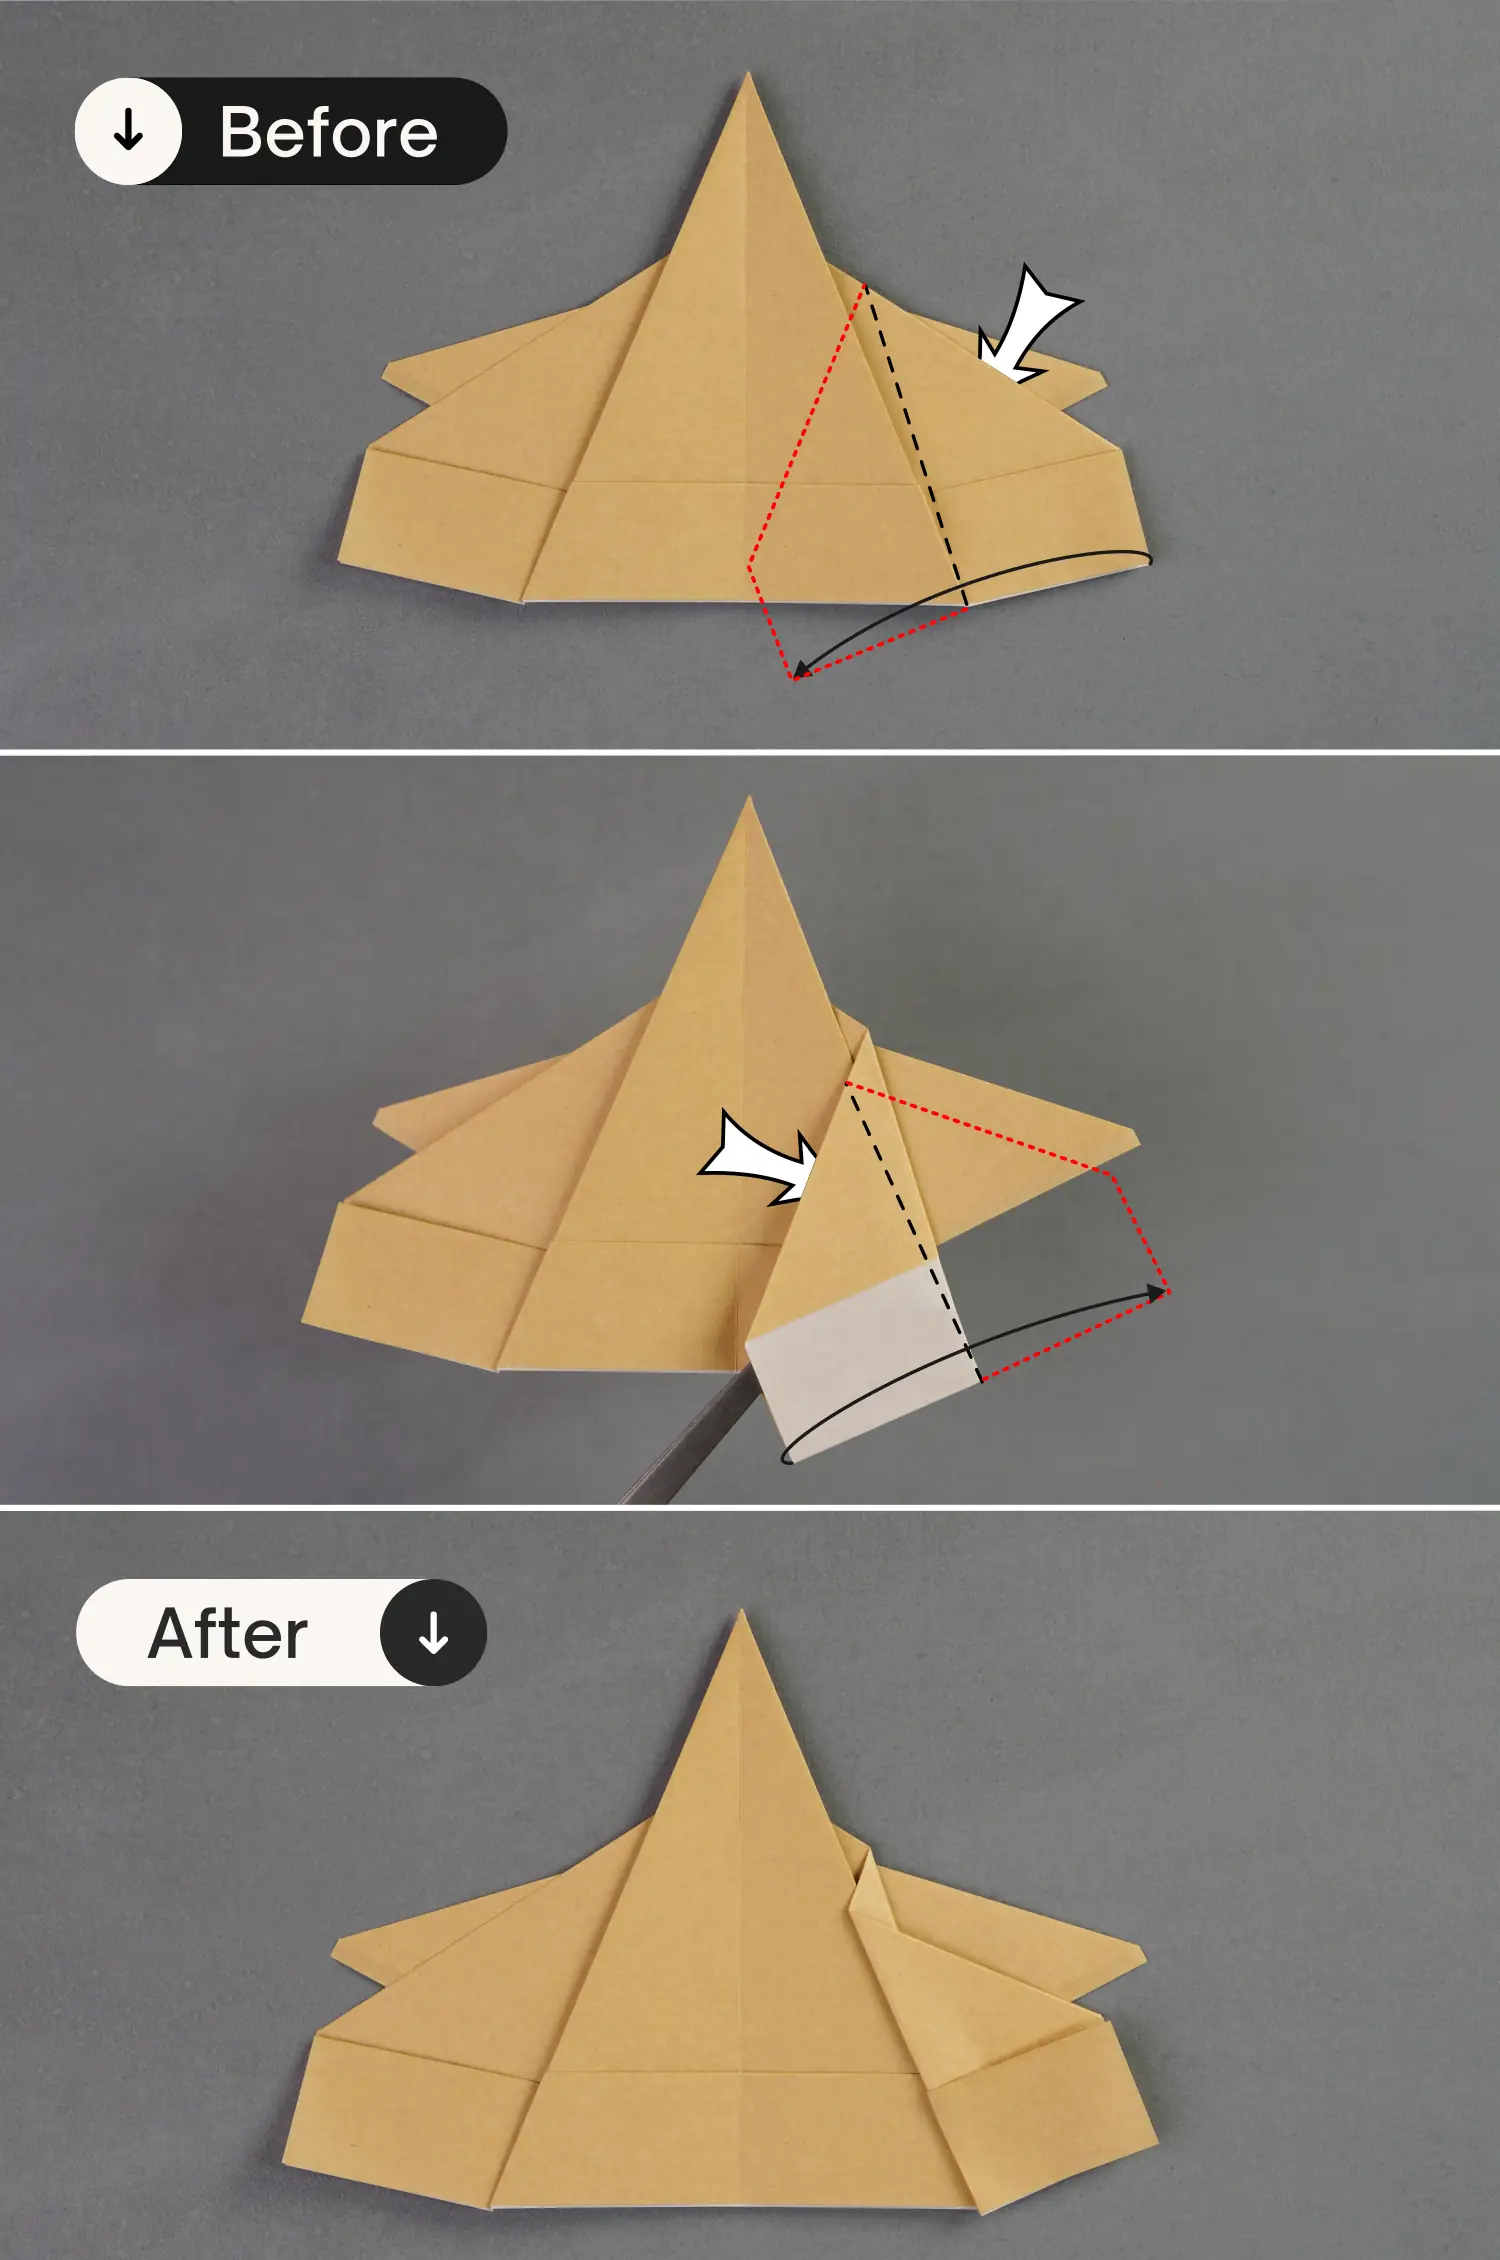
Step 18
Lift the small rectangle on the bottom right side, open it, and squash it.
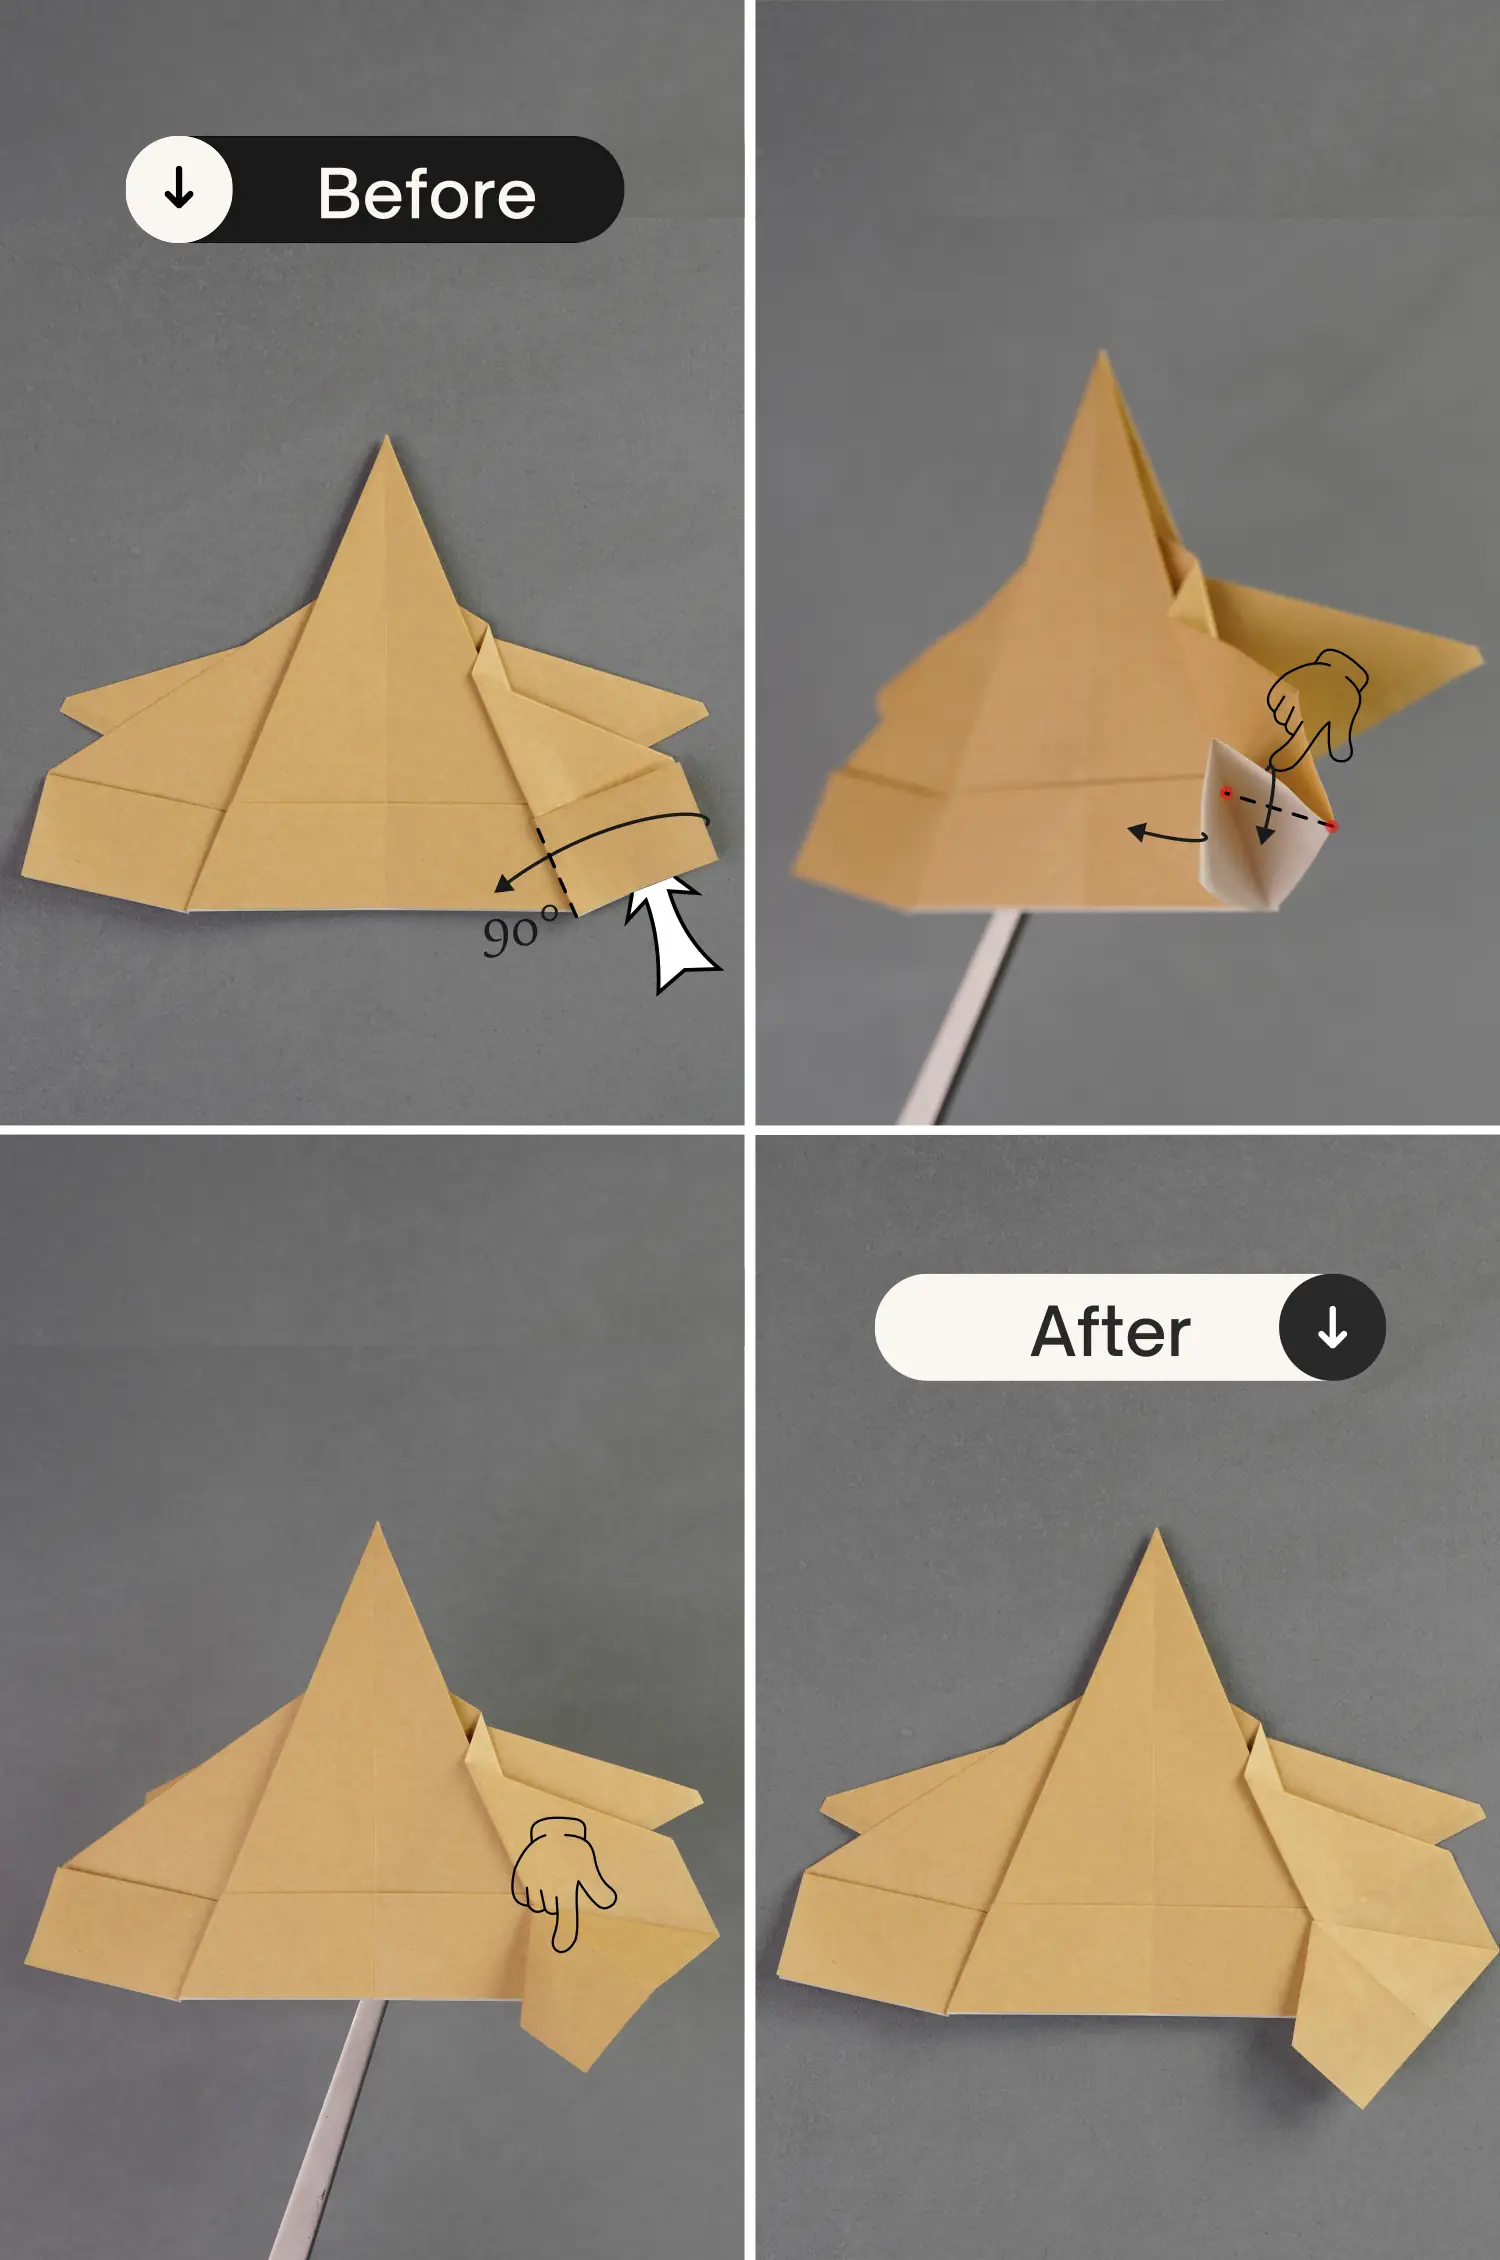
Step 19
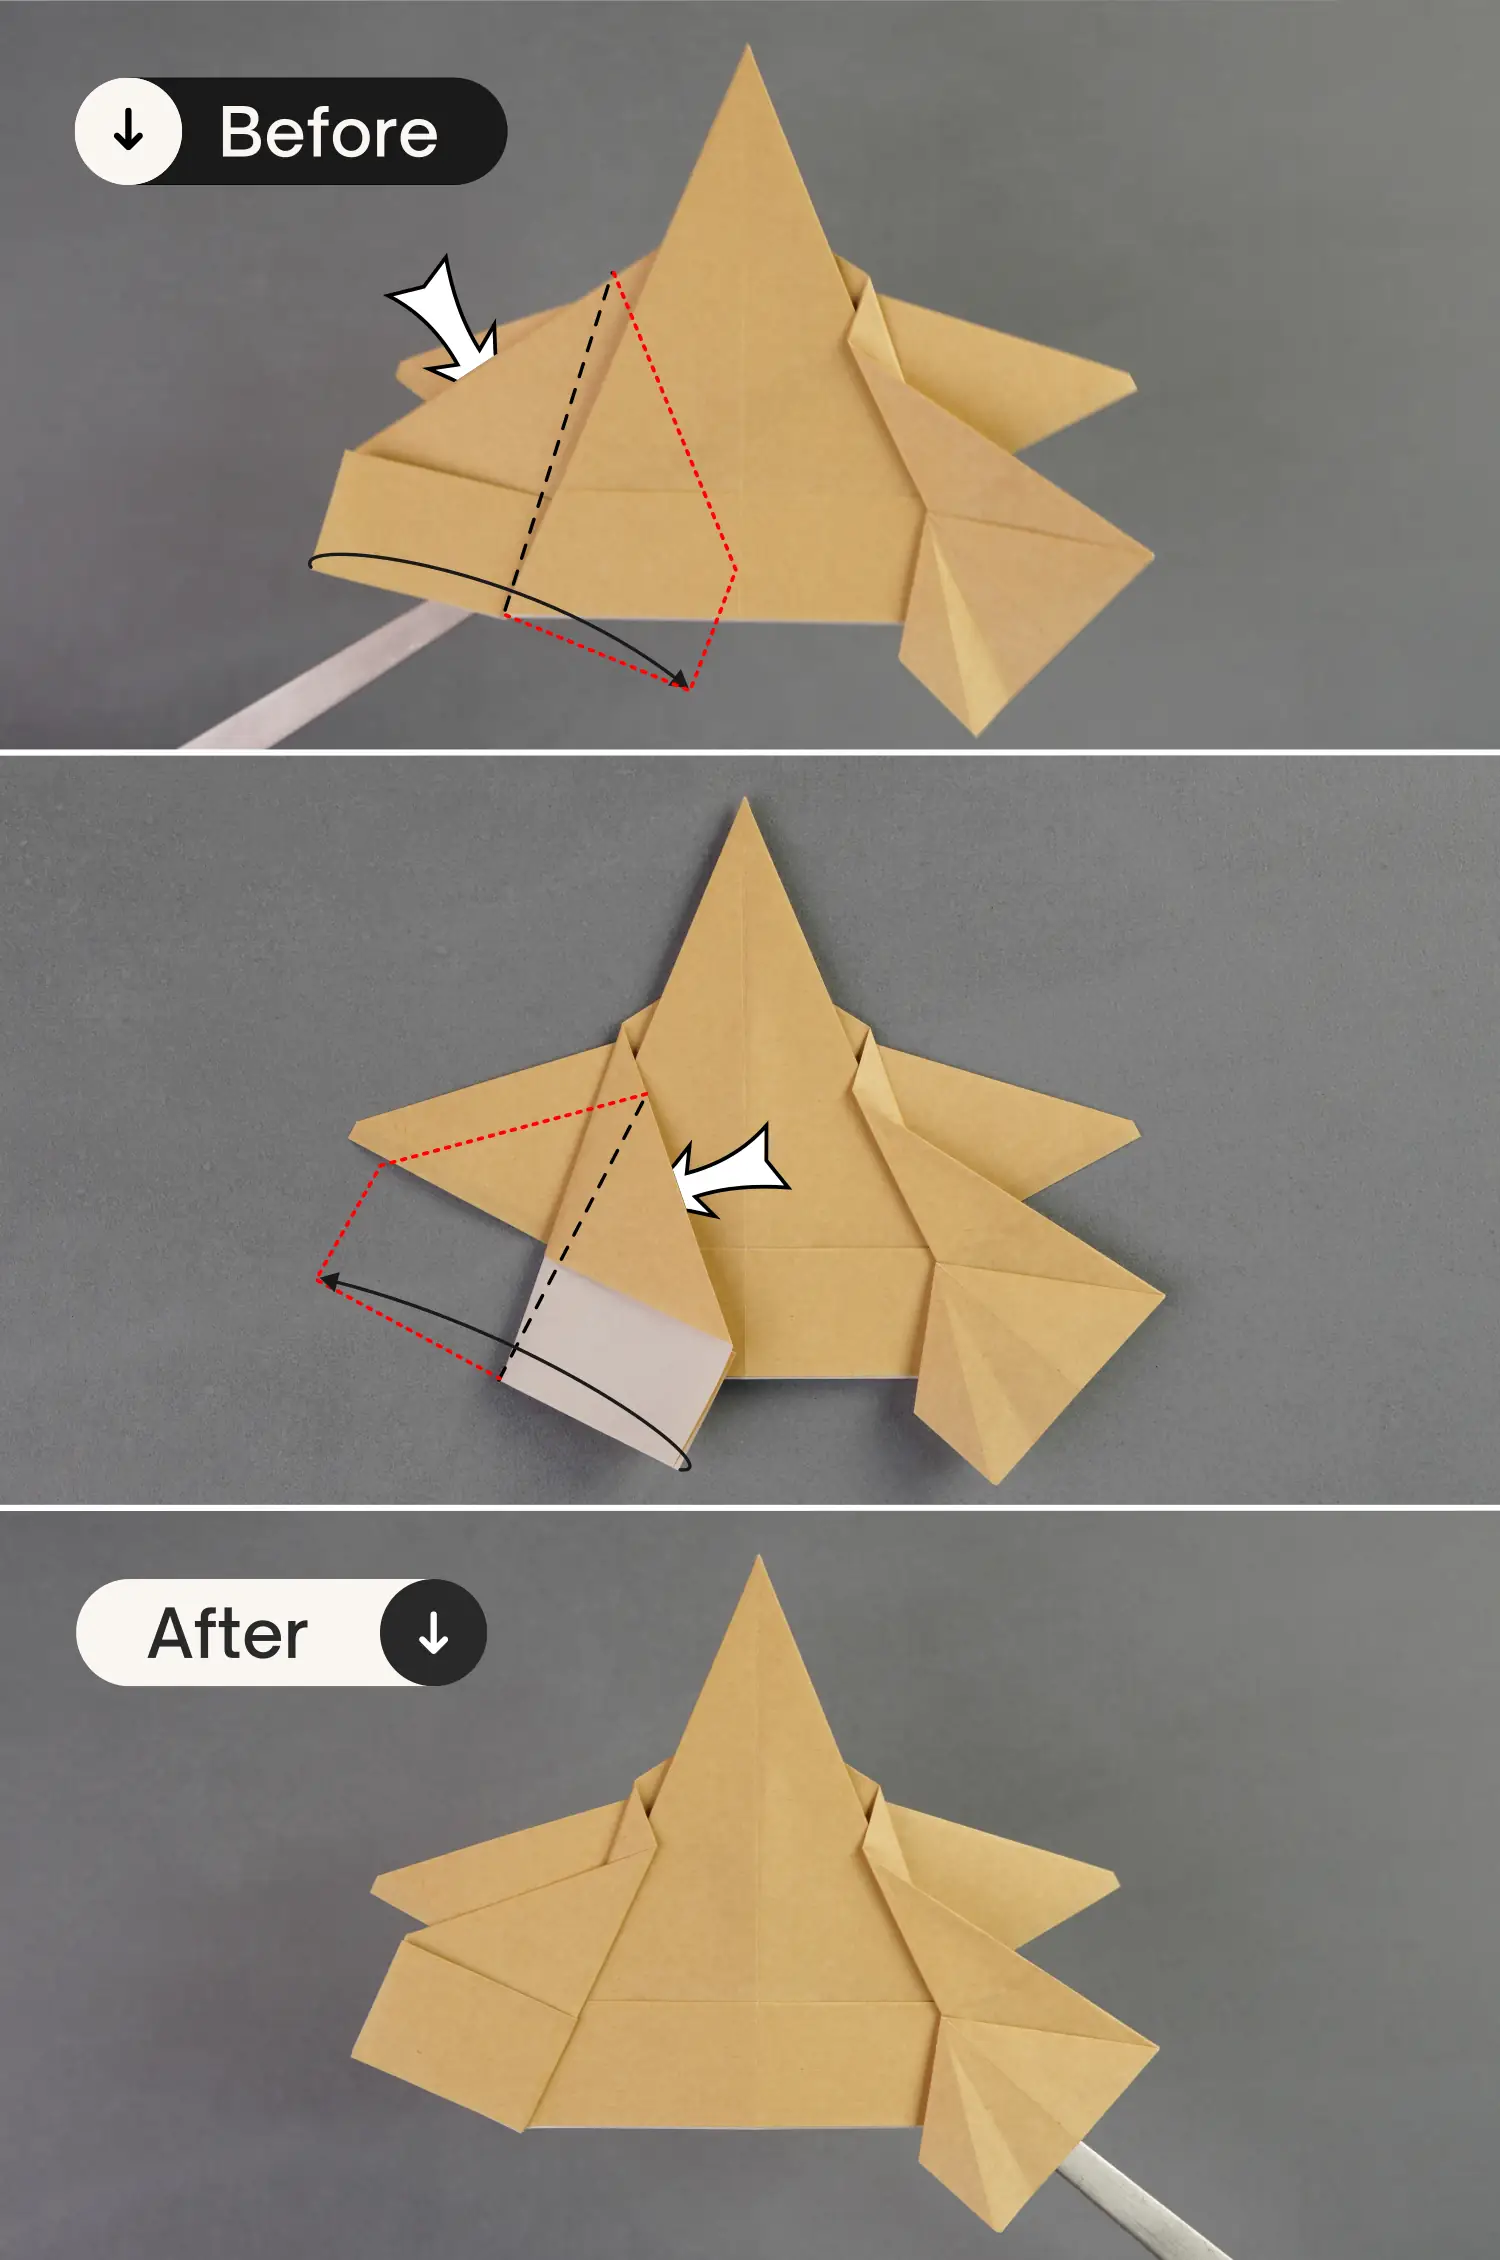
Fold the right edge of the top layer on the right side to the left along the black dotted line [picture 1], then fold this folded layer’s left corner to the right side along the black dotted line connecting two red spots [picture 2], then, fold this layer back to the right side [picture 3].
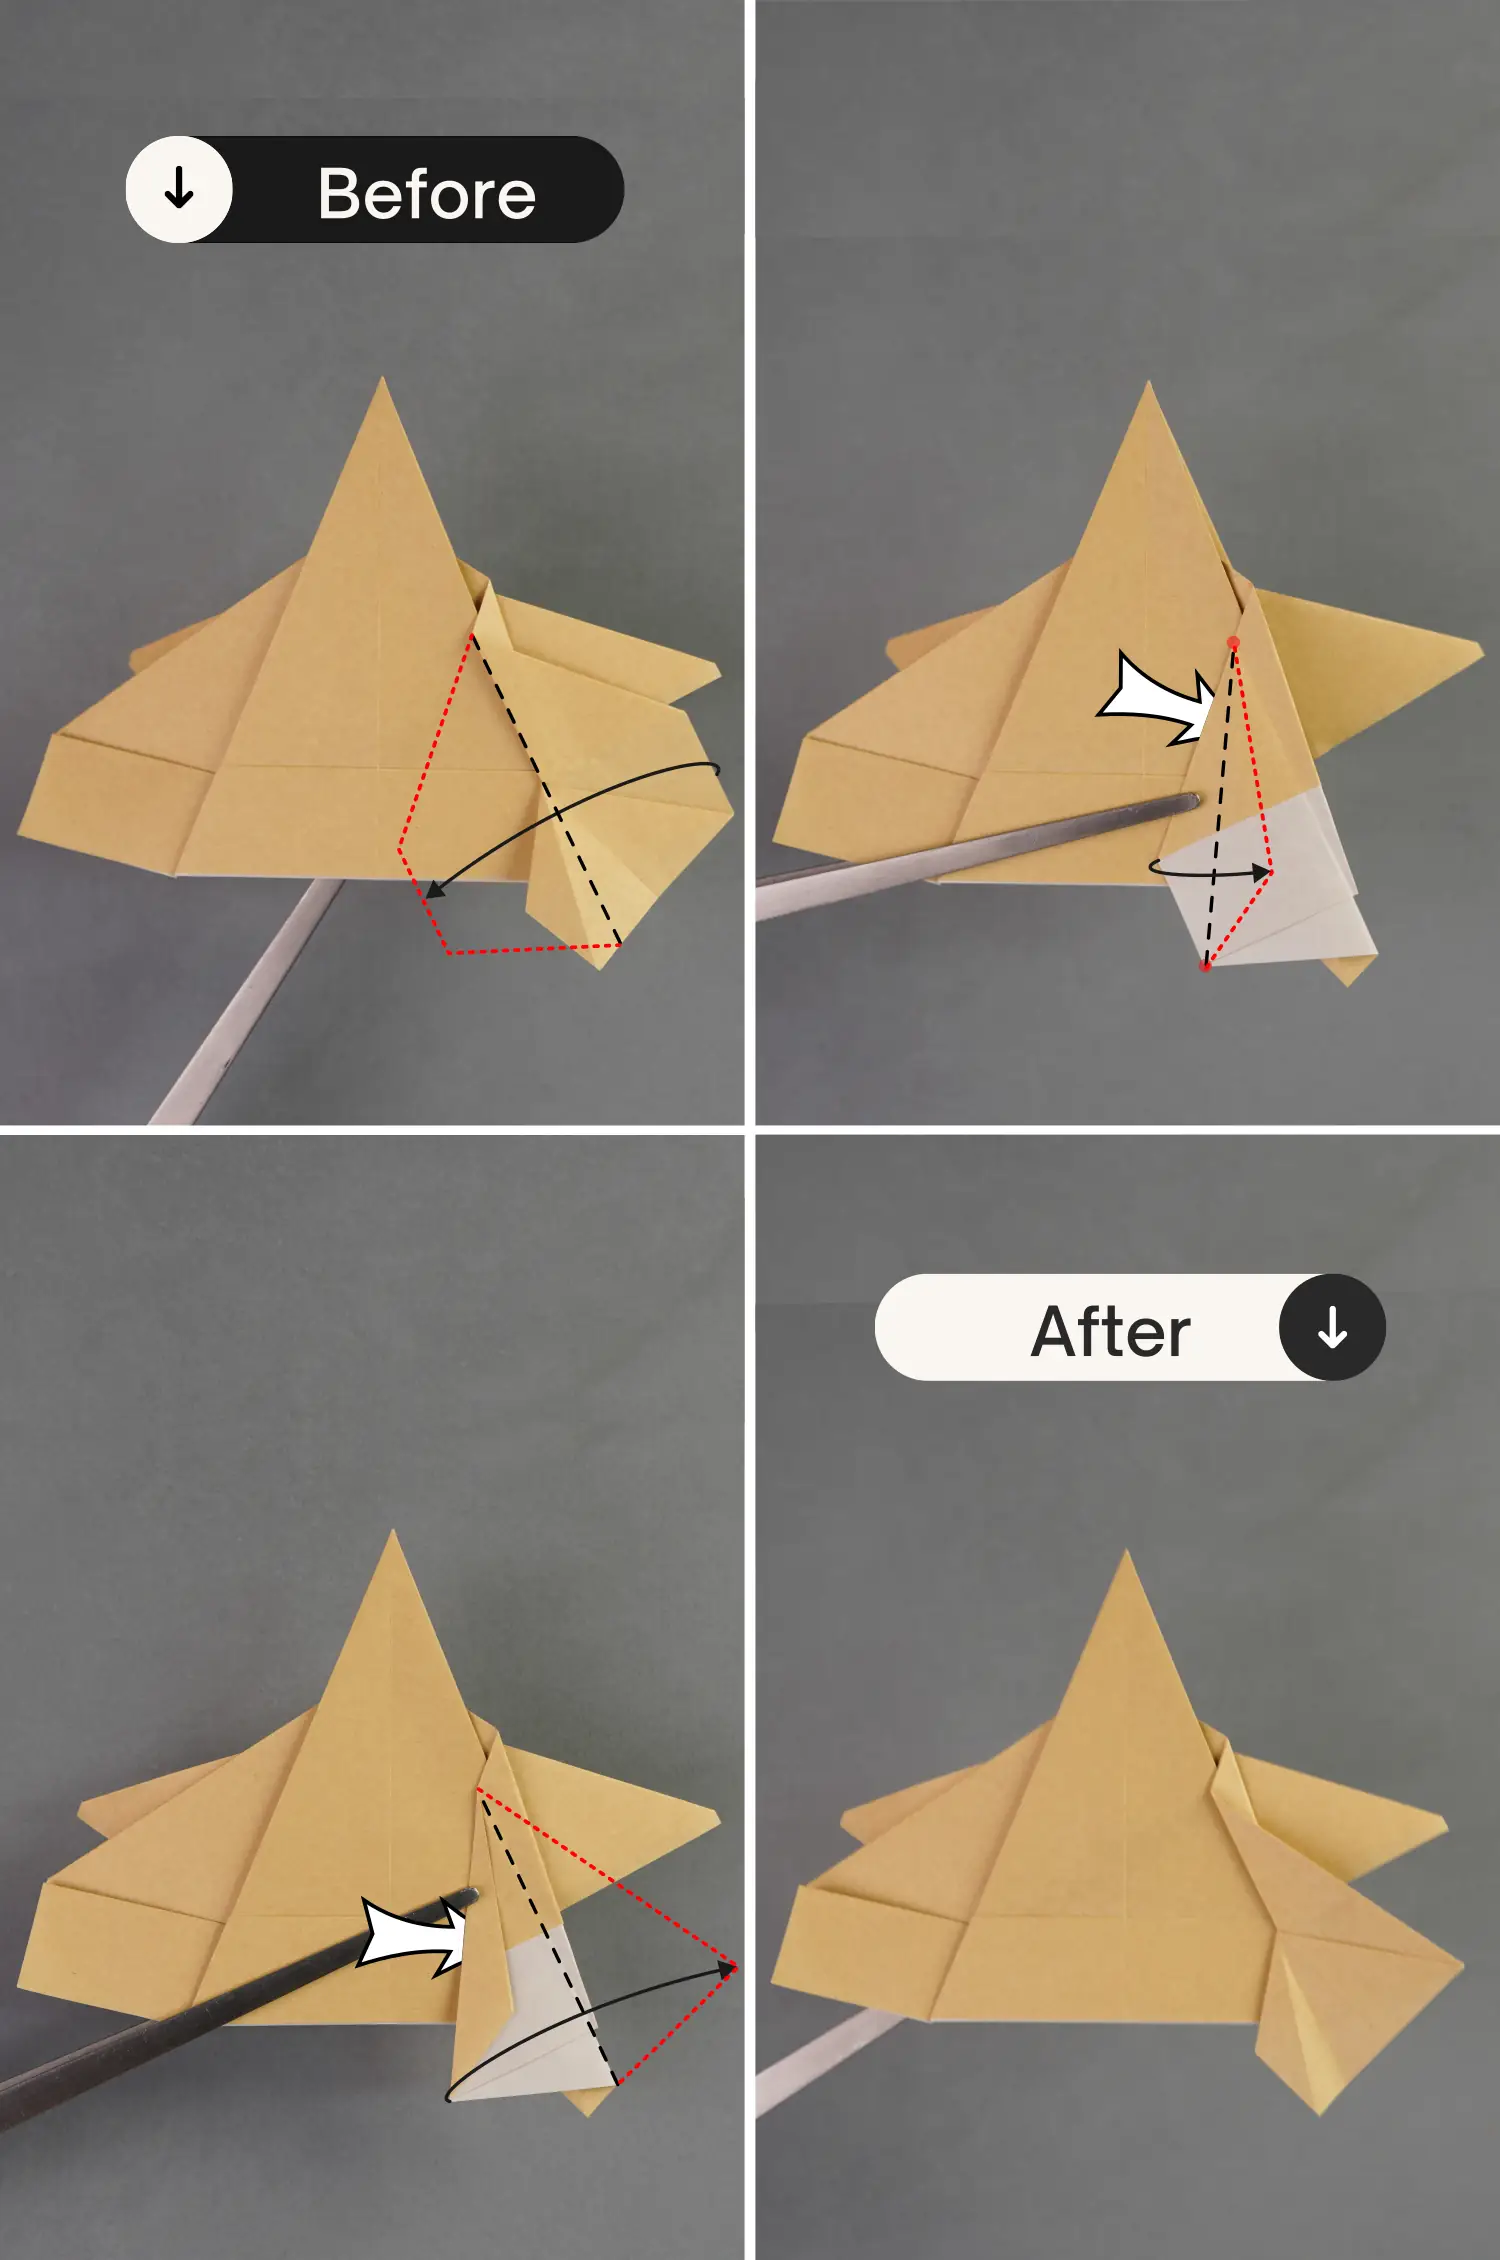
Step 20
Similar to step 17.
Fold the left edge of the top layer on the left side to the right along the black dotted line [picture 1], then fold this folded layer back to the left side along the black dotted line [picture 2]
Step 21
Lift the small rectangle on the bottom left side, open it, and squash it.
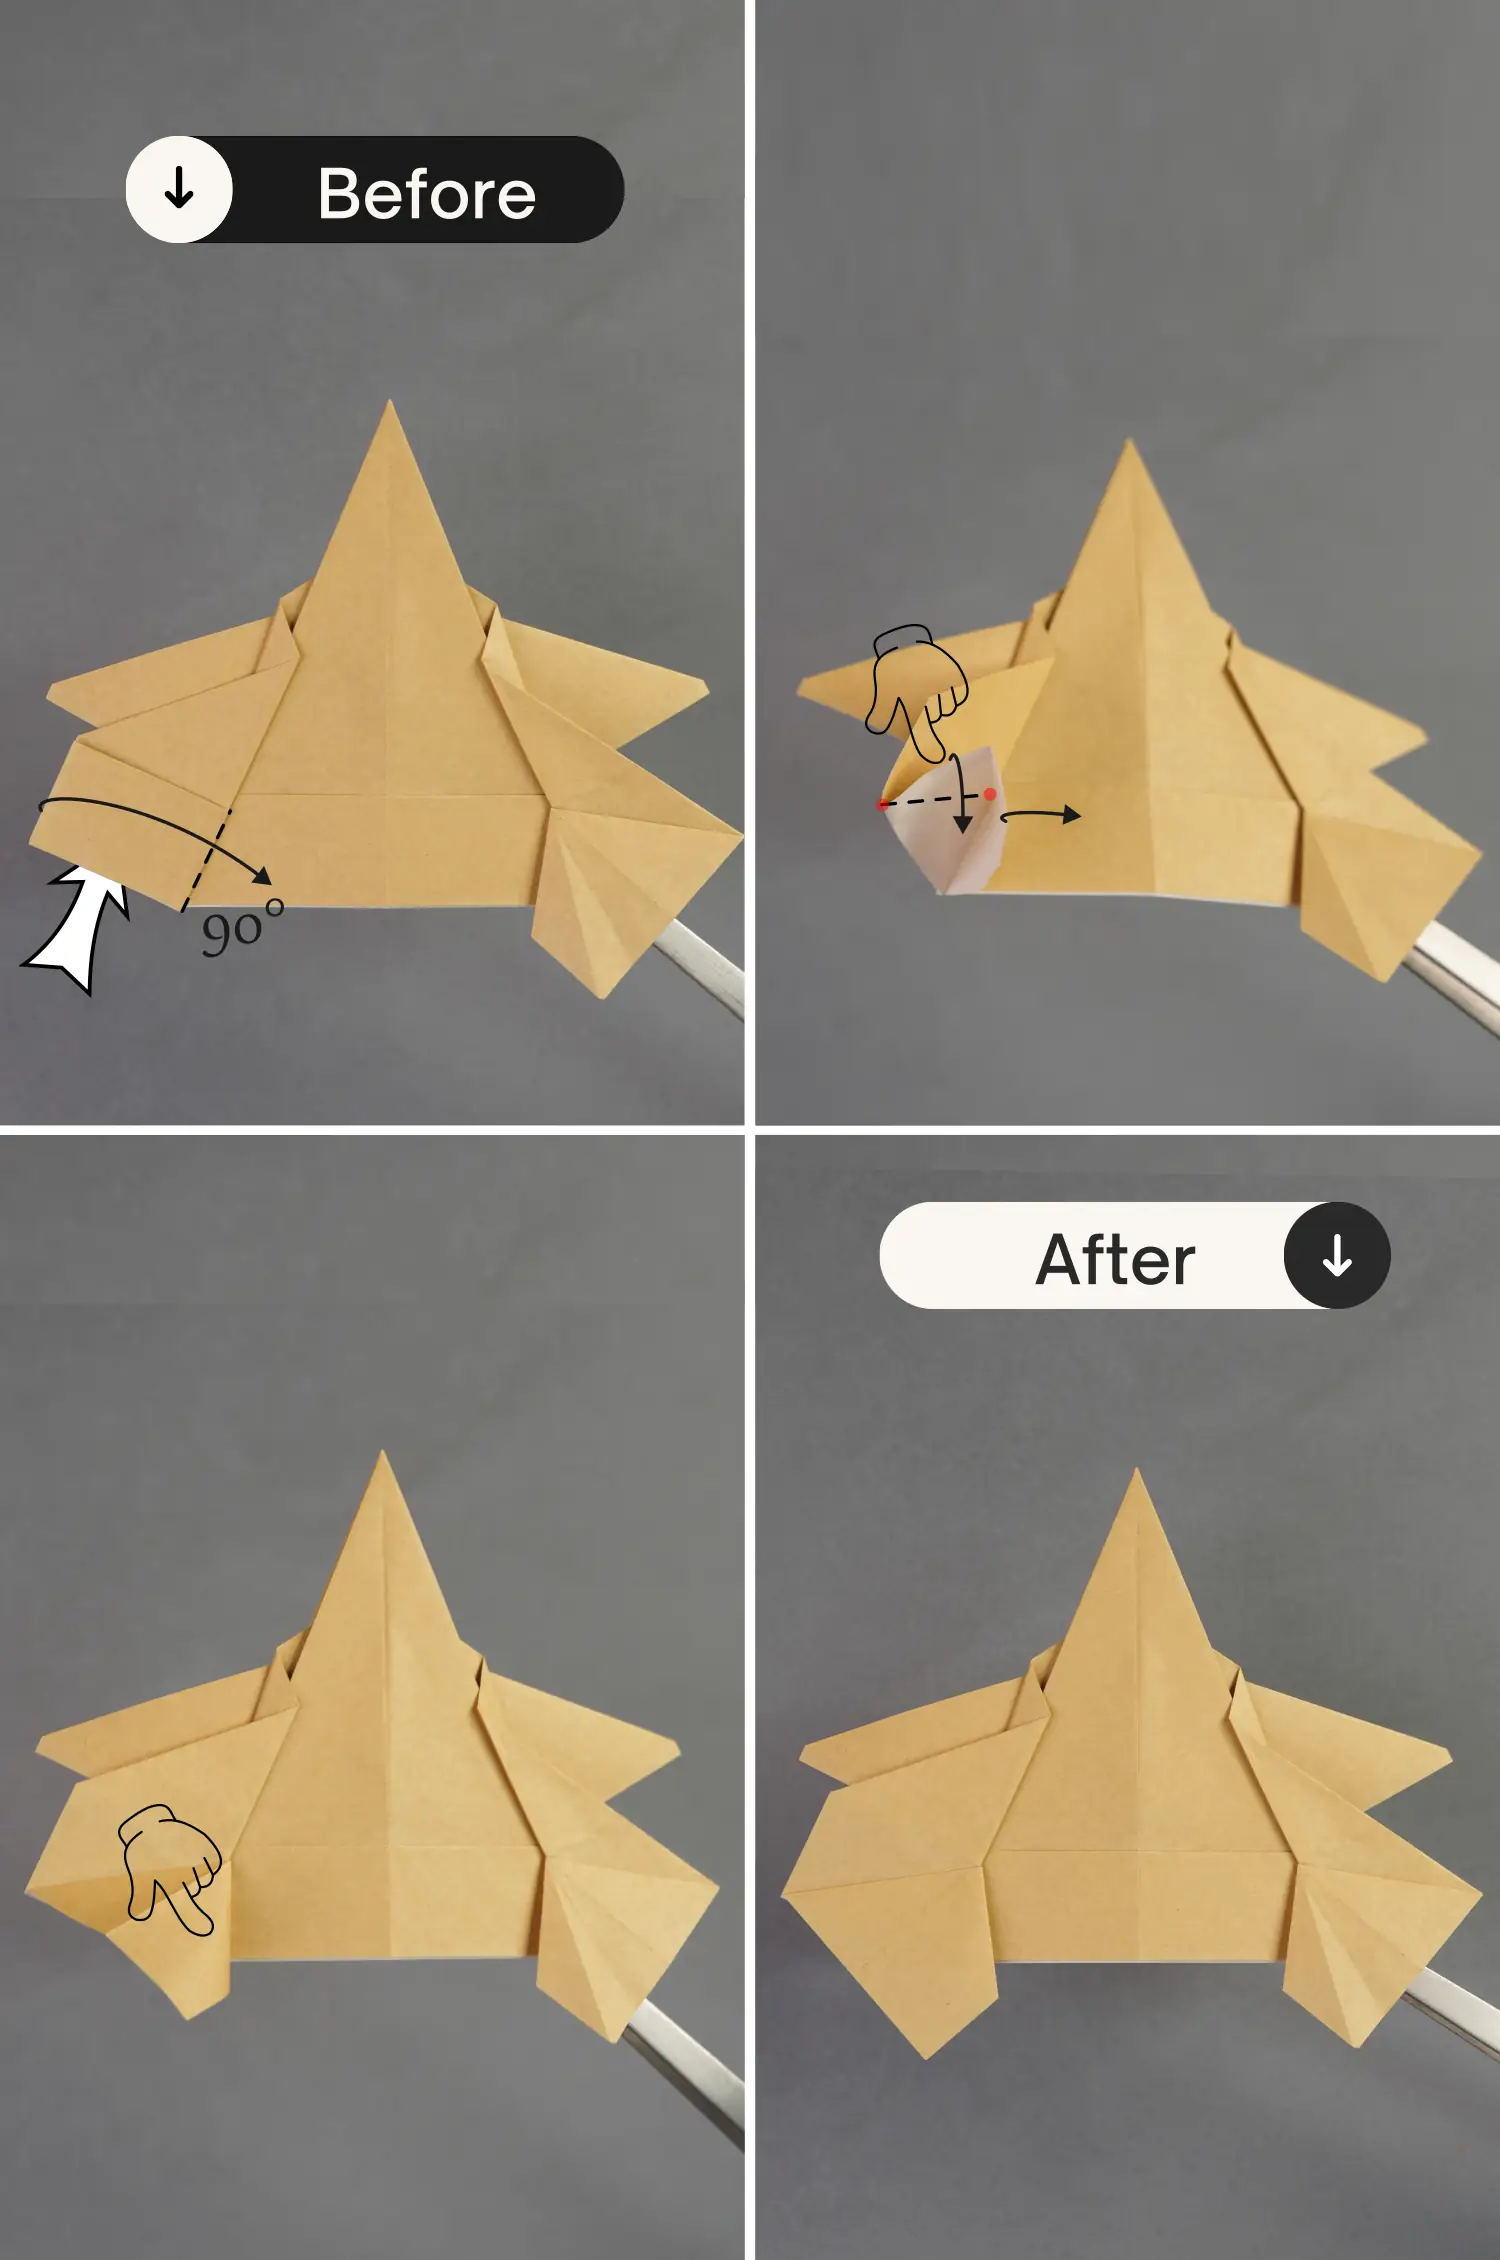
Step 22
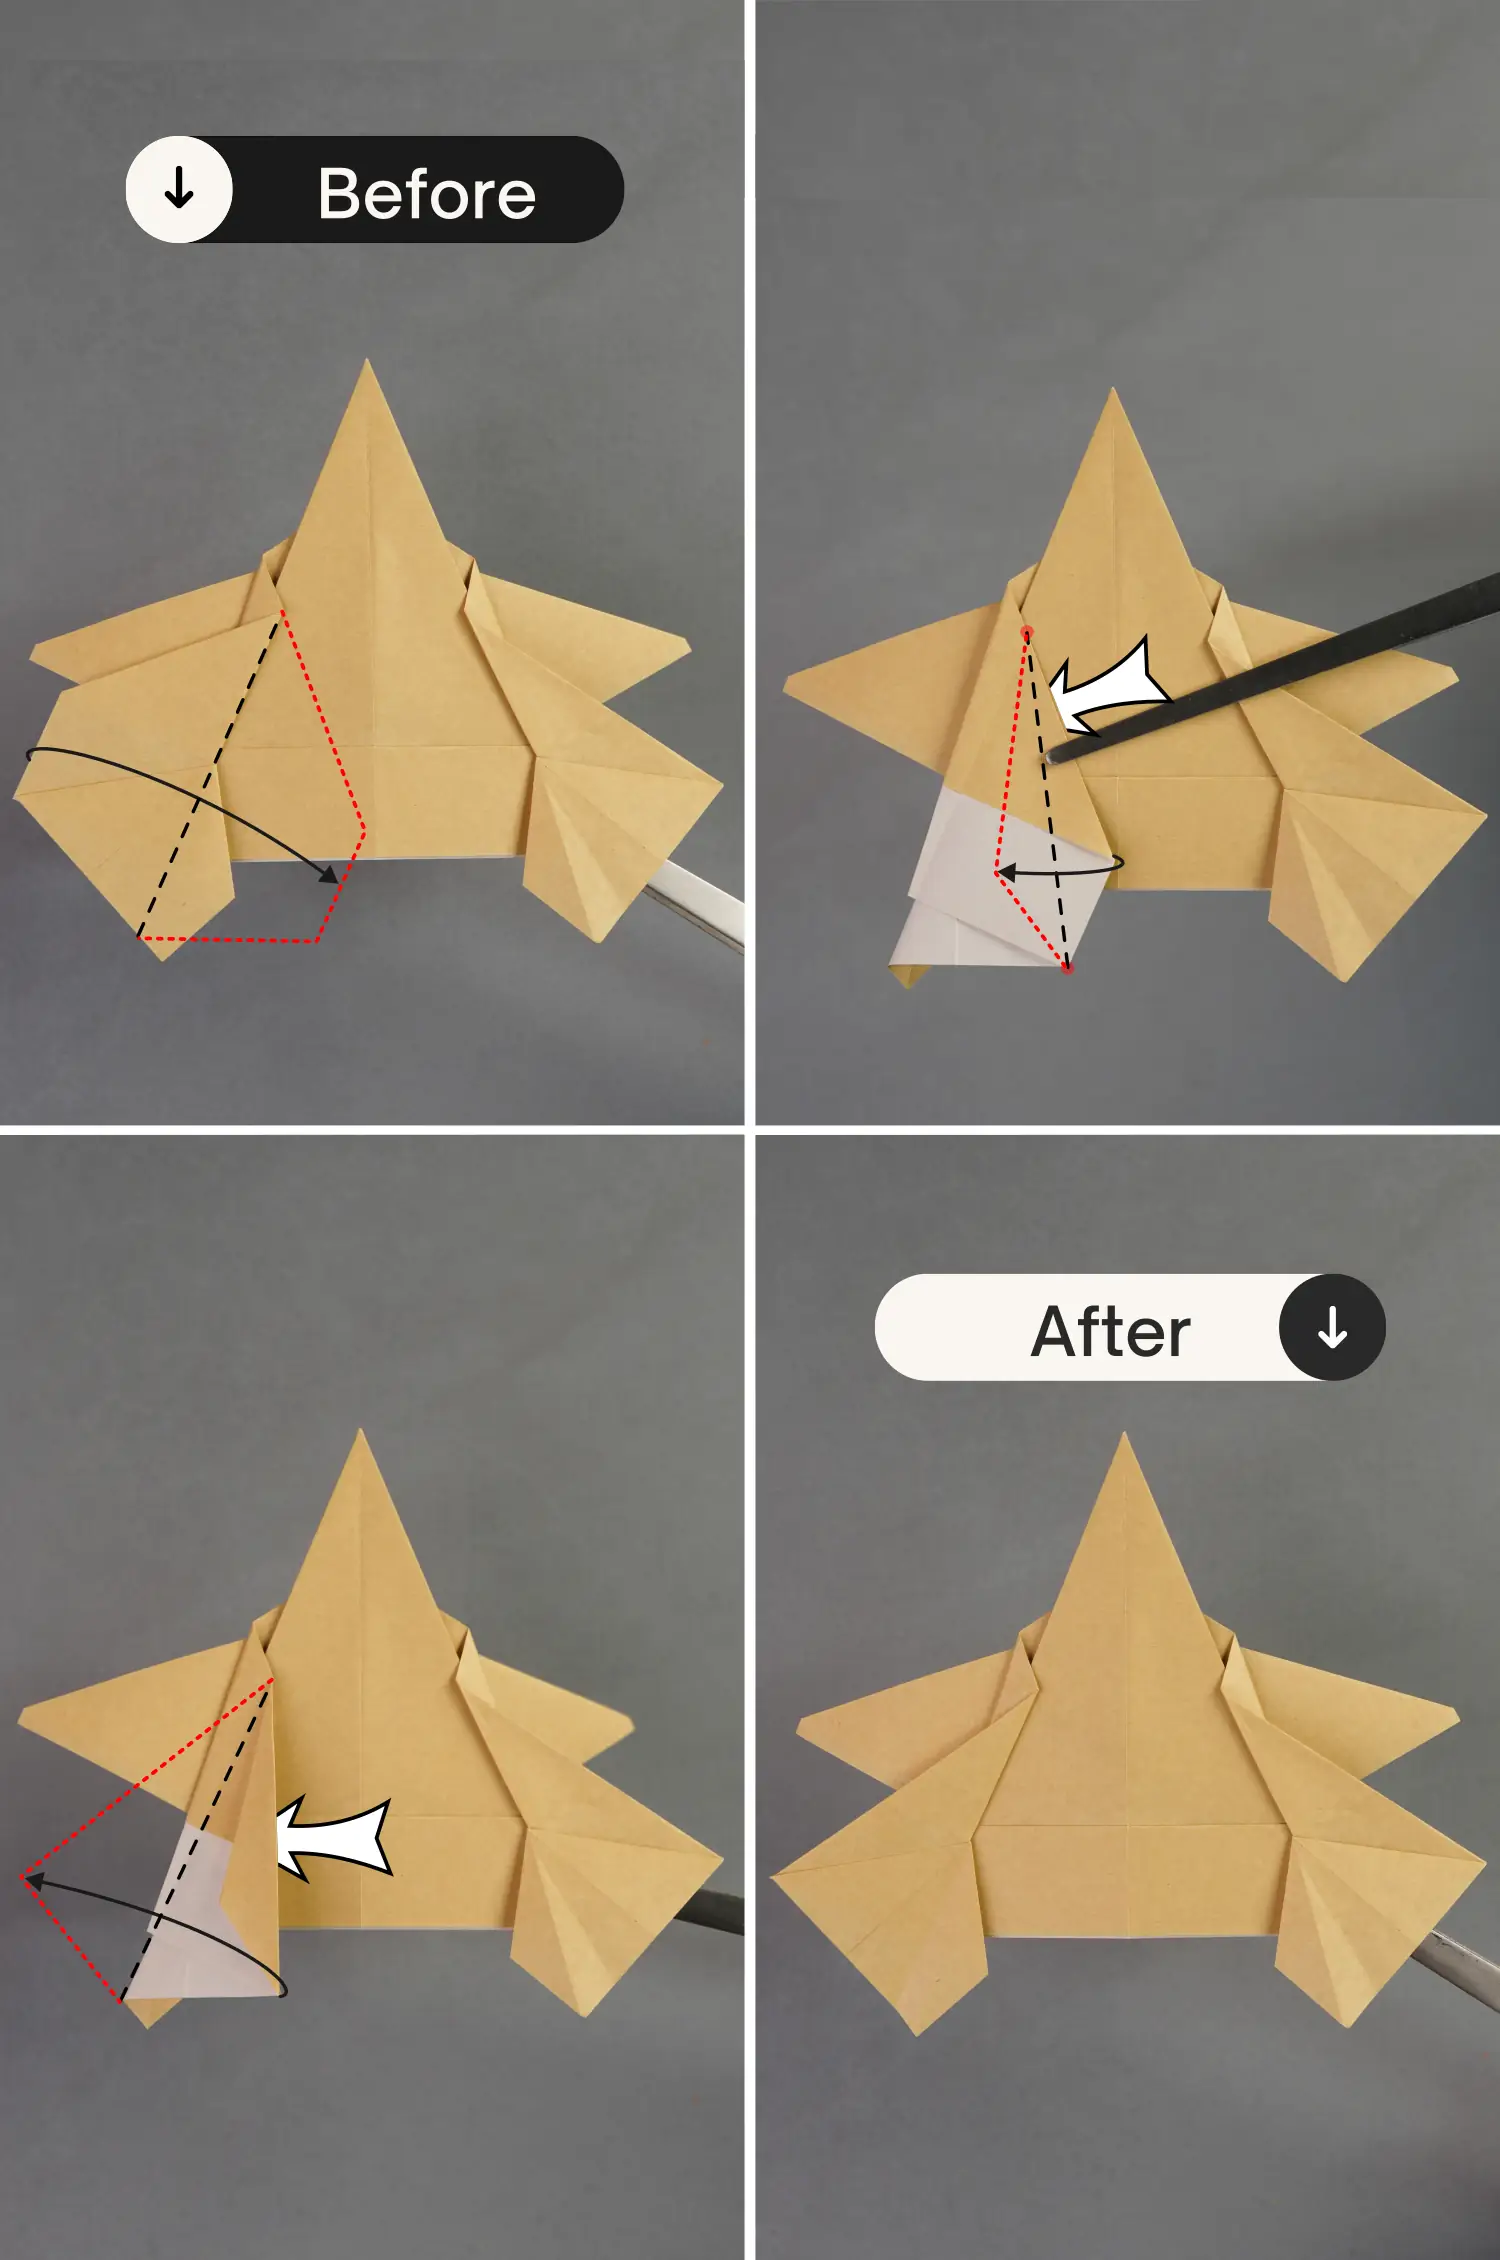
Similar to step 19.
Fold the left edge of the top layer on the left side to the right along the black dotted line [picture 1], then fold this folded layer’s right corner to the left side along the black dotted line connecting two red spots [picture 2], then, fold this layer back to the left side [picture 3].
Step 23
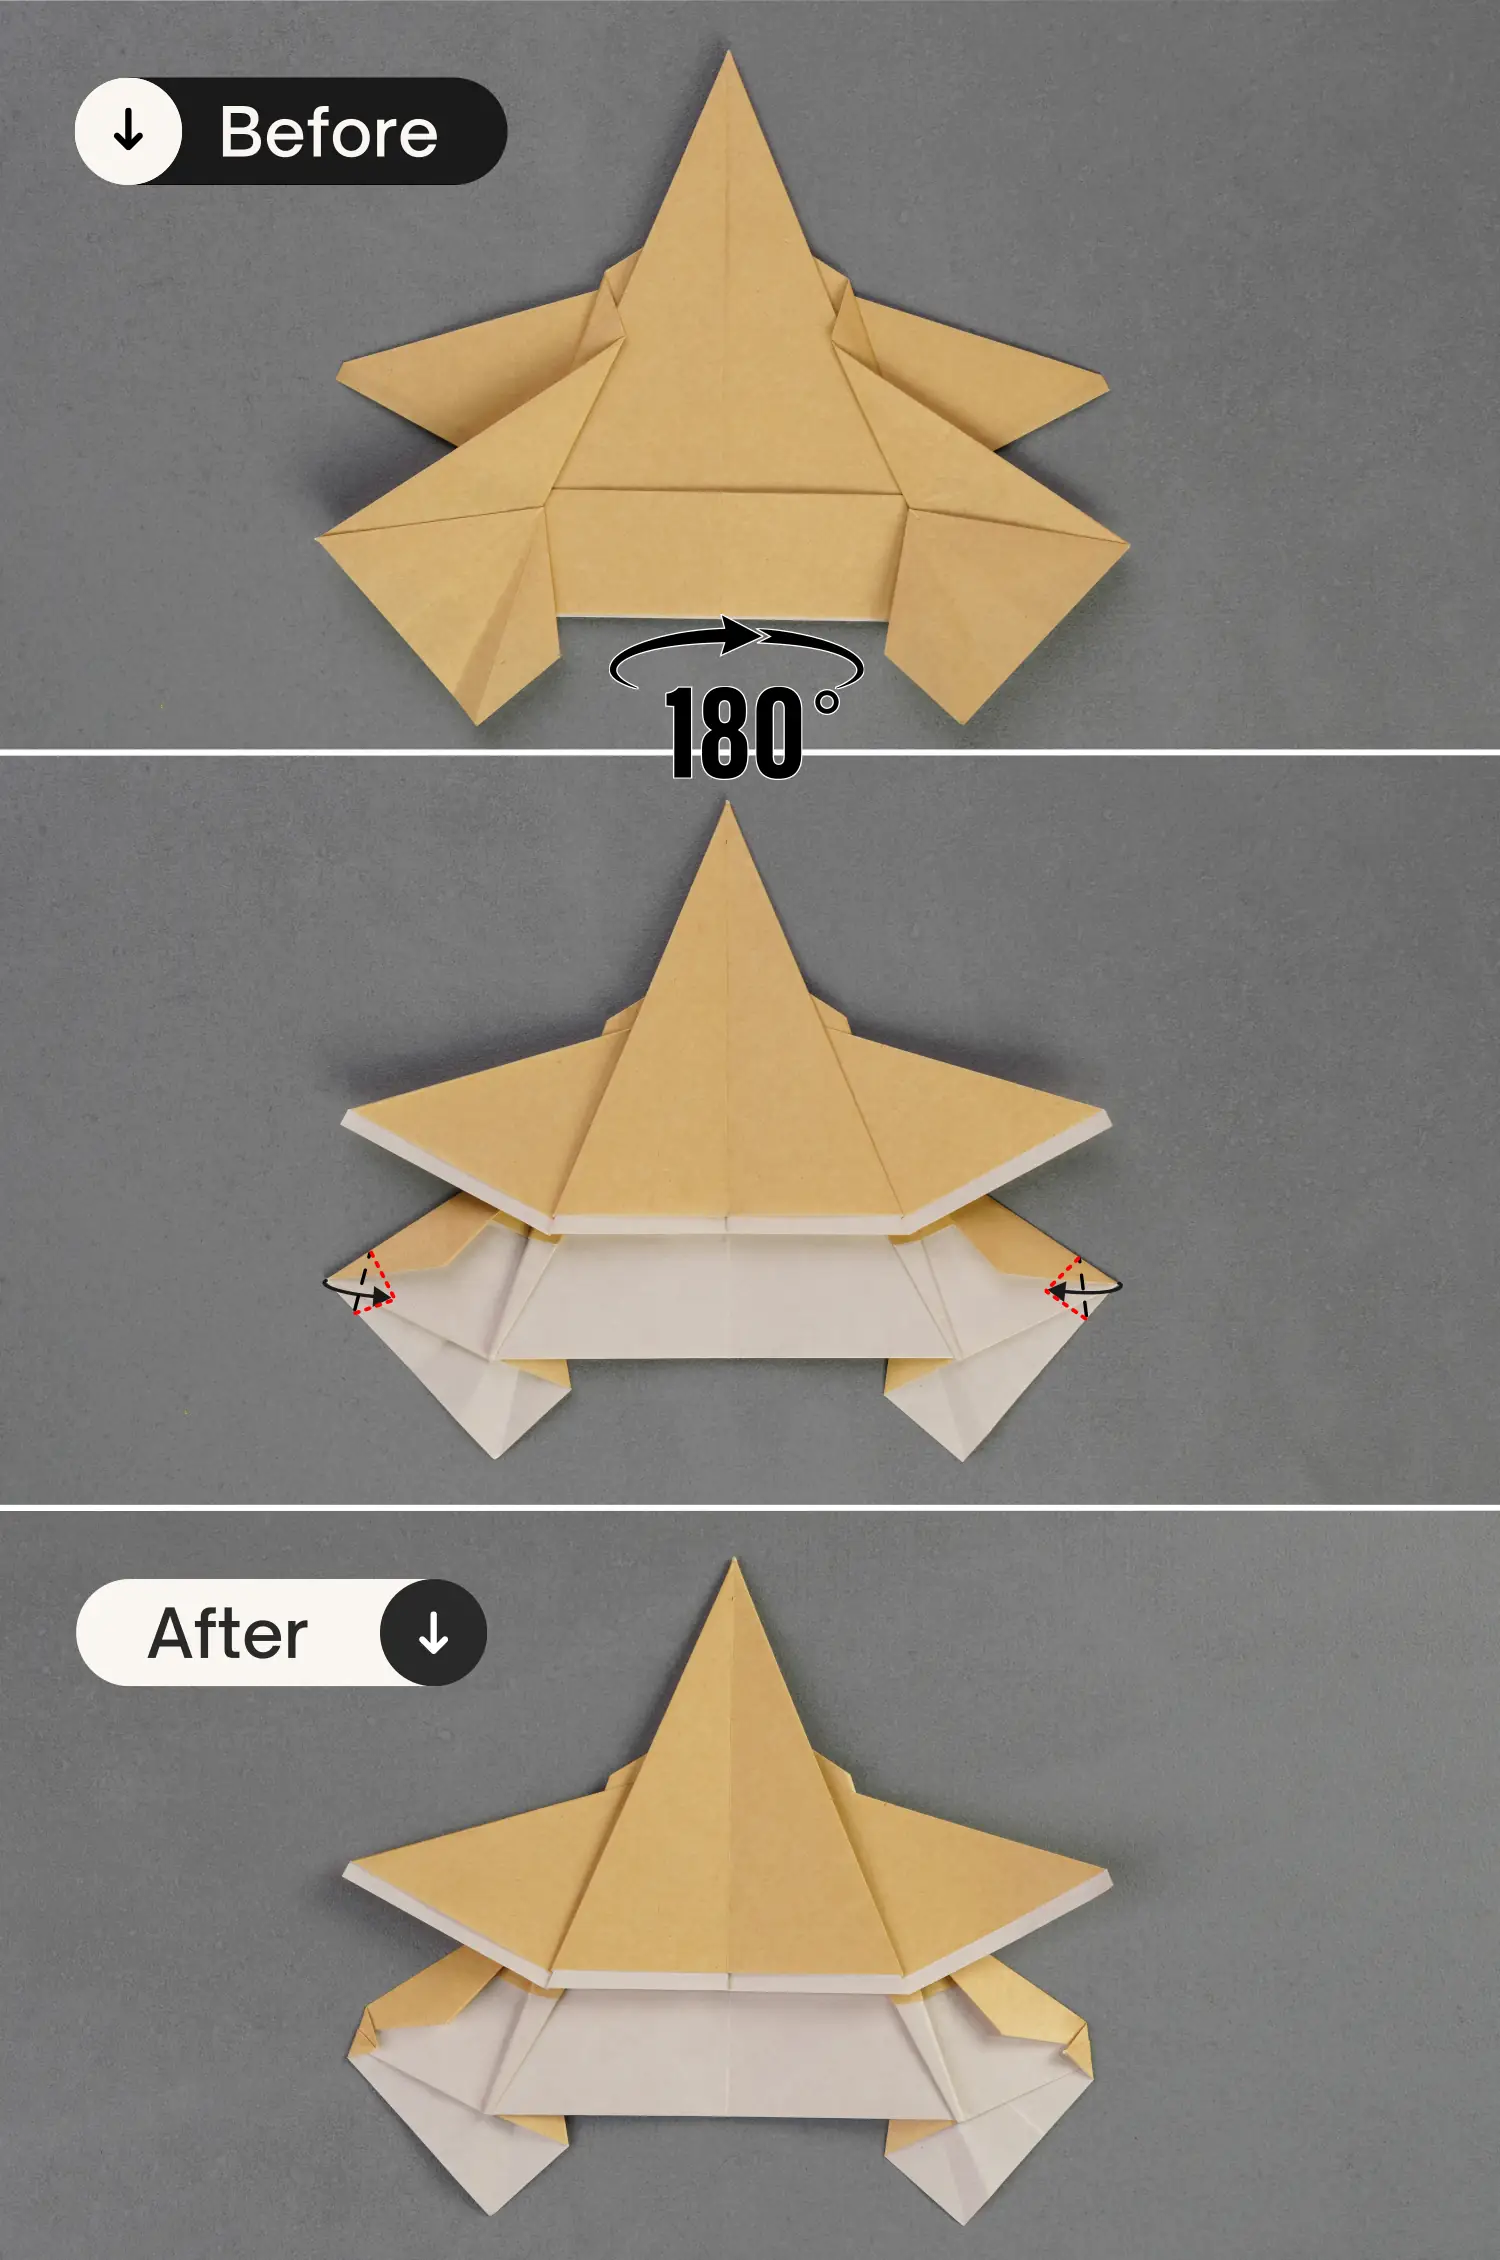
Turn the paper over from left to right, and then fold the left and right corners a little bit, as shown in second picture.
Step 24
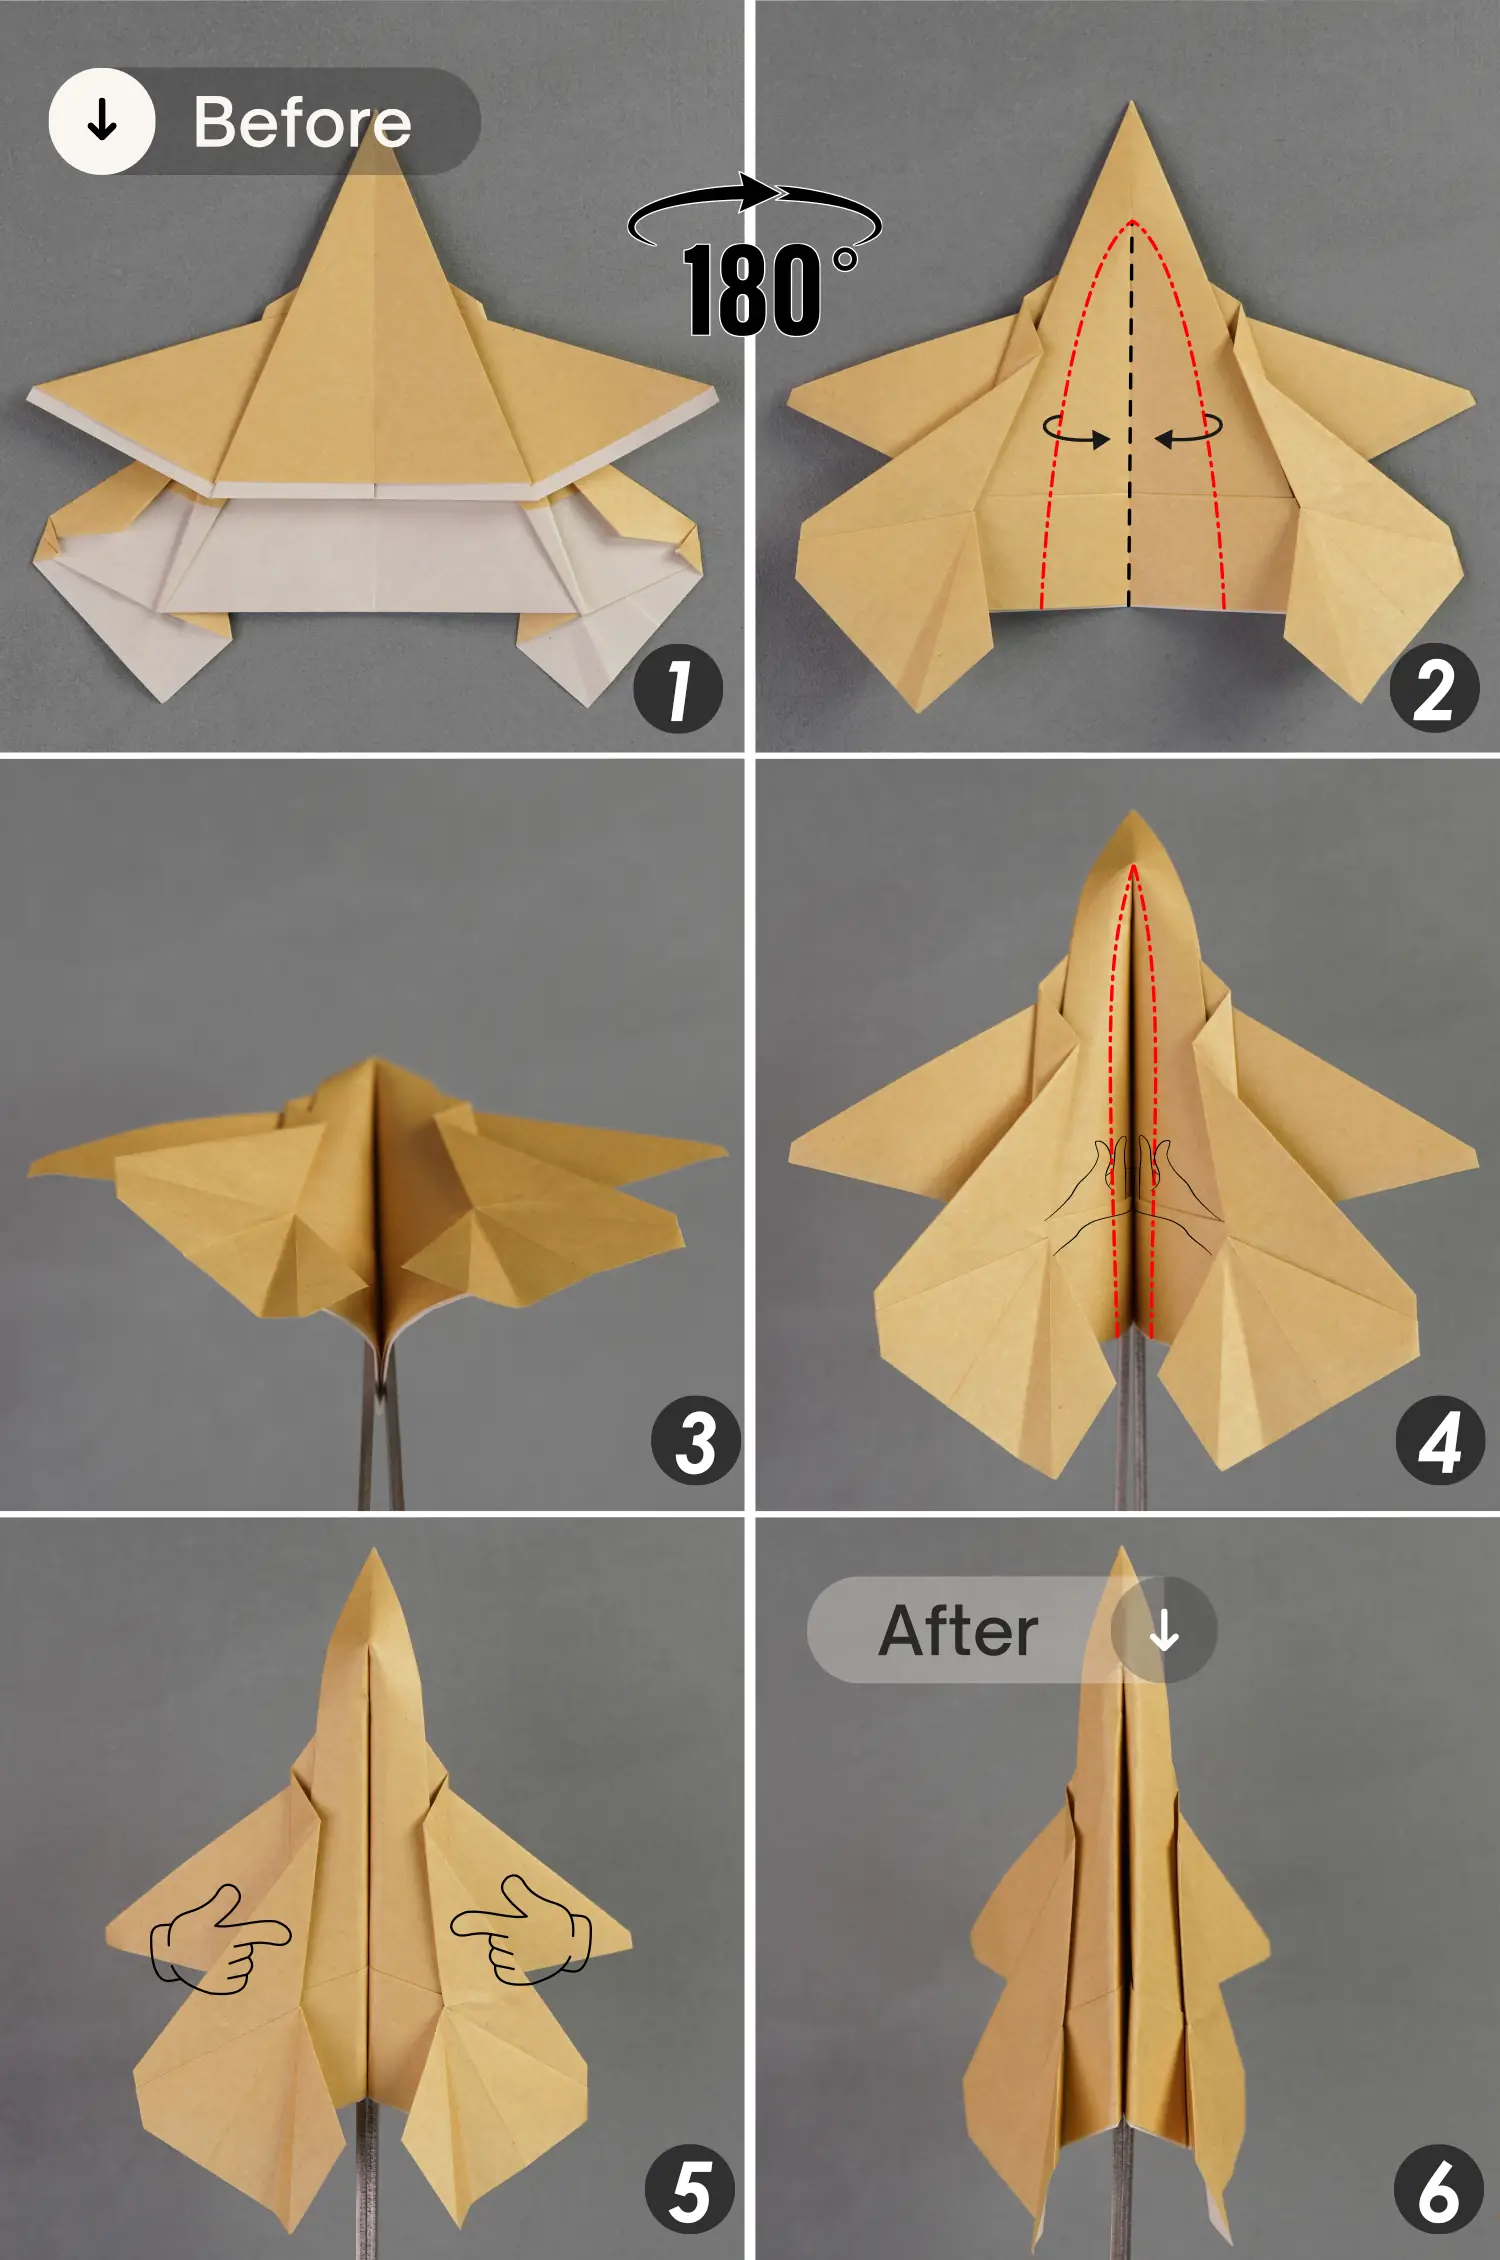
Flip the paper from left to right; valley fold the section of the vertical crease indicated by the black dotted line, and press down the left and right parts along the red dotted lines. Note that you need to push down on the top point of the paper at the same time.
Flatten the fold.
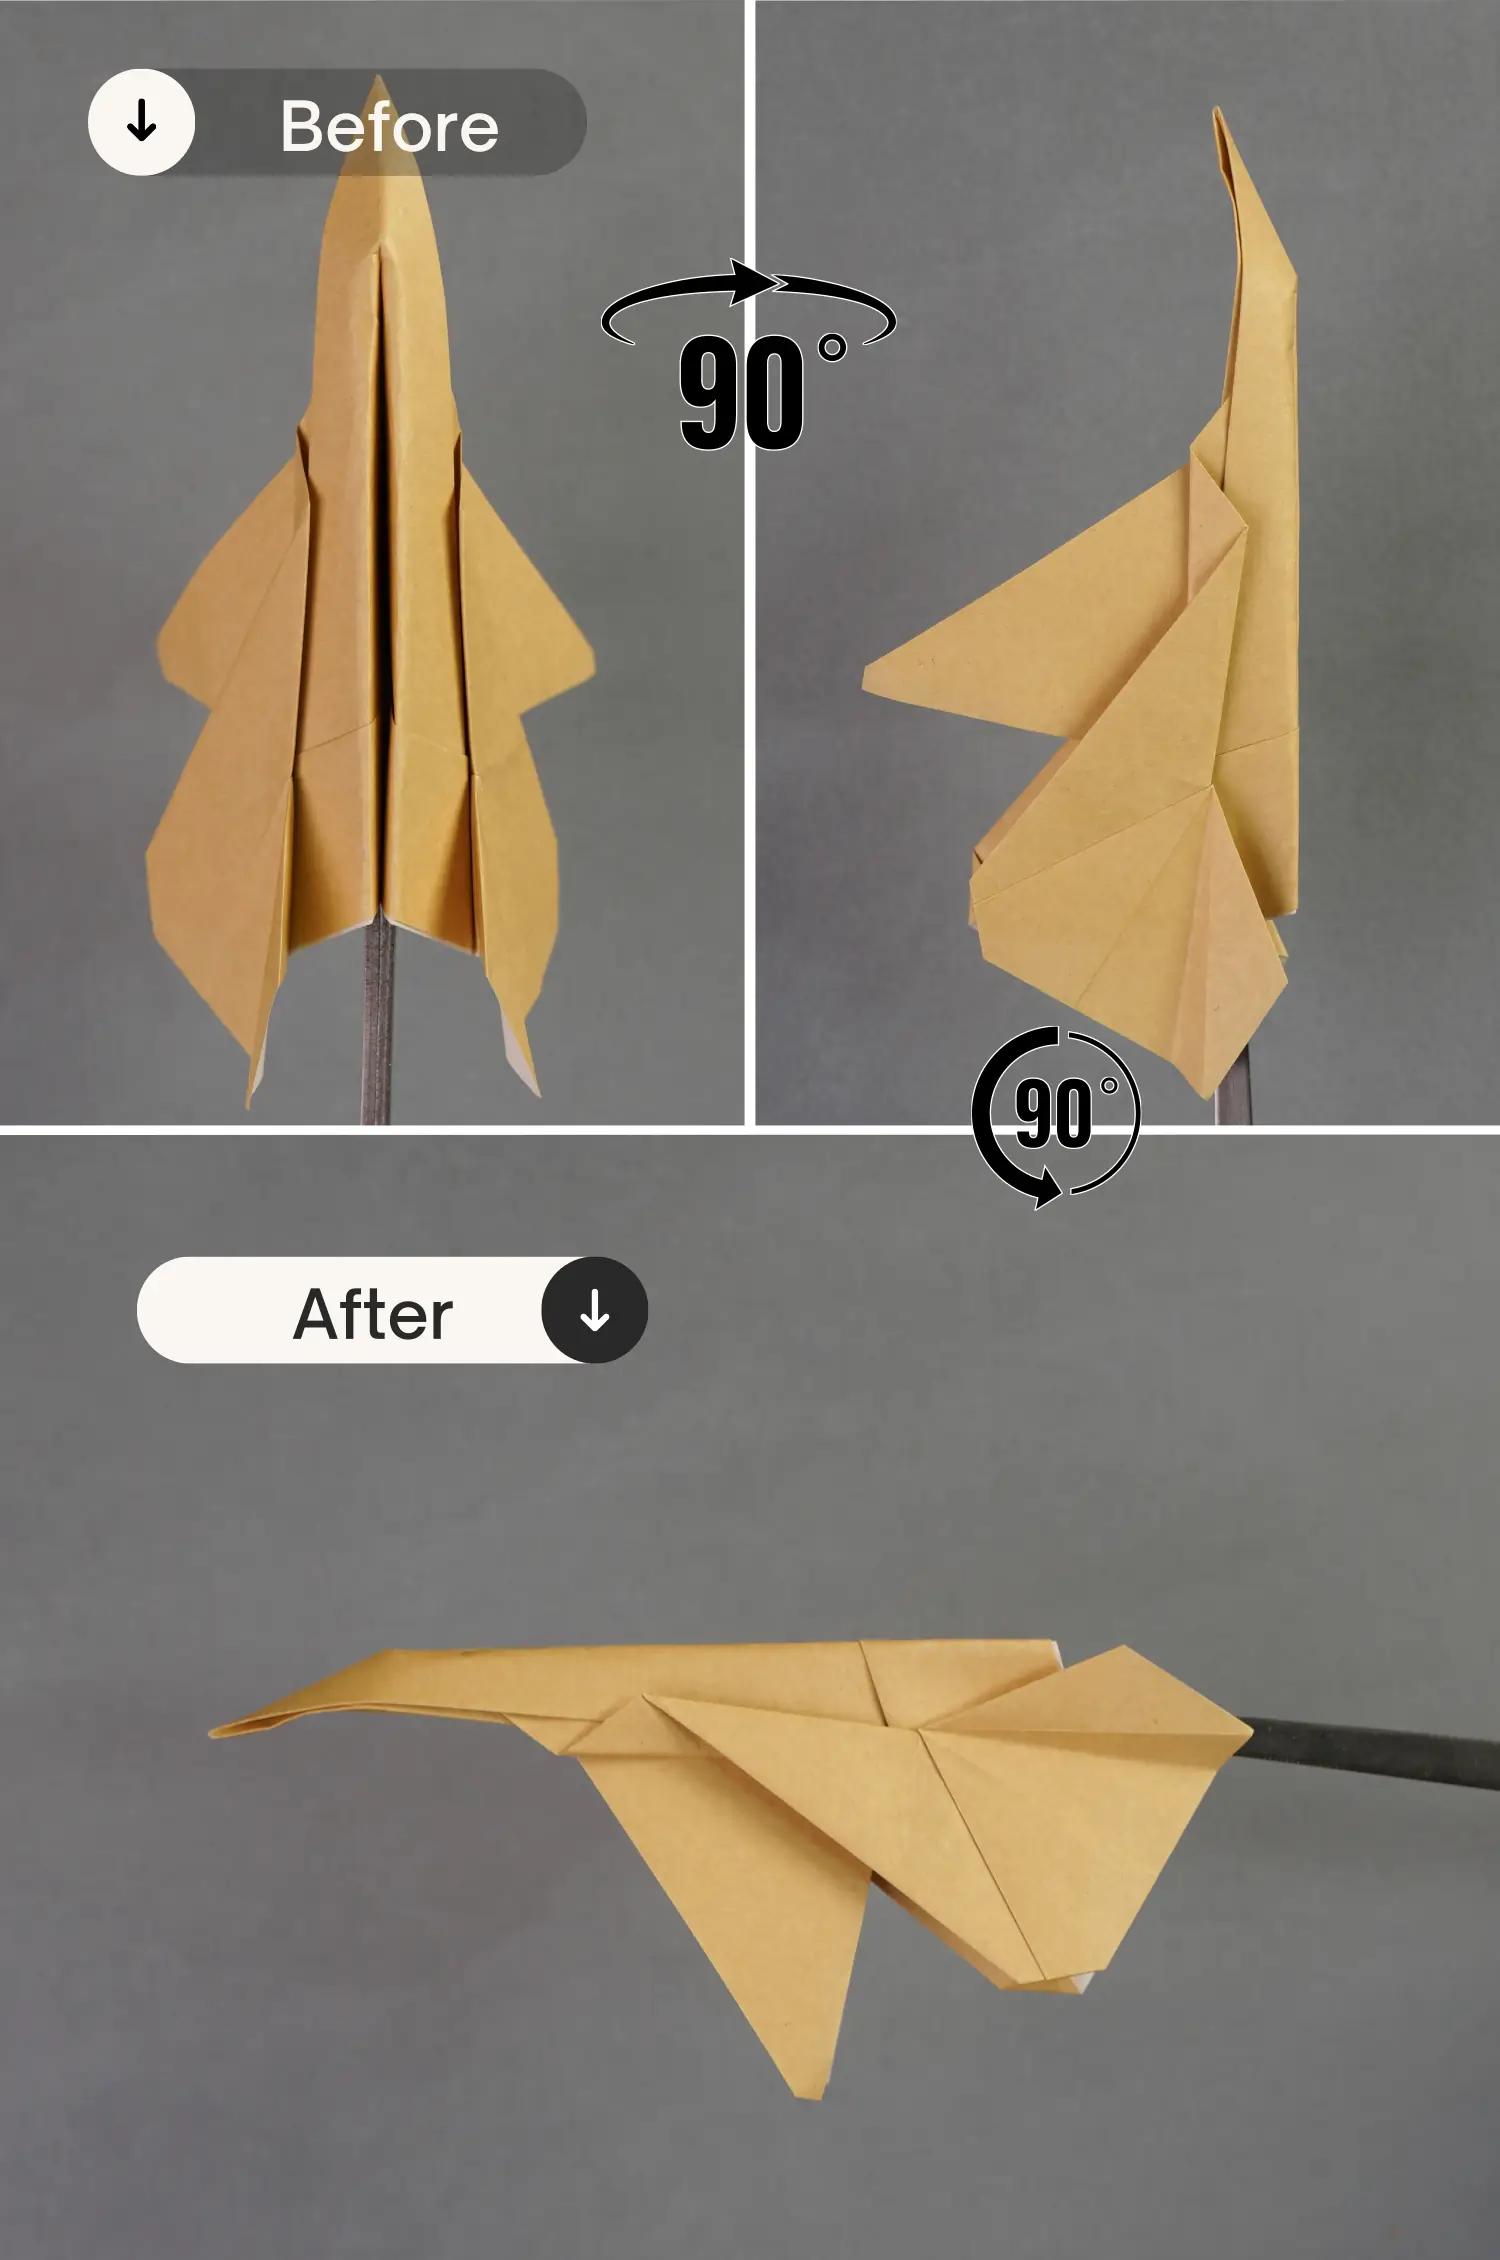
Step 25
Rotate the model 90 degrees from left to right, then another 90 degrees counterclockwise.
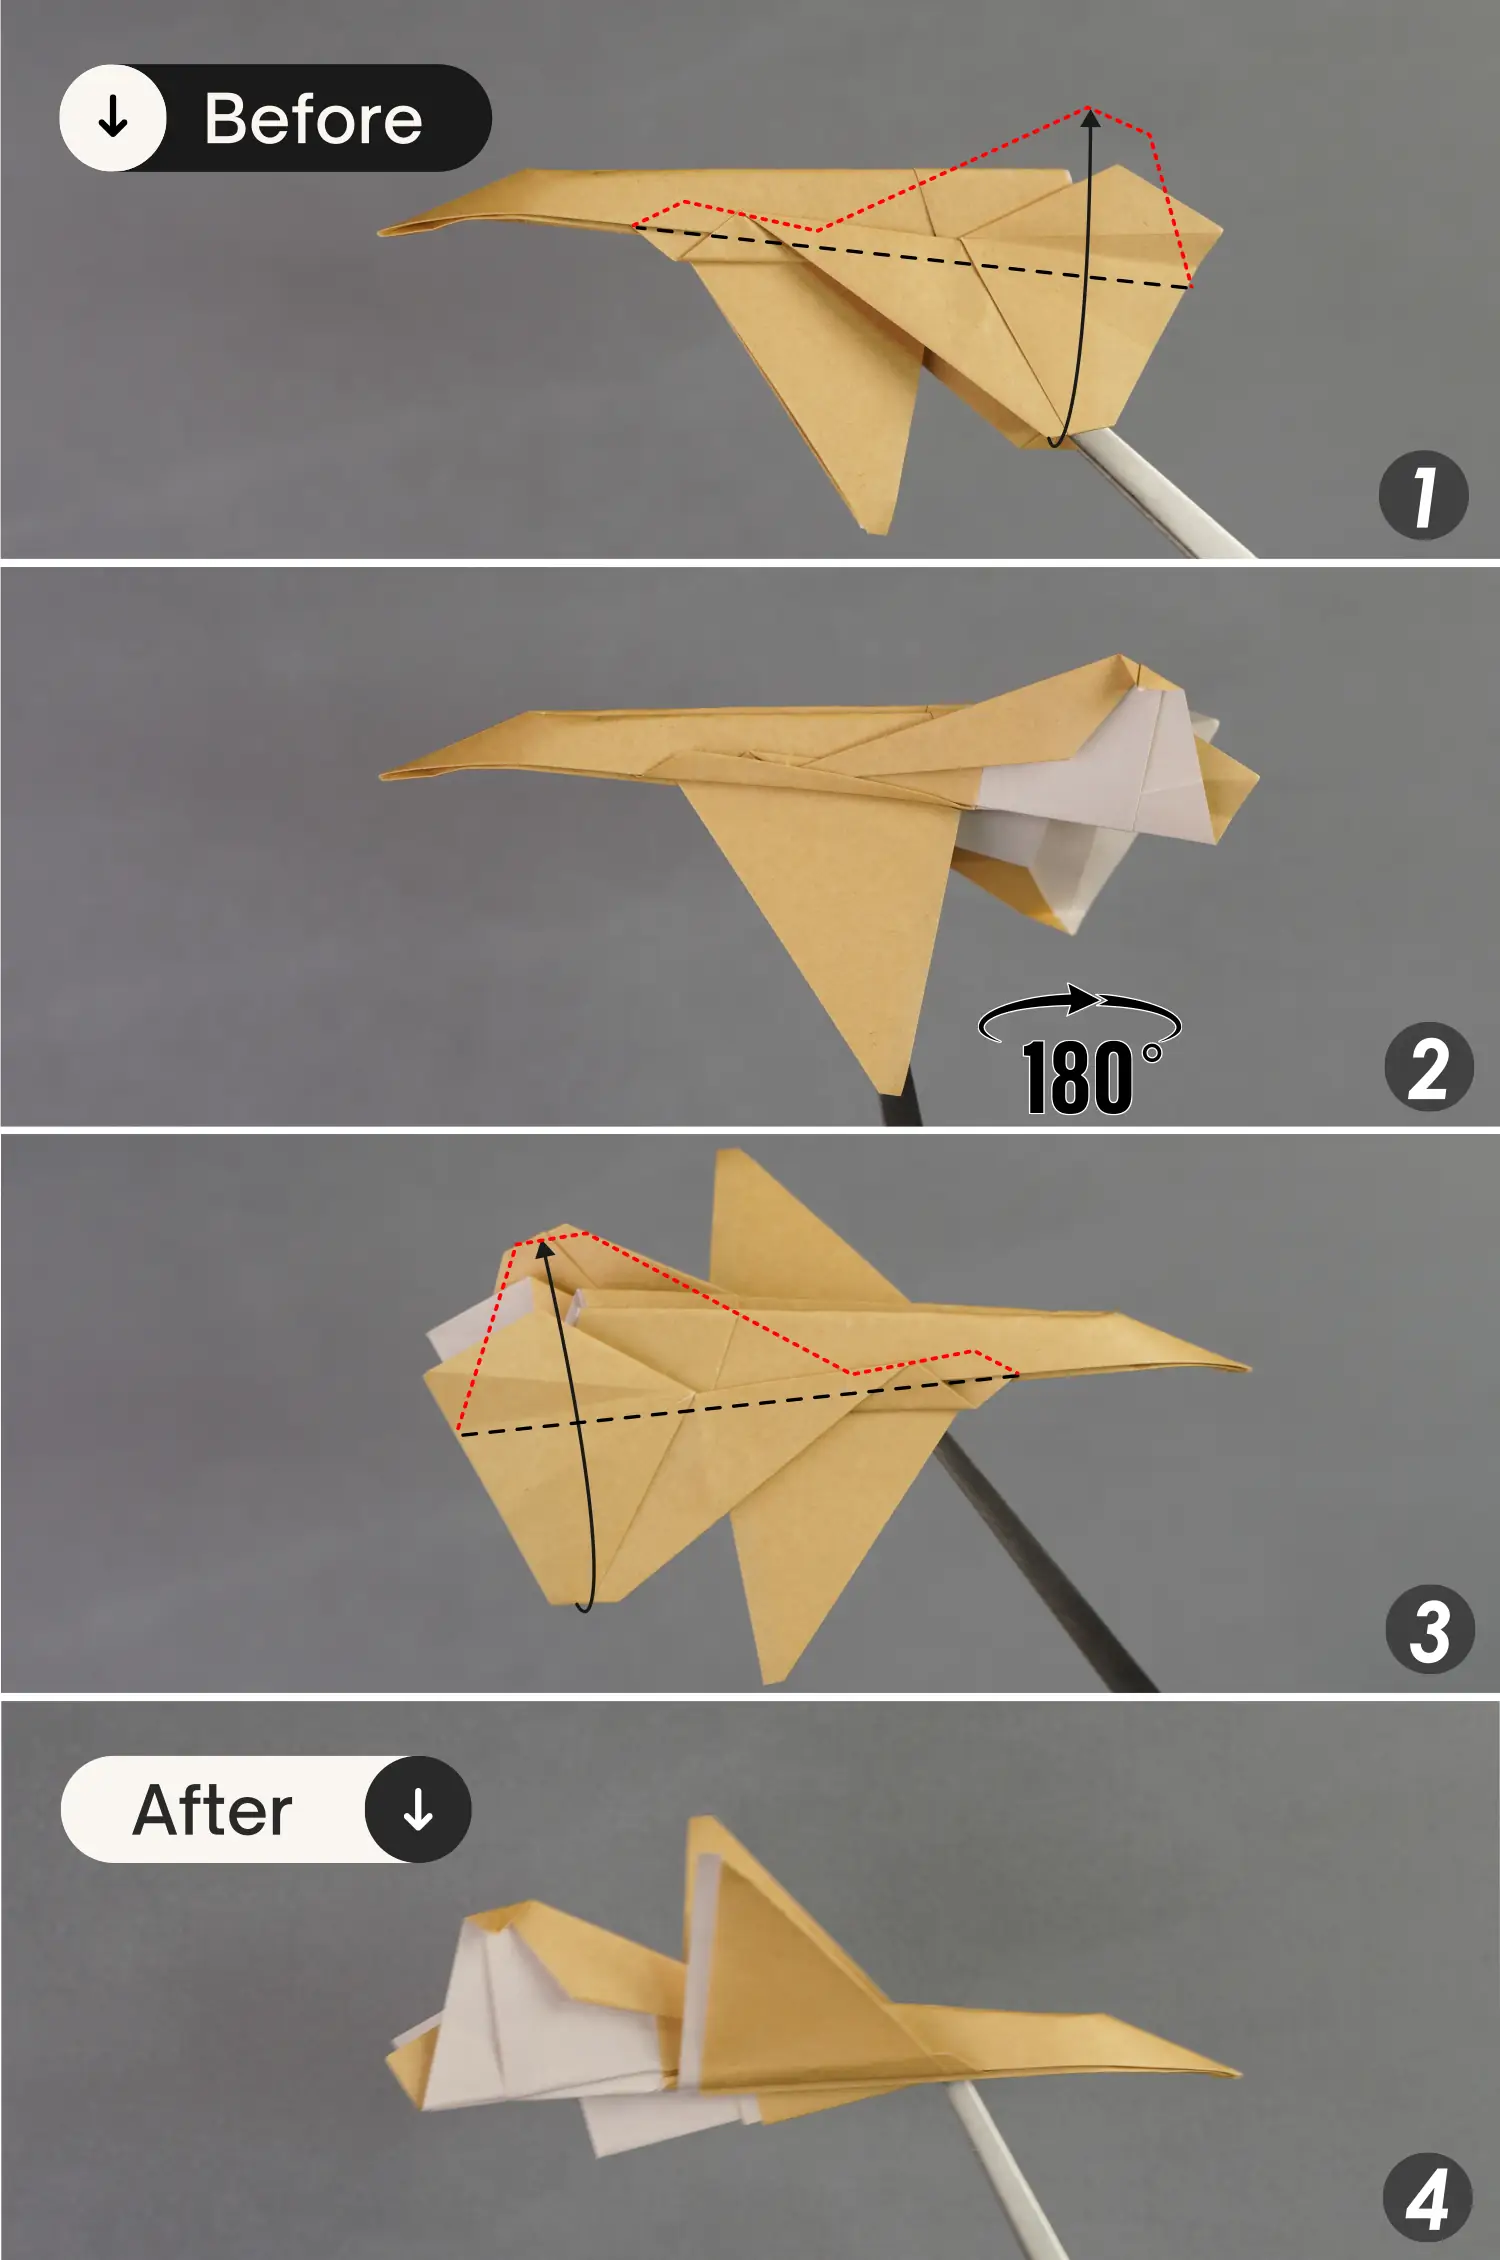
Step 26
Fold the wing along the black dotted line, then turn the model over from left to right, and fold the wing on the other side.
Step 27
Slightly lift the wing on this side to reveal the middle layer, fold the lower left corner of this layer along the black dotted line, leaving a crease, and then unfold it.
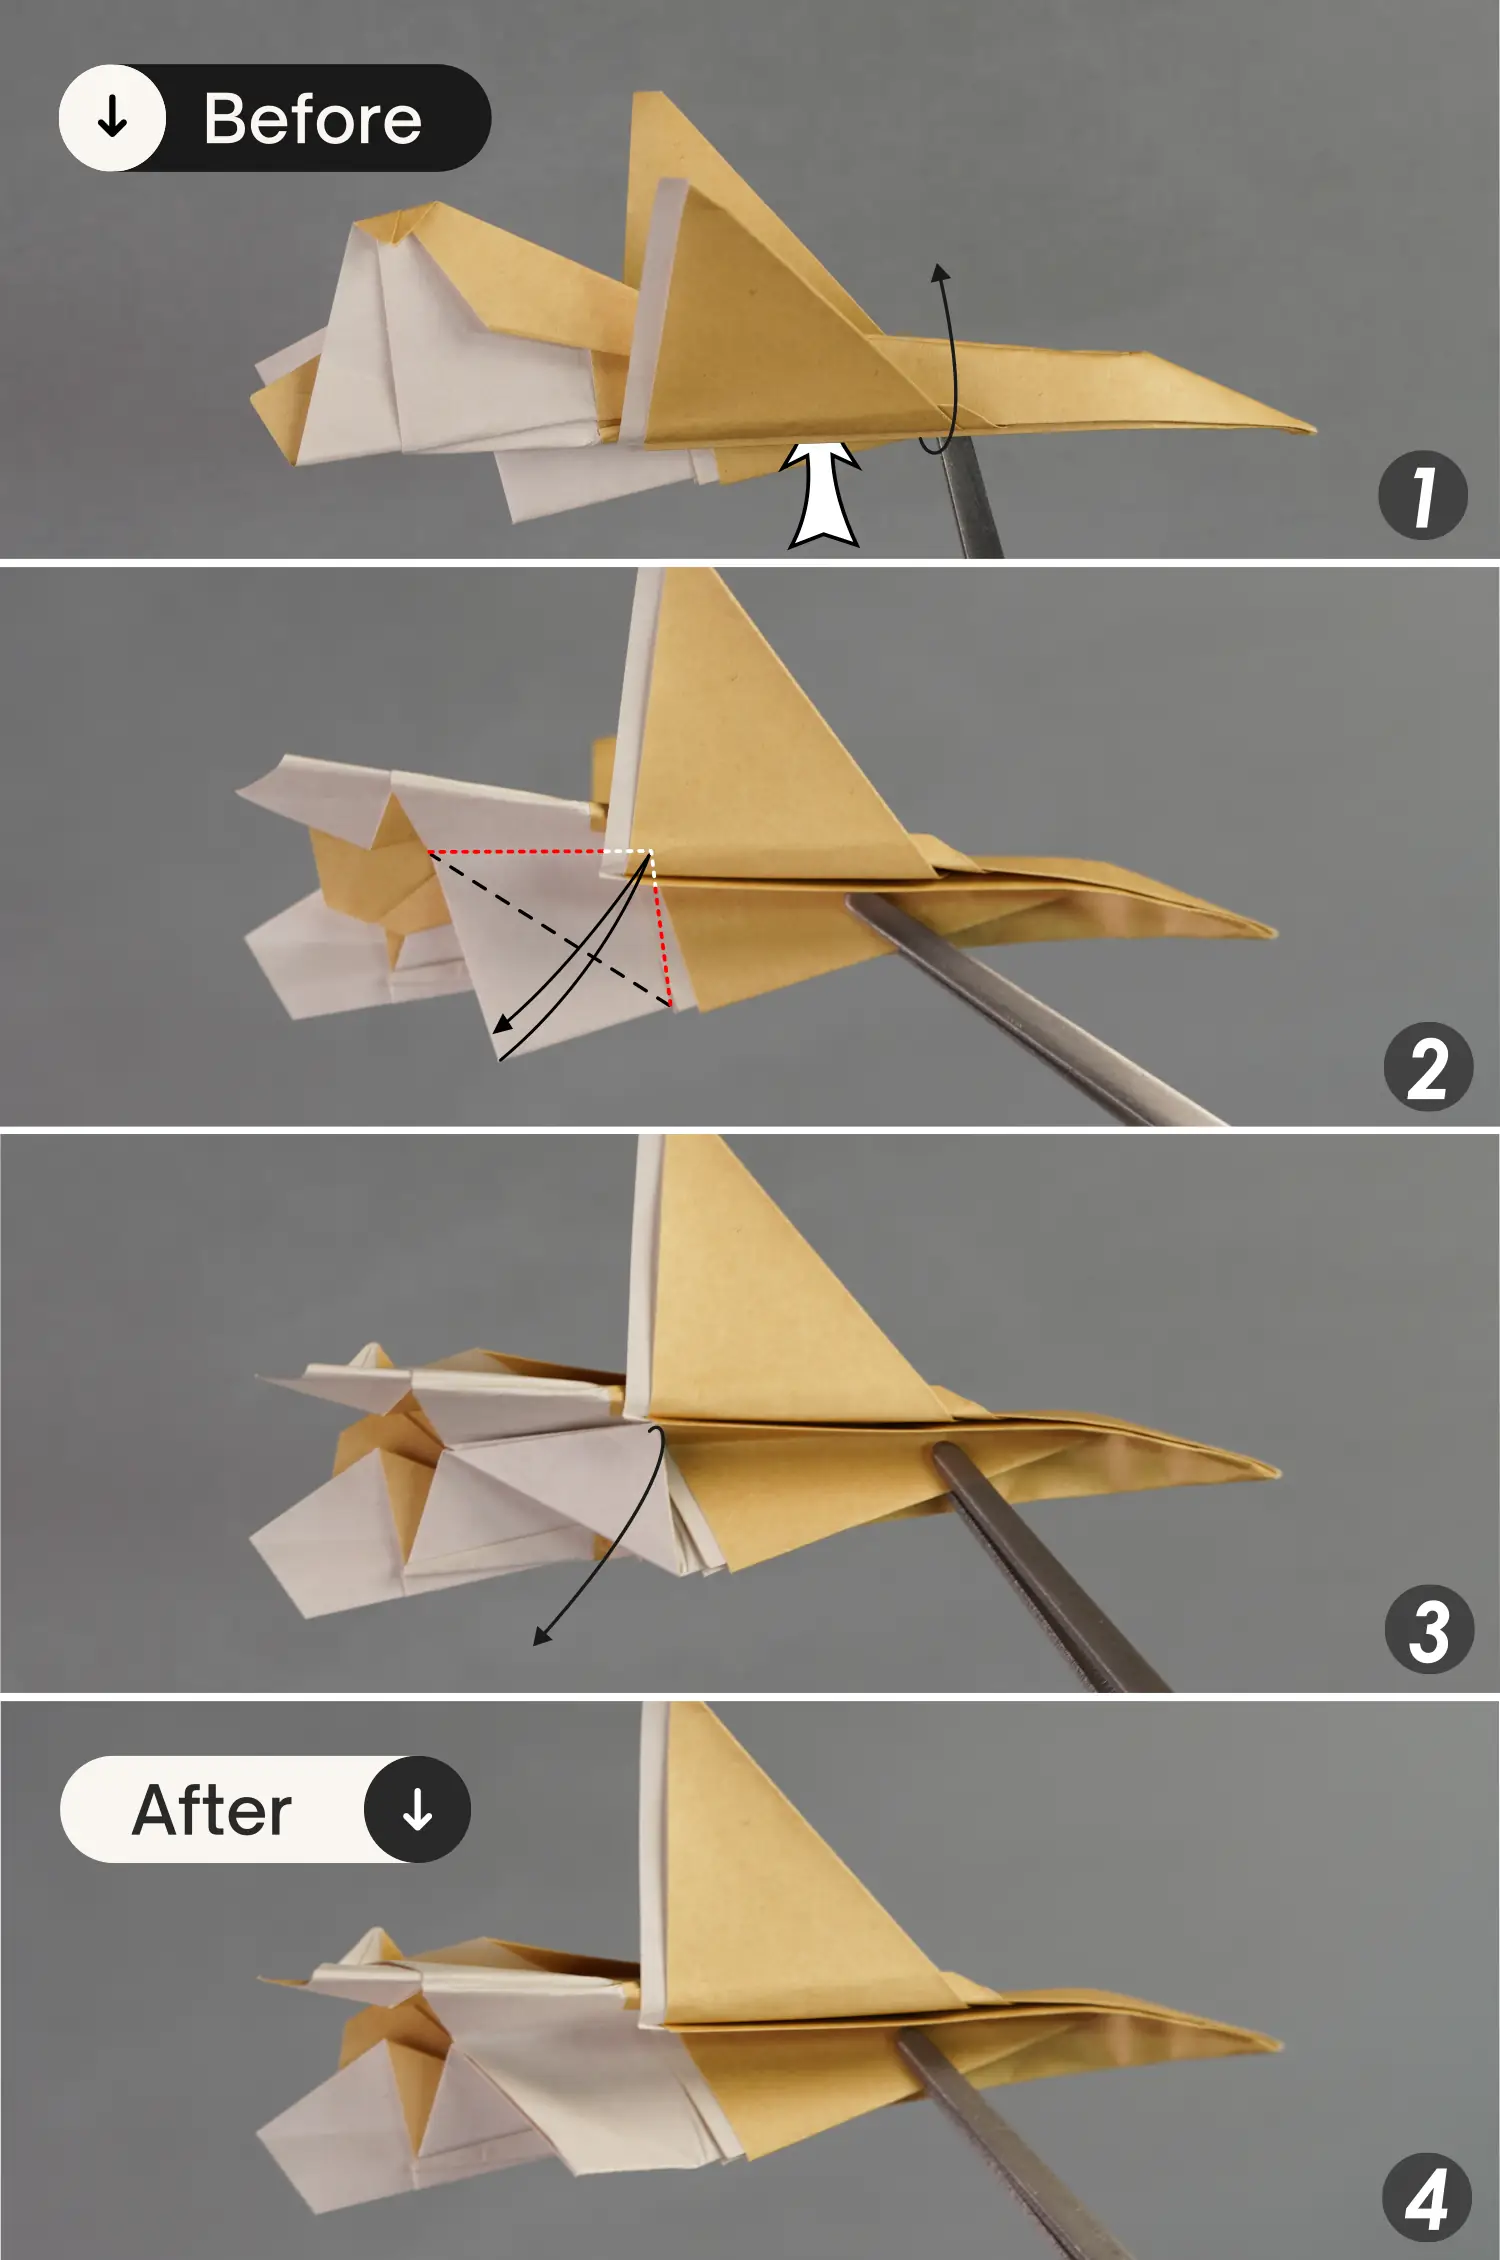
Step 28
Gently unfold the wing, then fold the lower left corner of the middle layer as in the previous step, and then restore the fold of the wing so that the lower left corner is sandwiched between the fuselage and the wing.
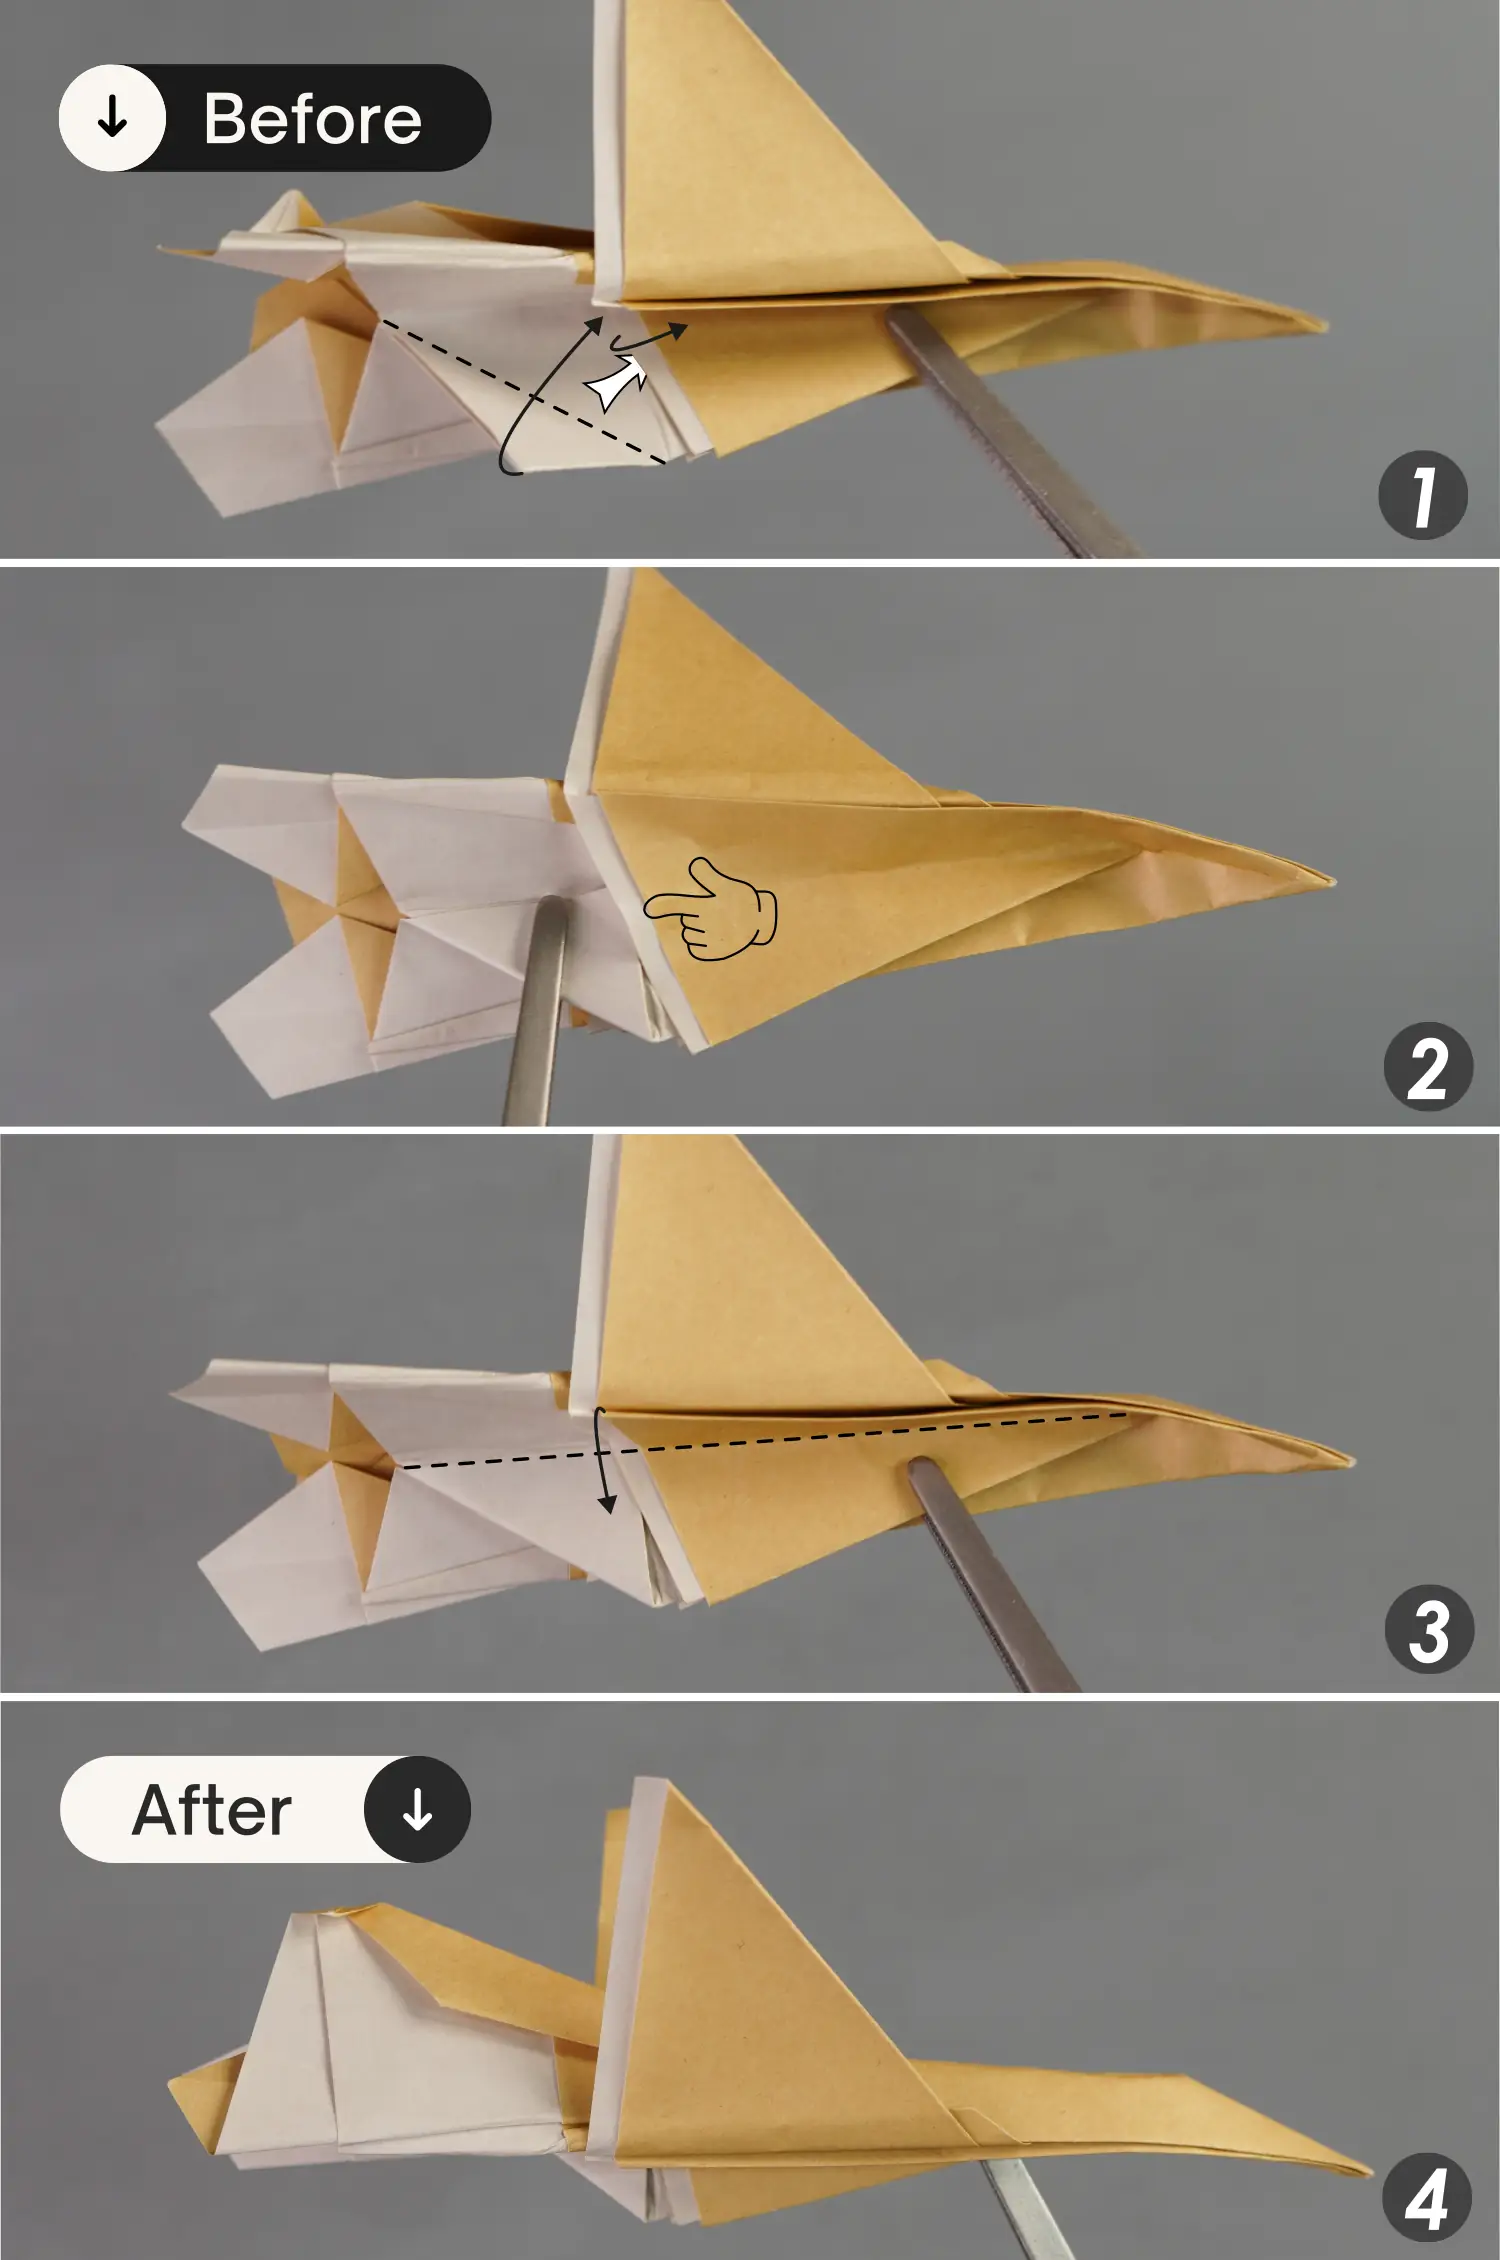
Step 29
Rotate the model 90 degrees from front to back, and then flatten the tail fins.
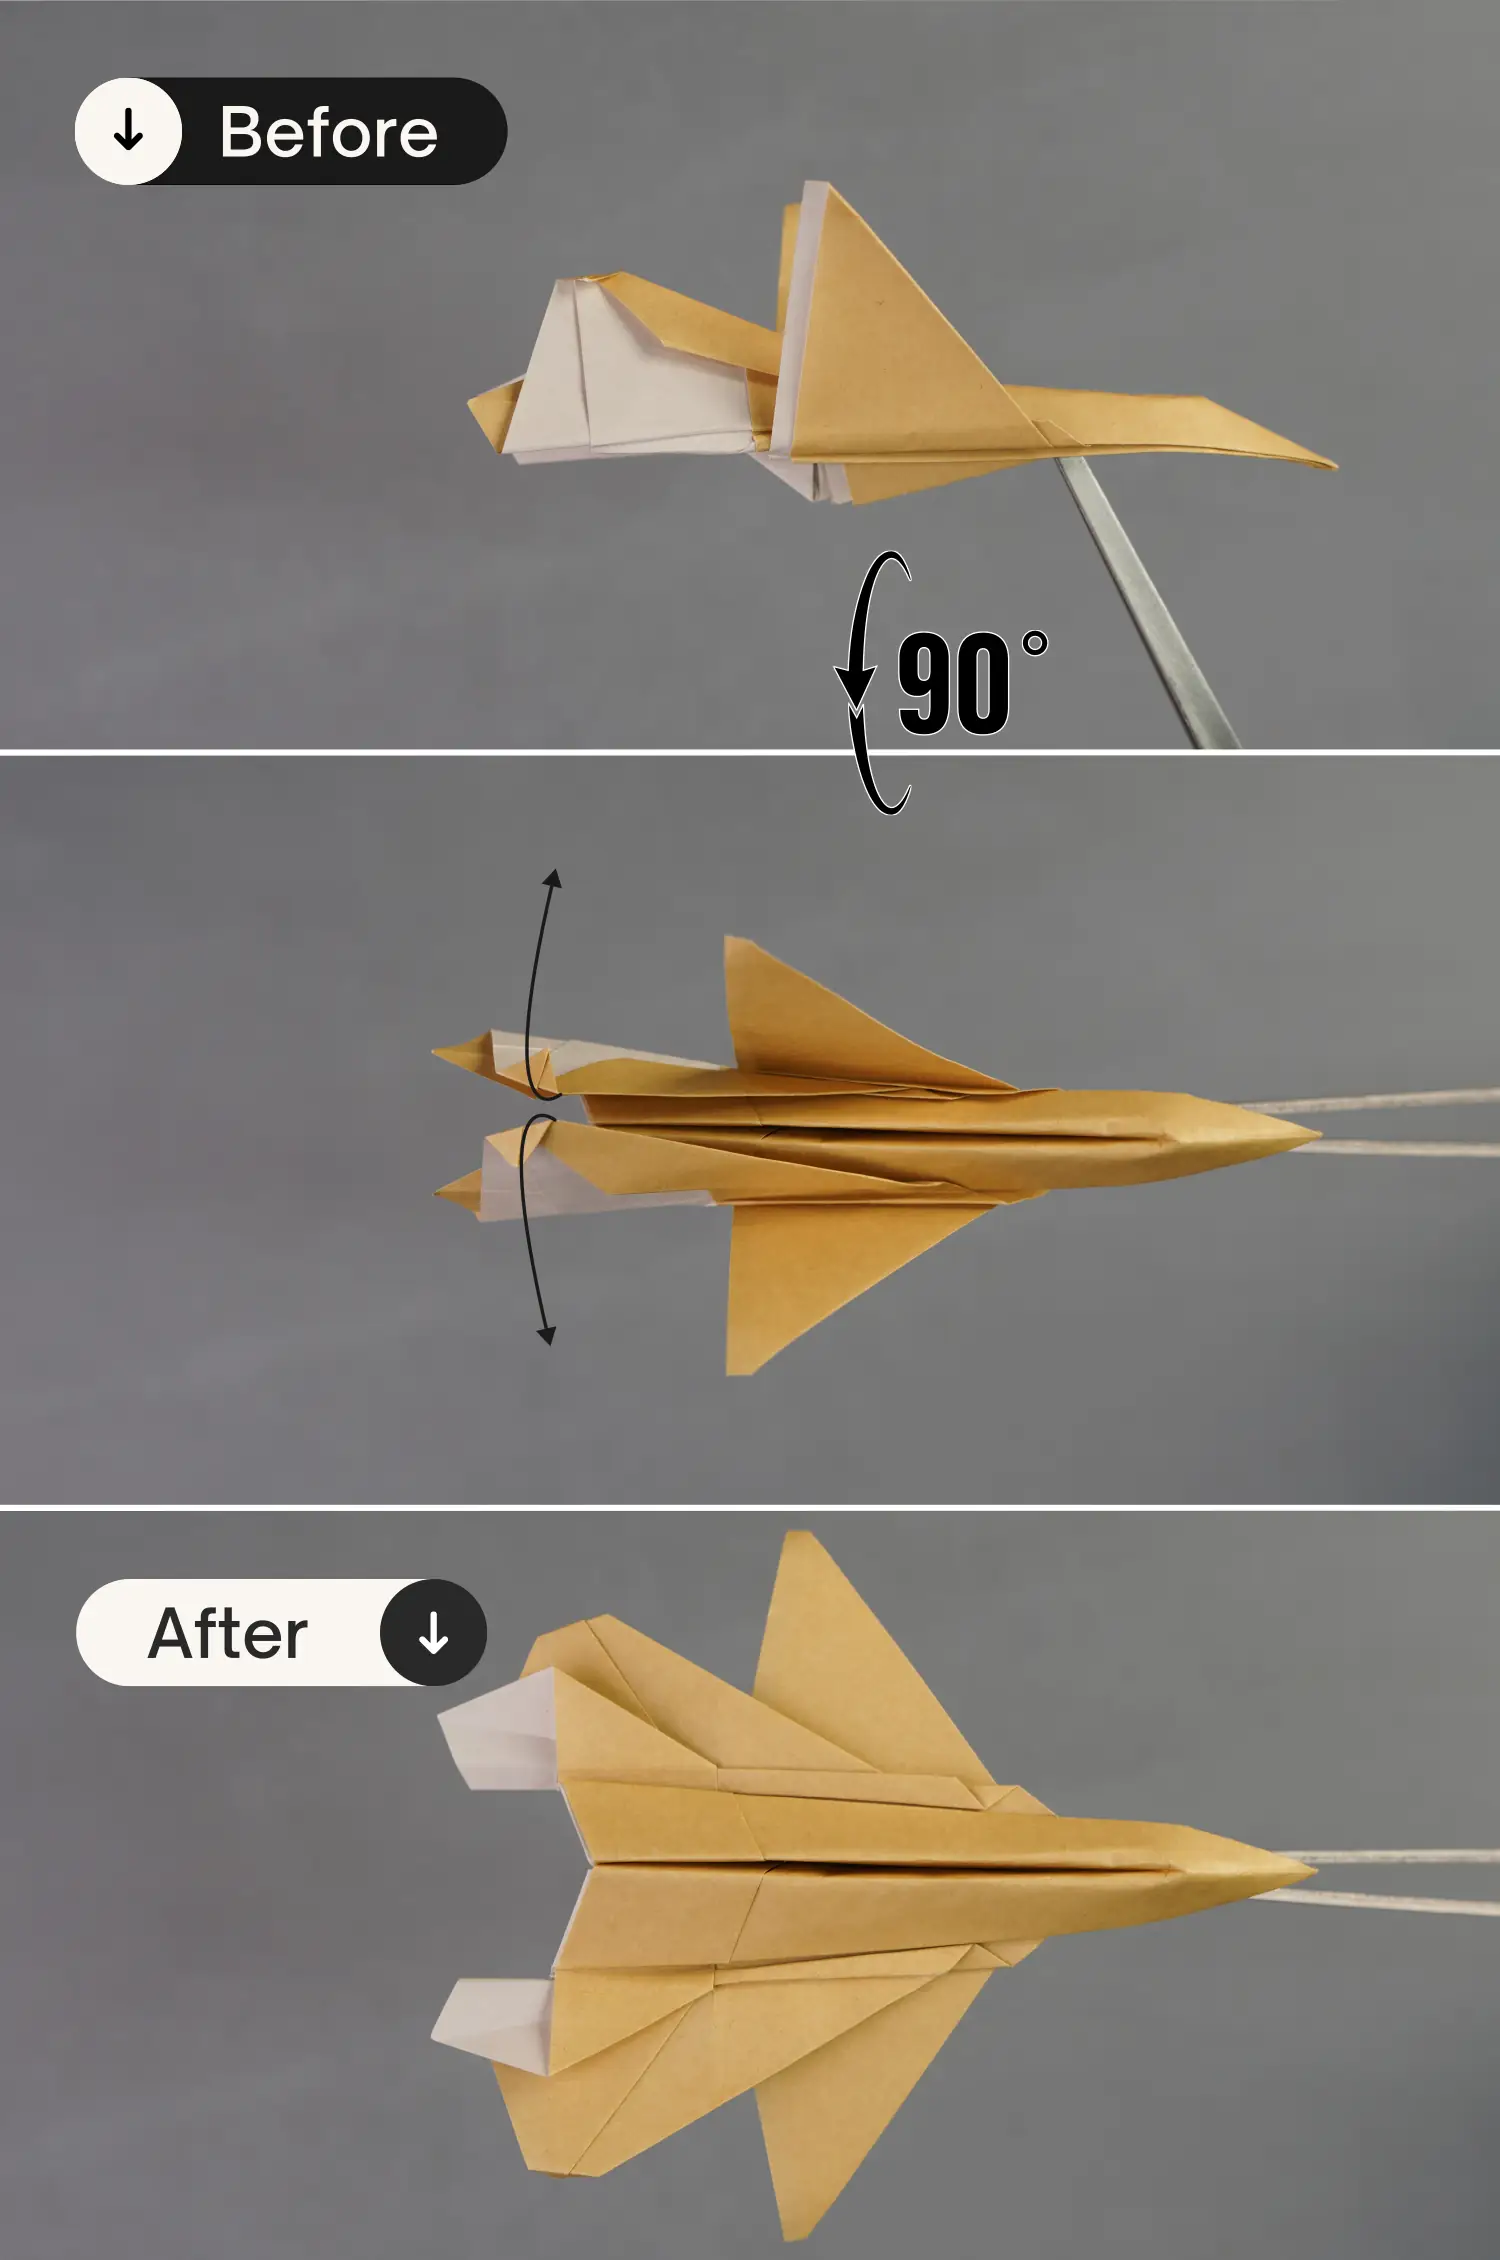
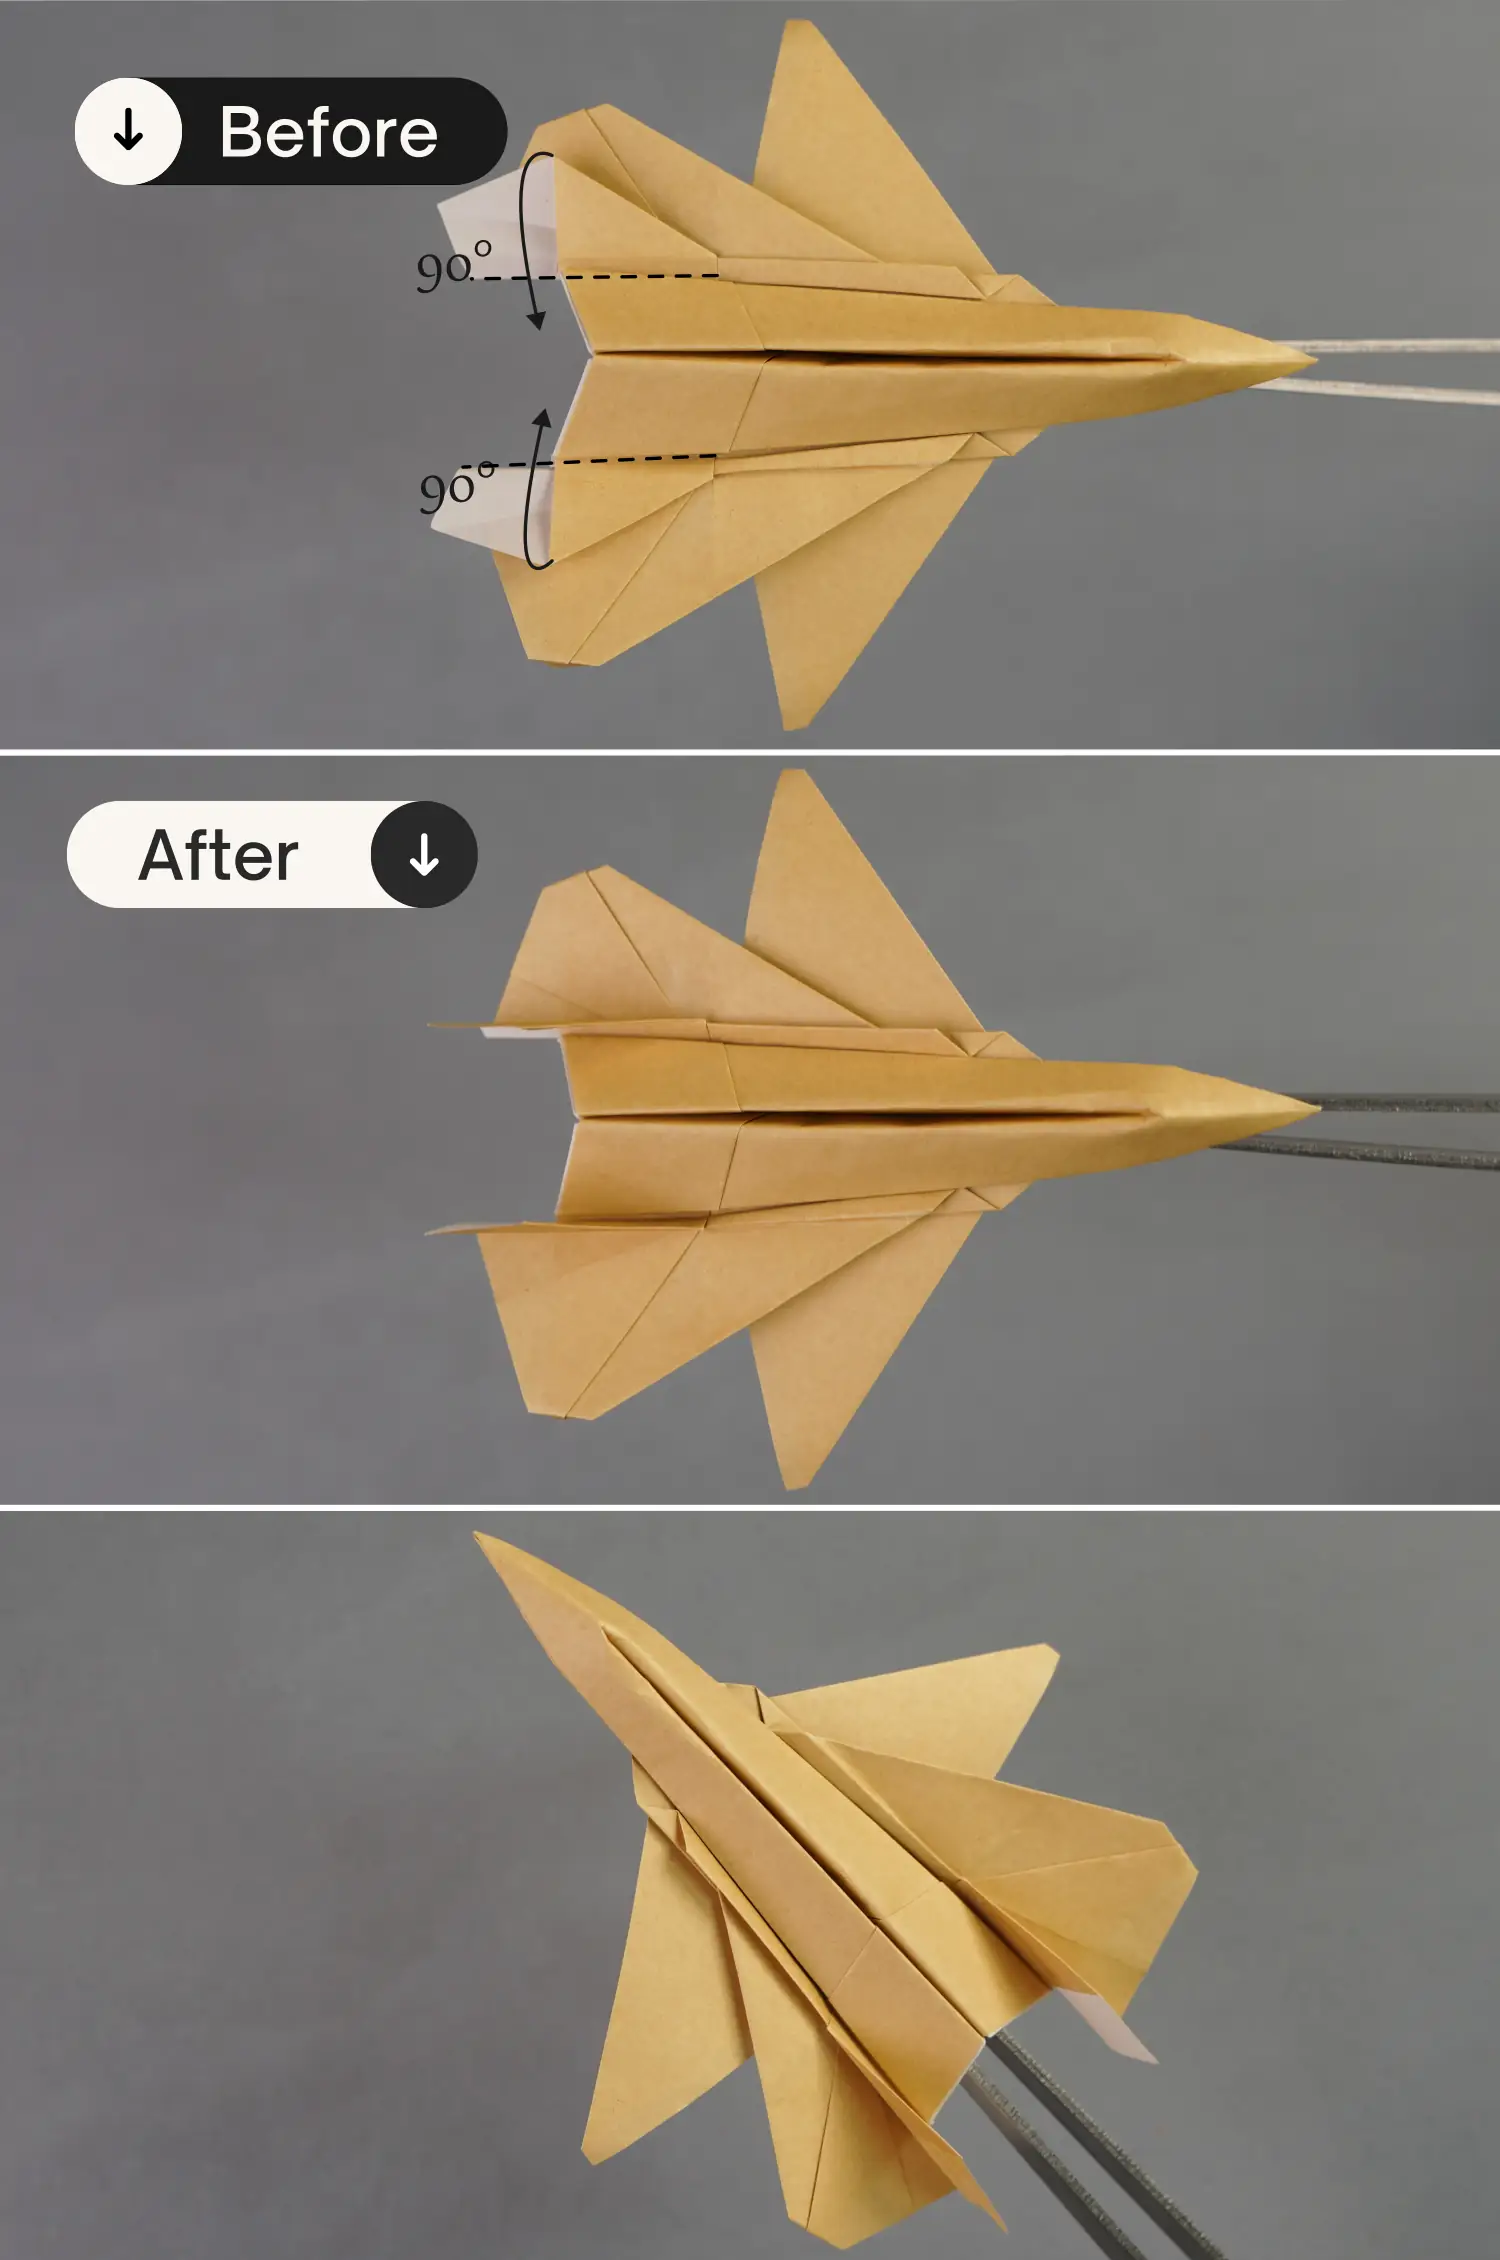
Step 30
Raise its two vertical tail fins.
