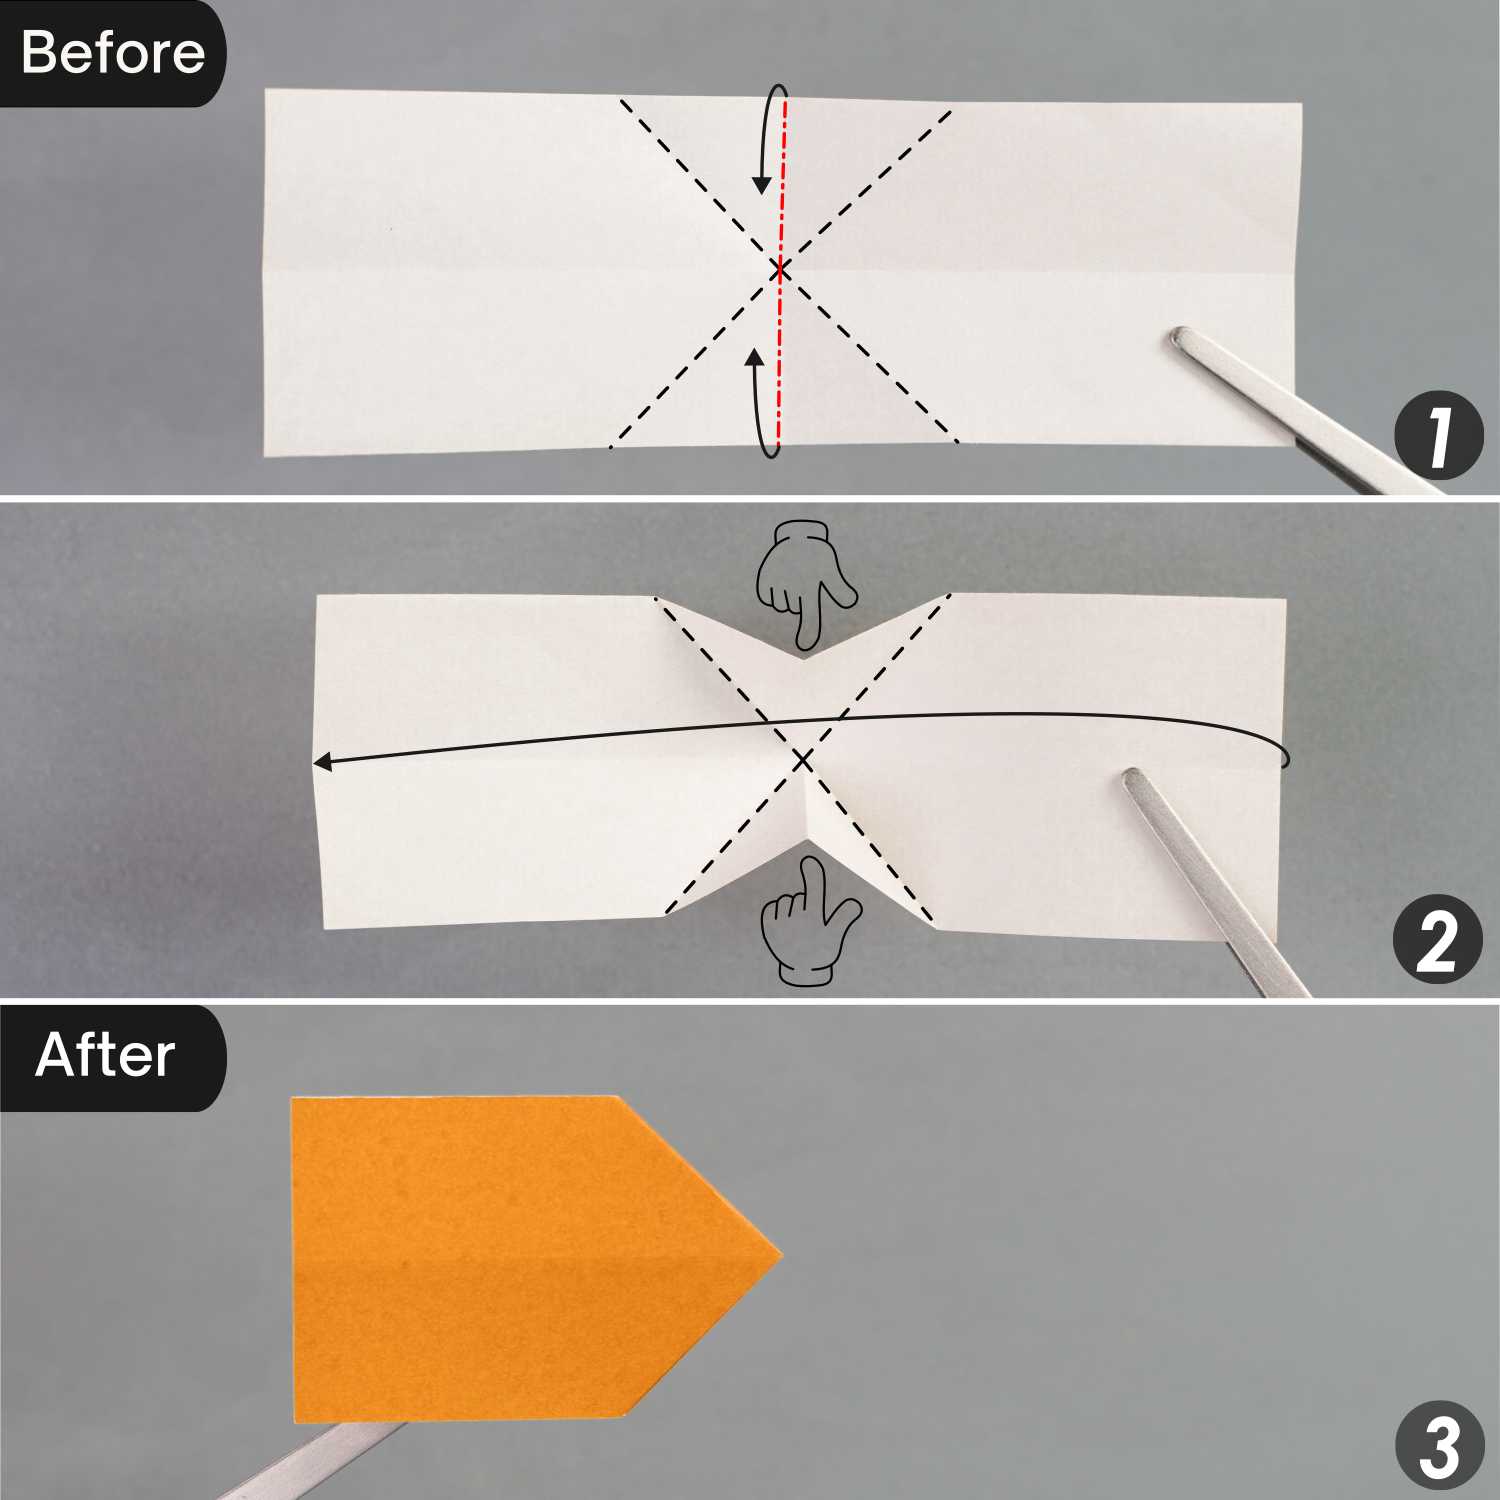
How to Fold an Origami Tank
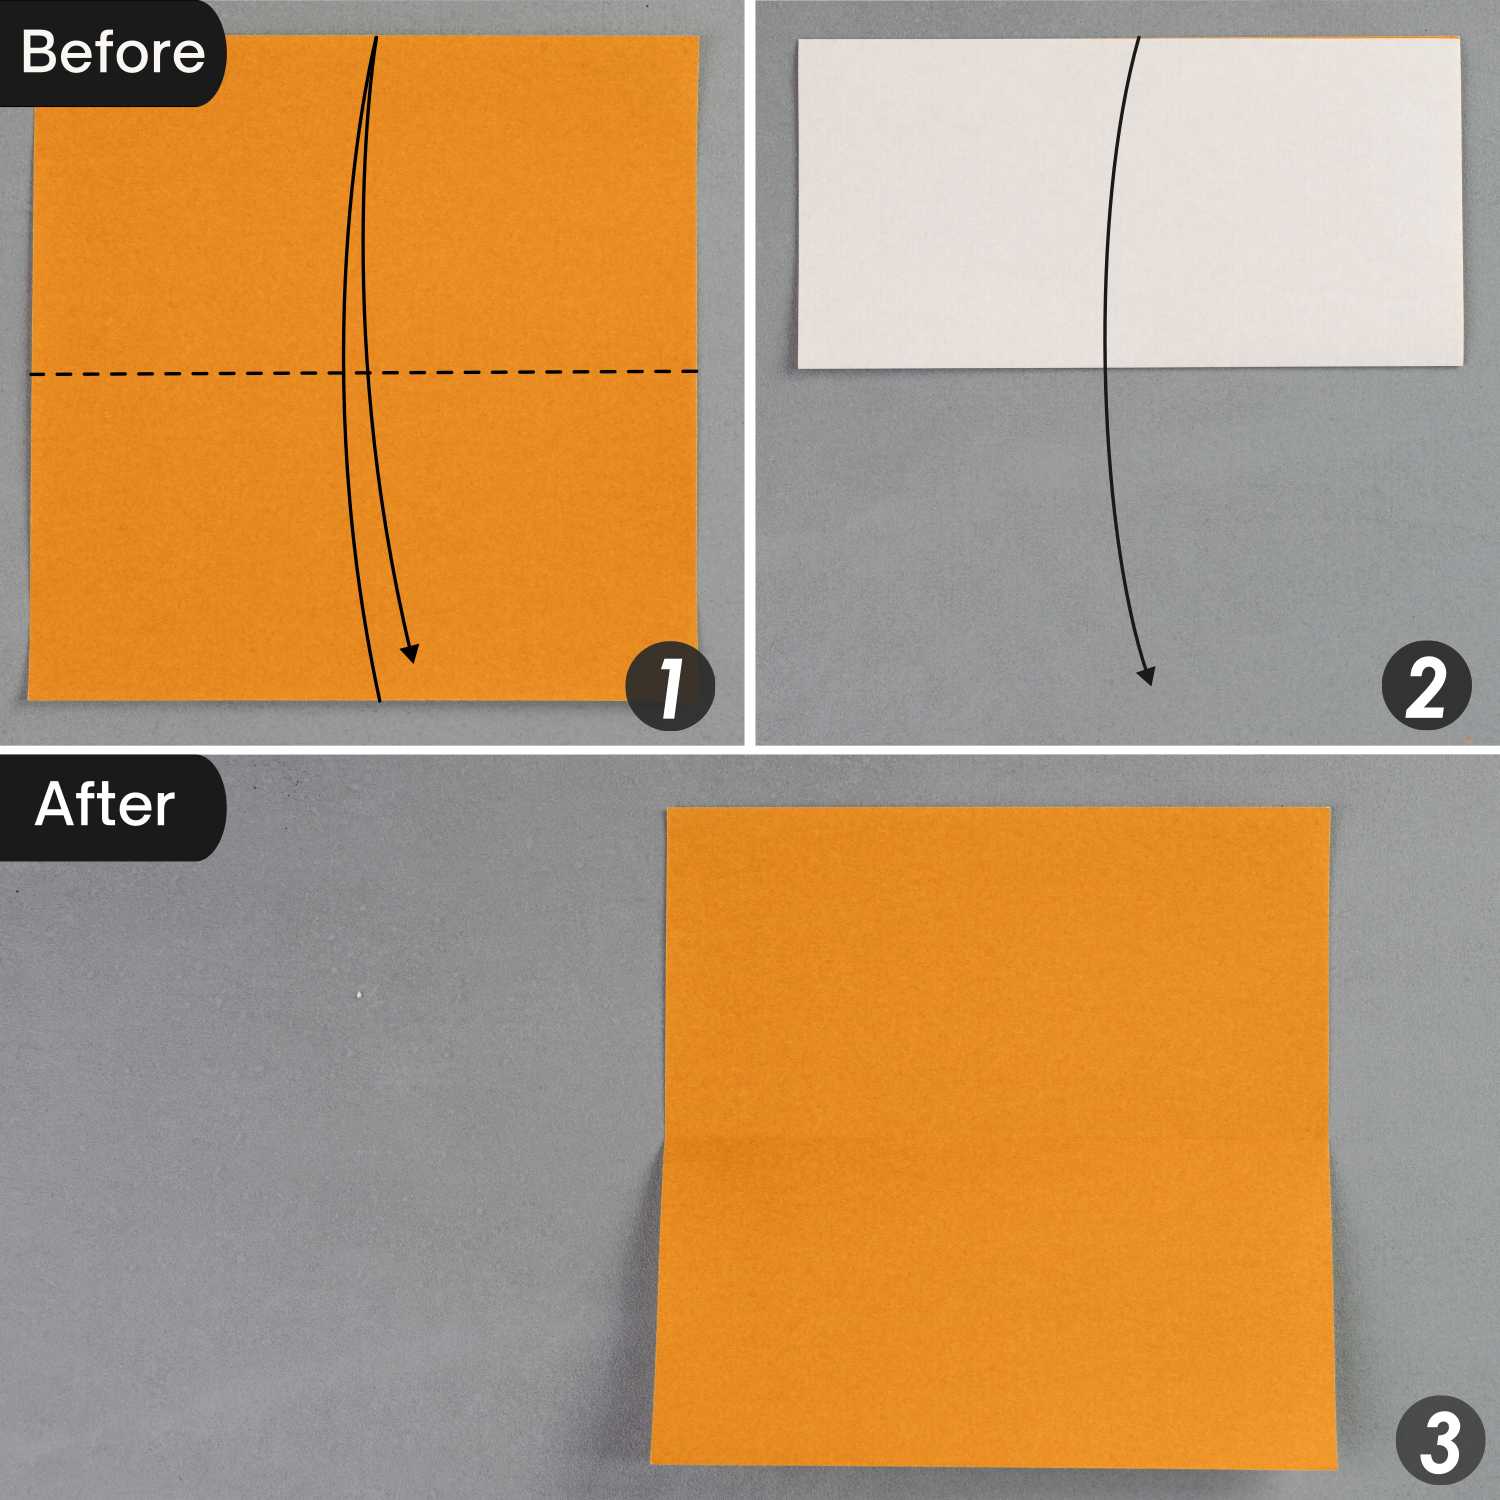
Step 1
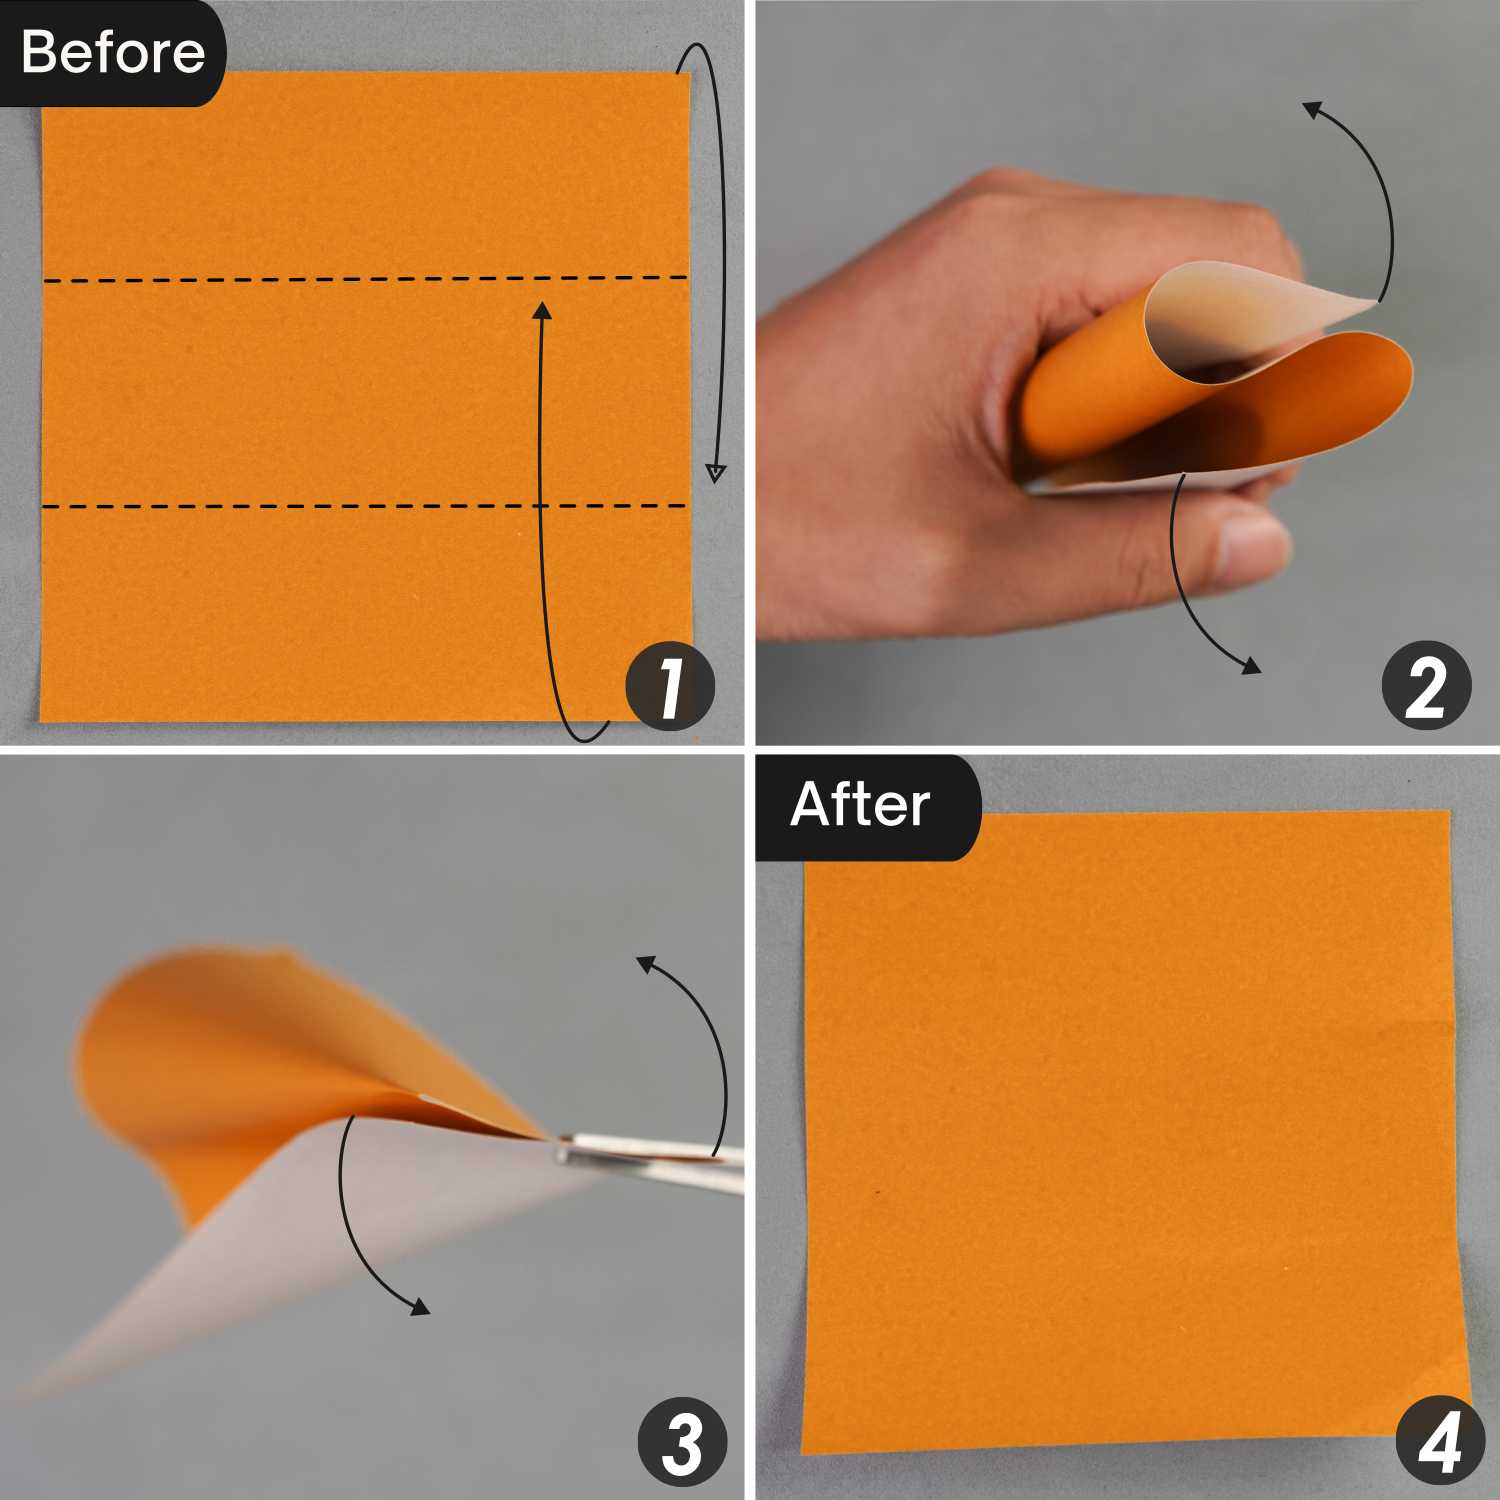
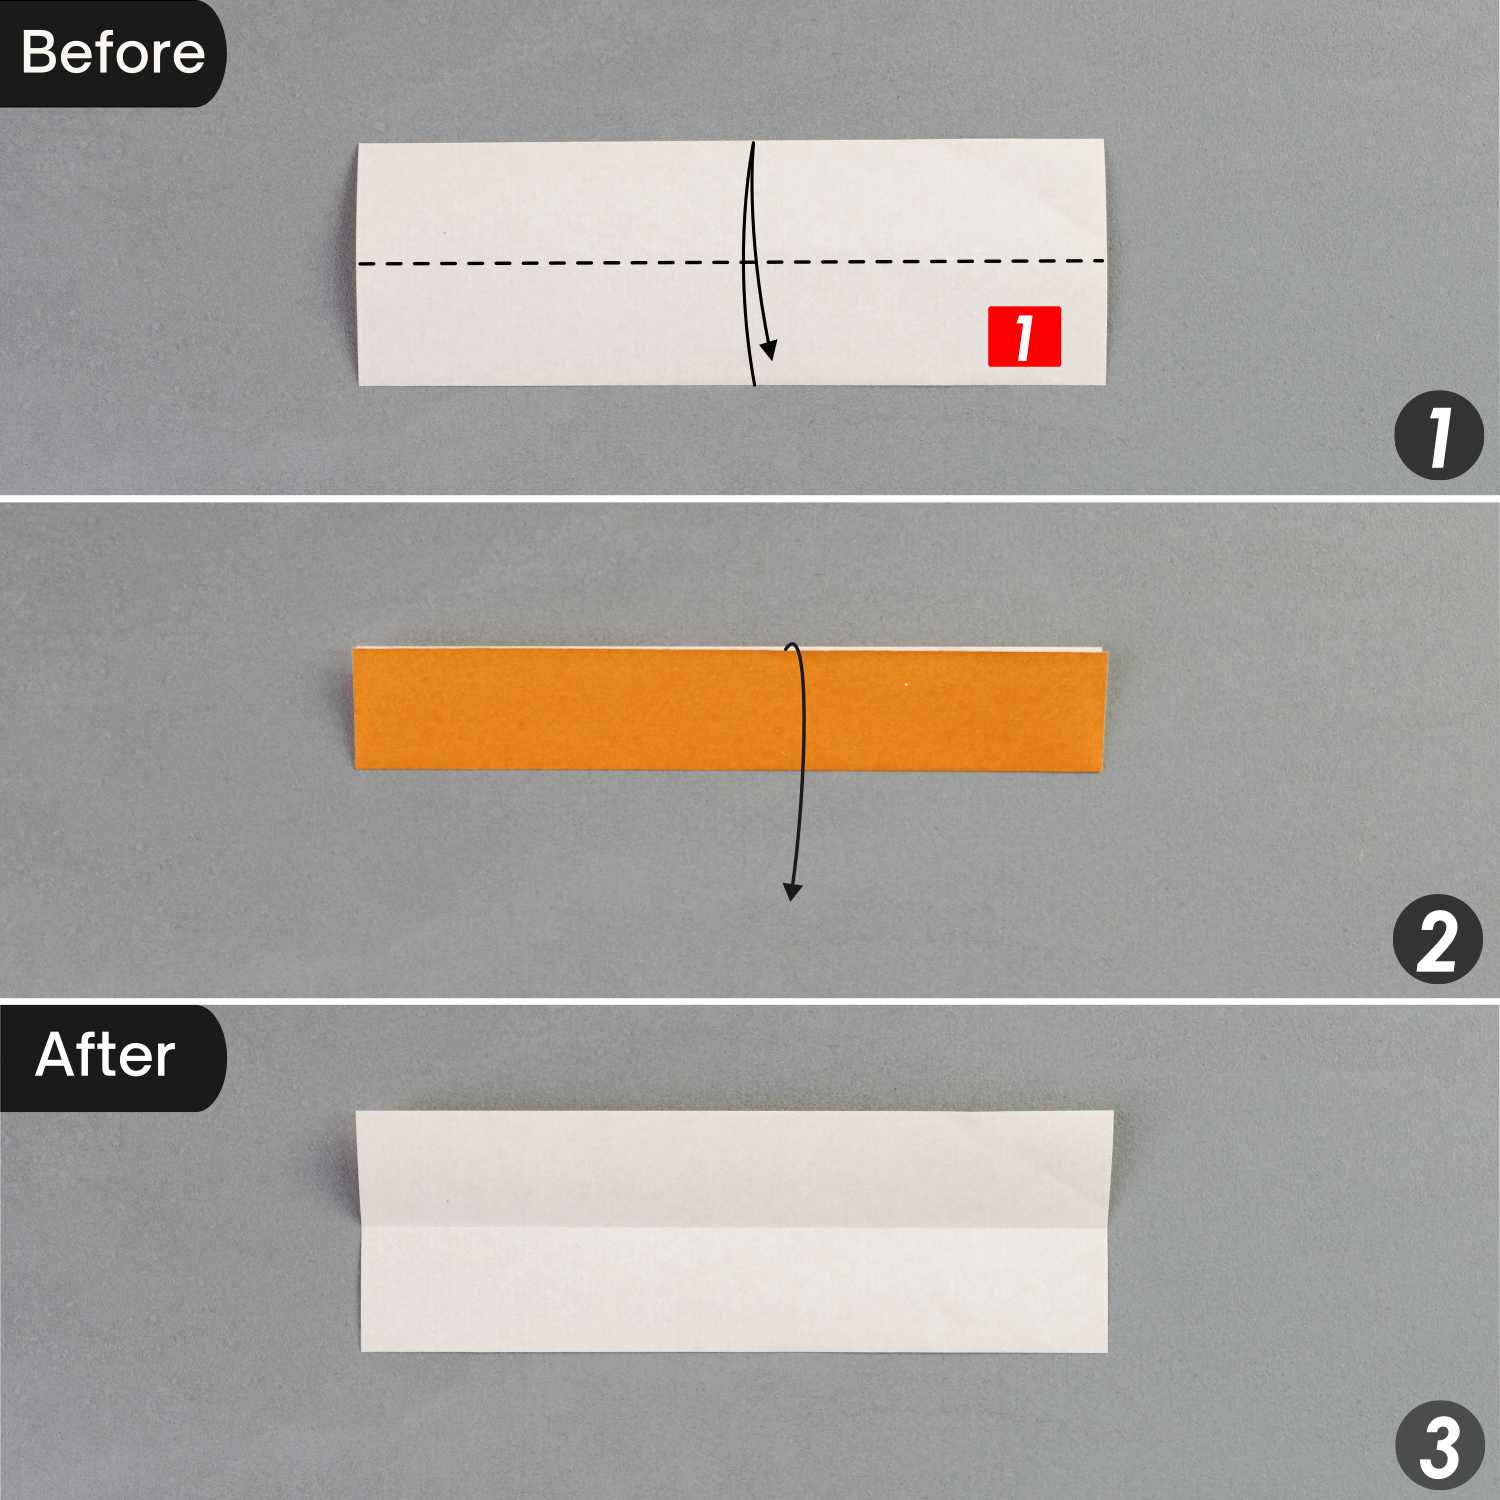
Place one piece of the paper with the desired display side face up, fold it in half vertically, leaving a crease, and unfold it.
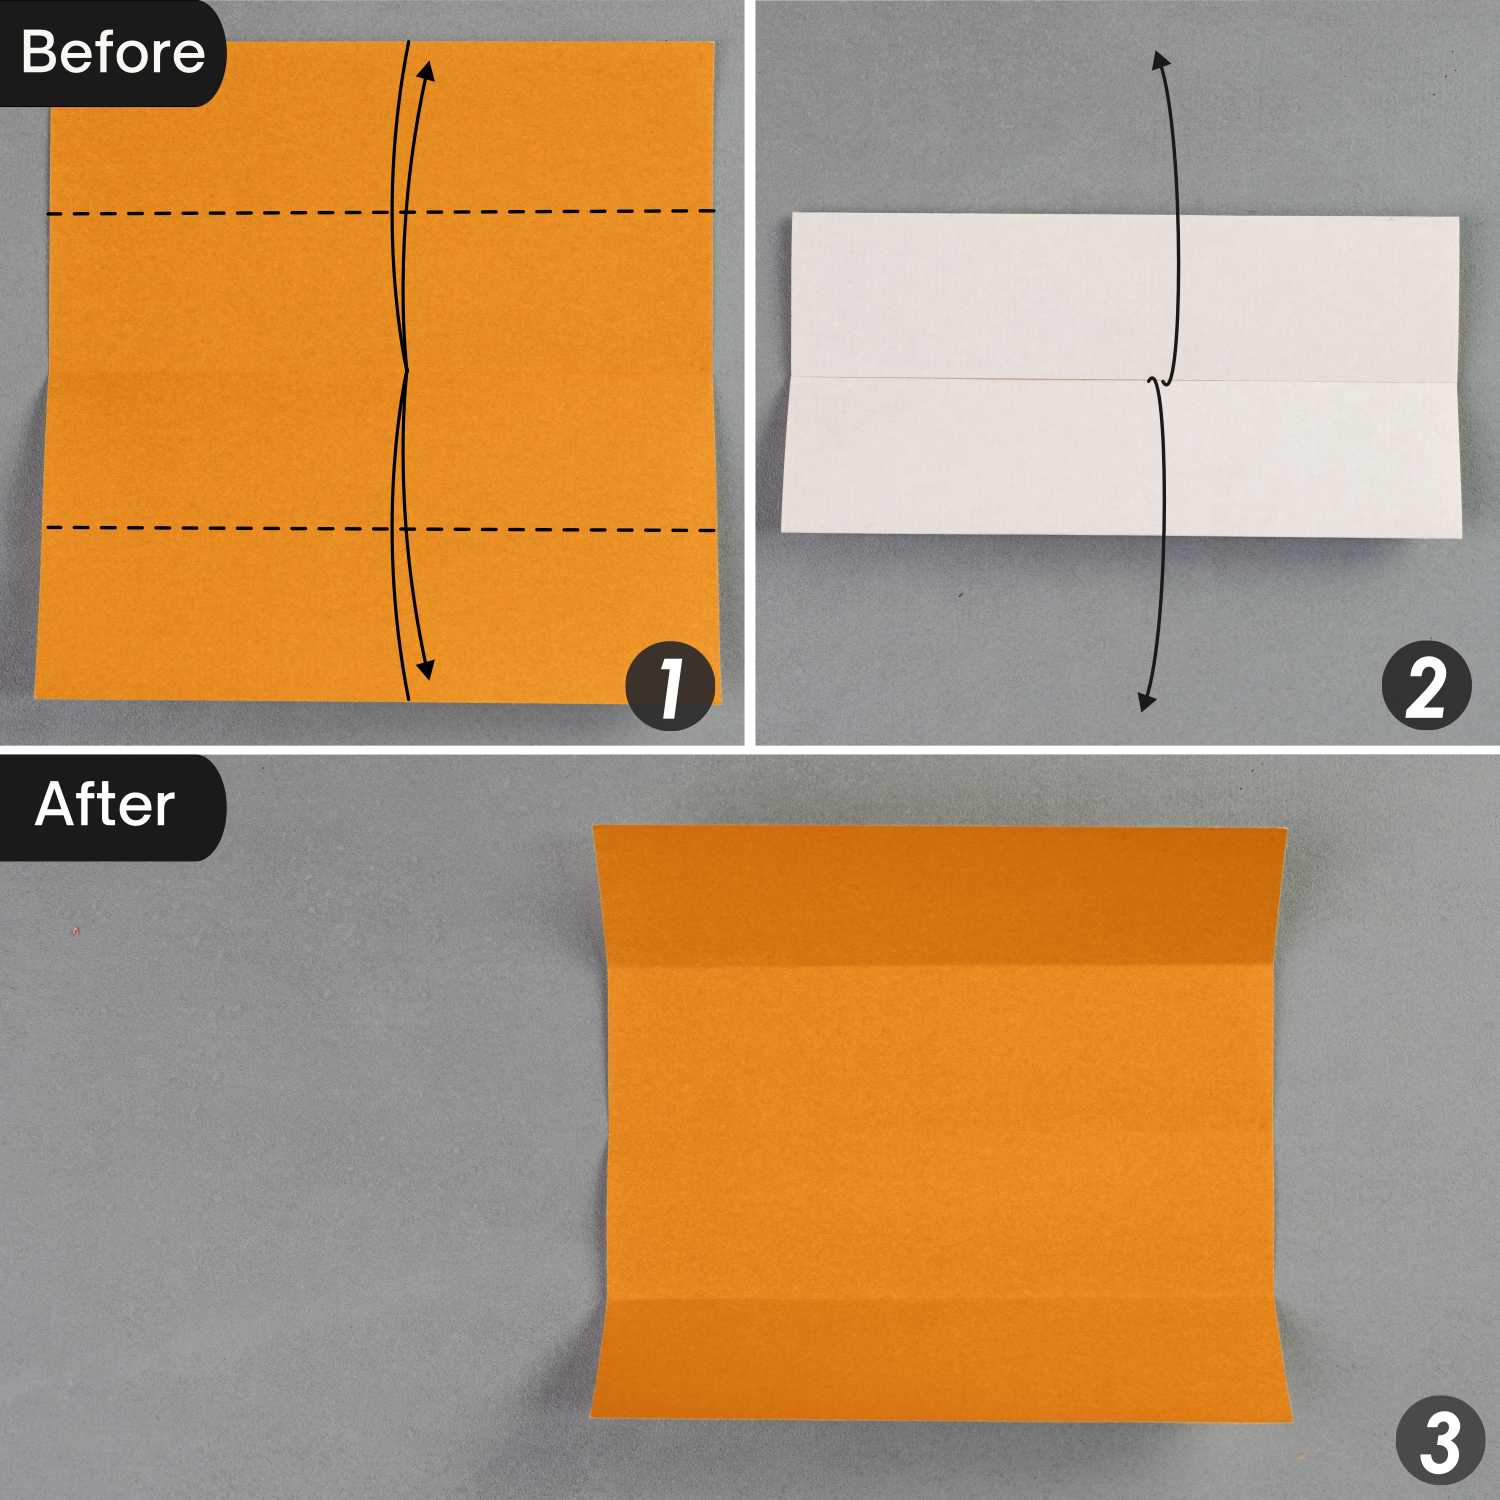
Step 2
Fold the top and bottom edges to align with the horizontal crease, crease them well, and unfold them.
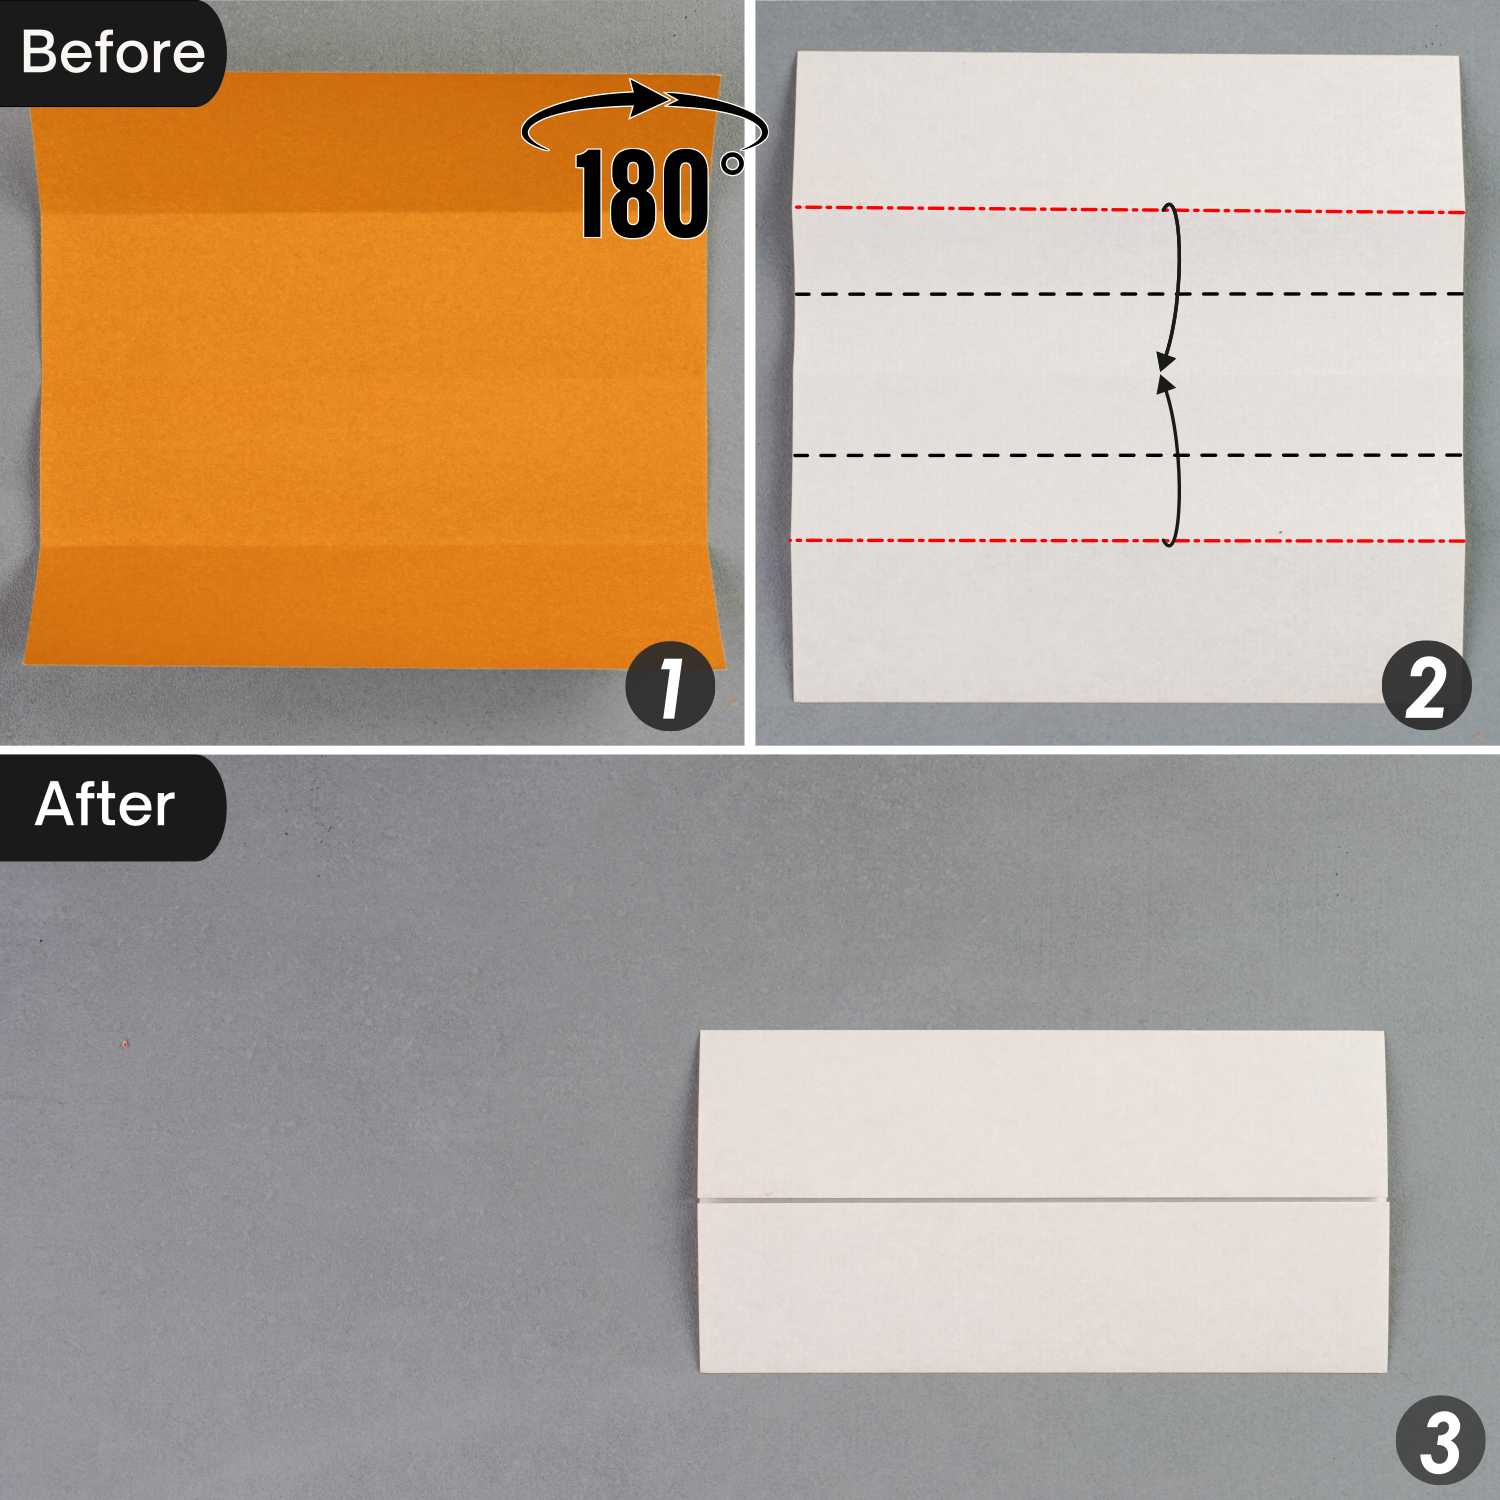
Step 3
Flip the paper over from left to right, and fold the creases indicated by the red dotted lines to align with the center horizontal crease.
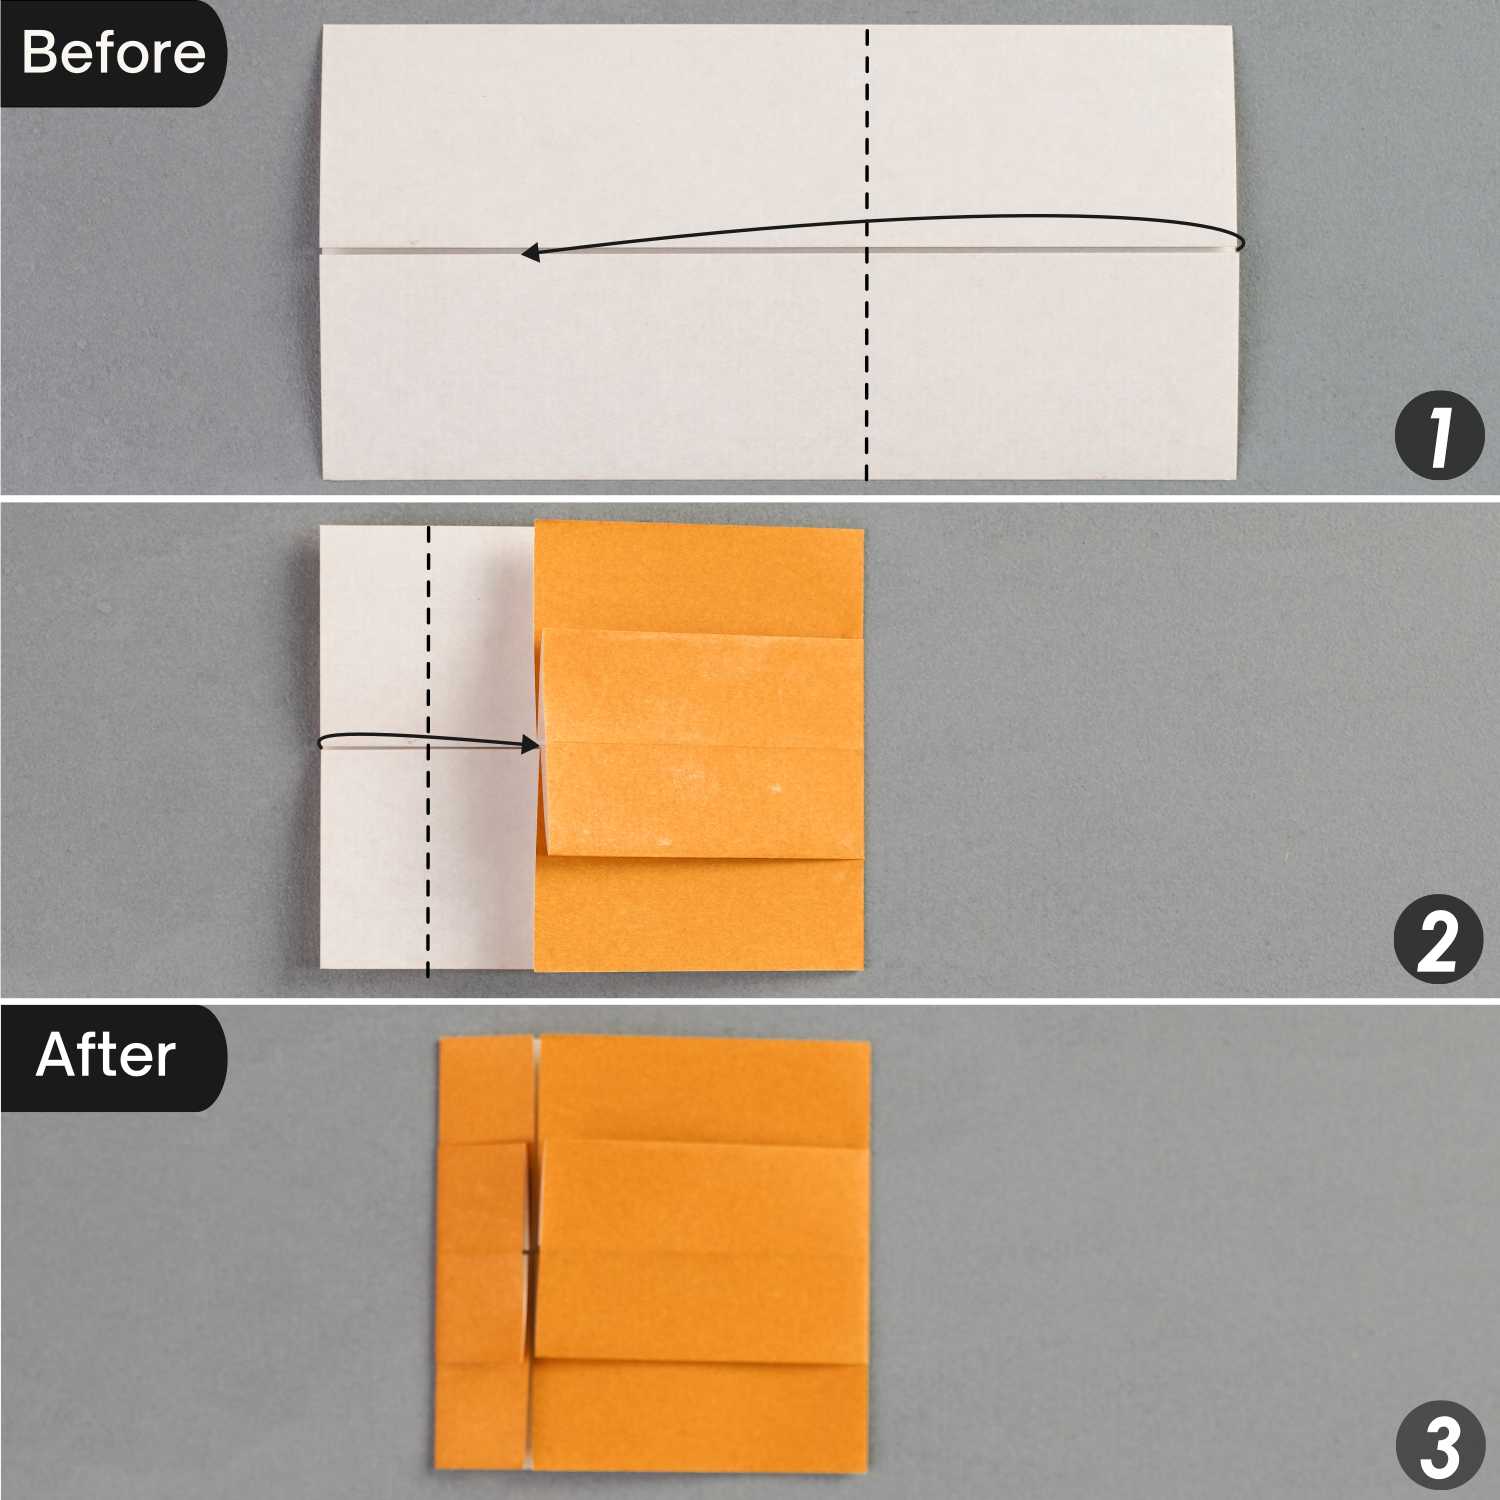
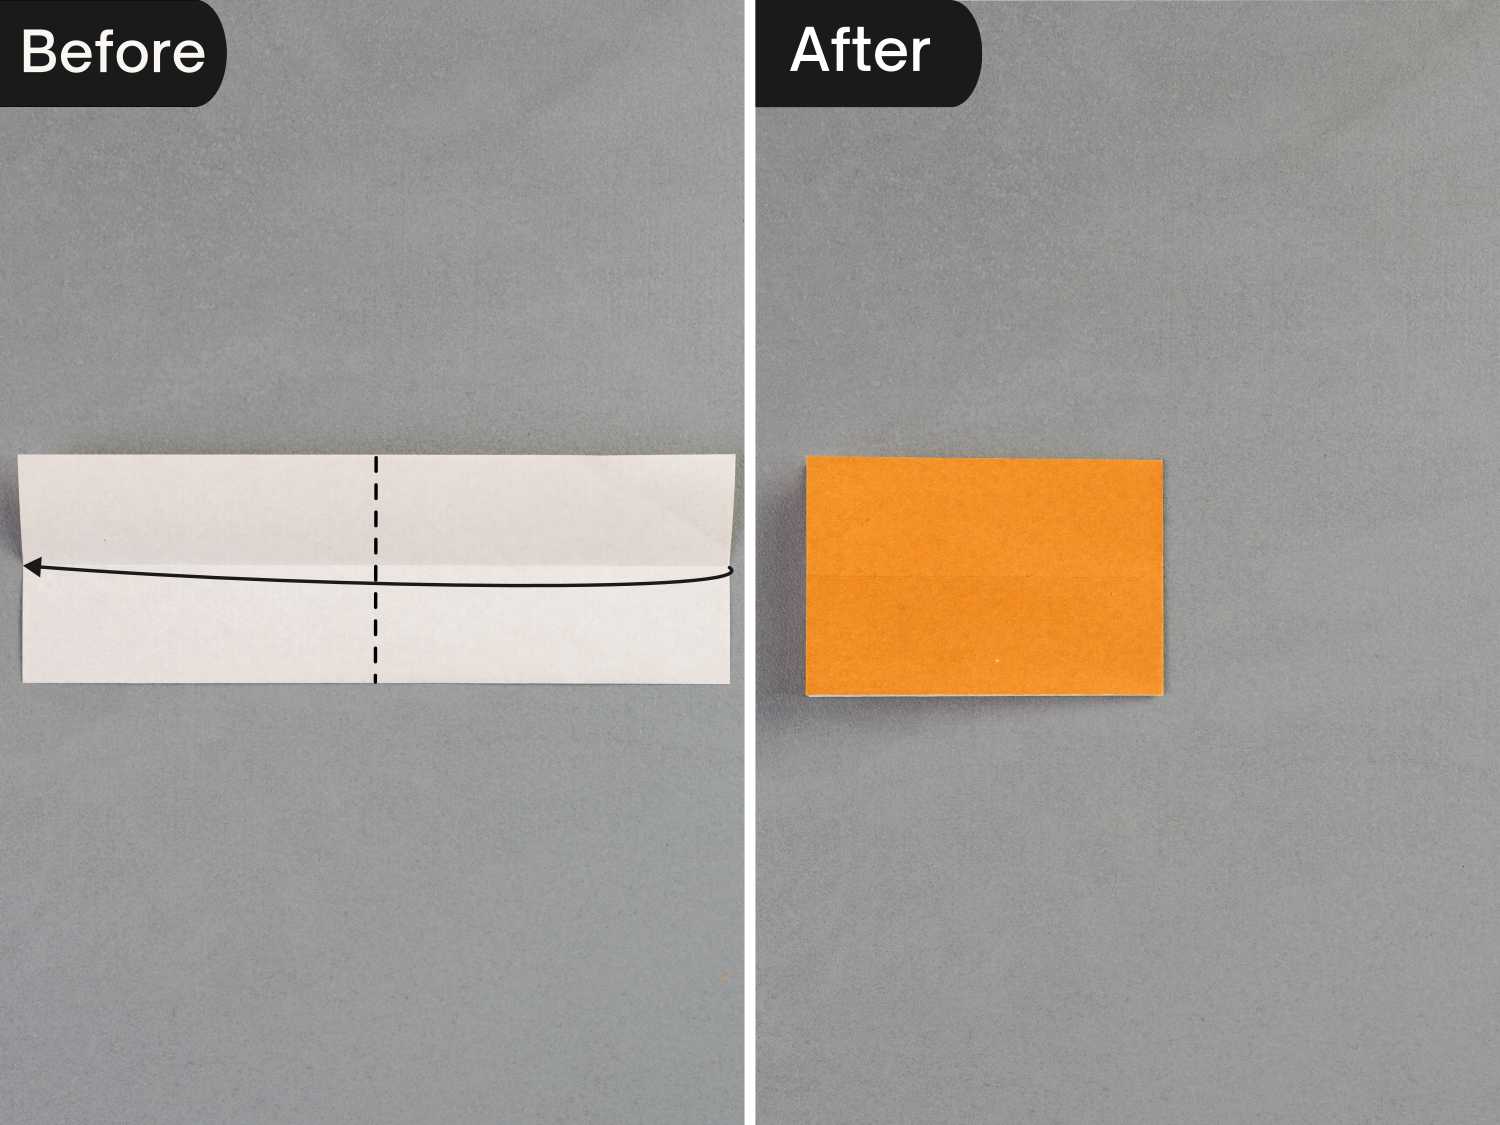
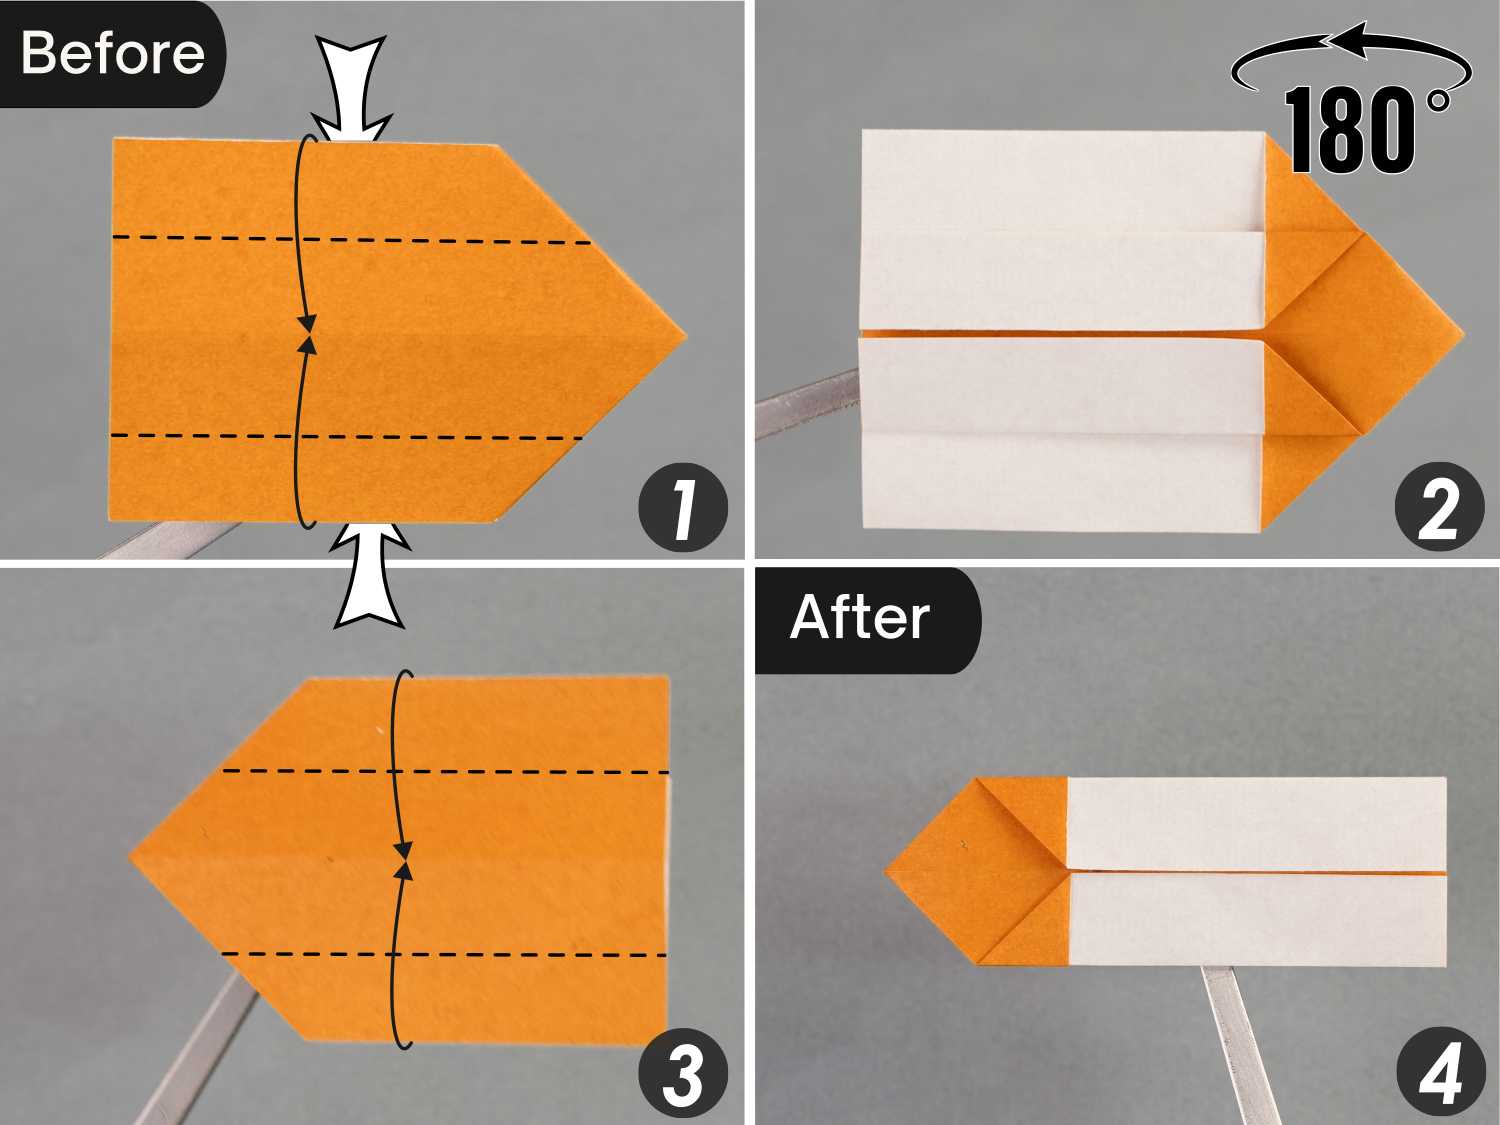
Step 4
Fold the right edge to the left side along the dotted line, then fold the left edge to align with the edge you just folded.
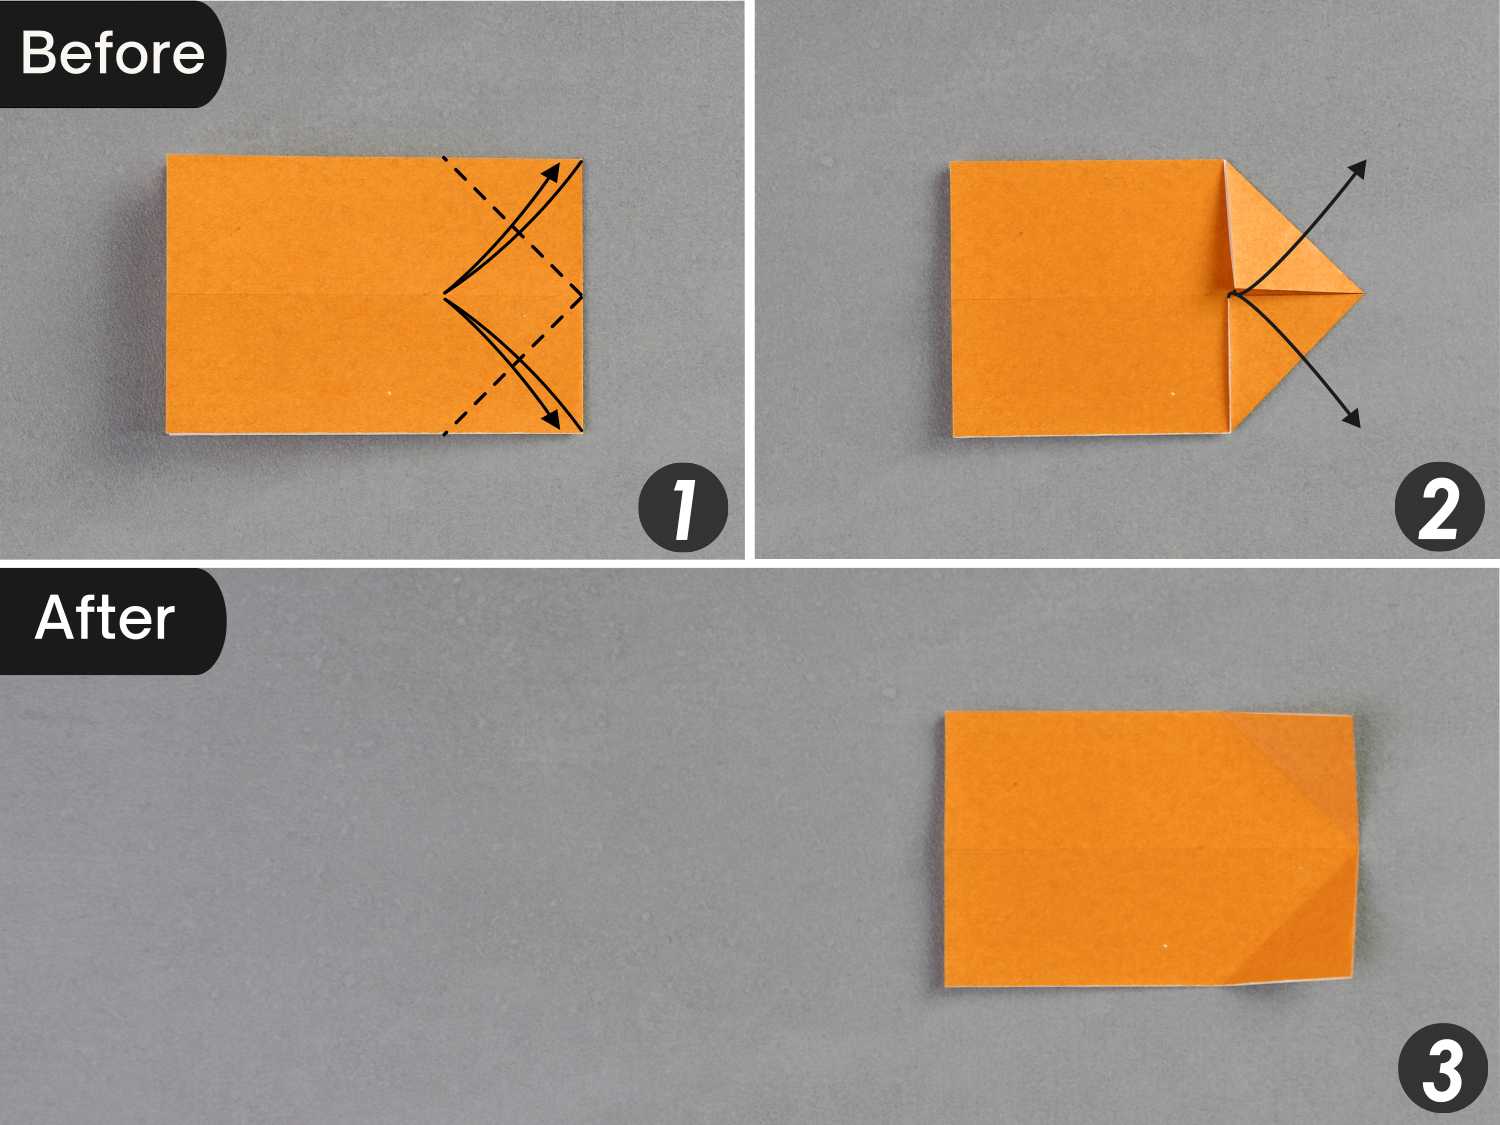
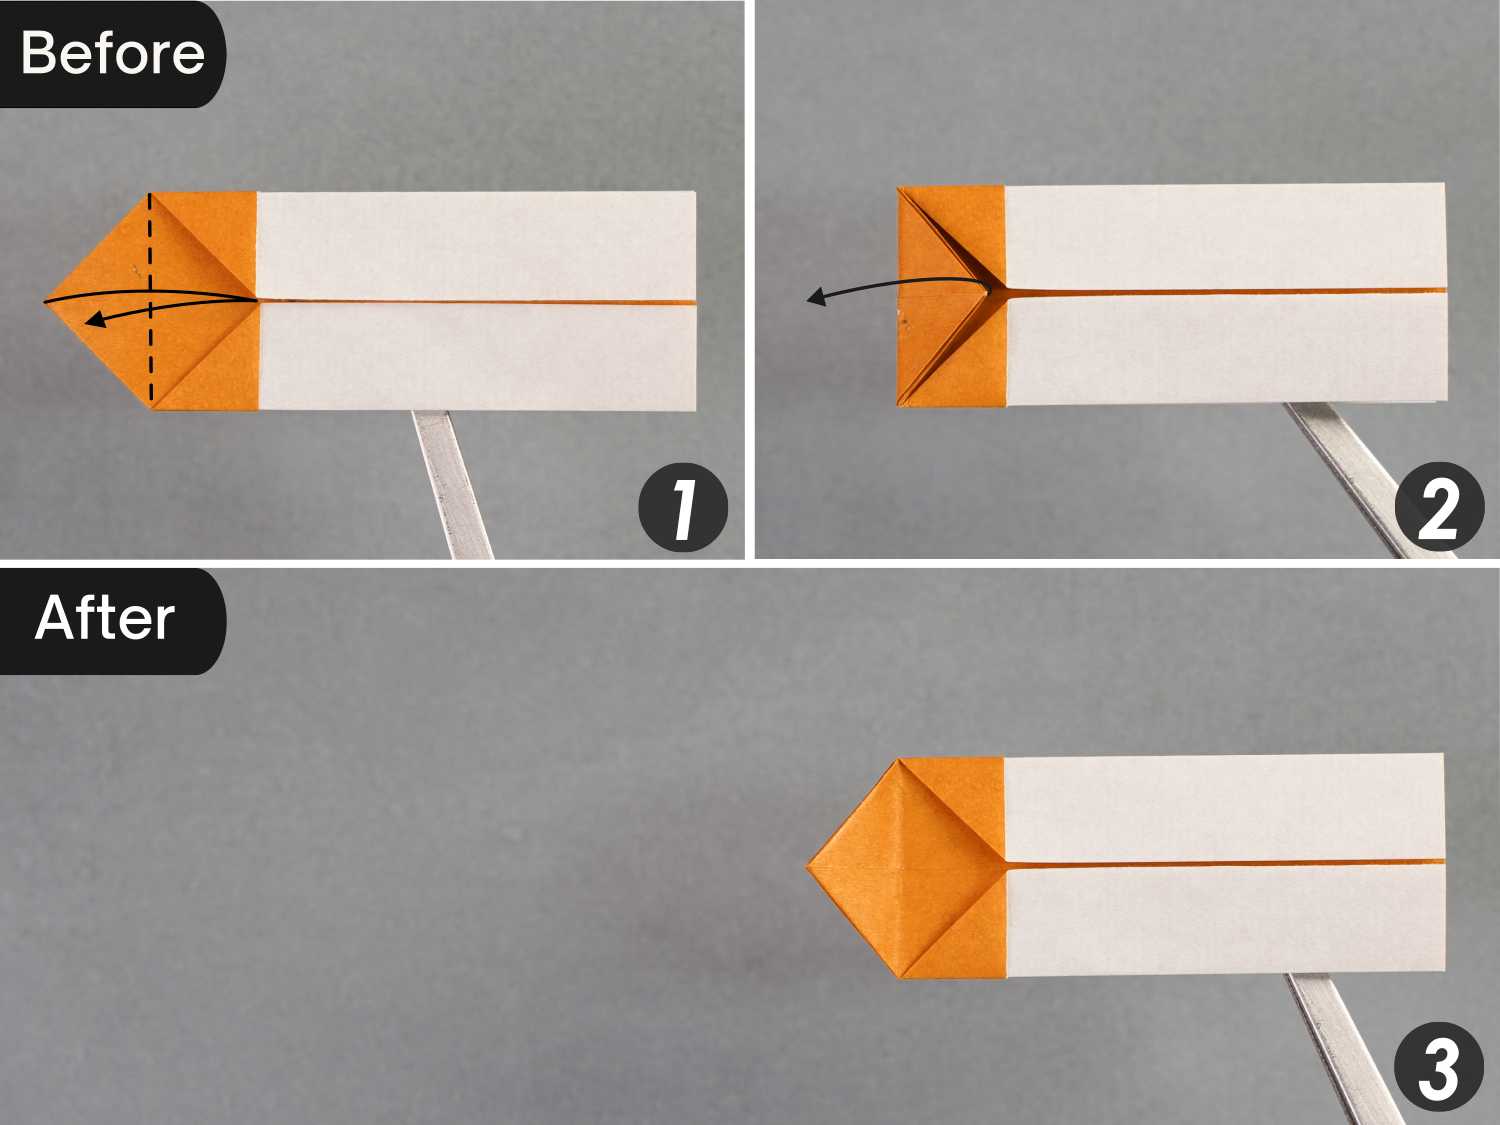
Step 5
Fold the top and bottom edges along the dotted lines to align with the center horizontal crease.
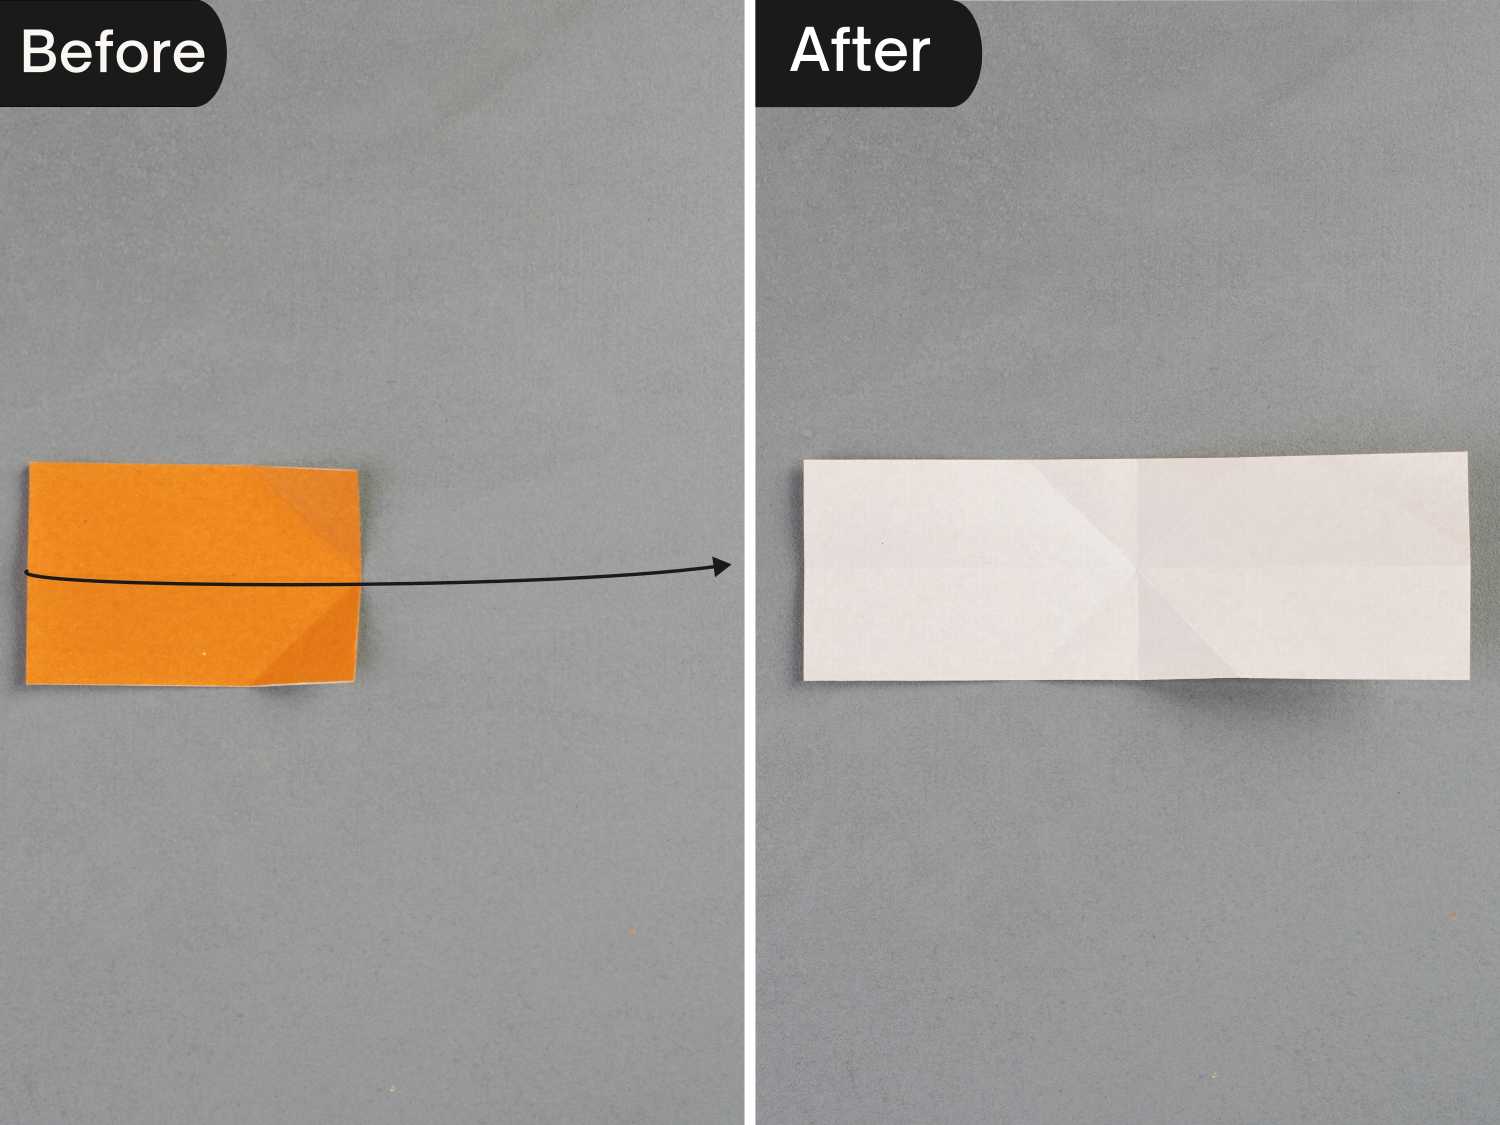
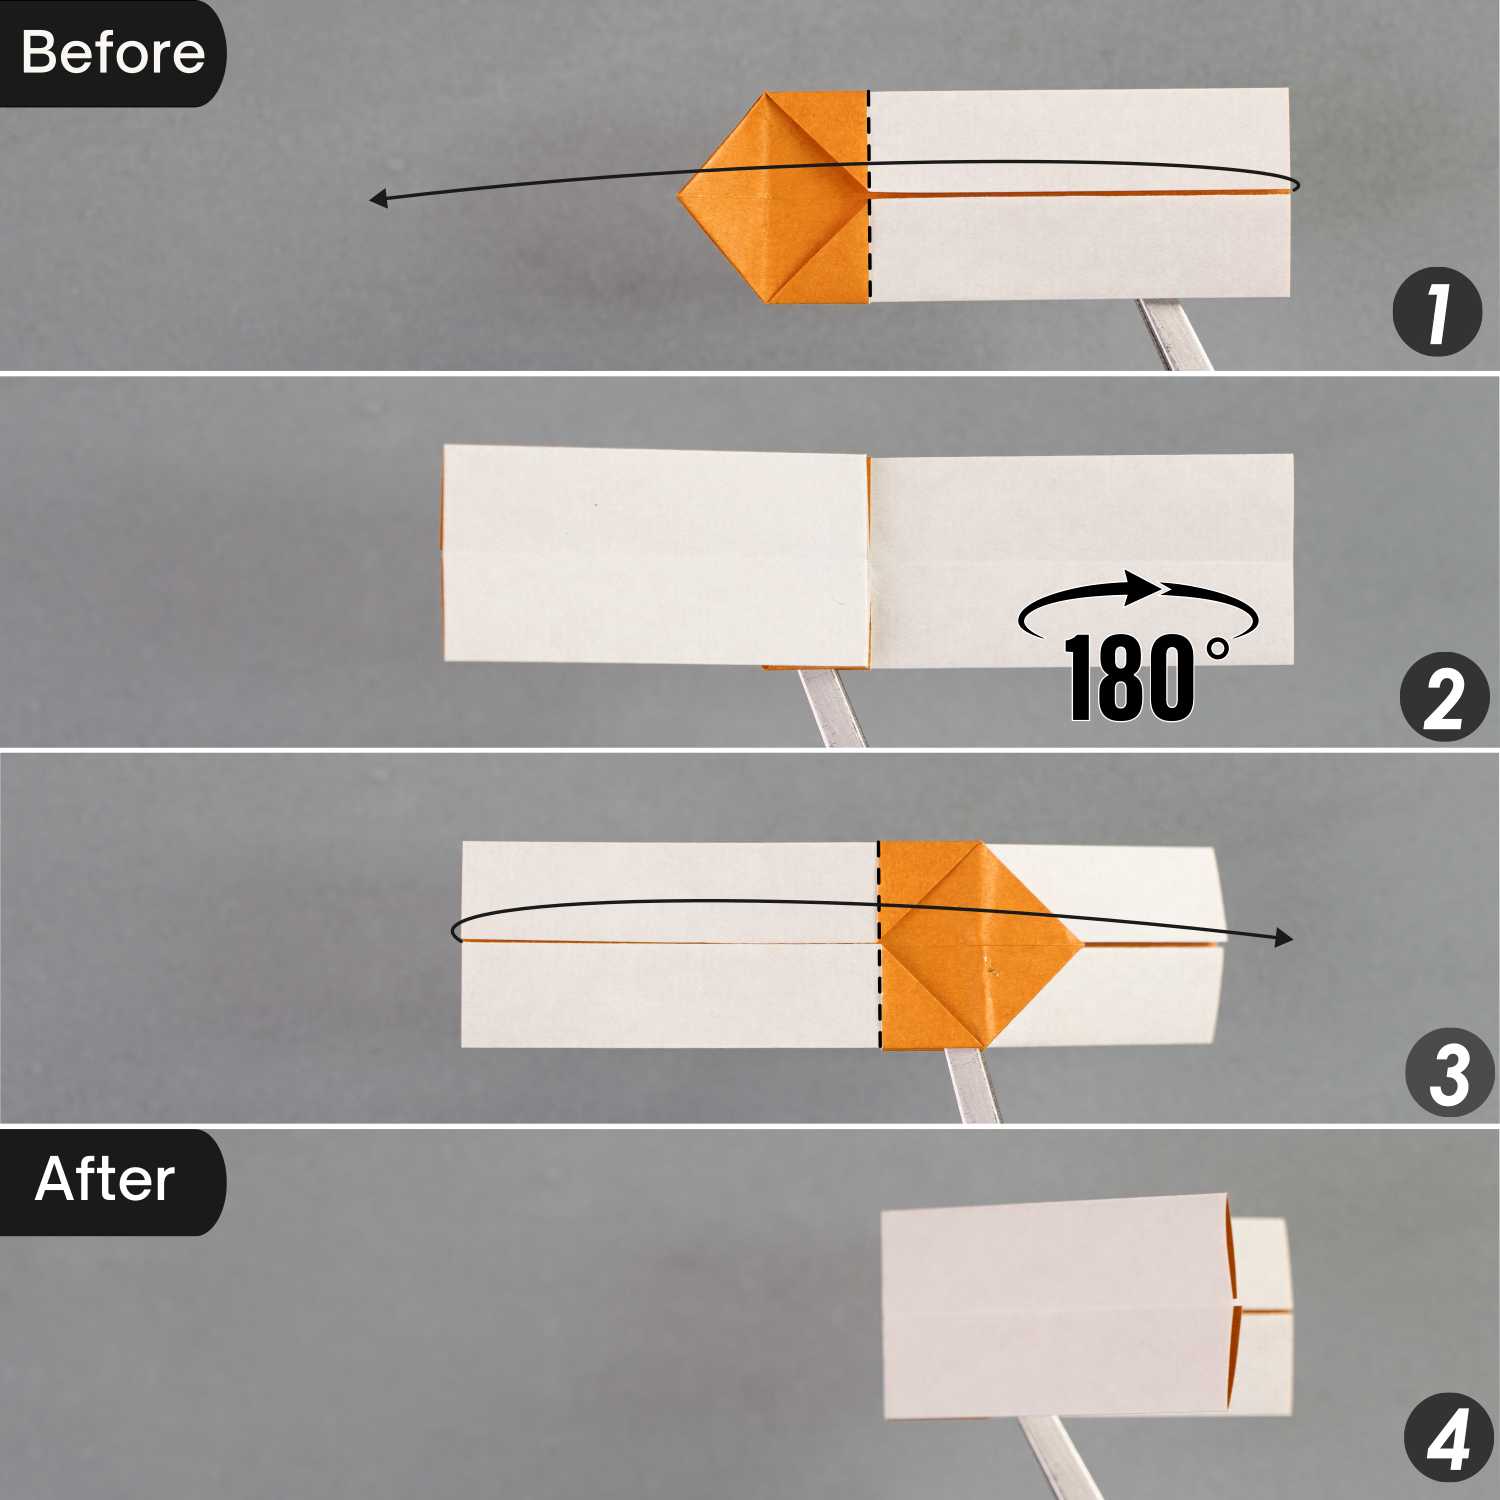
Prepare Papers for Other Parts of the Tank
Step 1
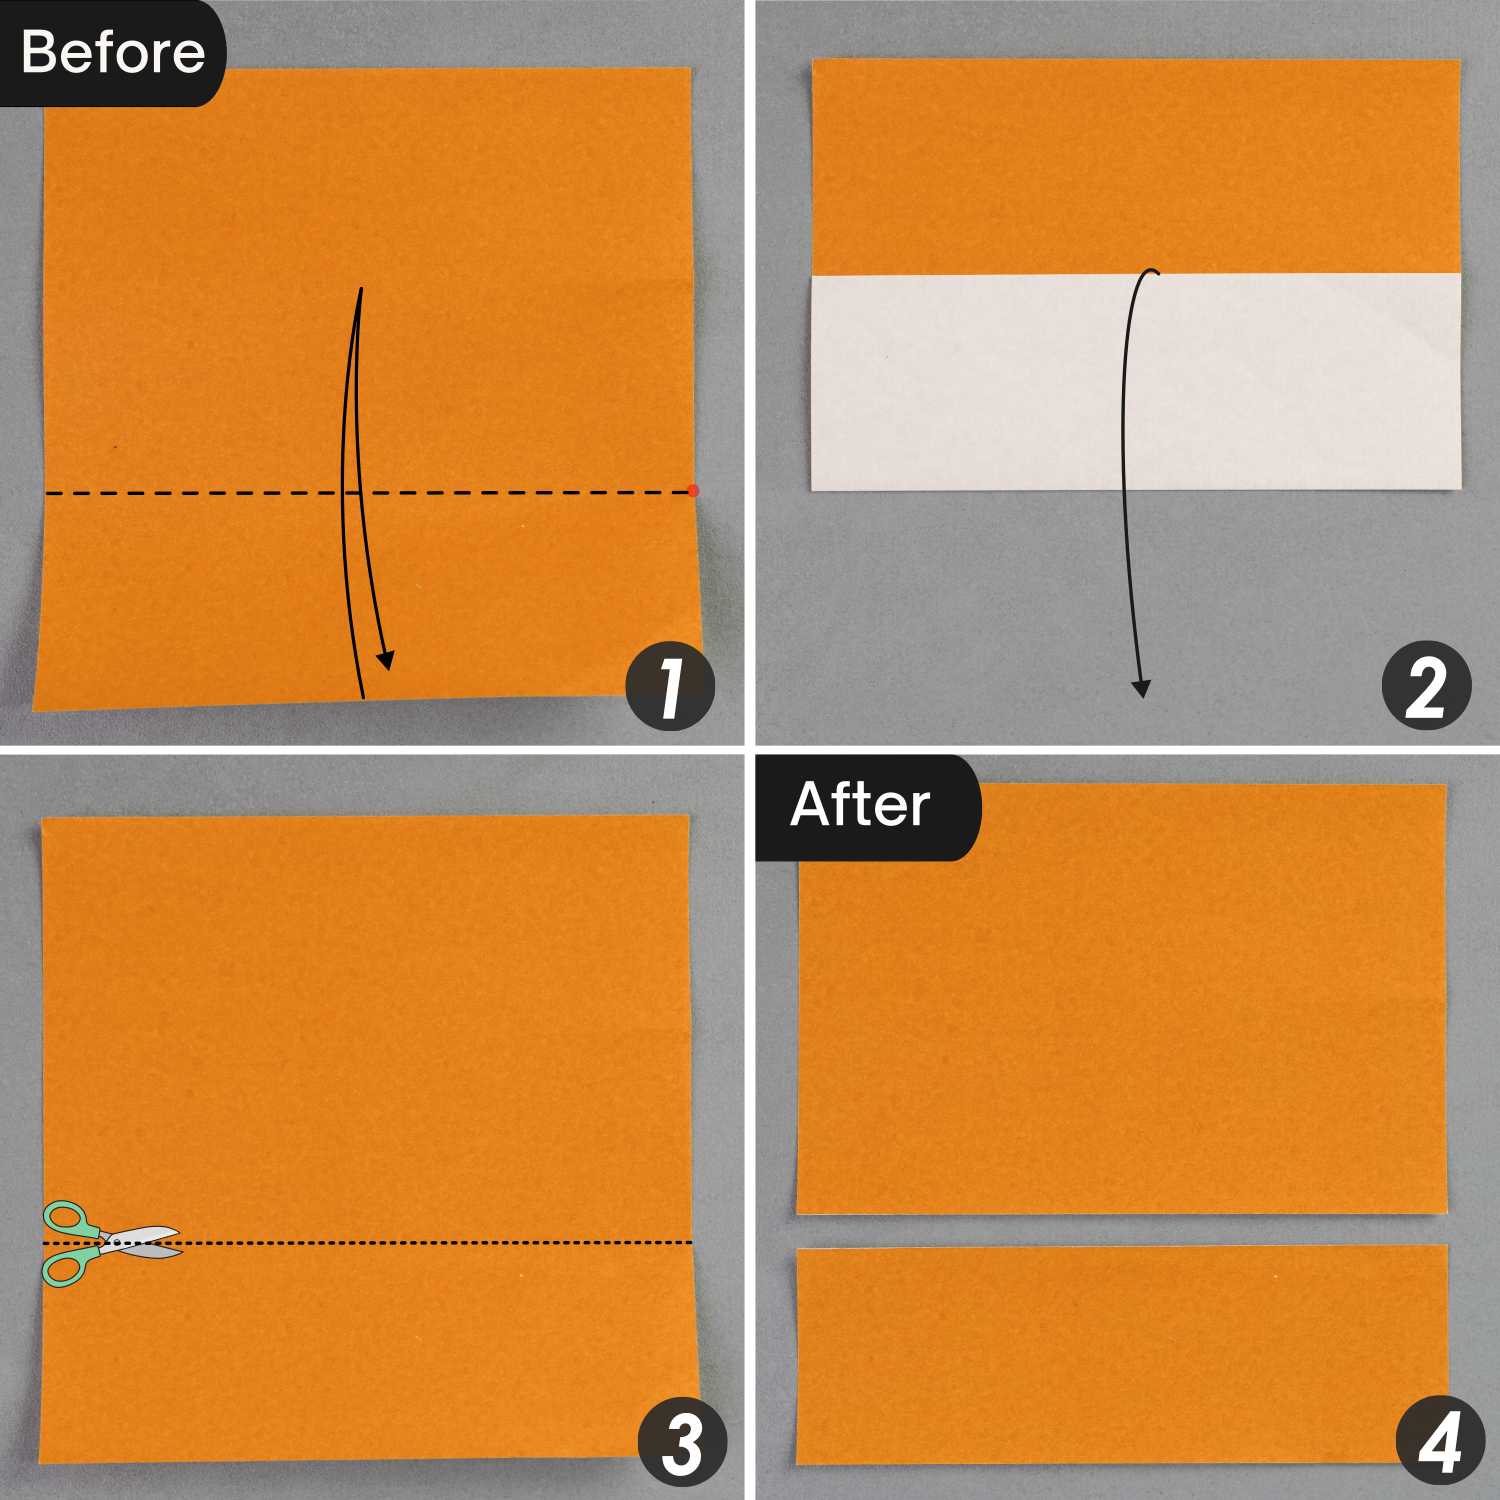
Take out another piece of paper, hold it in your hand so that it bends in the same way as the second picture shows, like an “S”, then flatten this edge, creating two points to divide this edge into three equal parts.
Step 2
Fold up the bottom edge along the dotted line, extending horizontally from the point you made in the previous step, leave a crease, and unfold it. Then, cut the paper along this crease.
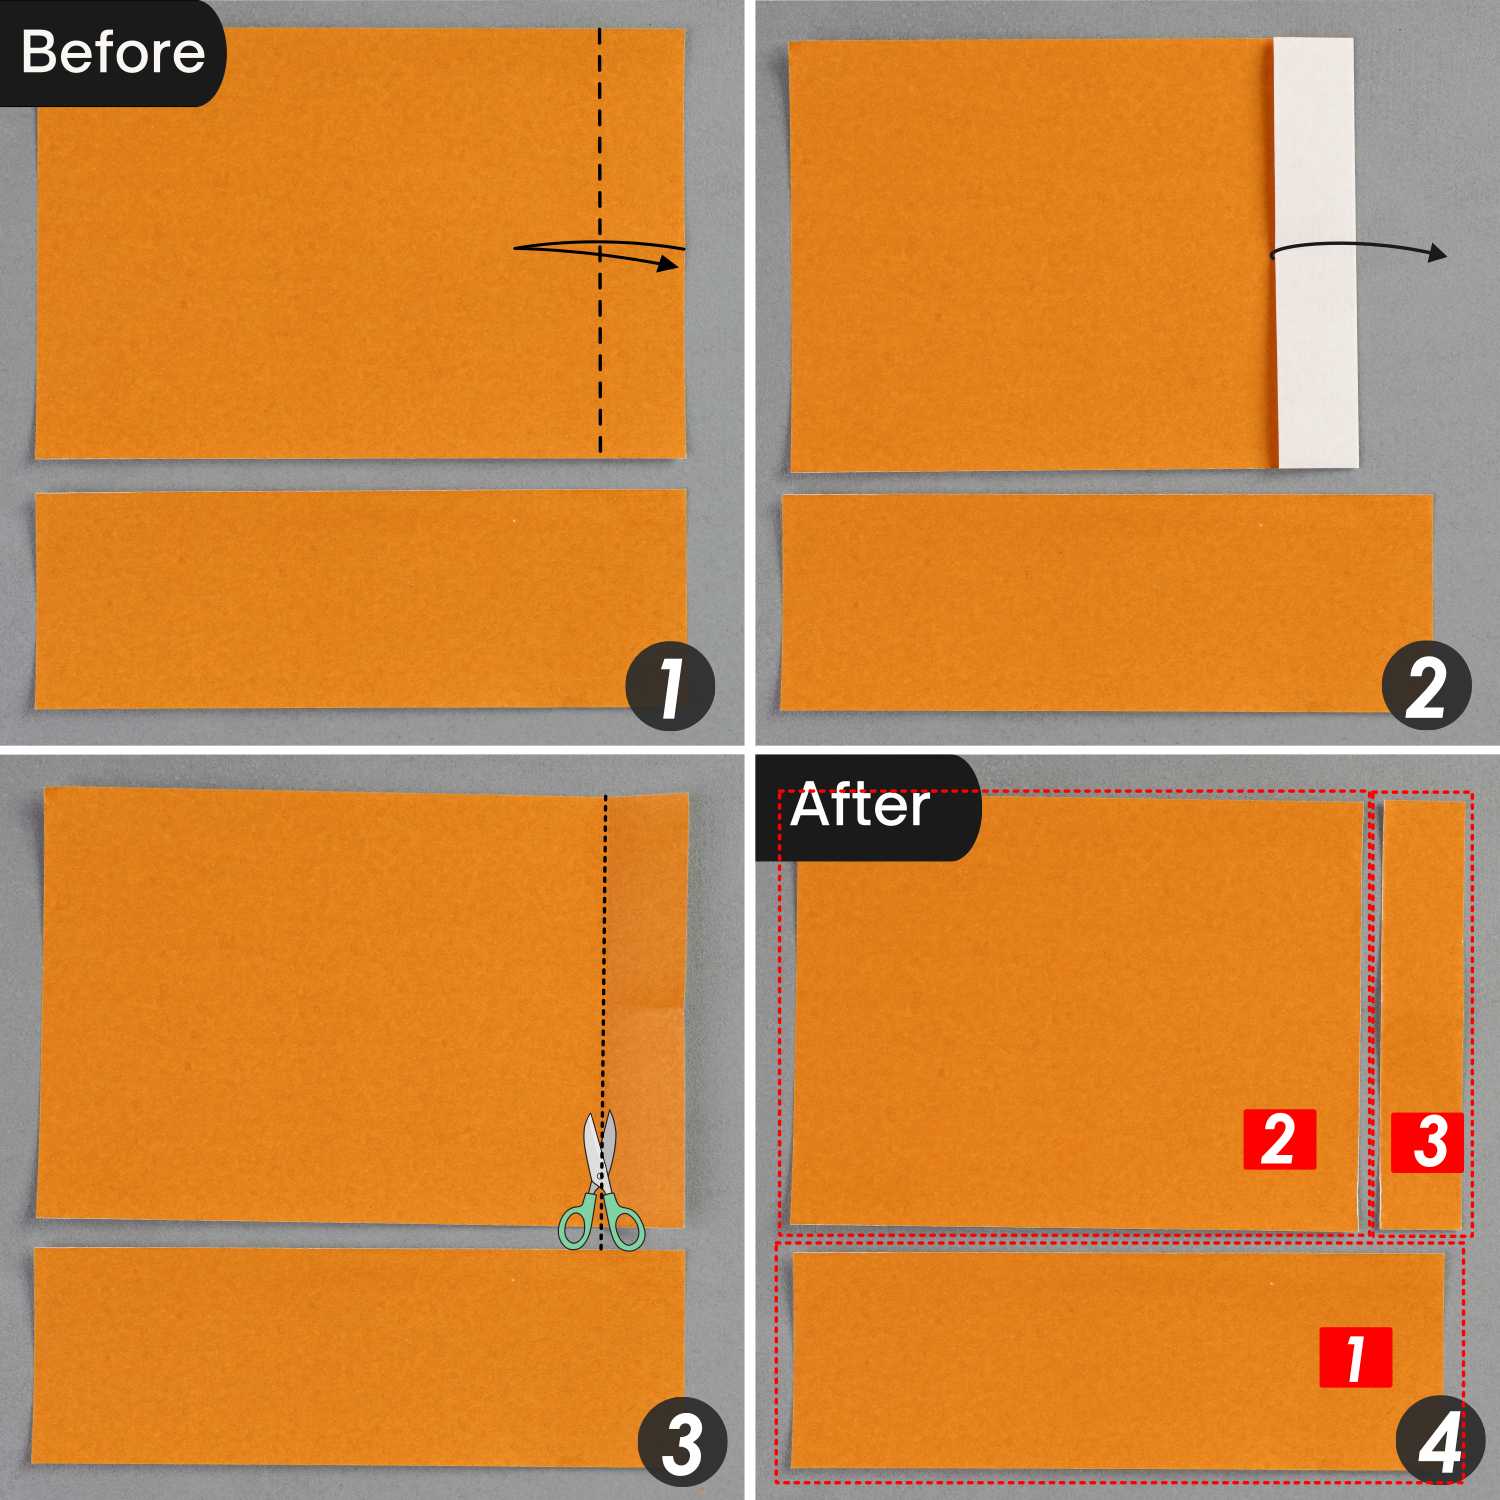
Step 3
Fold the right edge of the large paper to the left side along the dotted line, leave a crease, and unfold it, then cut this paper along this crease.
Origami Tank Part 2
Step 1
Fold the paper marked Number 1 in half horizontally, create a crease, and unfold it.
Step 2
Fold it in half vertically from right to left.
Step 3
Fold the top and bottom right corners along the dotted lines, crease them well, and unfold them.
Step 4
Unfold the paper.
Step 5
Push the top and bottom edges’ center point toward the center along the existing creases, then fold the right edge to align with the left edge.
Step 6
Fold the top and bottom edges to align with the center horizontal crease. Then, turn the paper from right to left and repeat this step, folding the top and bottom edges to align with the center horizontal crease.
Step 7
Fold the left point to the right side along the dotted line and unfold it.
Step 8
Fold the top layer to the left side, then turn the paper over and fold the top layer on this side to the right side.
Step 9
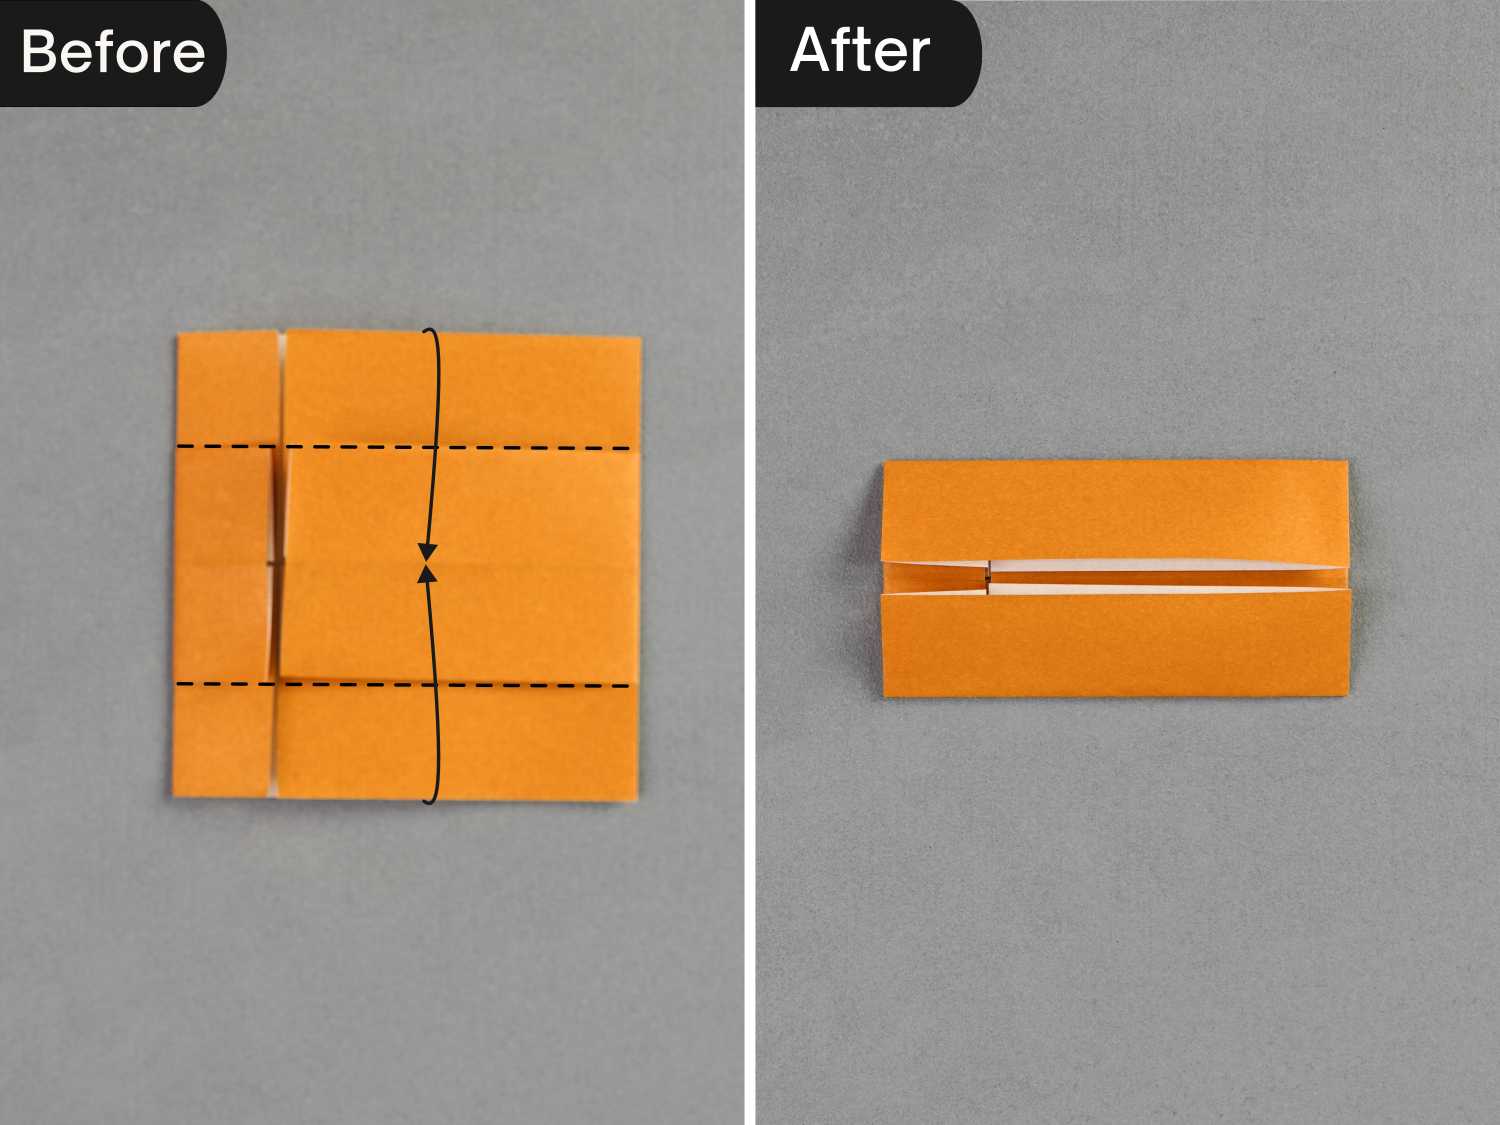
Rotate the paper 90 degrees from right to left, then expand the center.
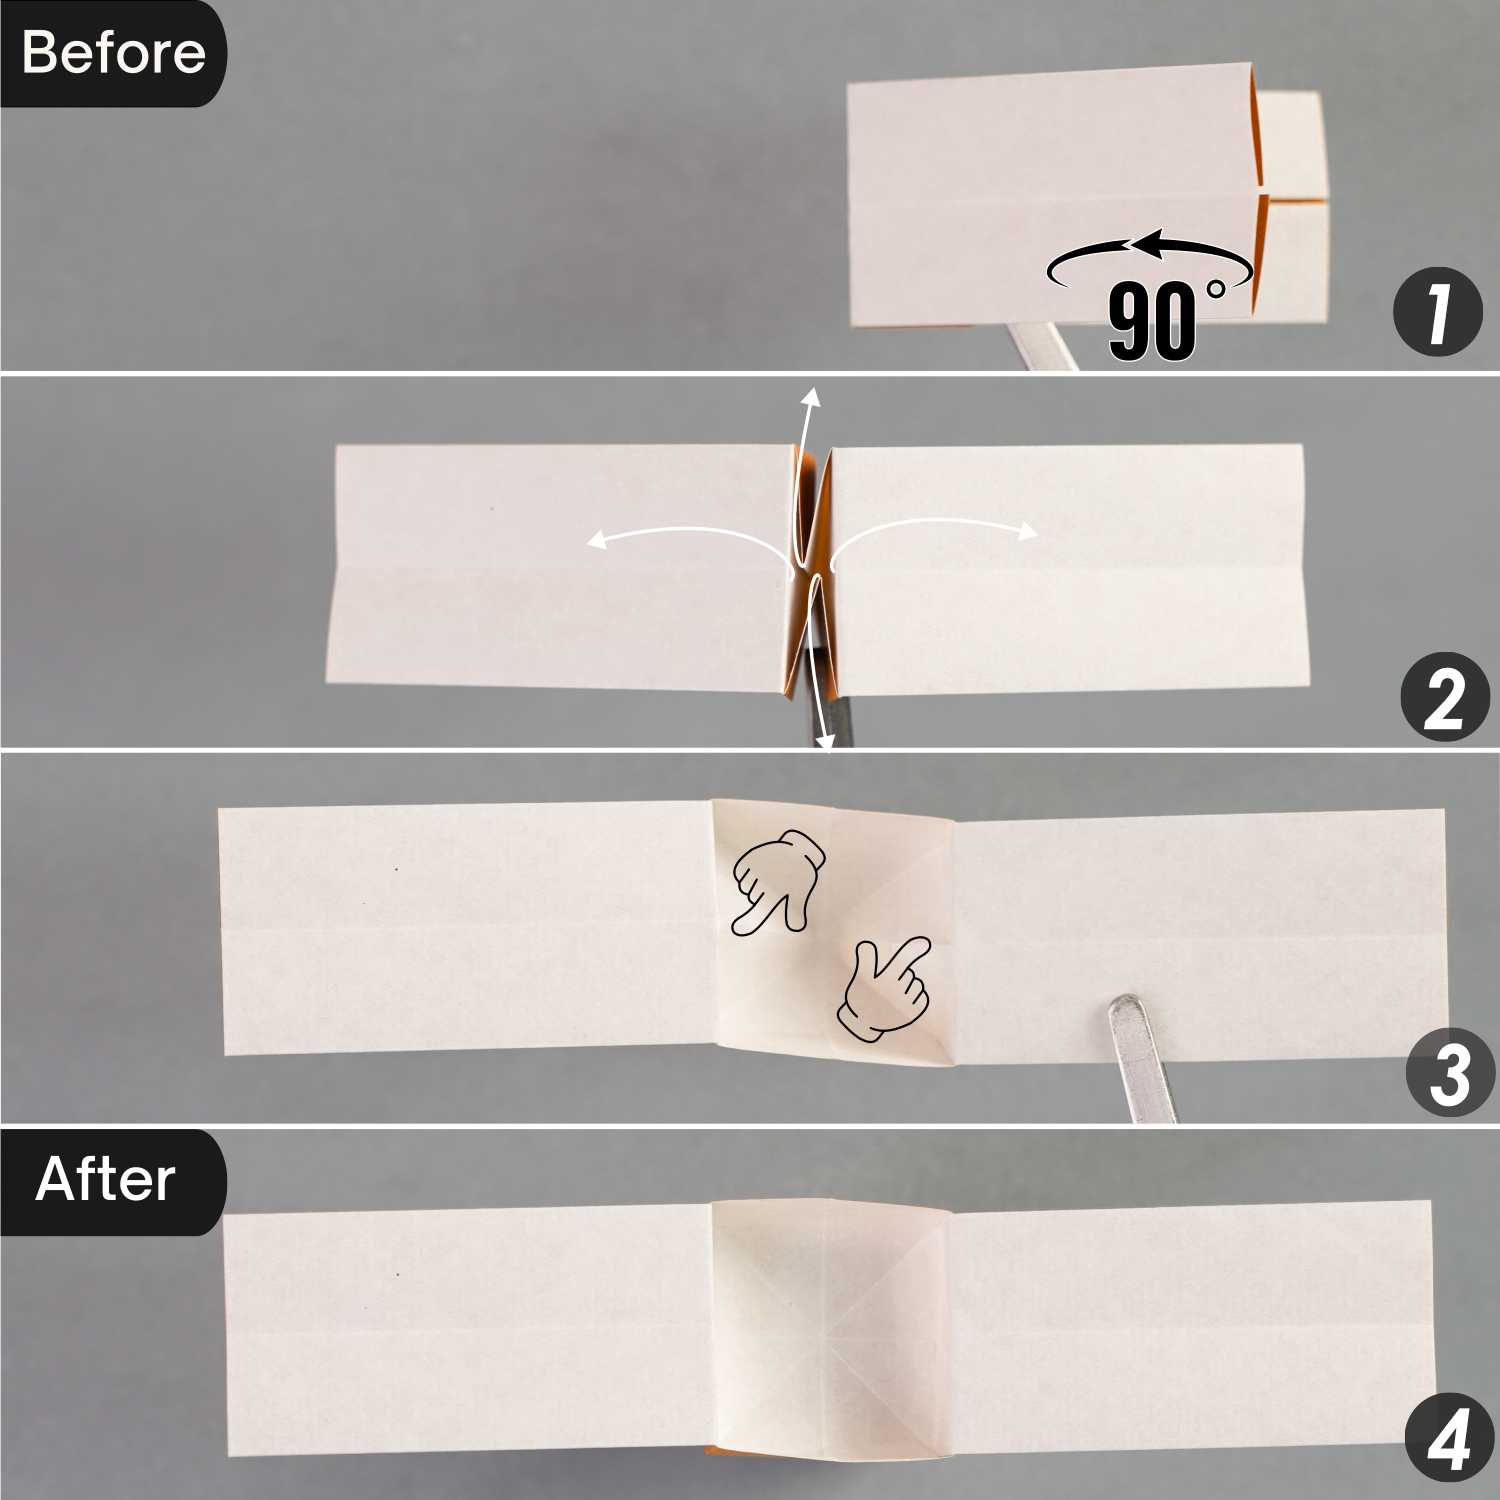
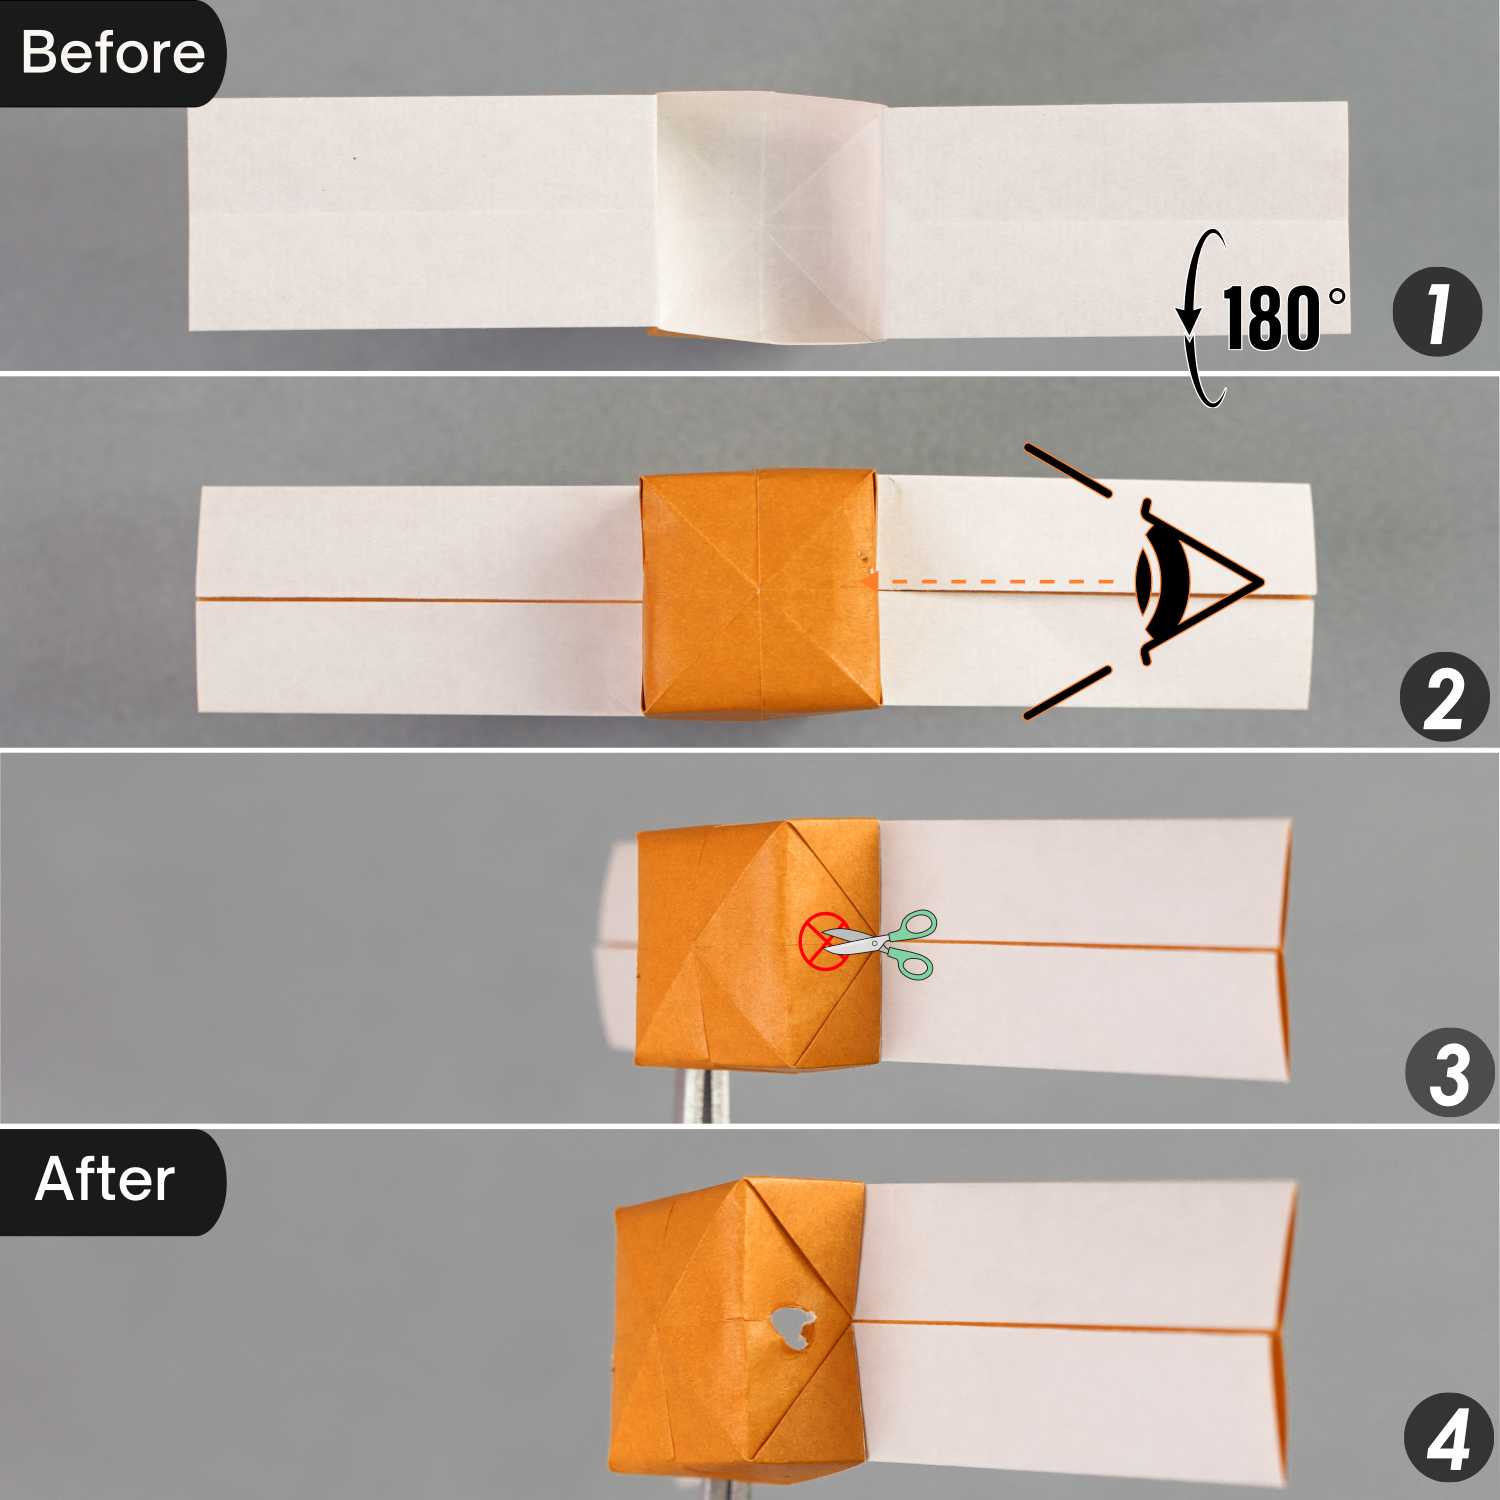
Step 10
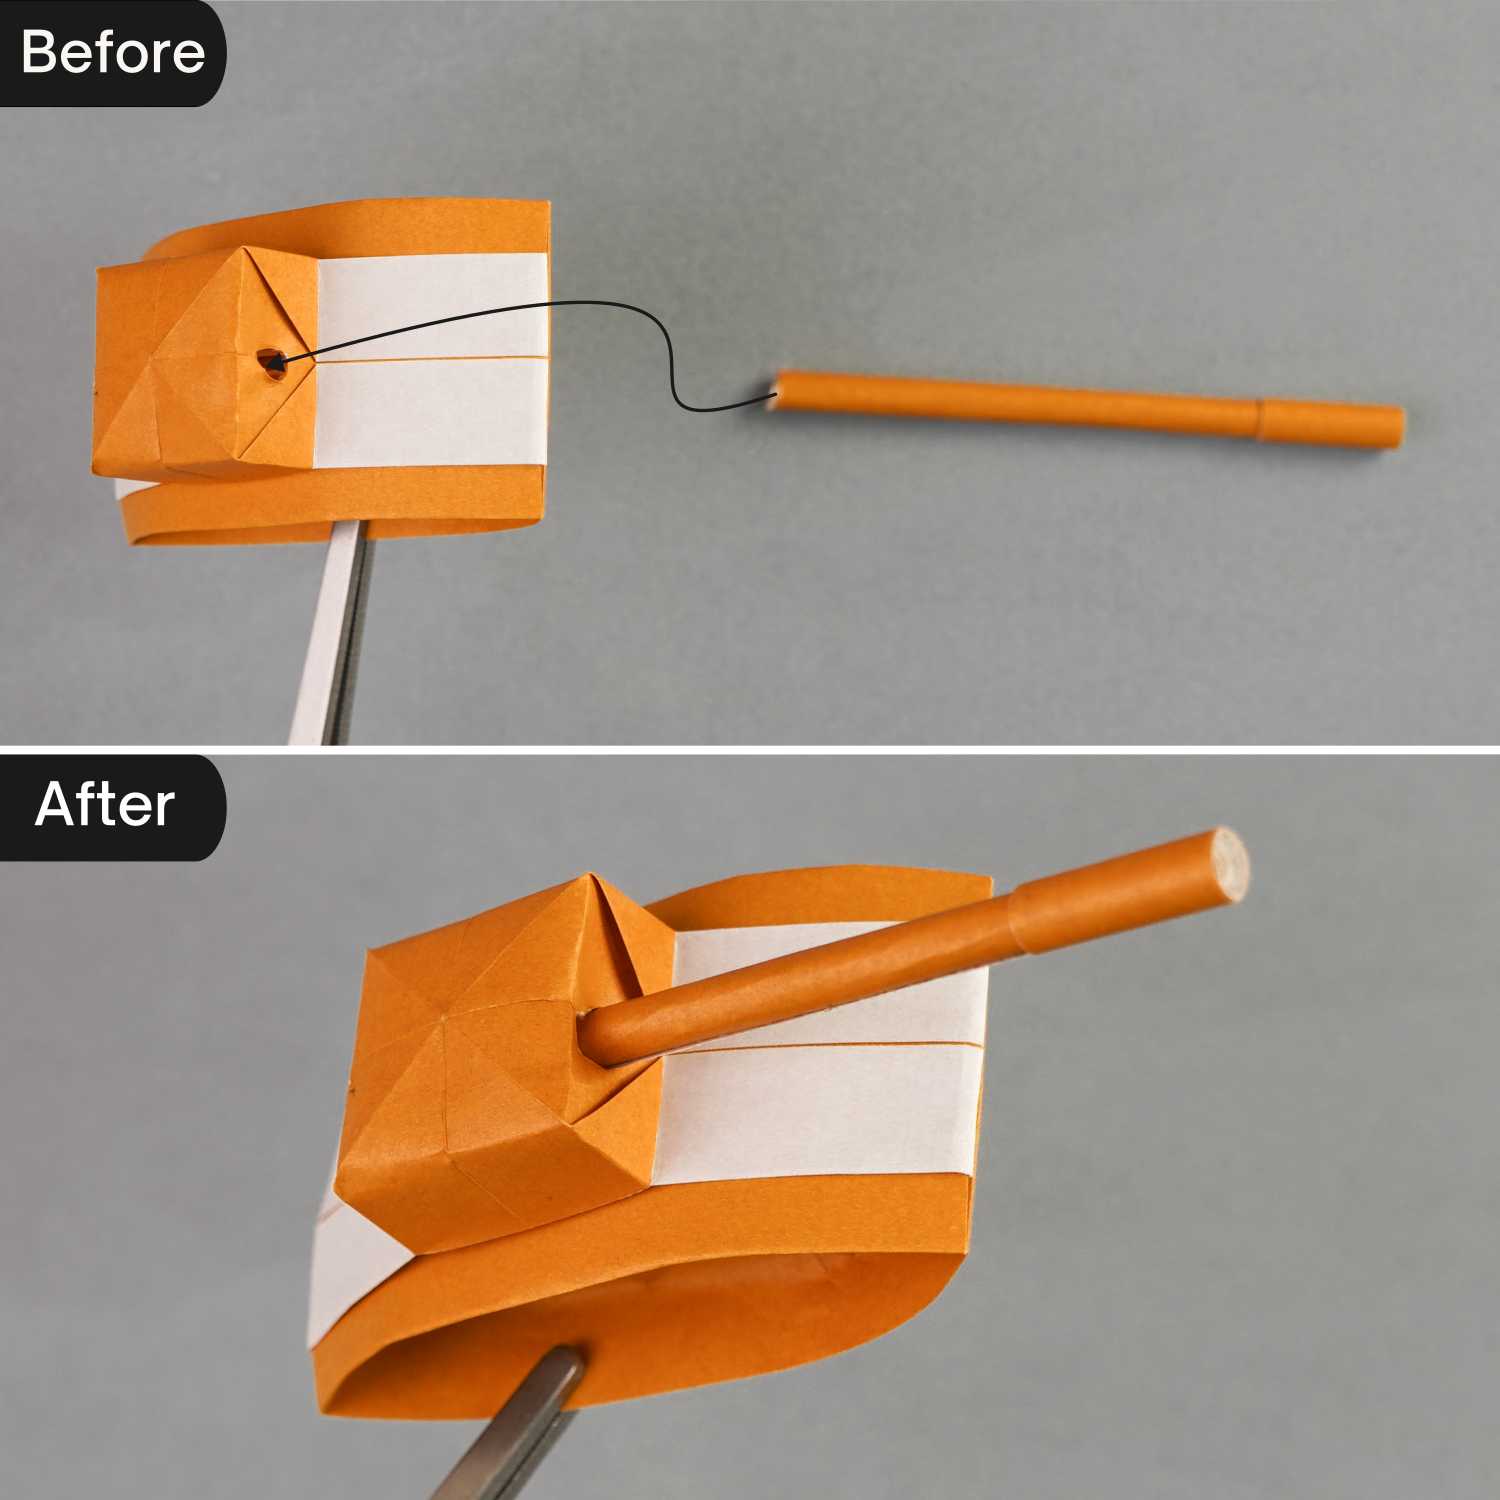
Rotate the paper 180 degrees from front to back, and then use scissors to drill a small hole on the right side of the raised part in the middle.
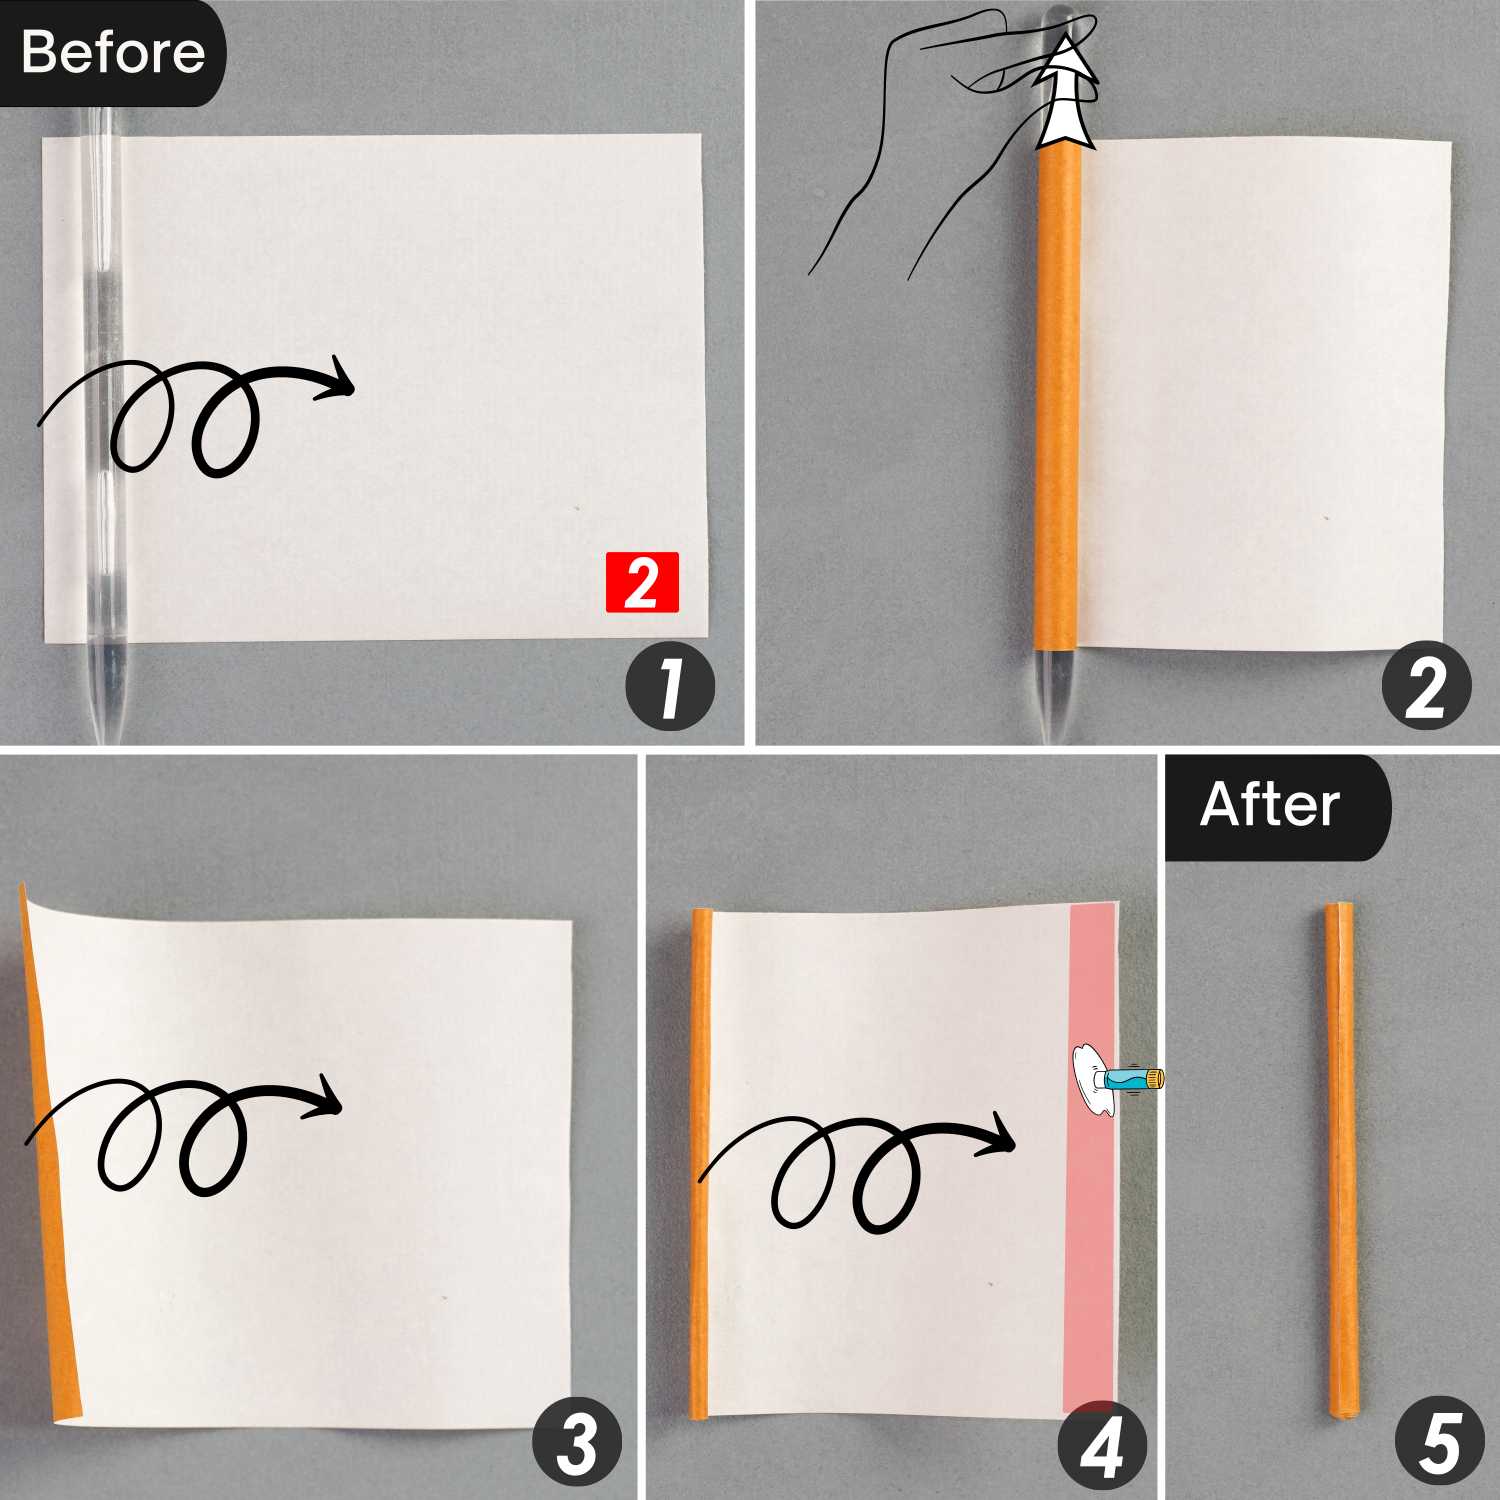
Origami Tank Part 3
Step 1
Start by rolling the paper marked number 2 from the left edge towards the right edge until you form a cylindrical shape. Once you’ve reached the right edge, apply glue to secure the paper, creating a sturdy paper roll or rod.
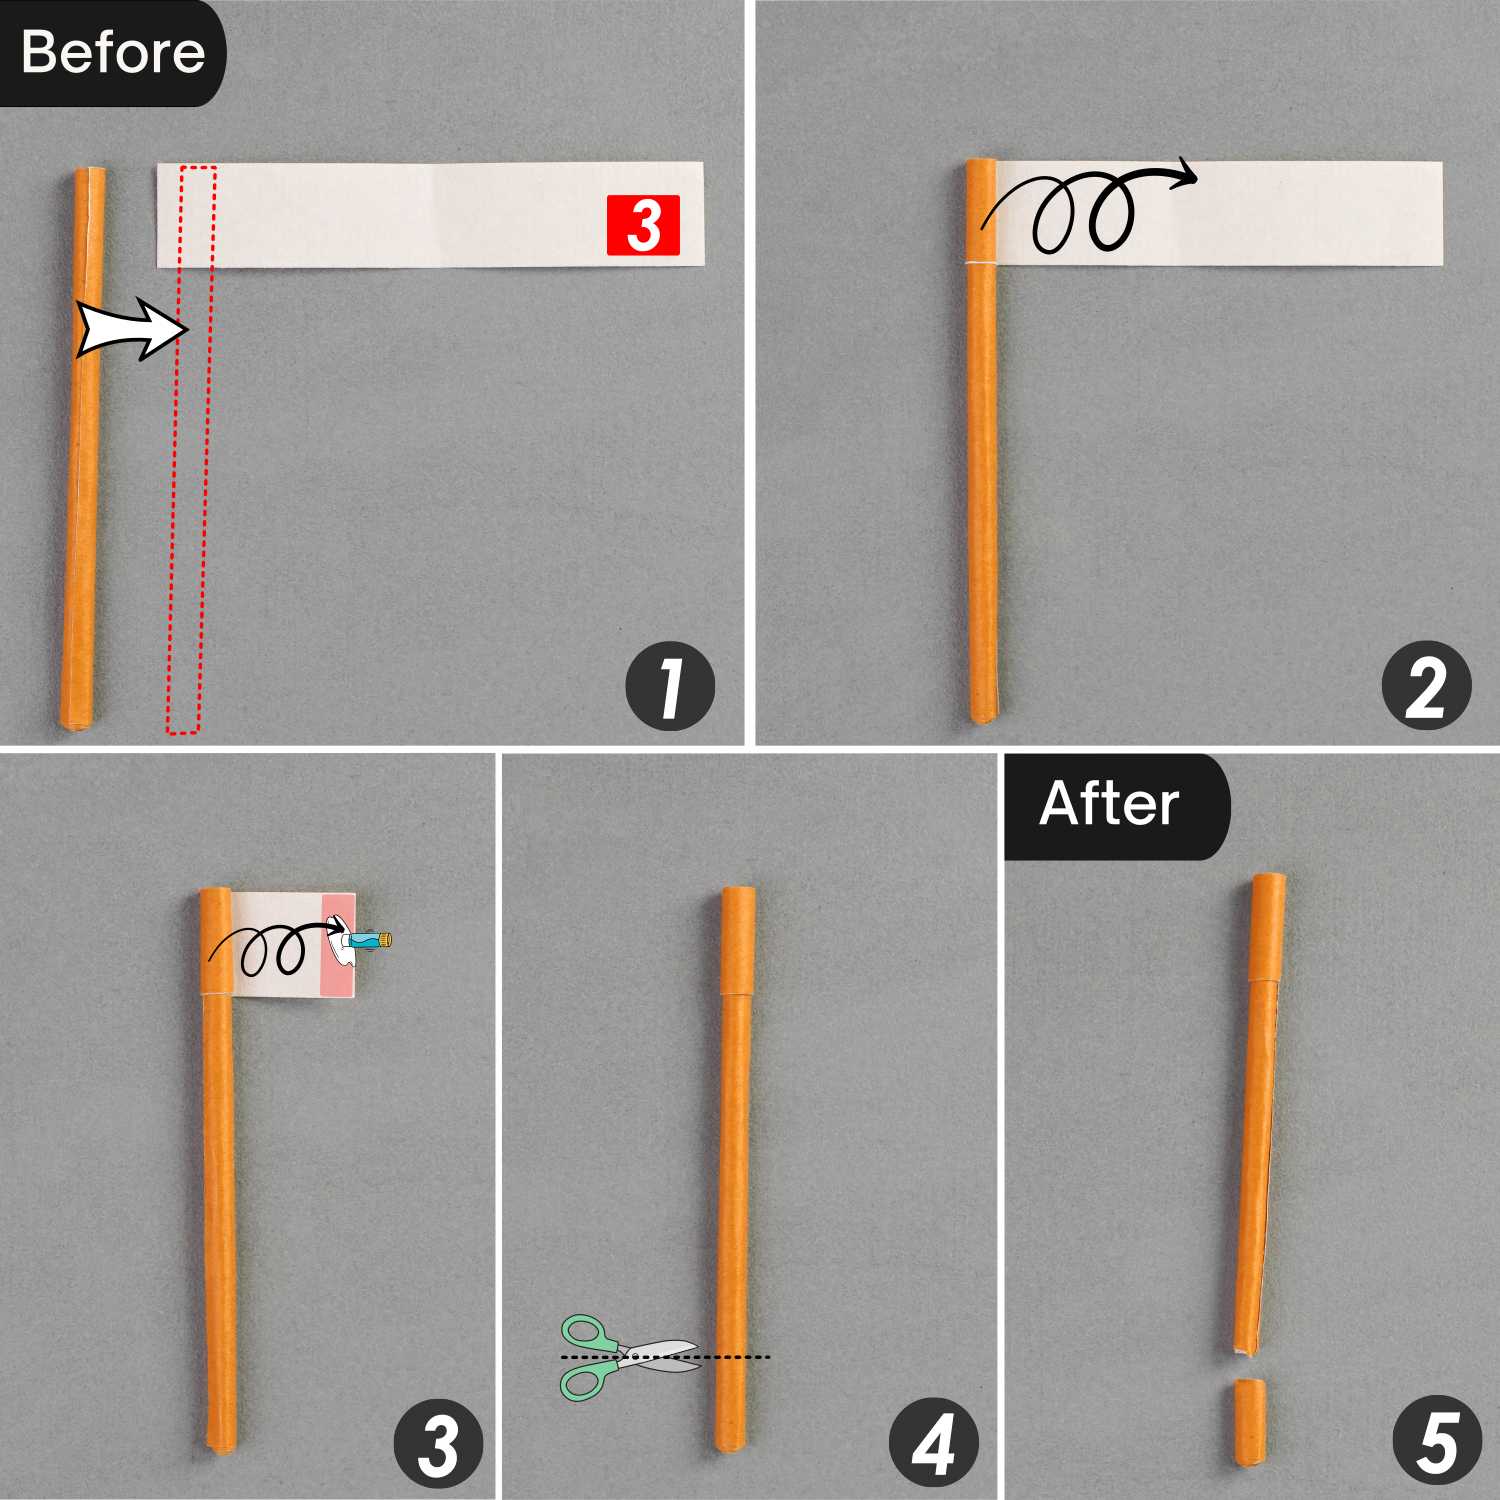
Step 2
Wrap the top of the roll with the paper numbered 3 and cut the bottom a little shorter. This is the gun barrel of the origami tank.
Combine Origami Tank
Step 1
Place part 2 on top of part 1, then flip them over from left to right.
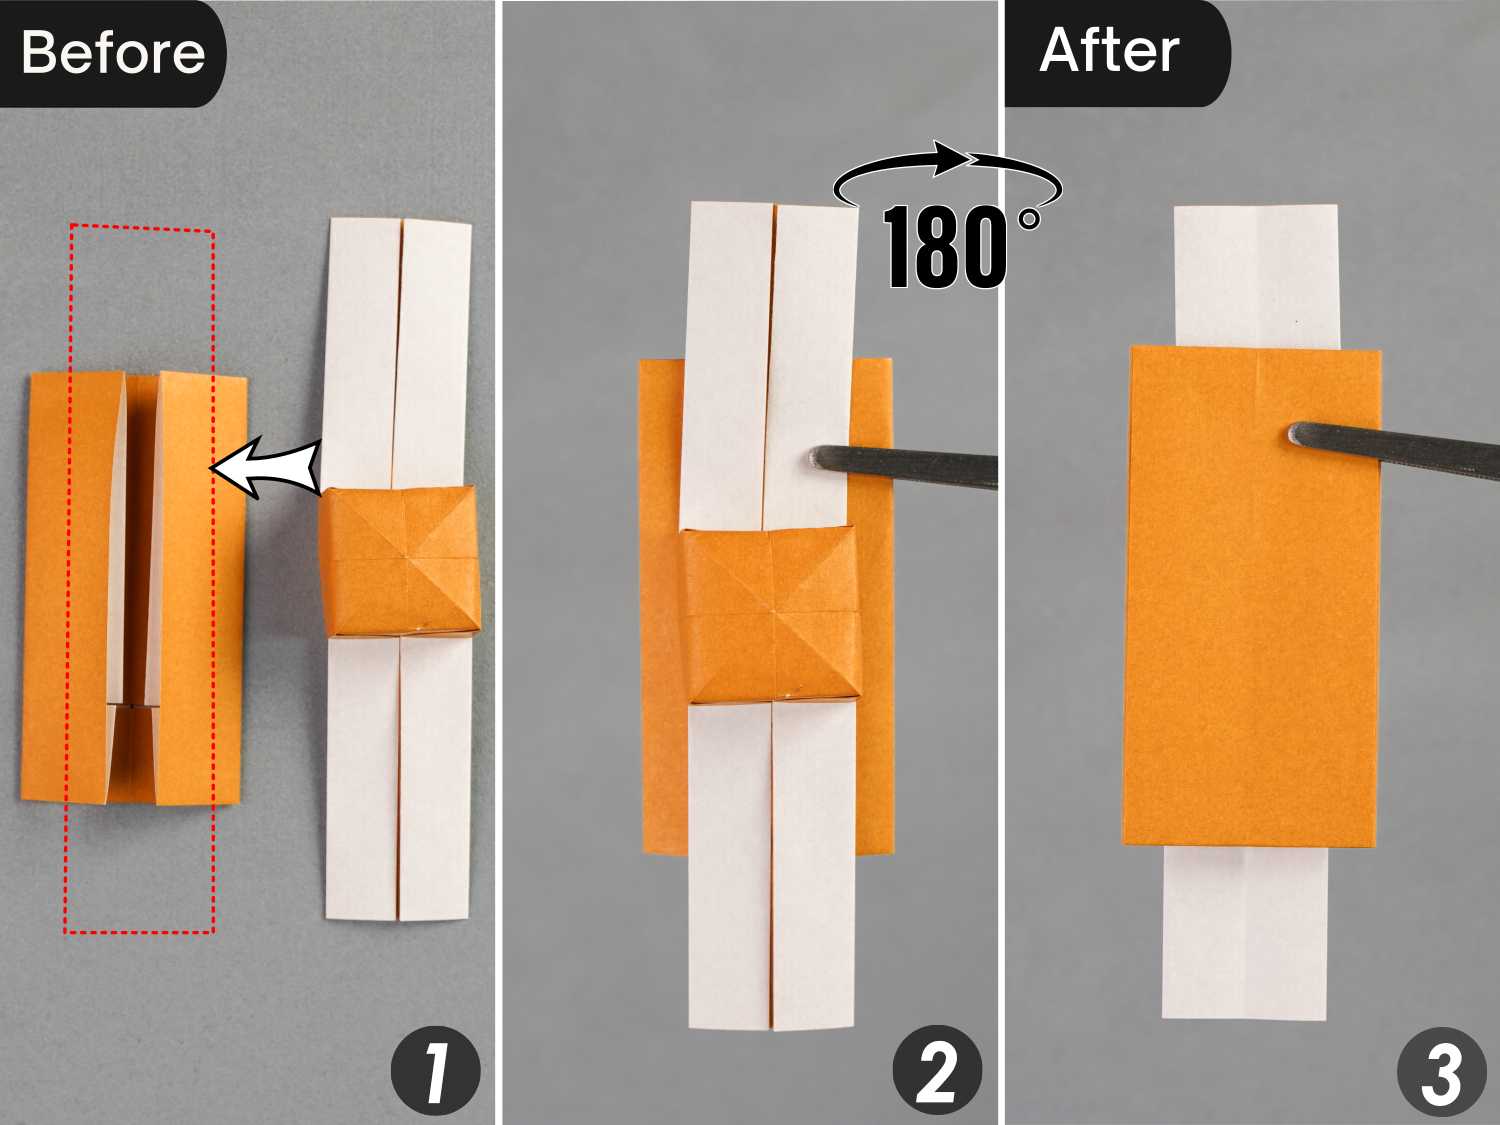
Step 2
Fold the top and bottom parts extending from the 2 parts, then unfold.
Step 3
Tuck the extending part of part 2 on the top side between the layers of part 1.
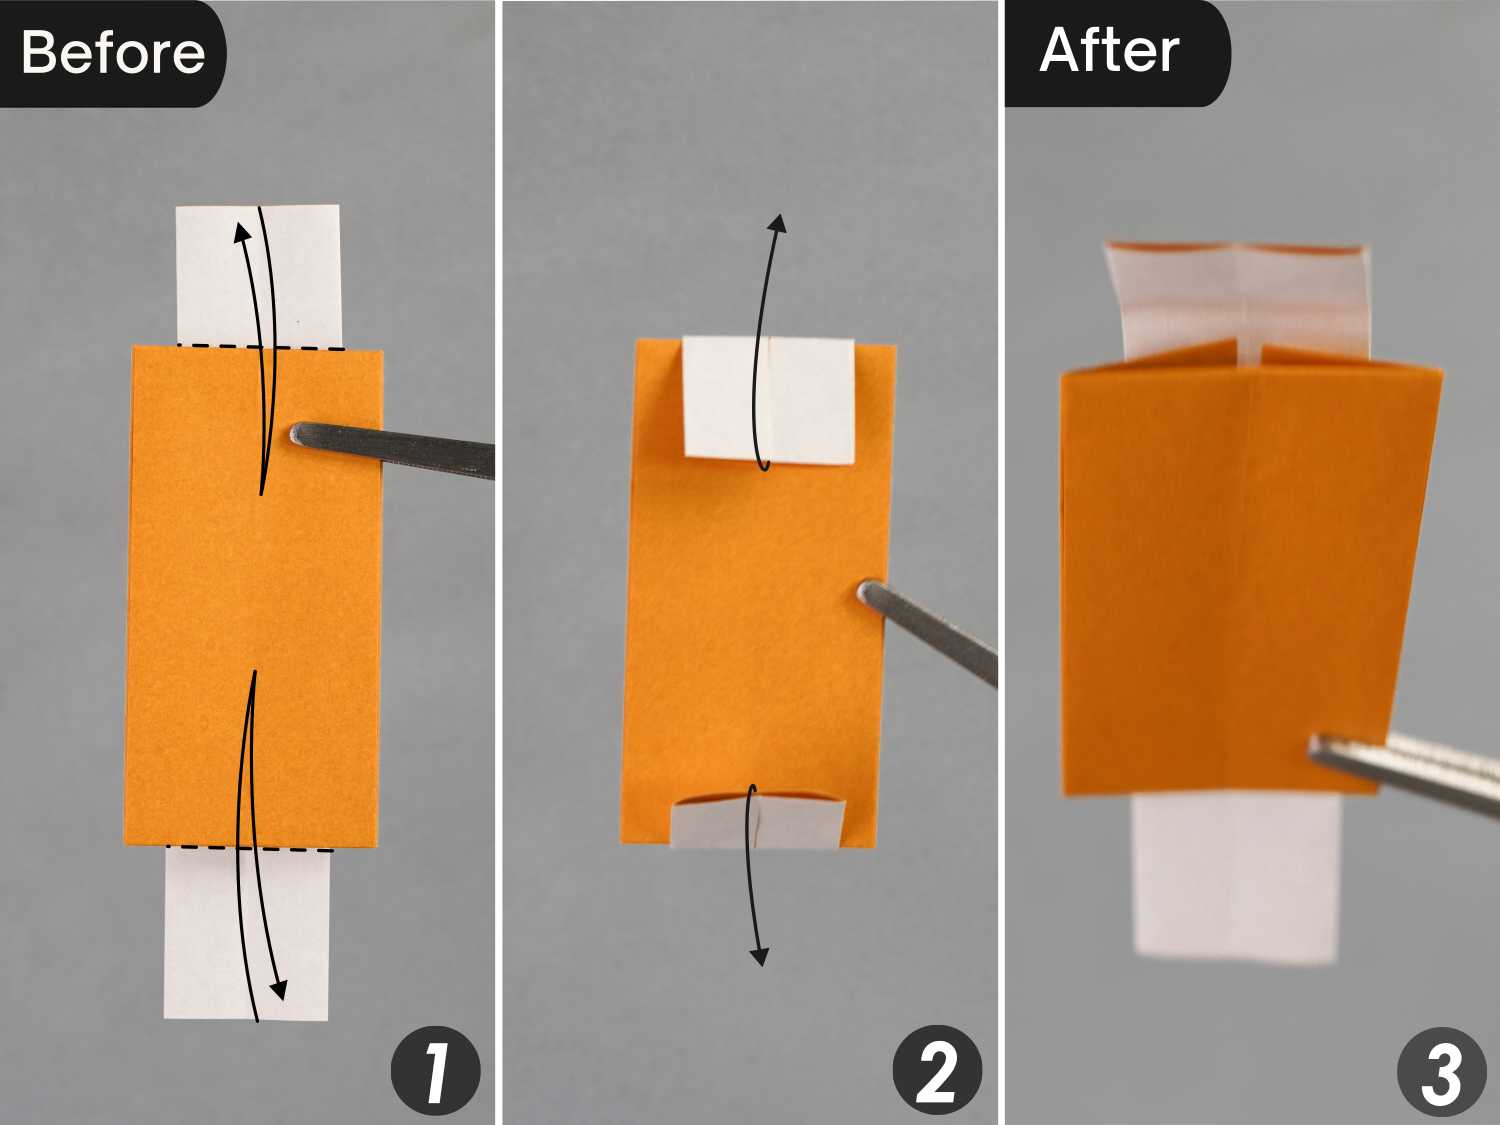
Step 4
Rotate the model 180 degrees from back to front.
Step 5
Likewise, tuck the extension of part 2 on this end between the two layers of part 1.
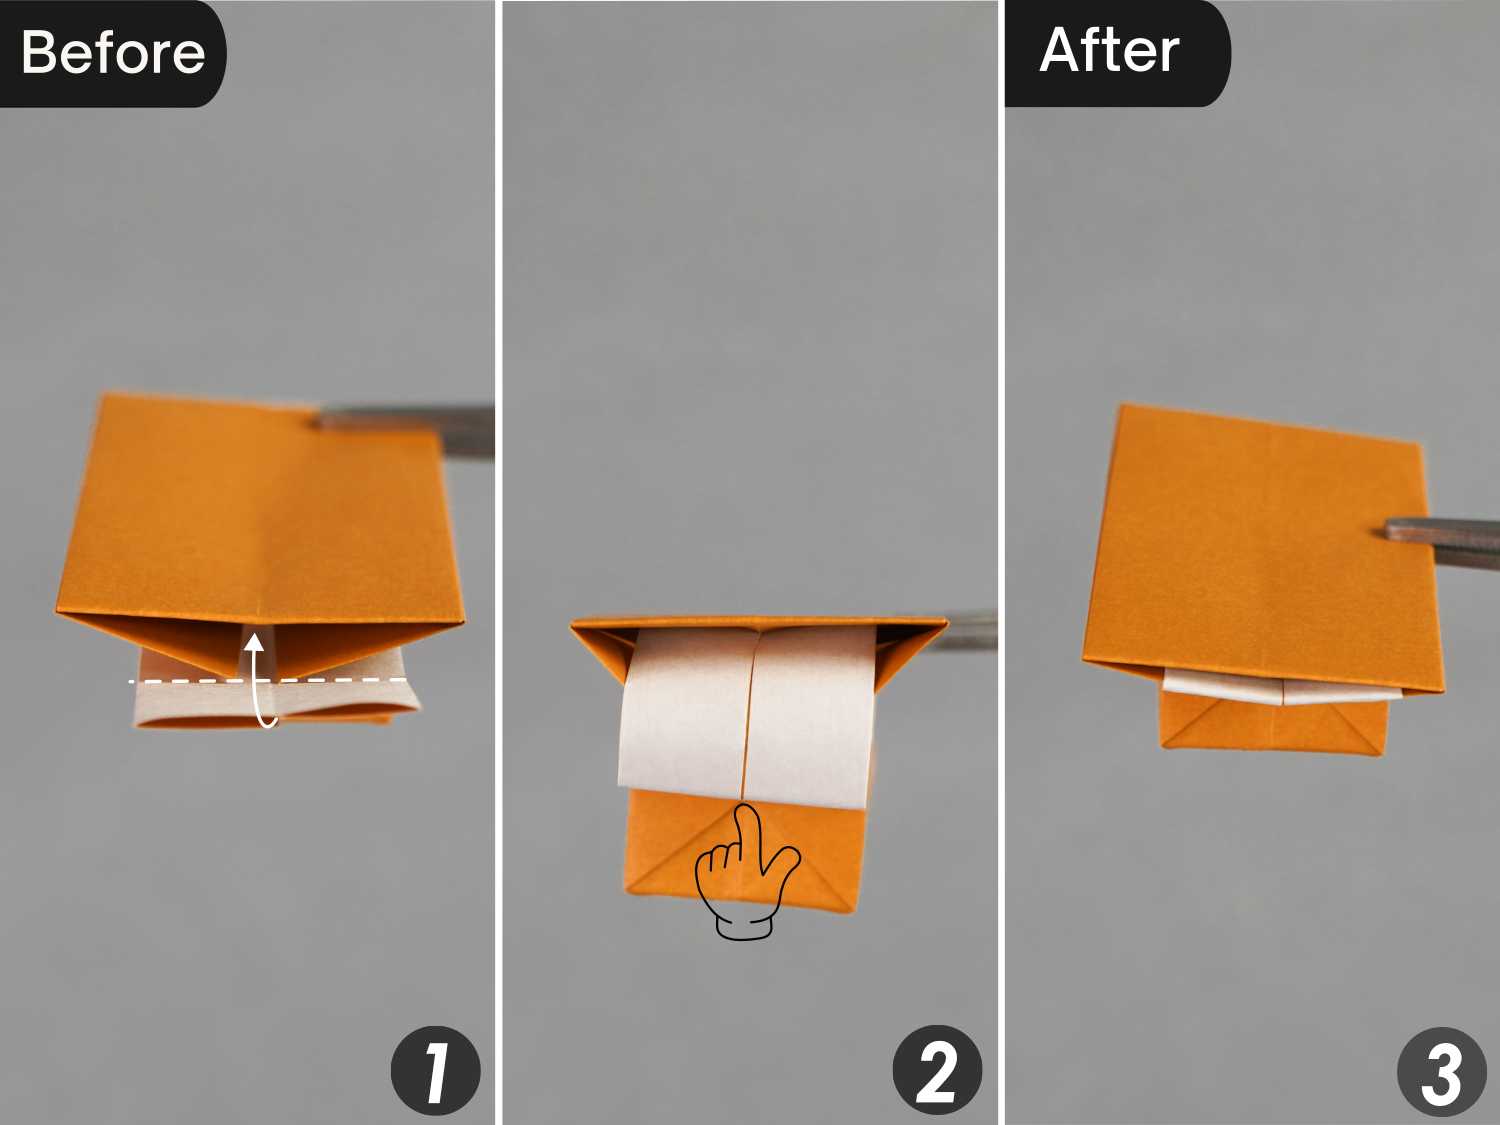
Step 6
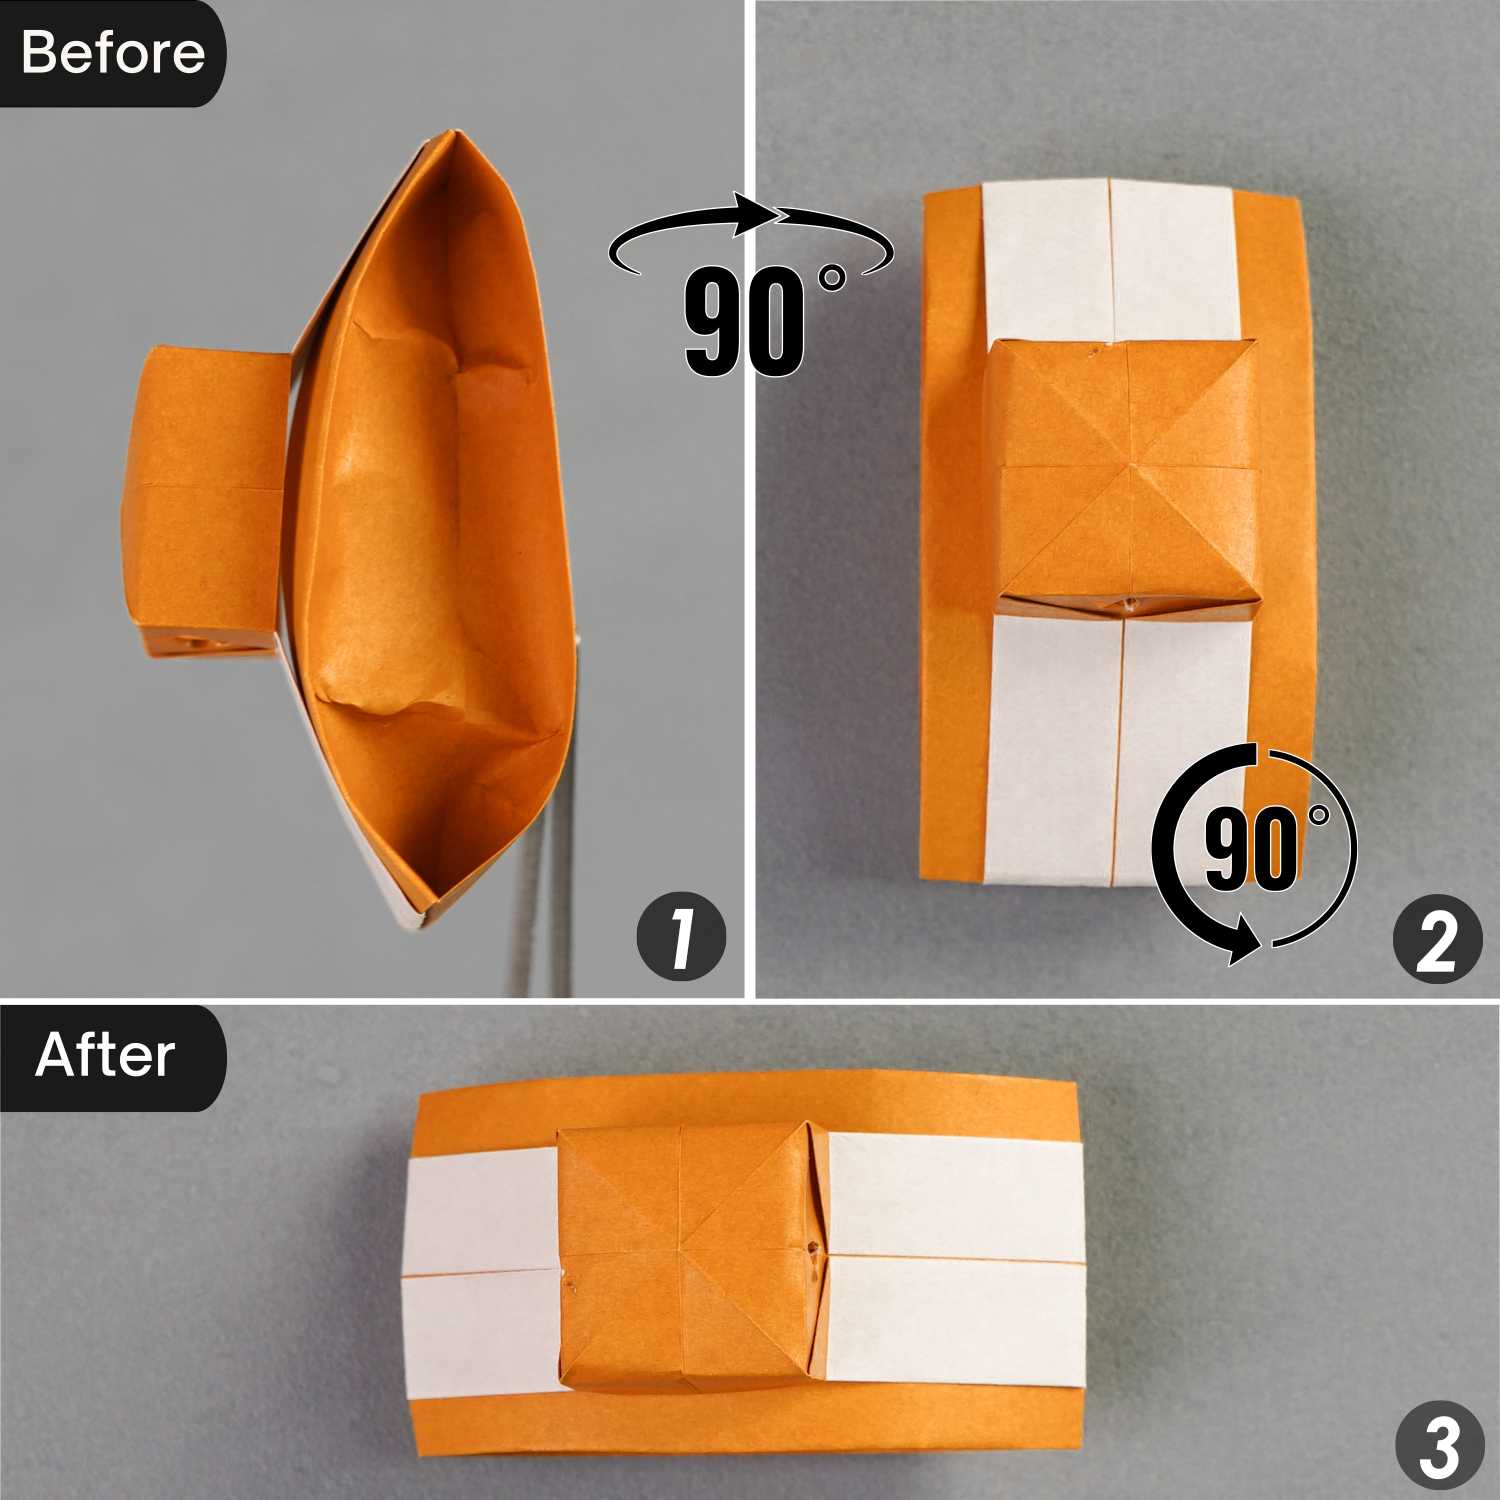
Rotate the model 180 degrees from back to front, then another 90 degrees from right to left.
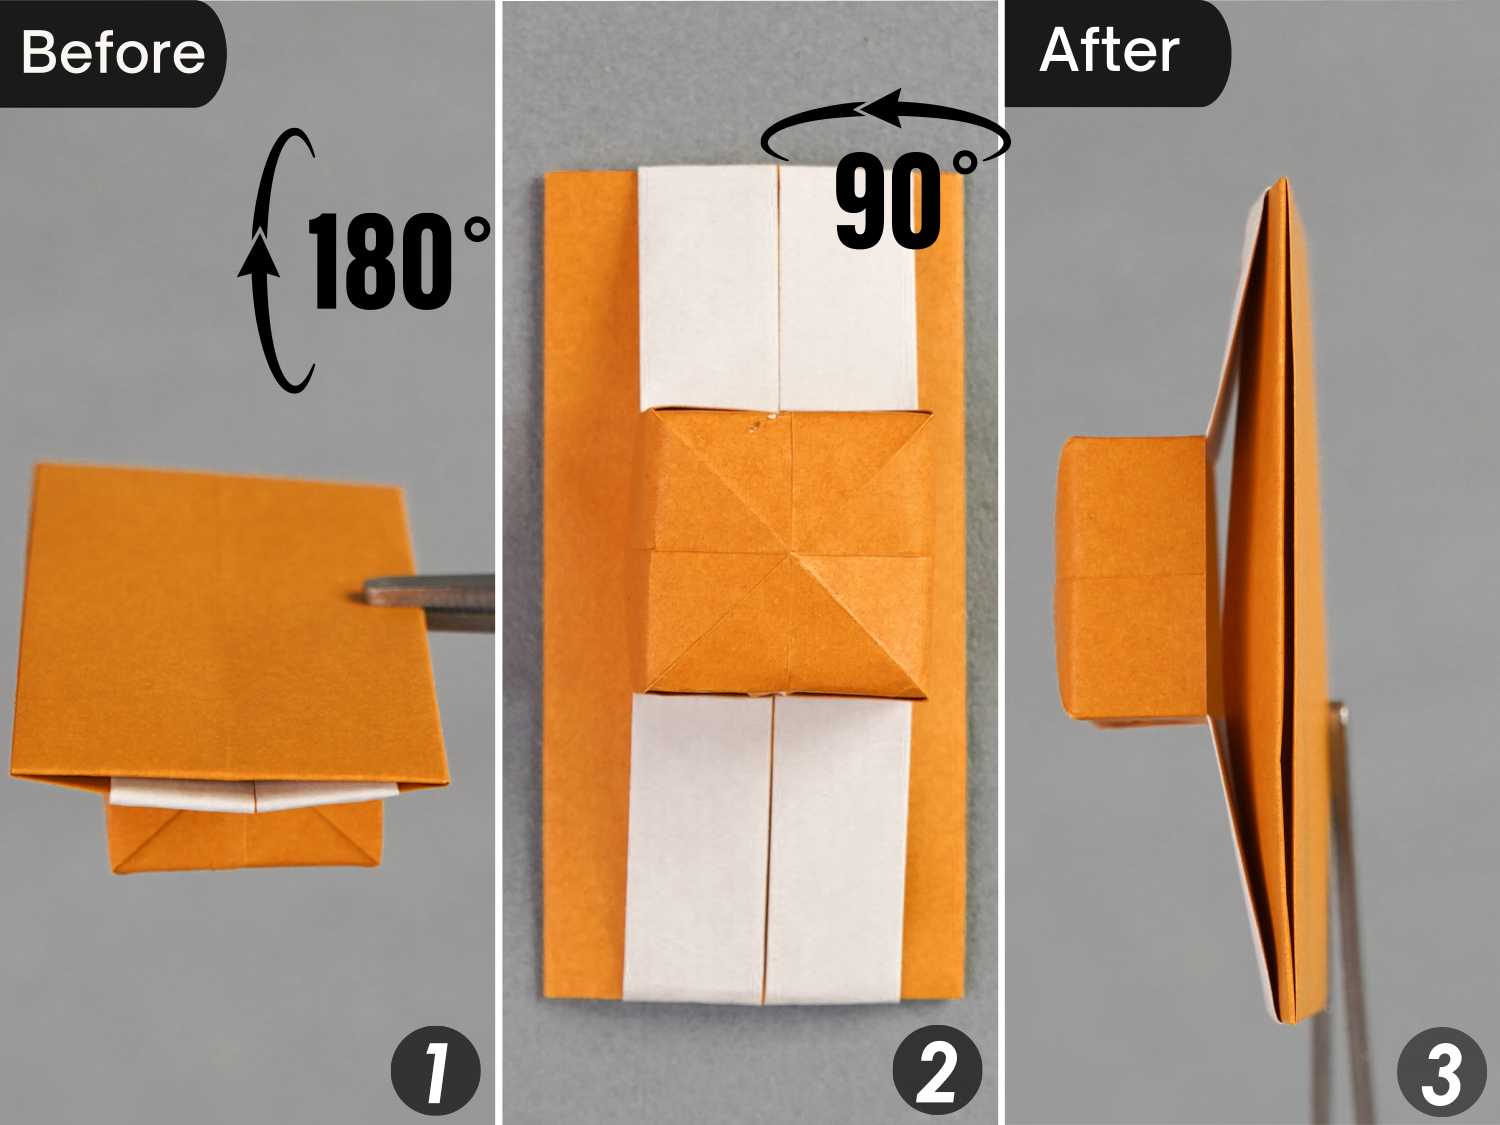
Step 7
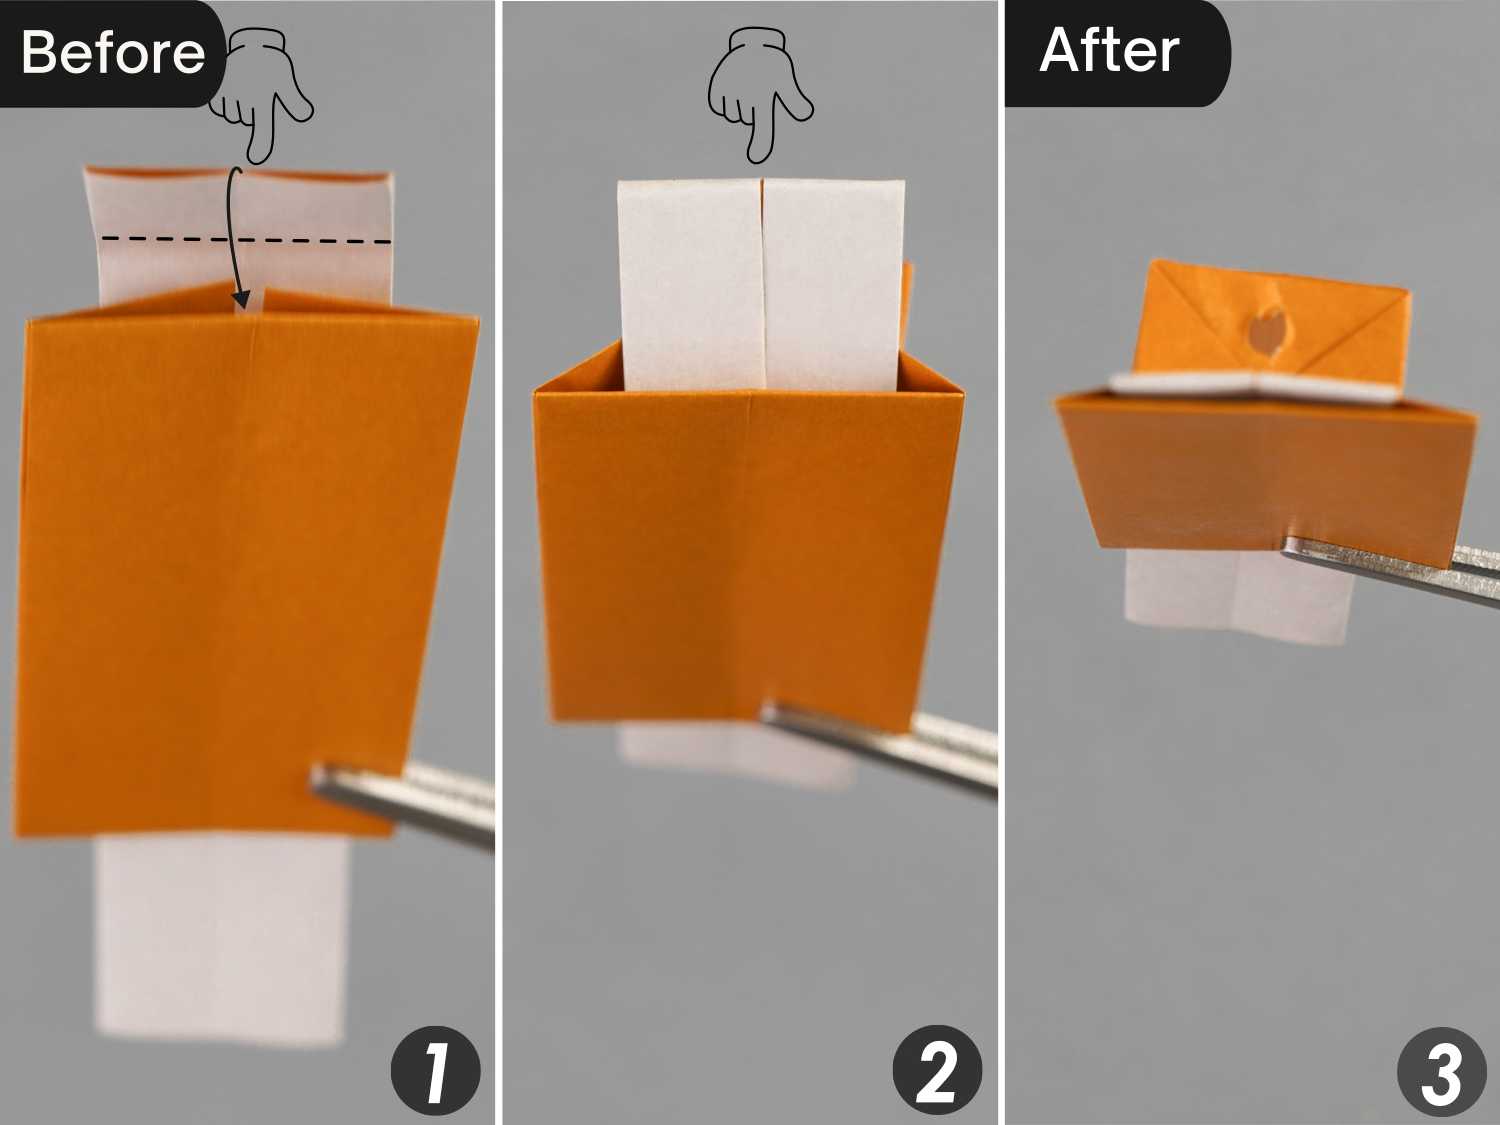
Open up this opening.
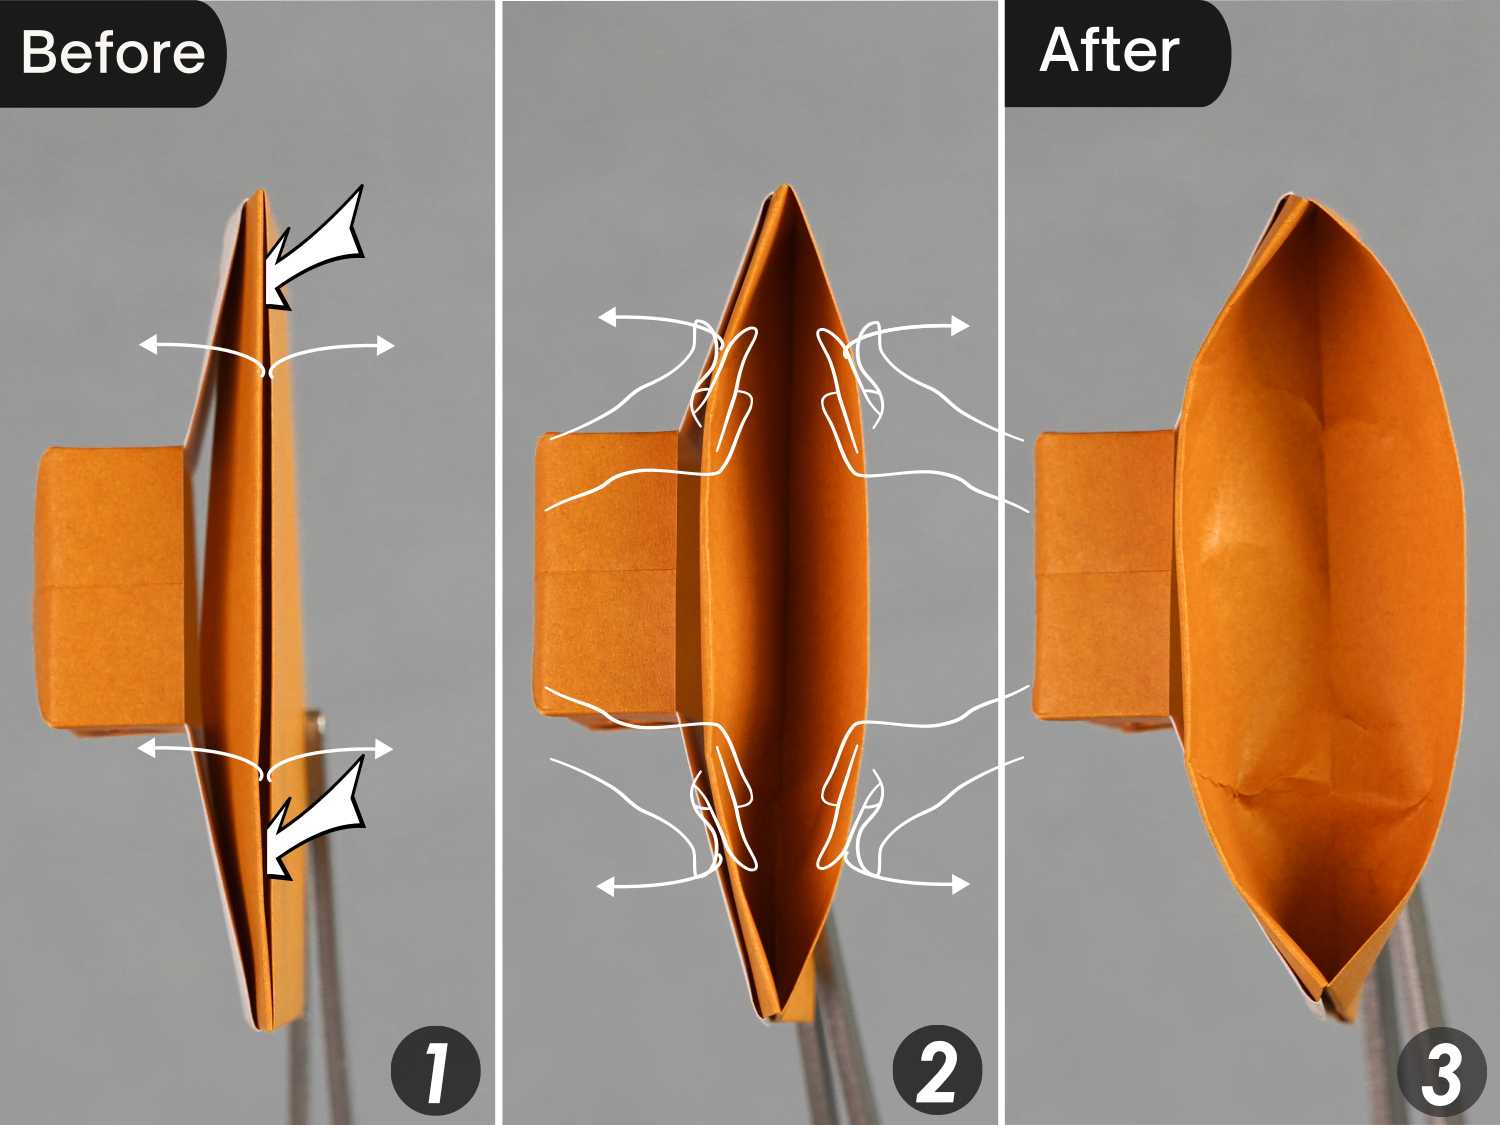
Step 8
Rotate the model 180 degrees from left to right.

Step 9
Expand the opening on this side.
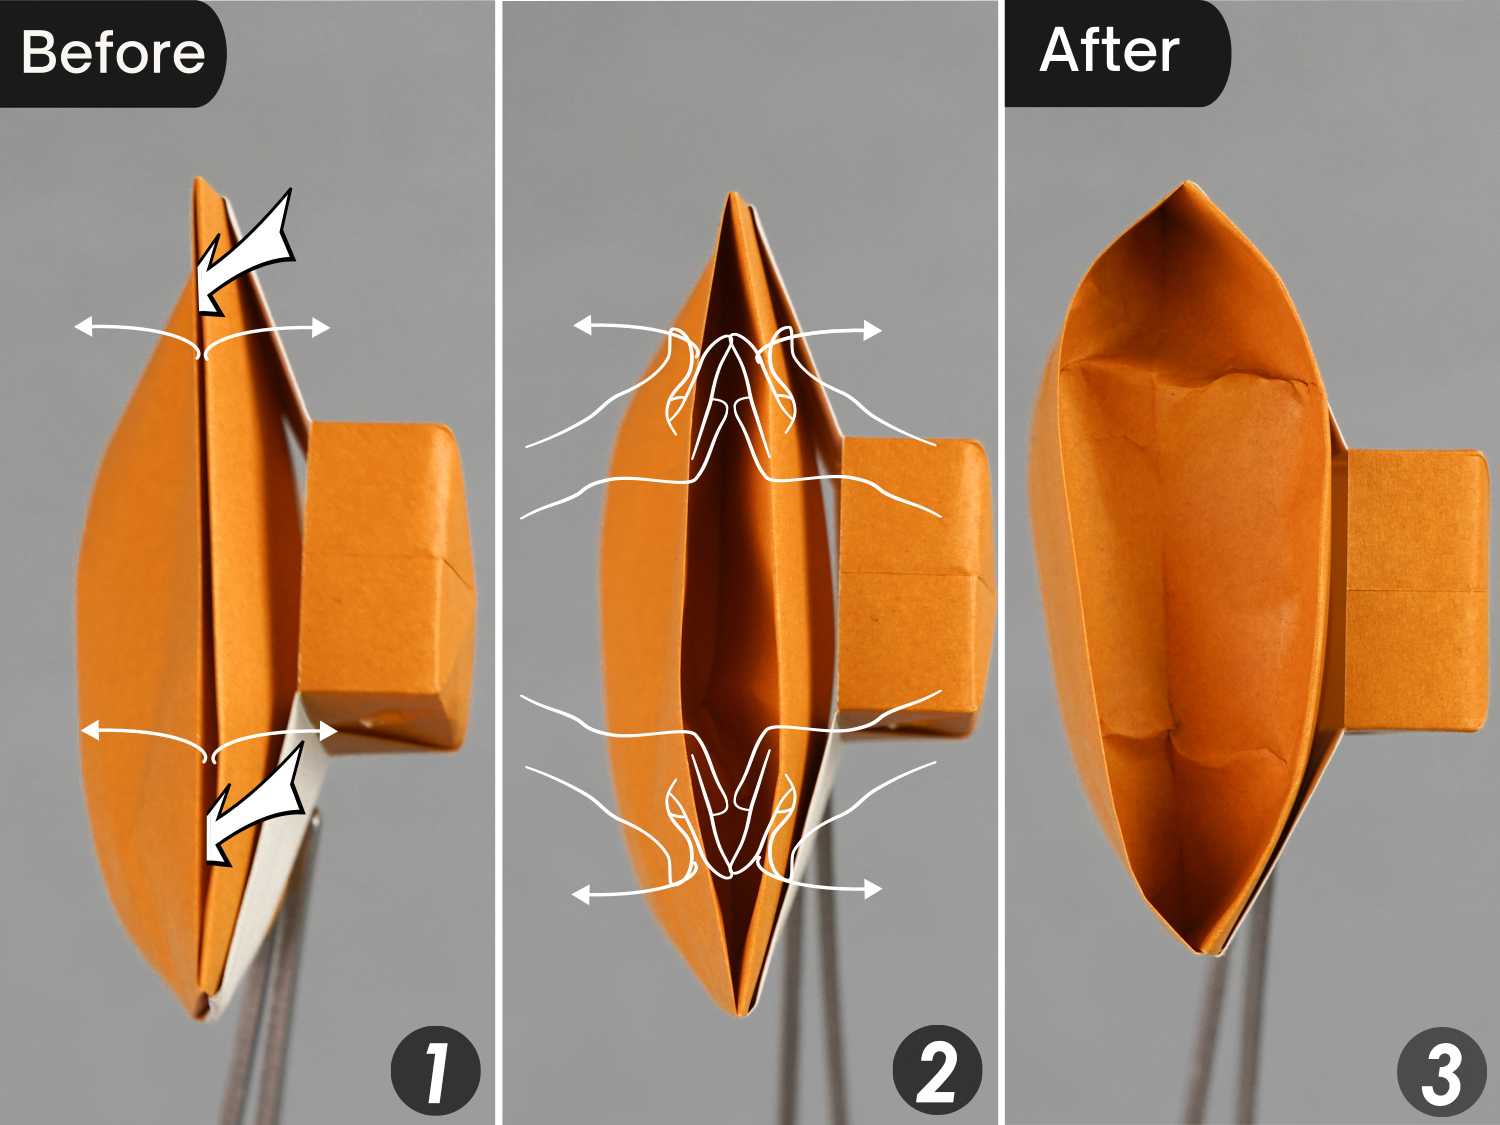
Step 10
Rotate the model 90 degrees from left to right, then another 90 degrees counterclockwise.
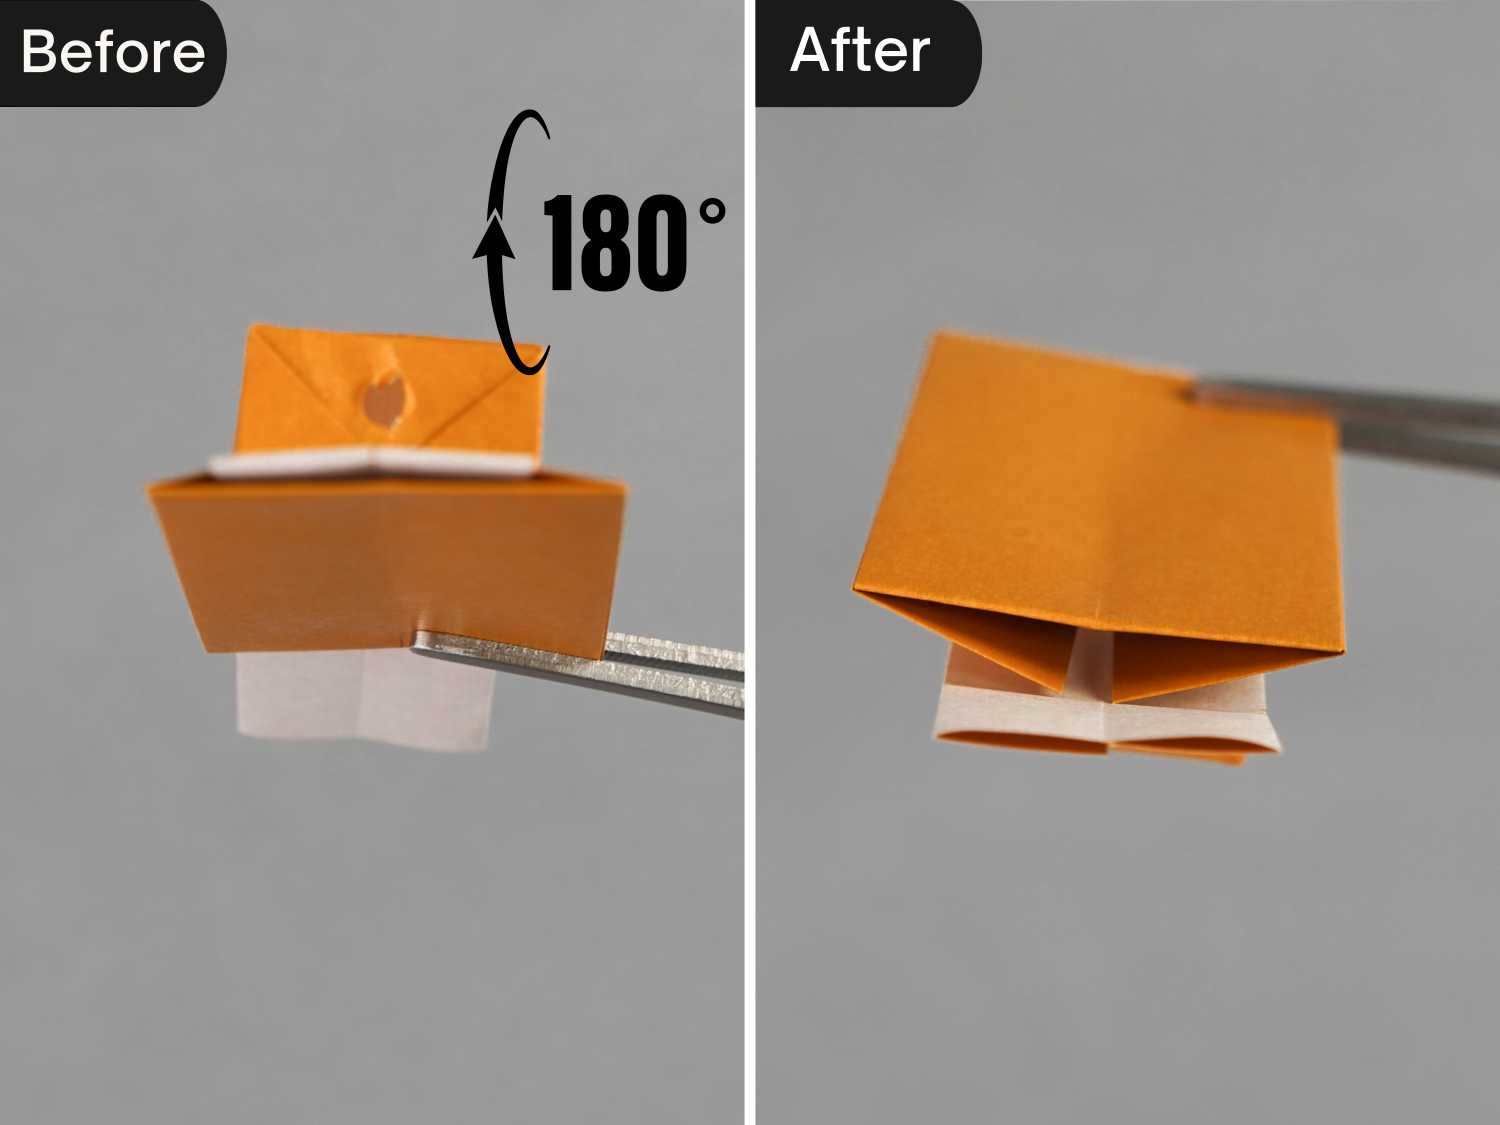
Step 11
Insert the gun barrel into the small hole to complete the assembly of the origami tank.