How to Make an Origami Robot
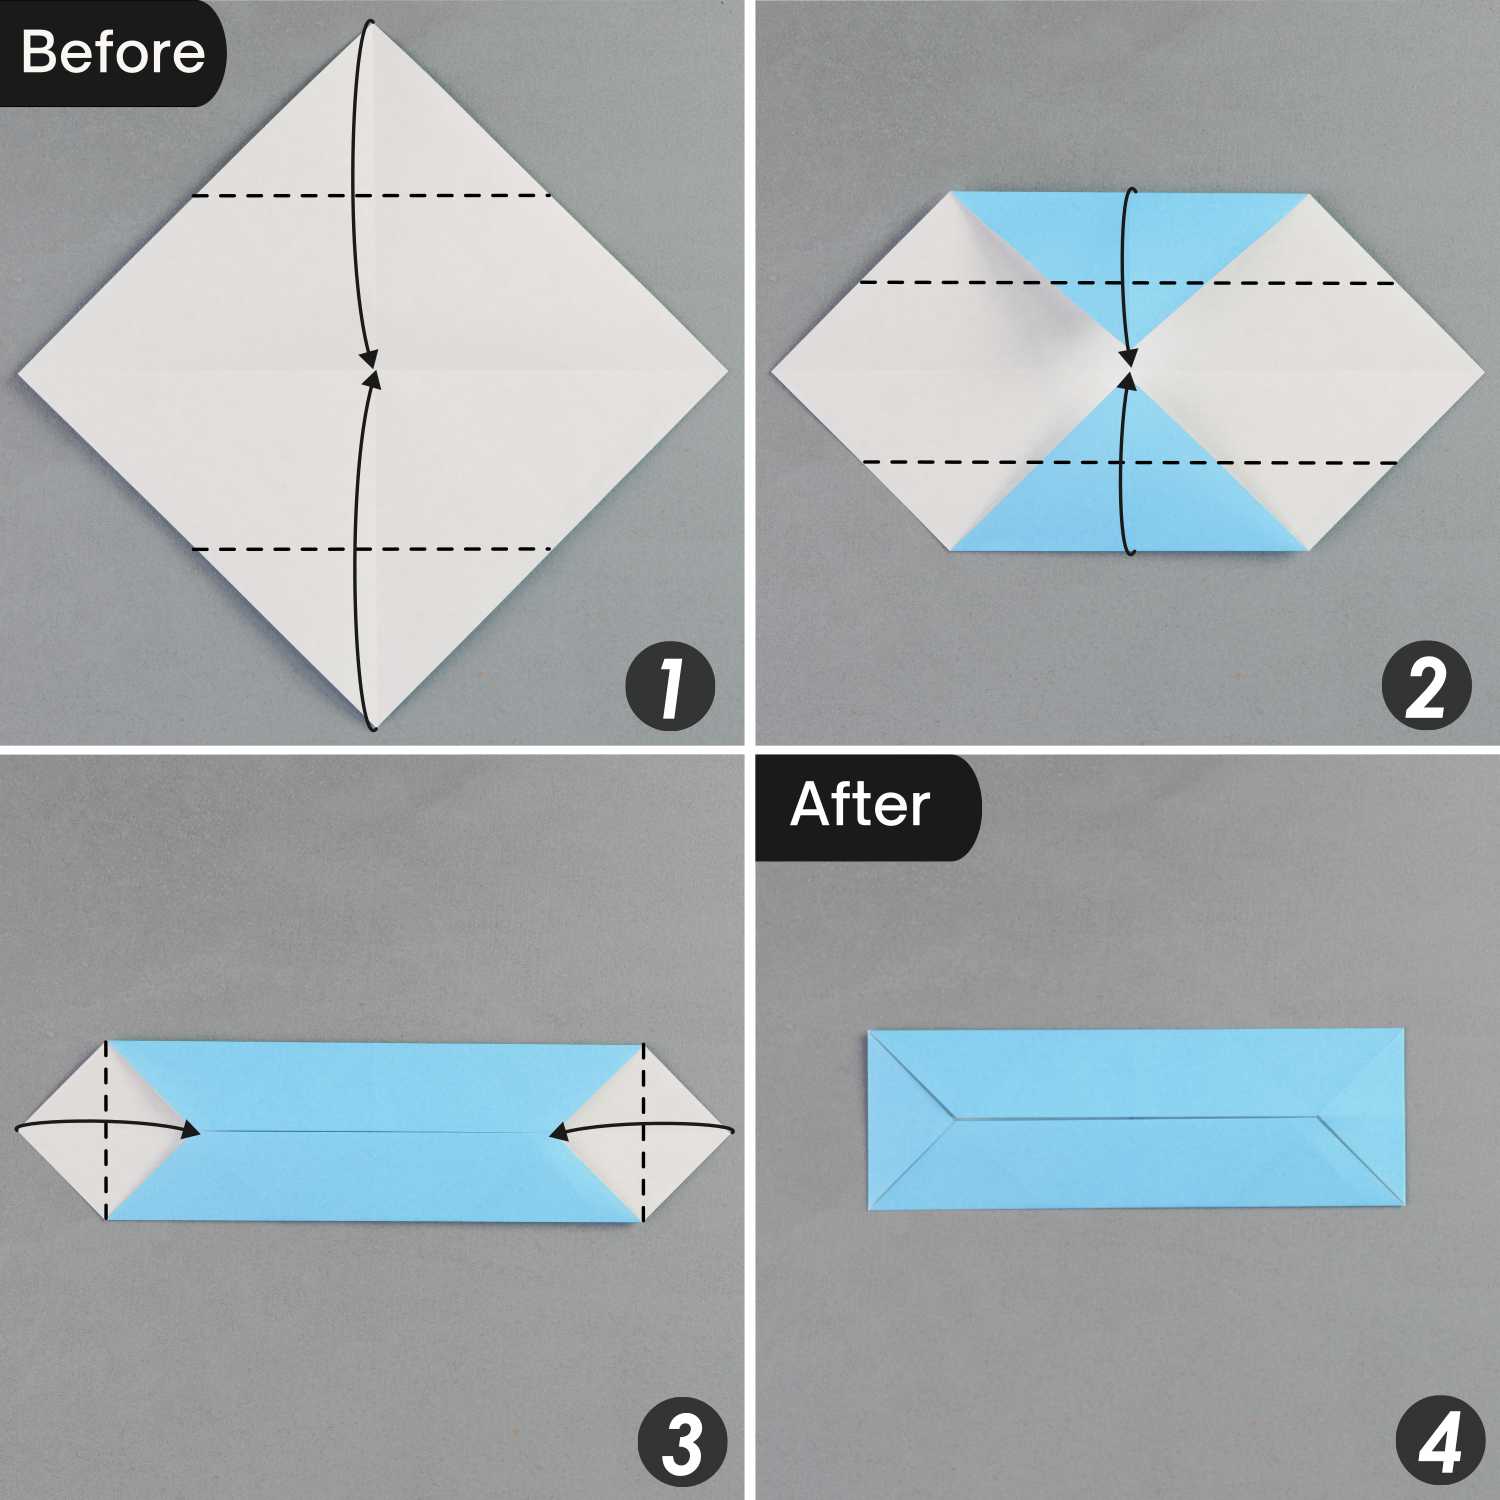
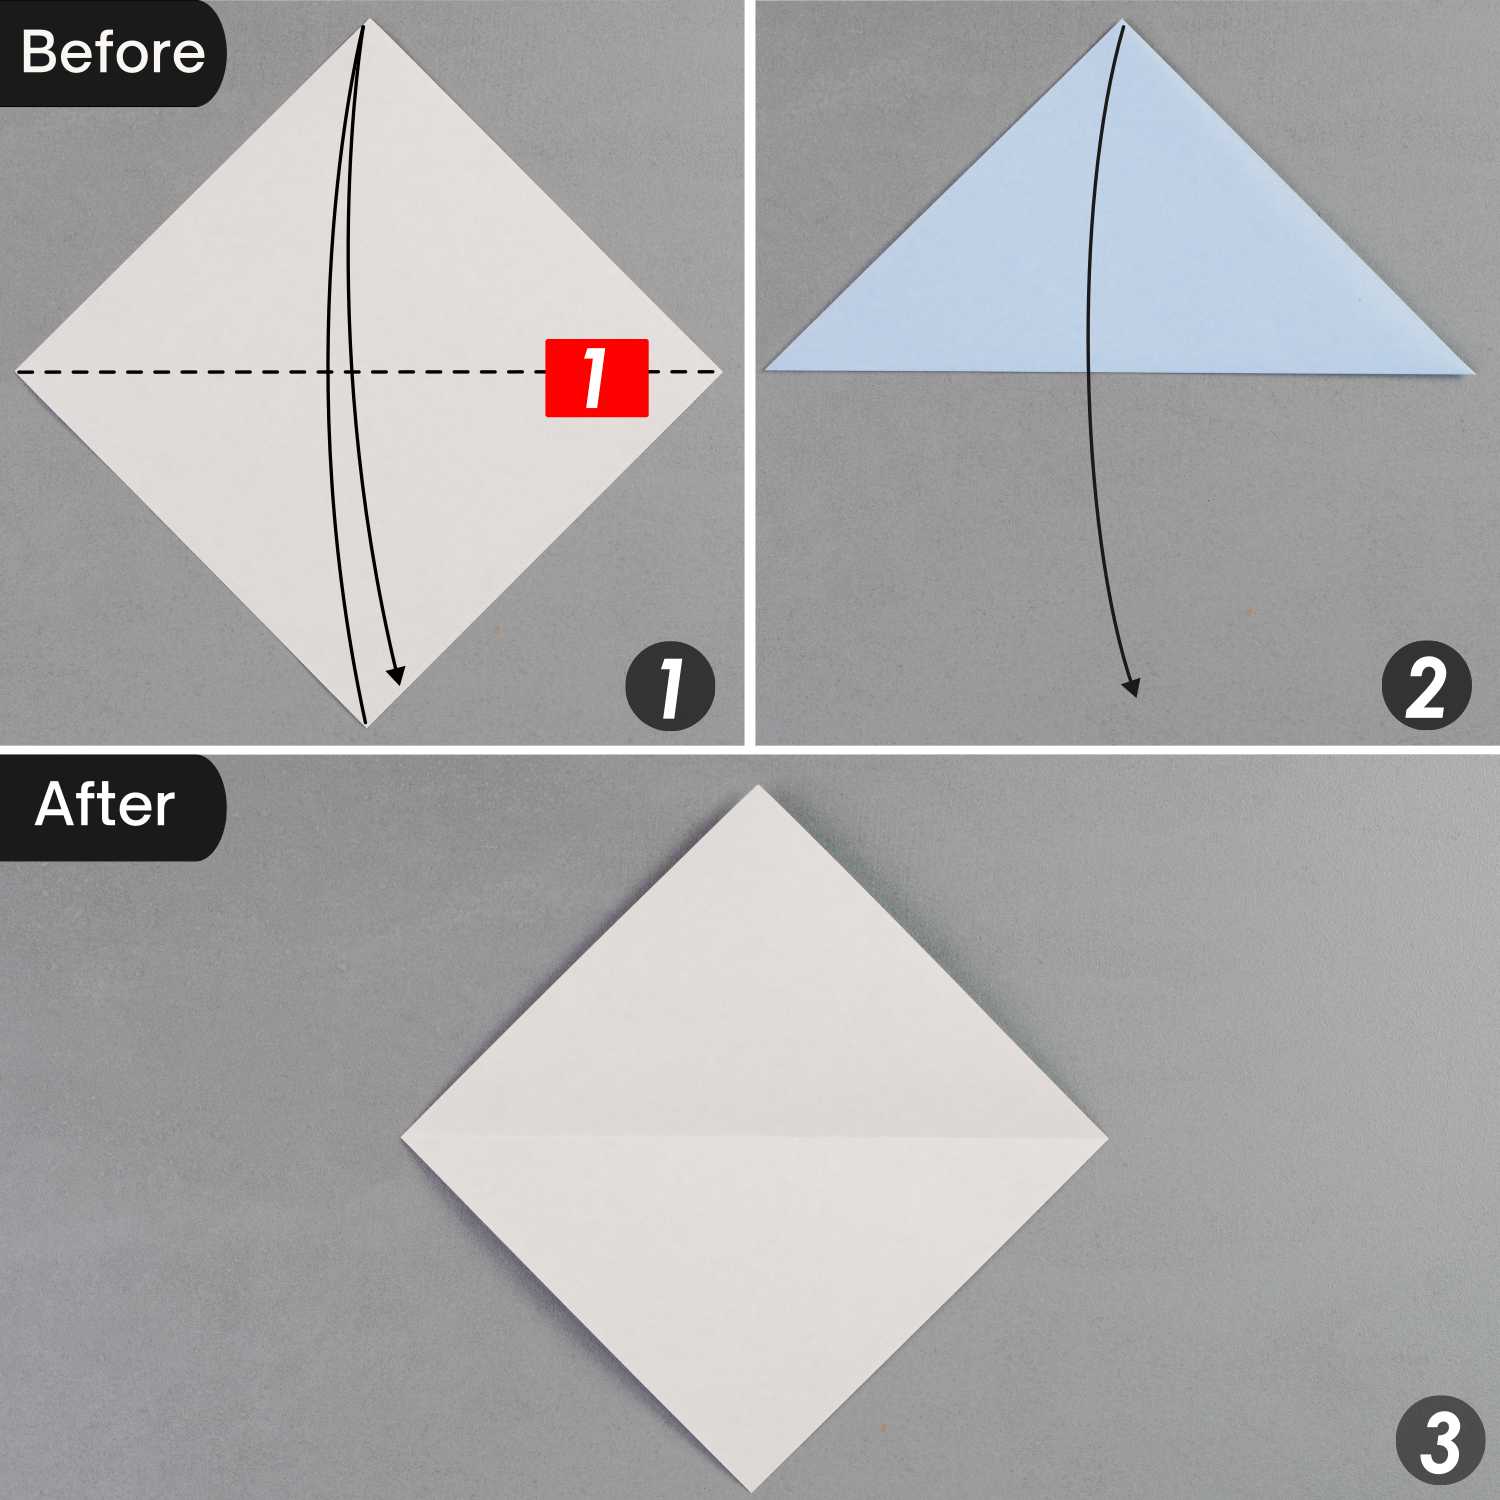
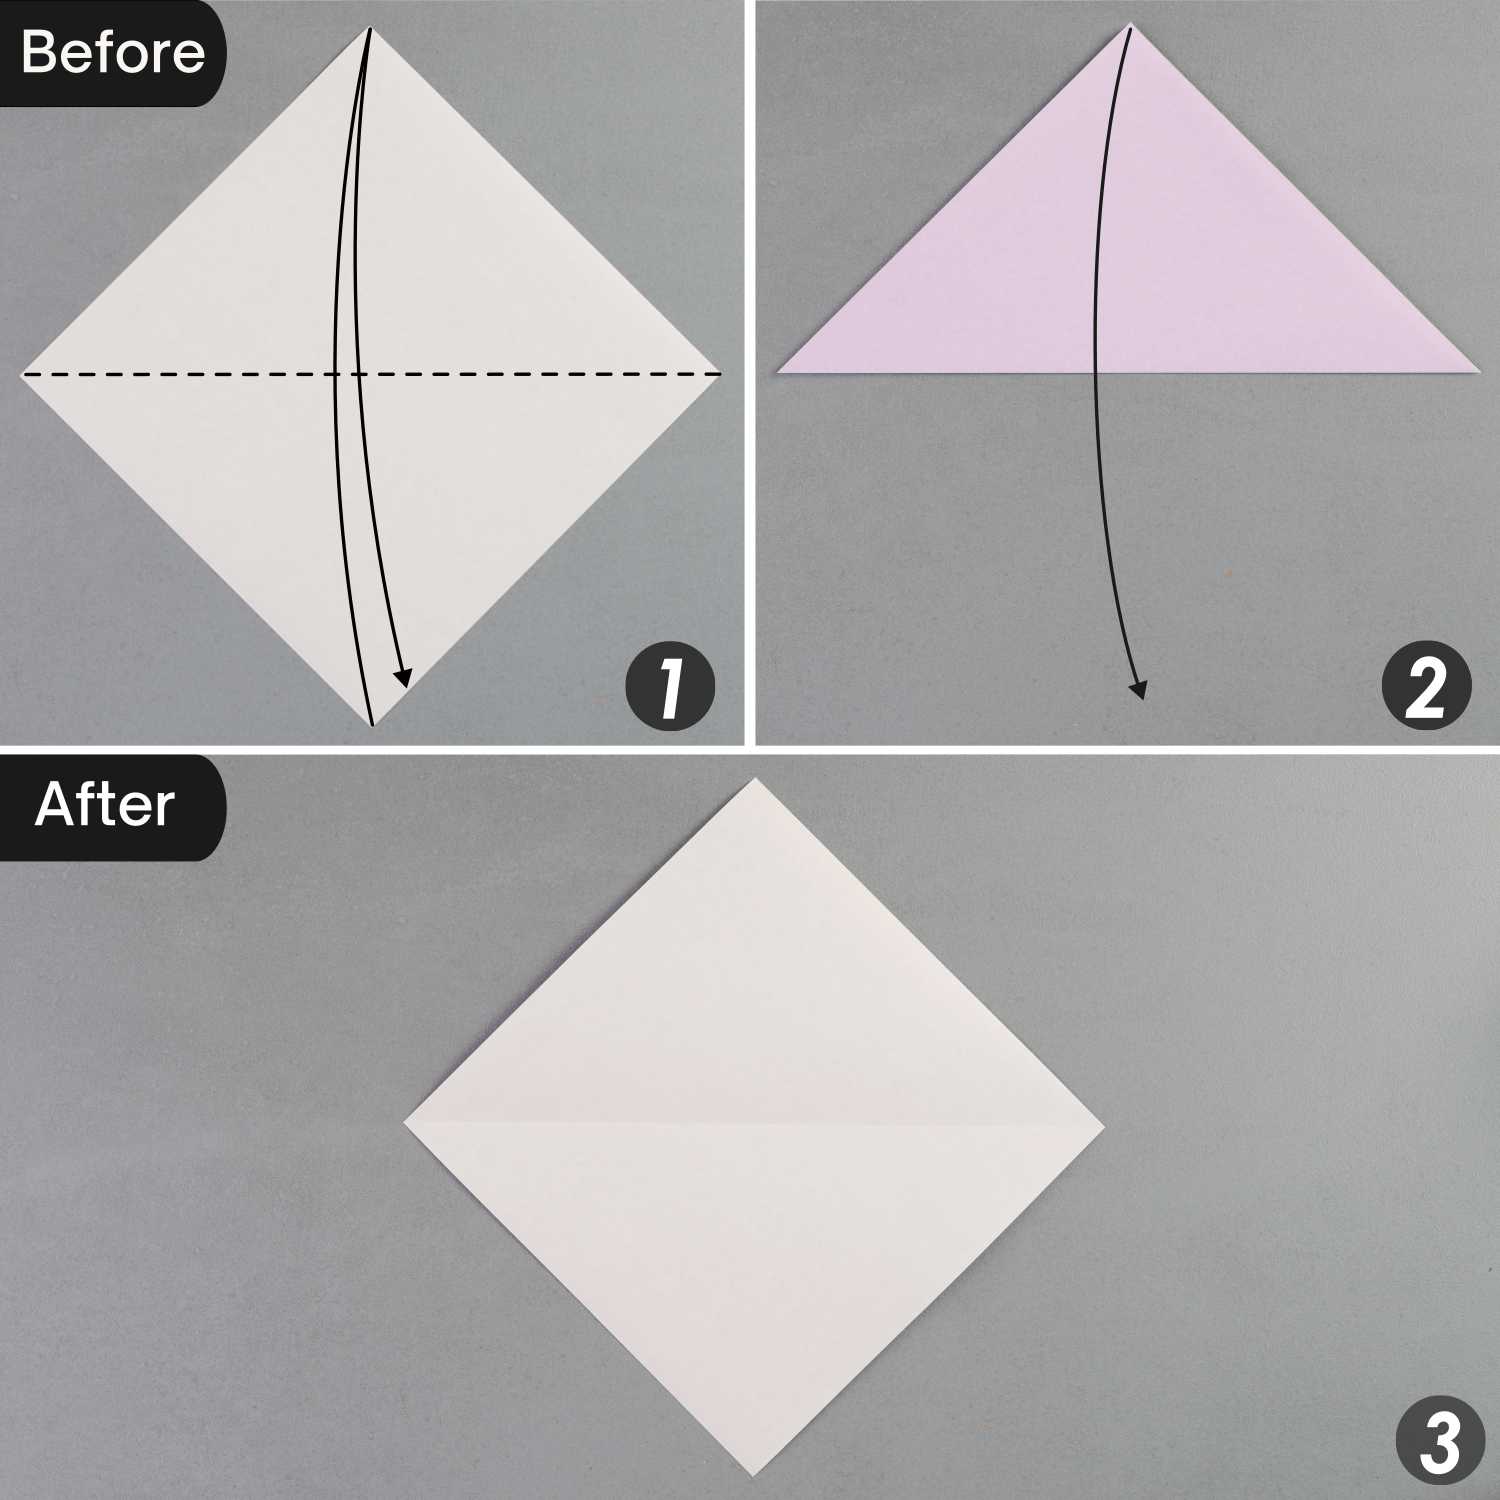
Step 1
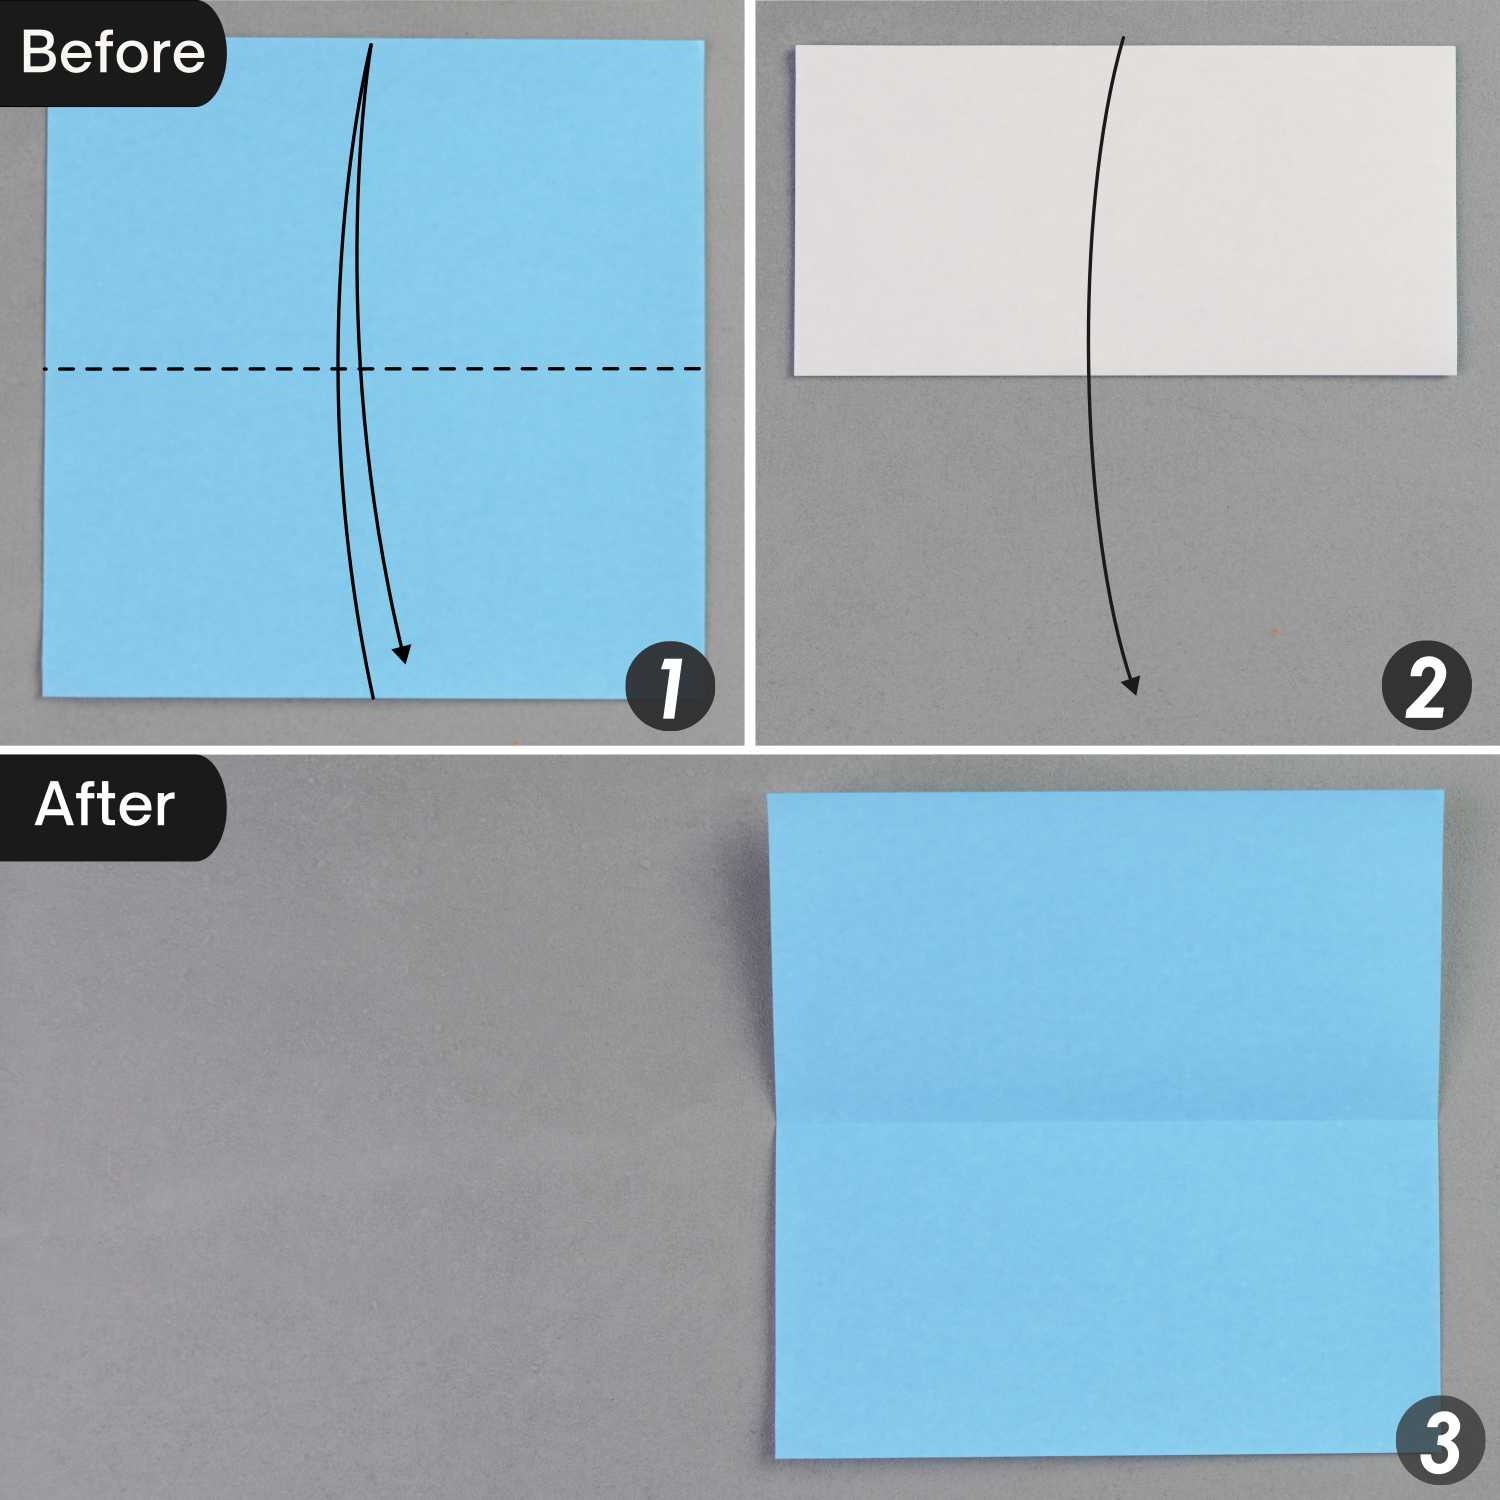
Take out one piece of paper, place it with the desired display color side down to begin folding, fold it in half horizontally, and unfold it.
Fold it in half vertically, and unfold it.

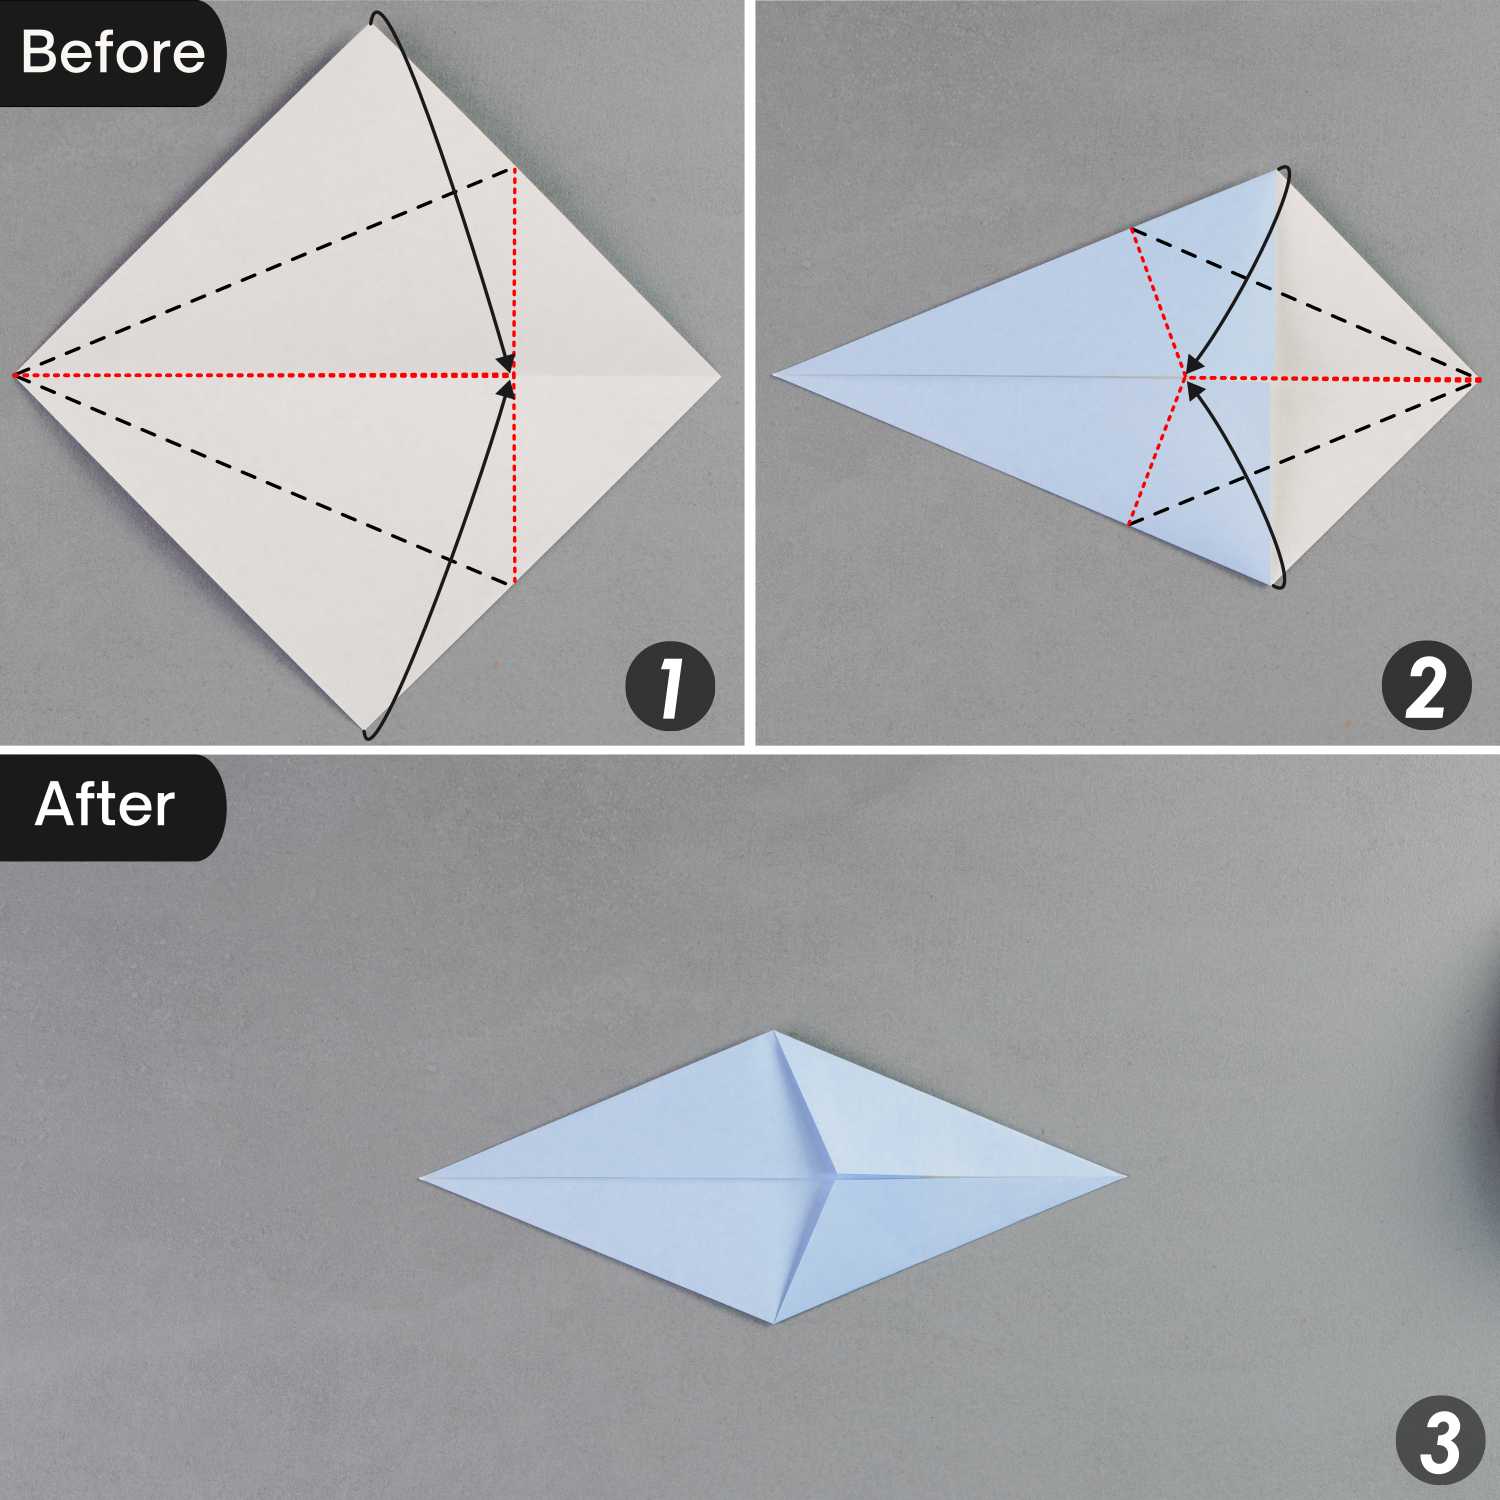
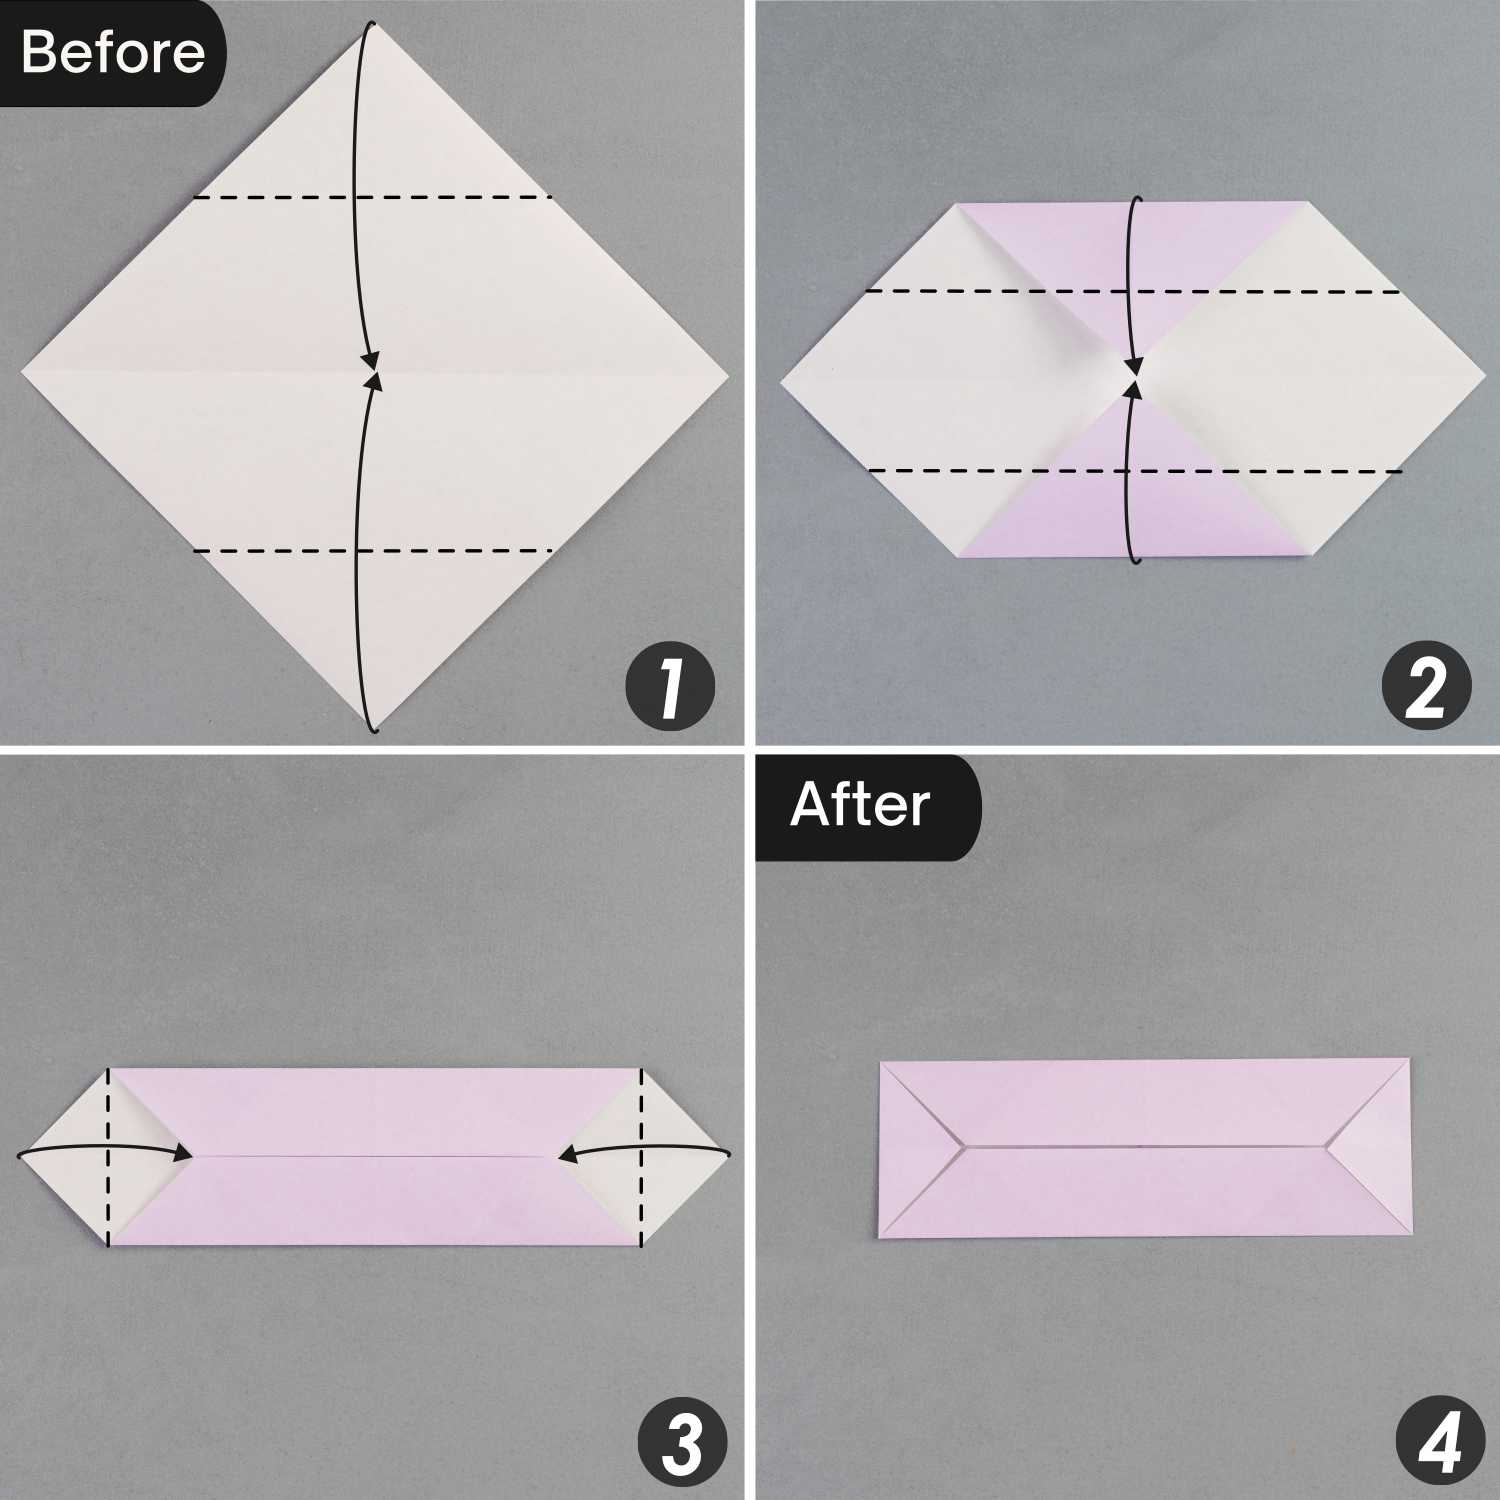
Step 2
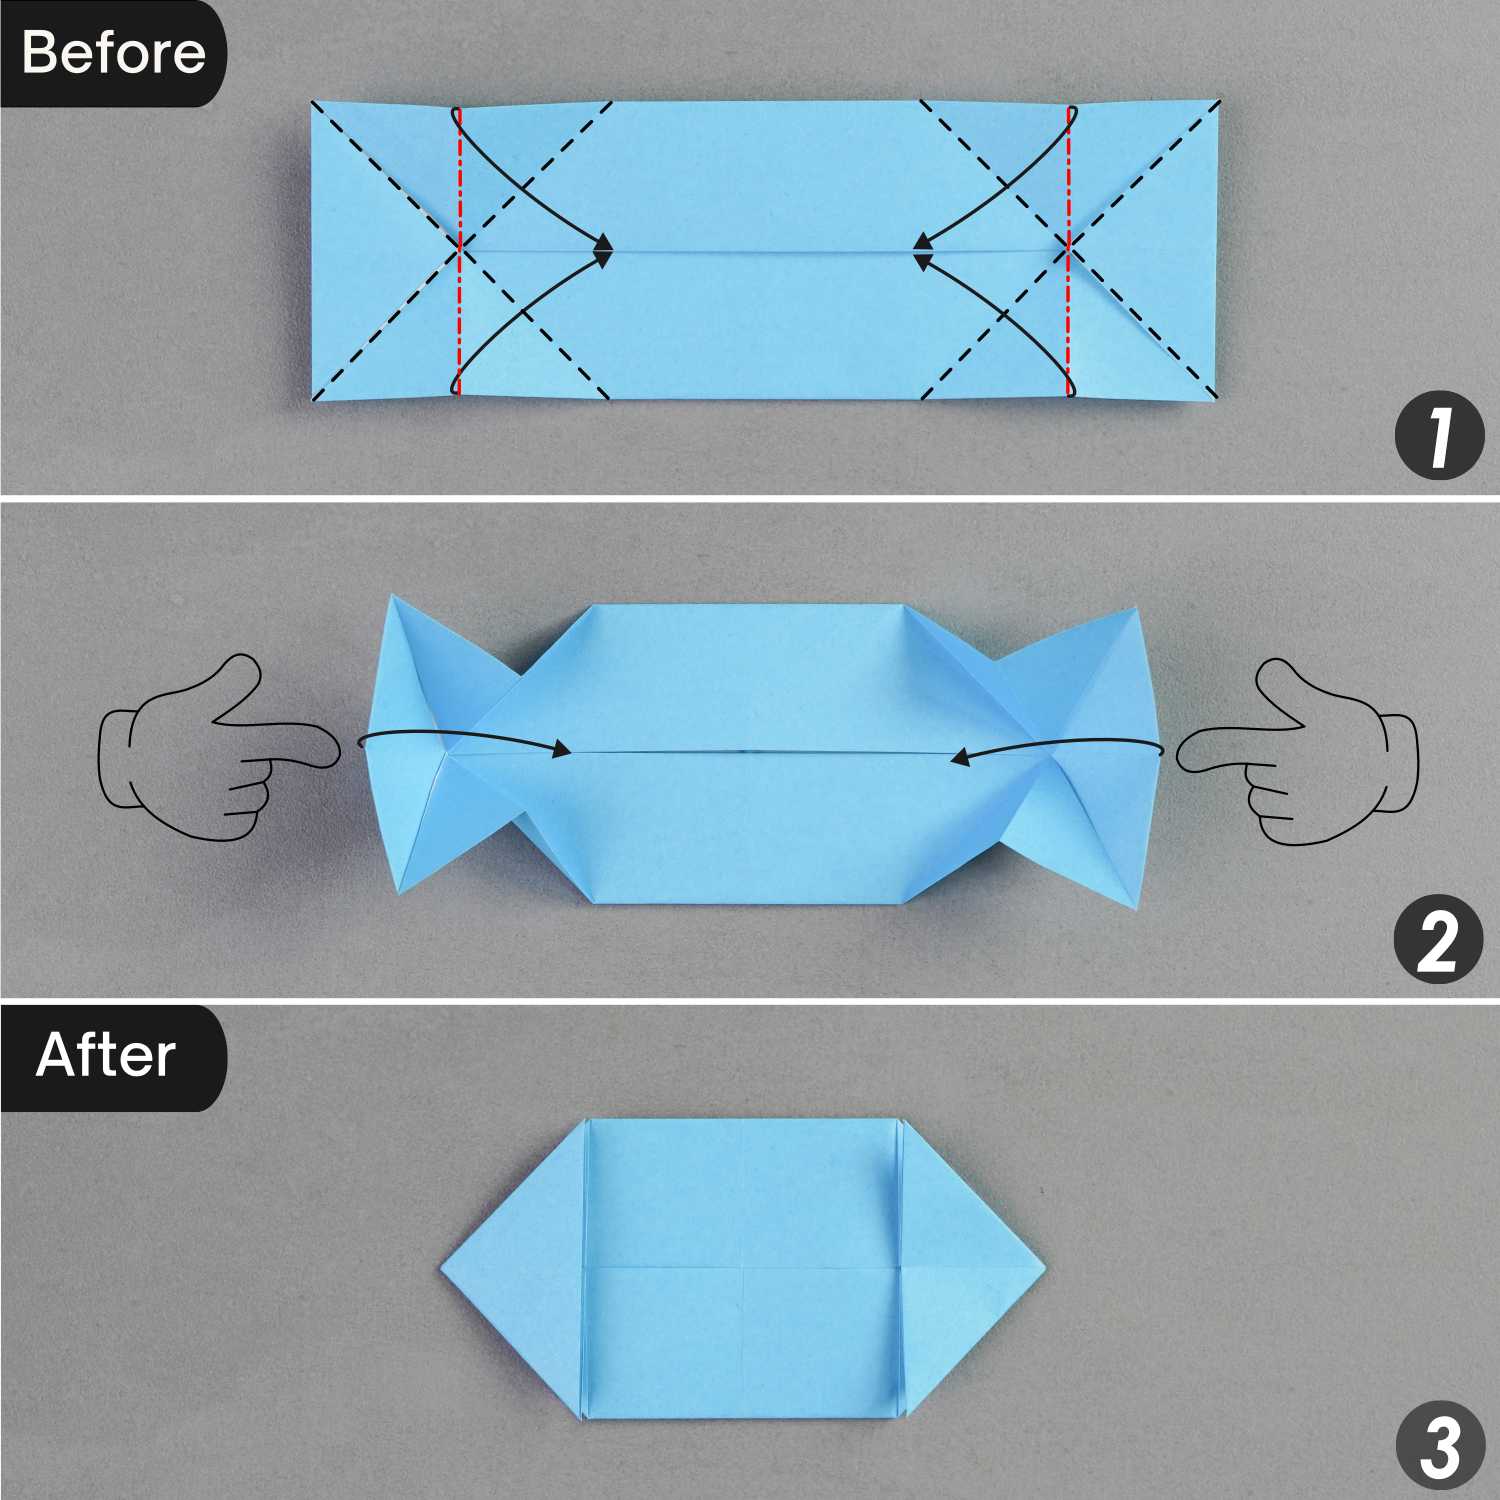
Fold the bottom and top corners to meet the middle intersection point, then fold the top and bottom edges to align with the horizontal crease, and finally, fold the left and right corners along the dotted lines as shown in the third picture.
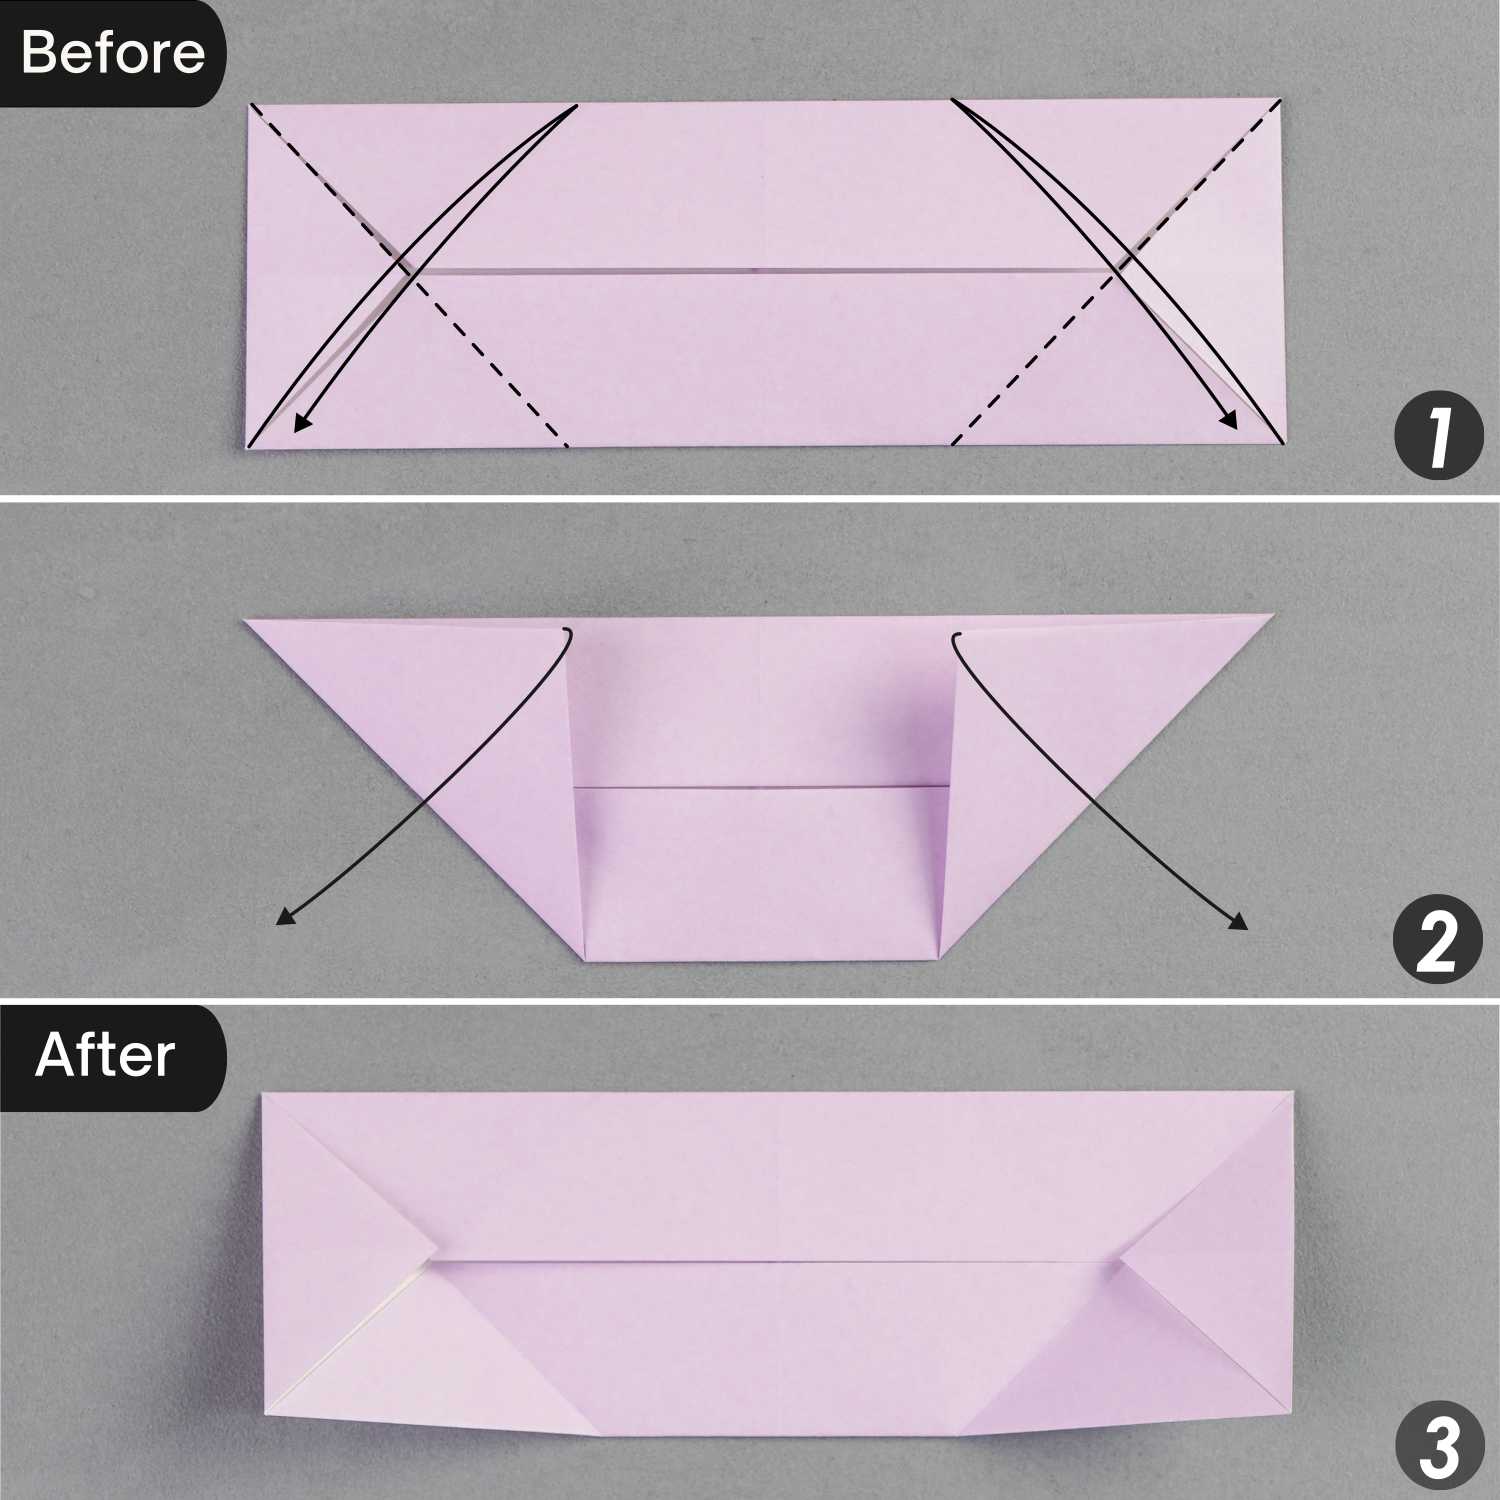
Step 3
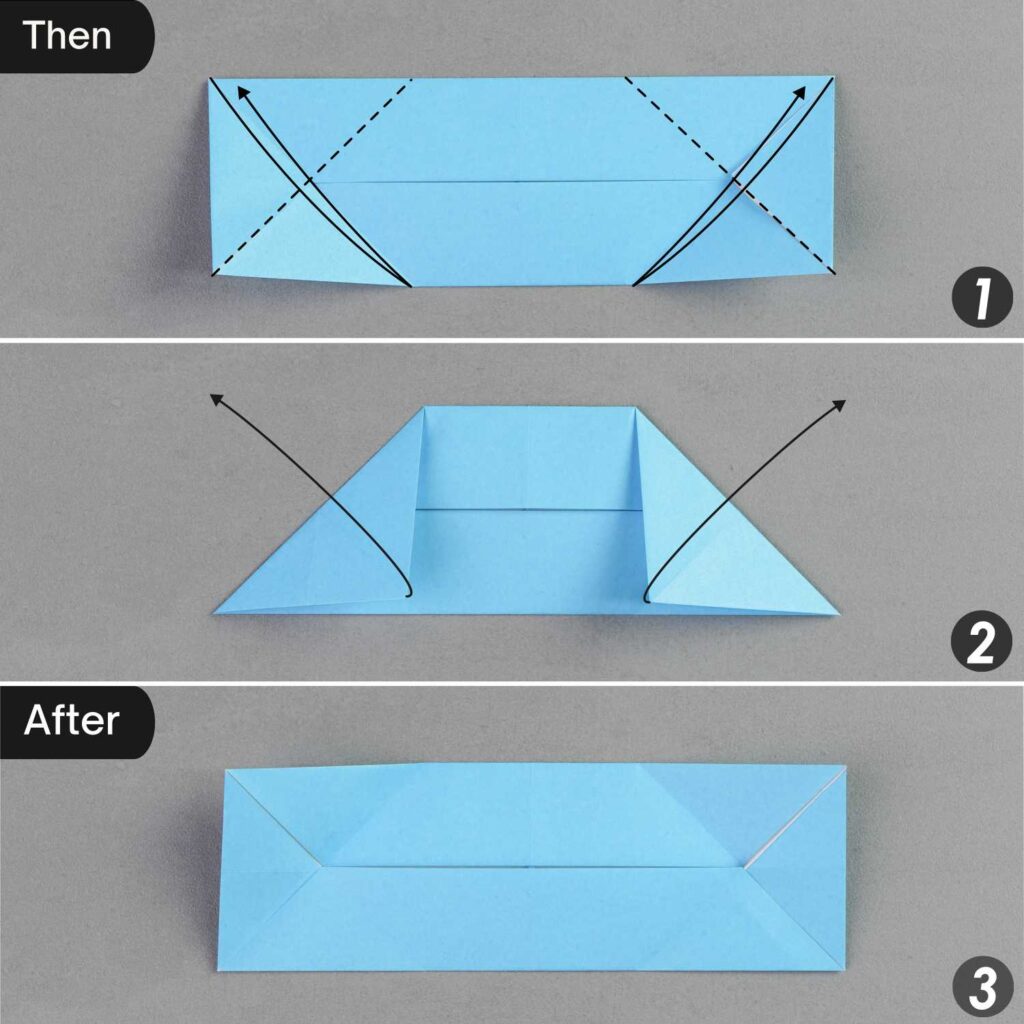
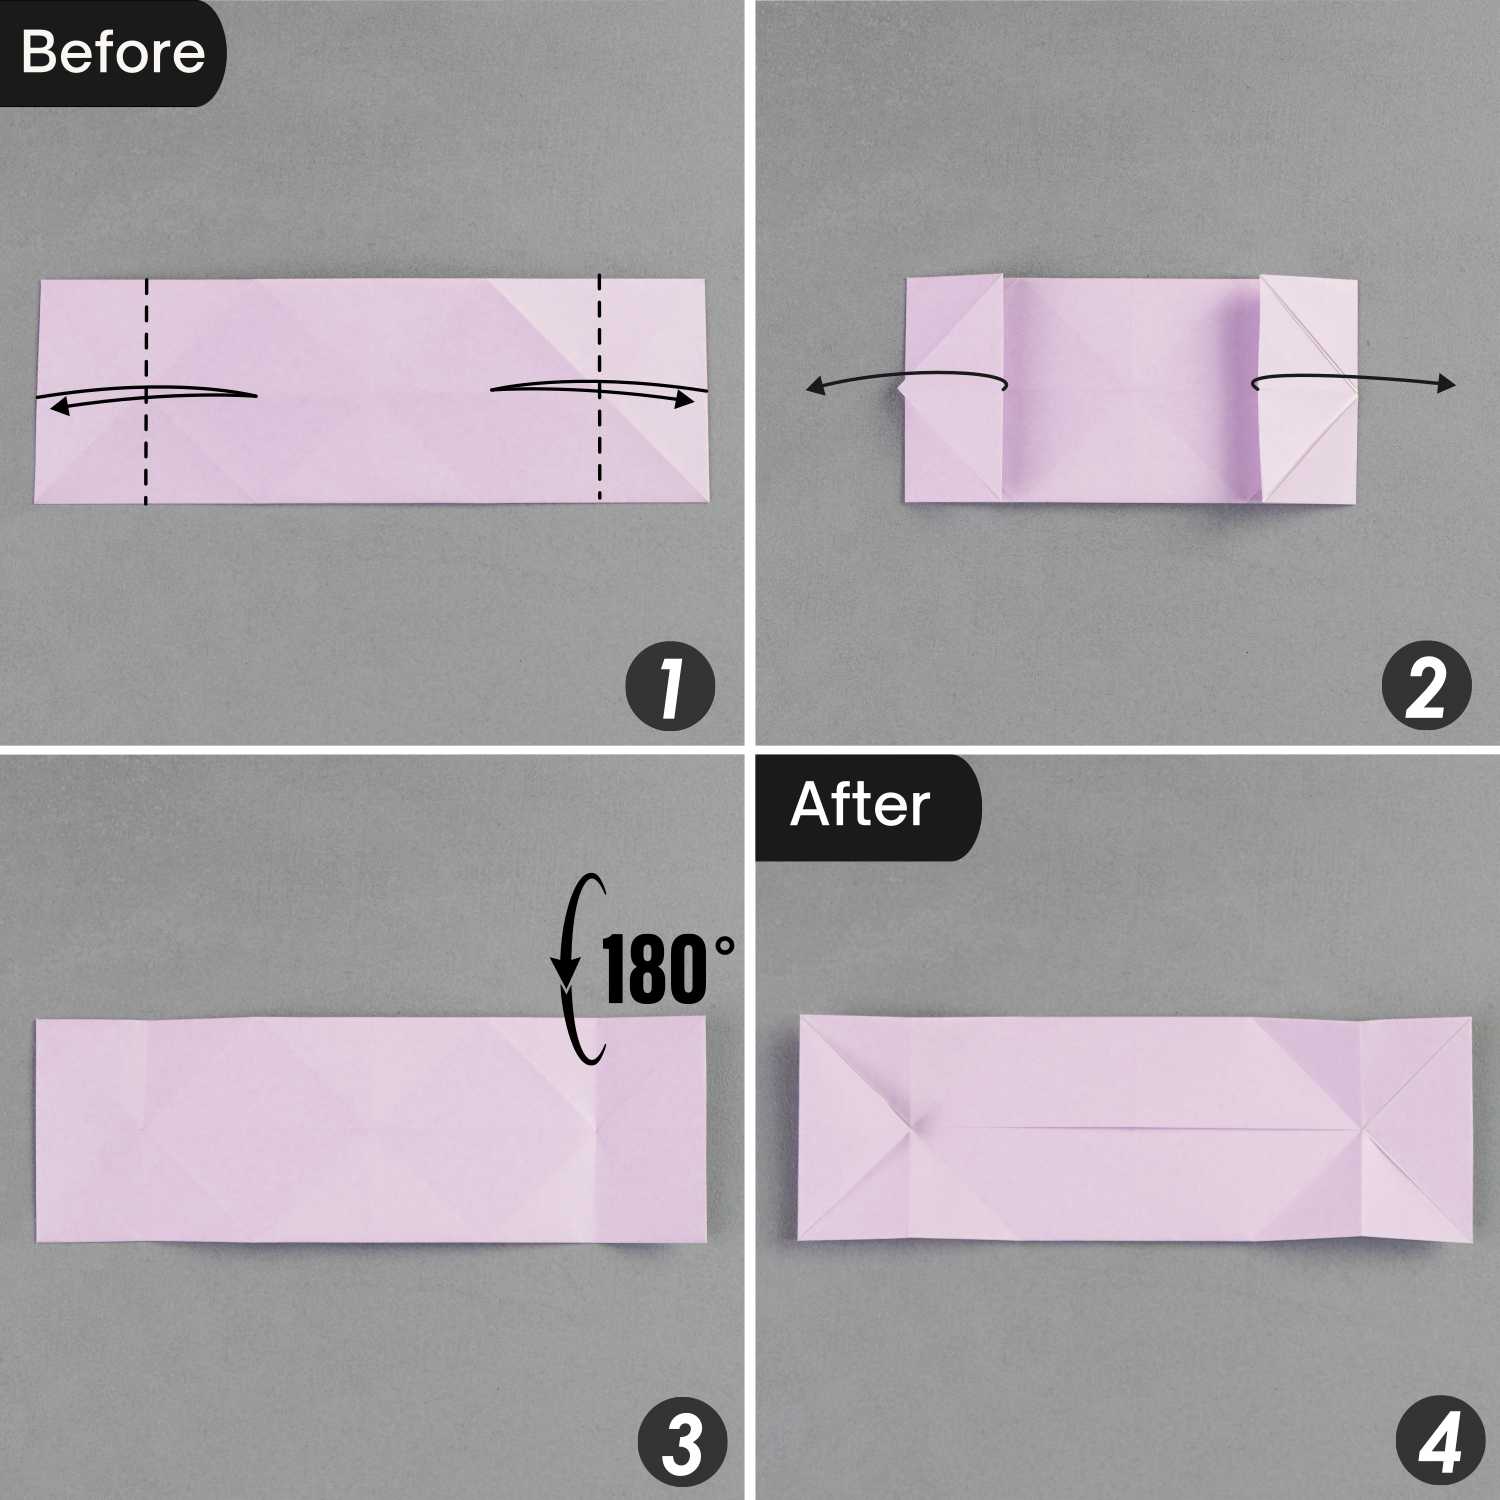
Fold the bottom left and right corners diagonally along the dotted lines, leaving two creases, and unfold them.
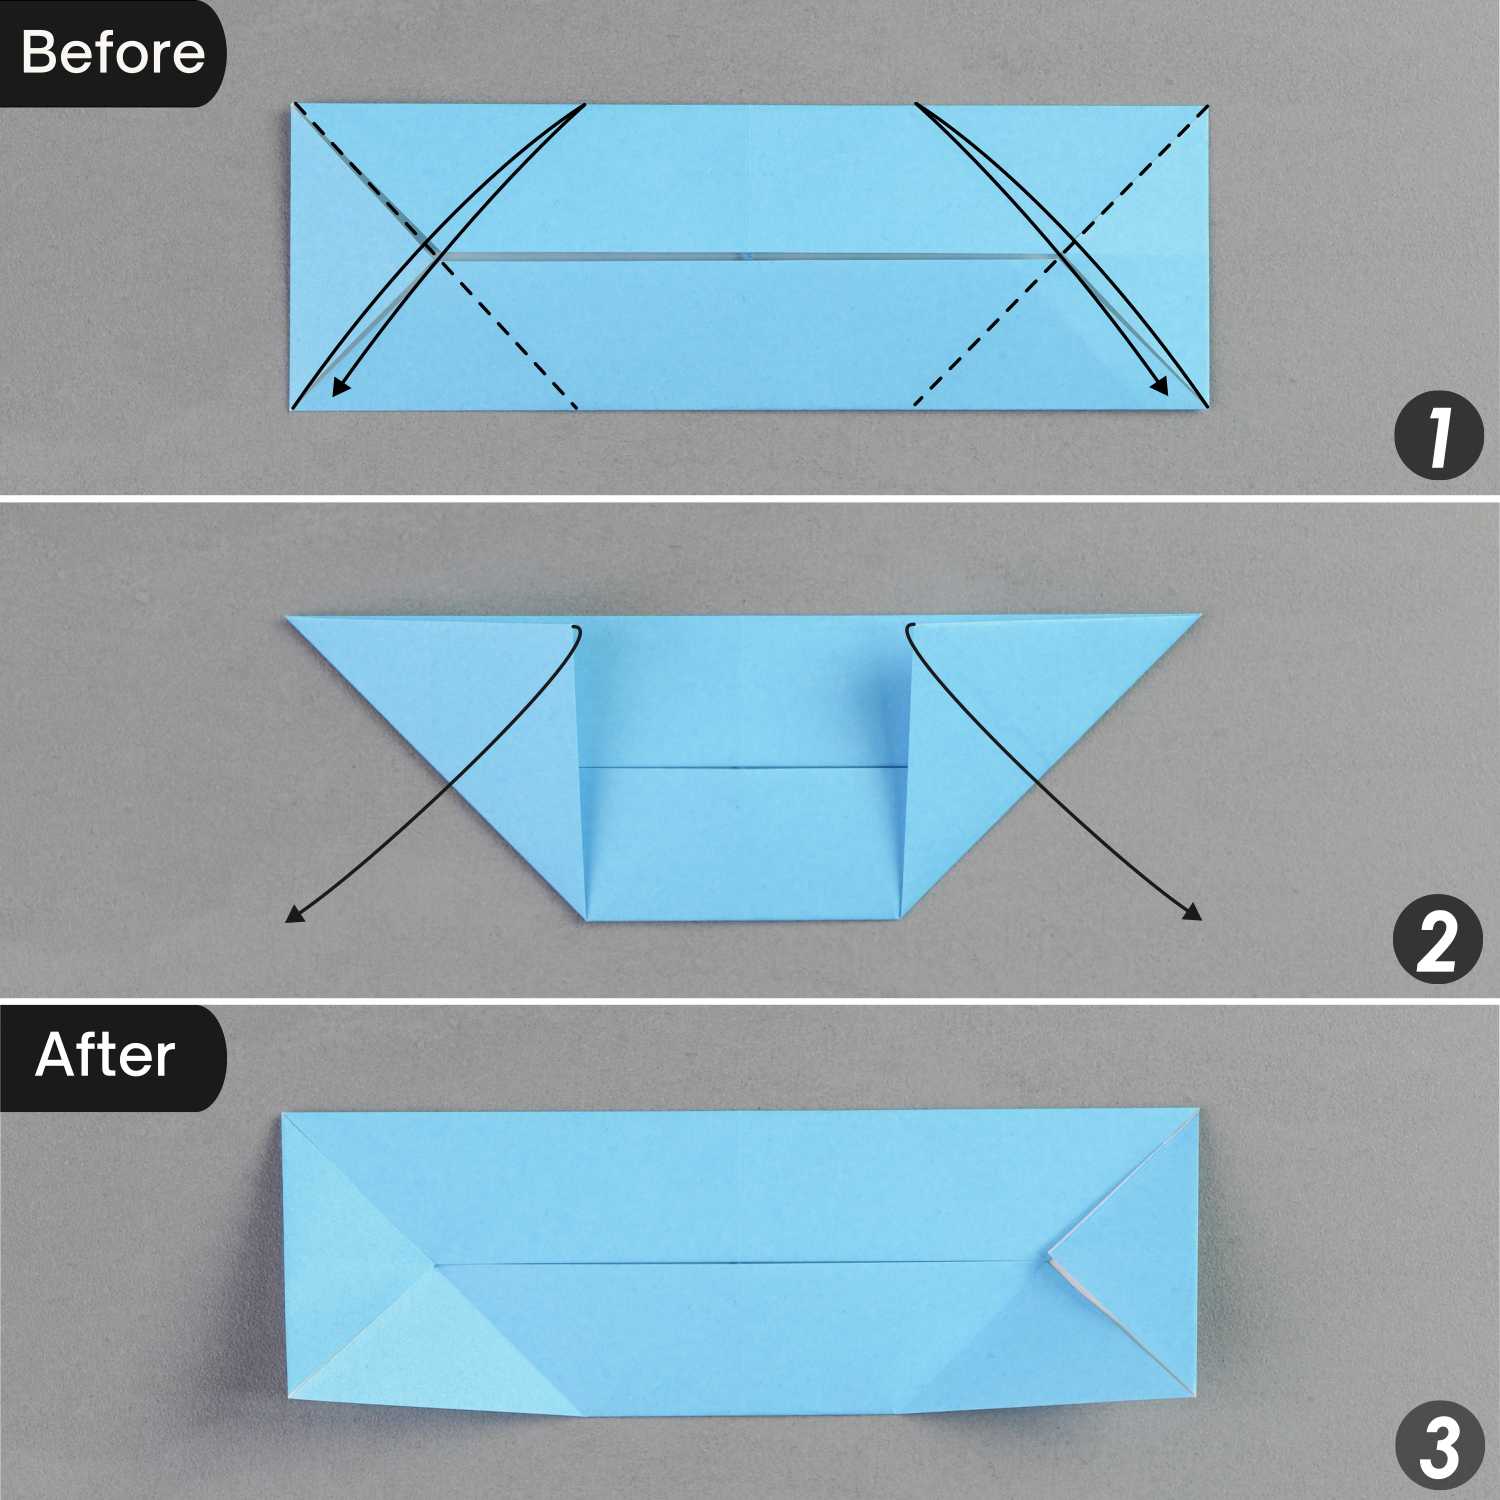
Fold the top left and right corners diagonally along the dotted lines, leaving two creases, and unfold them.
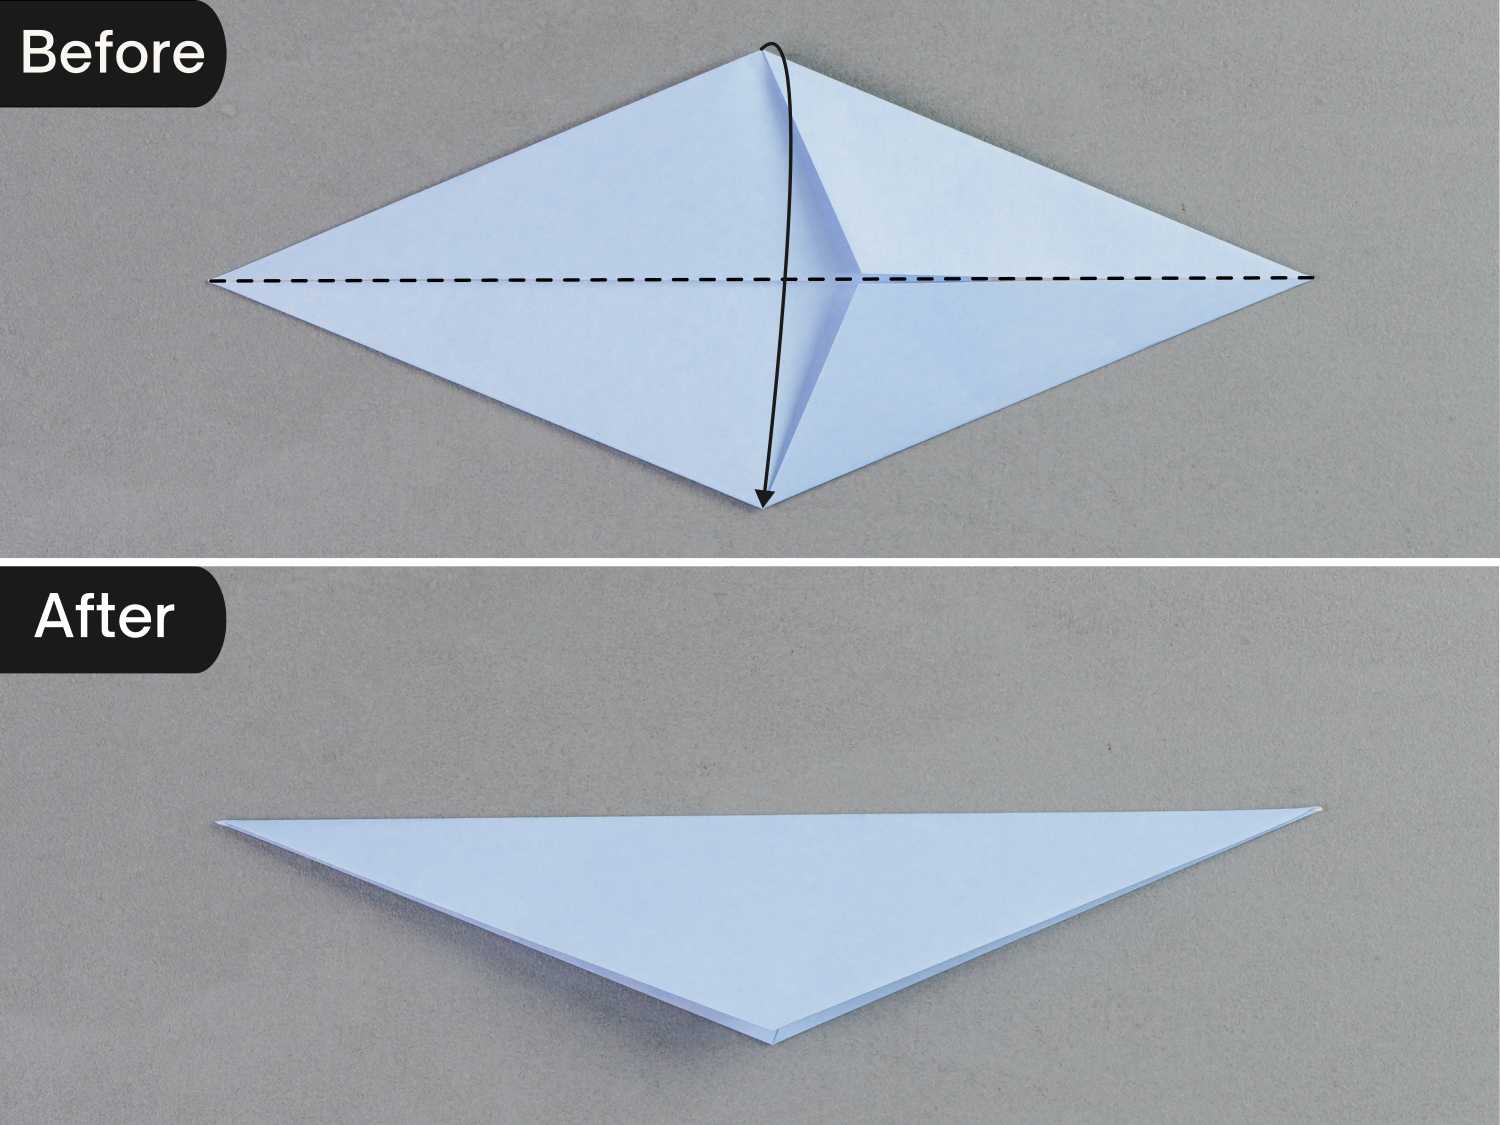
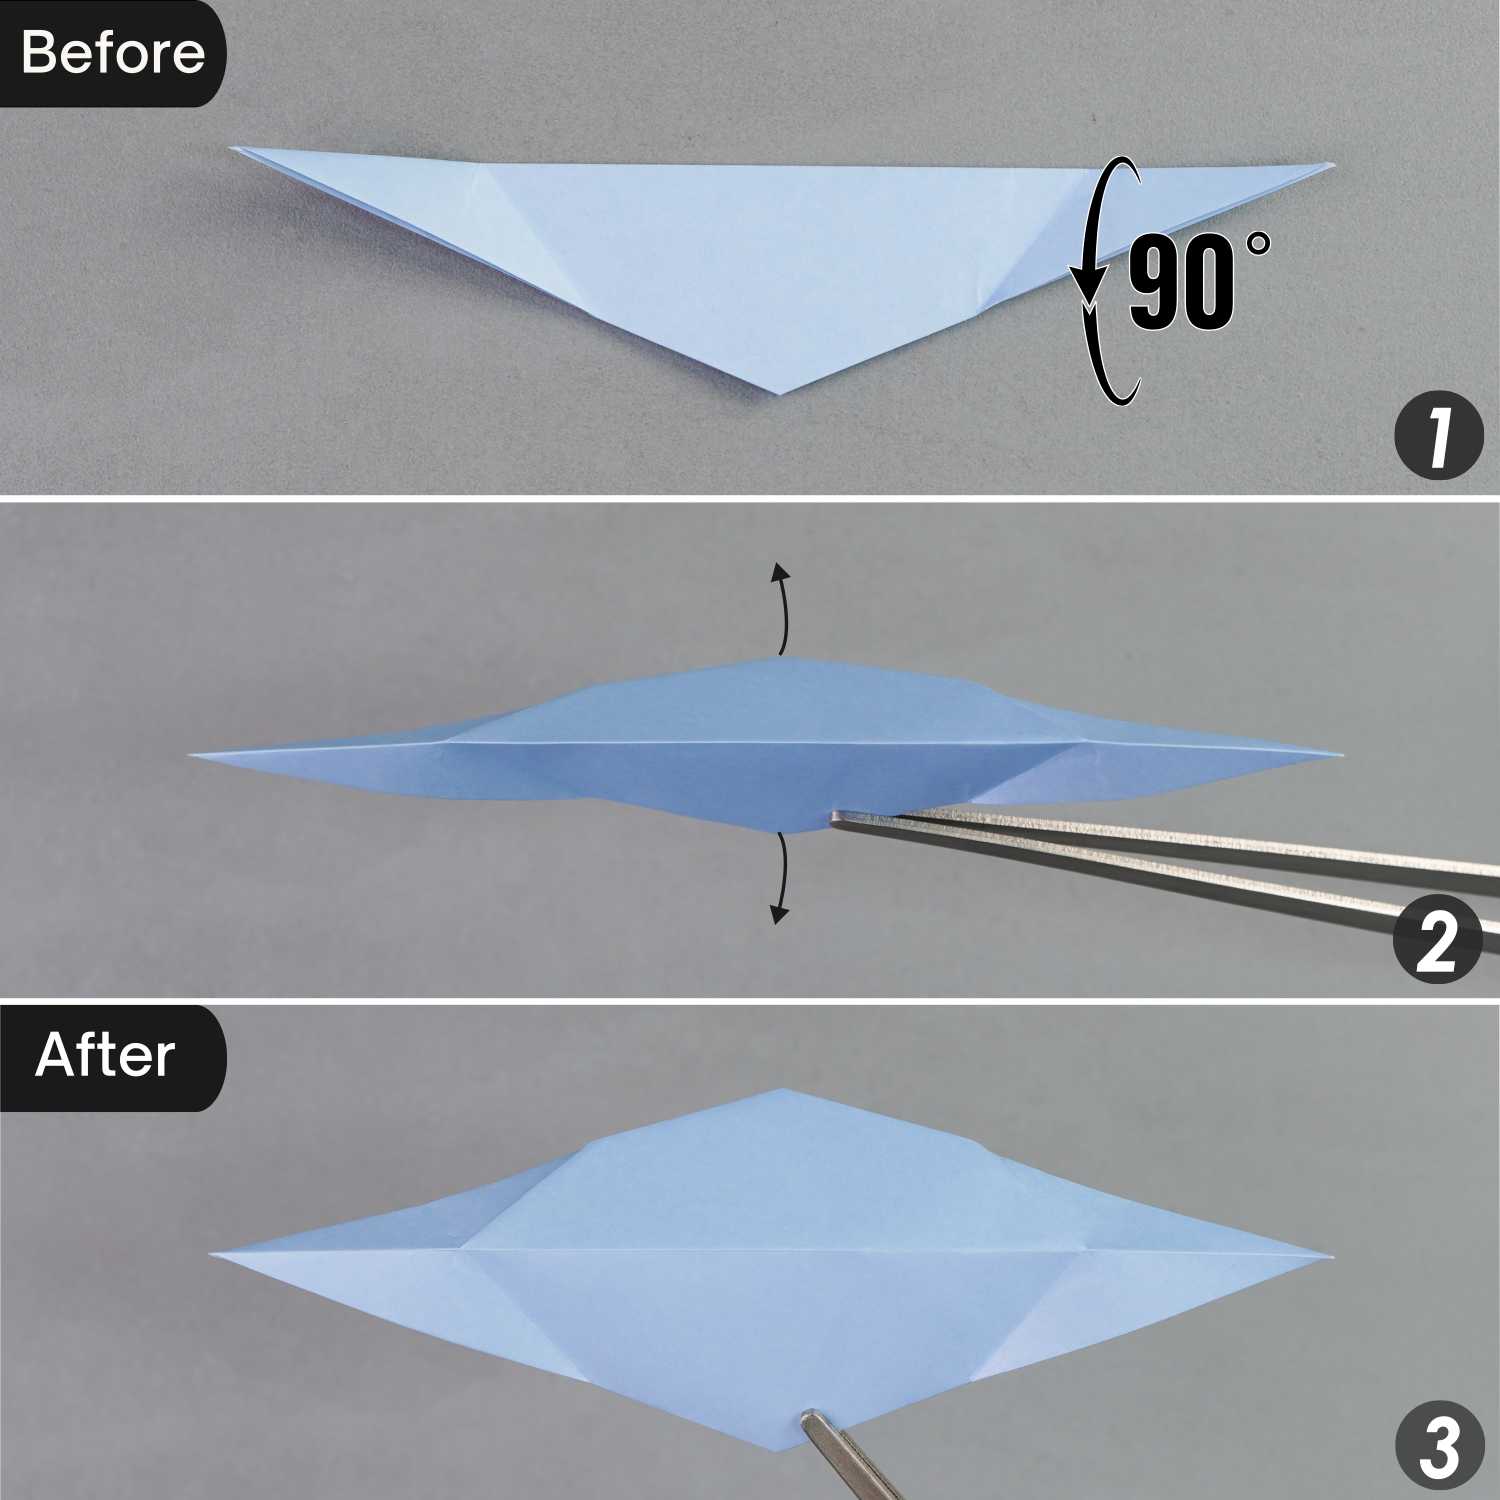
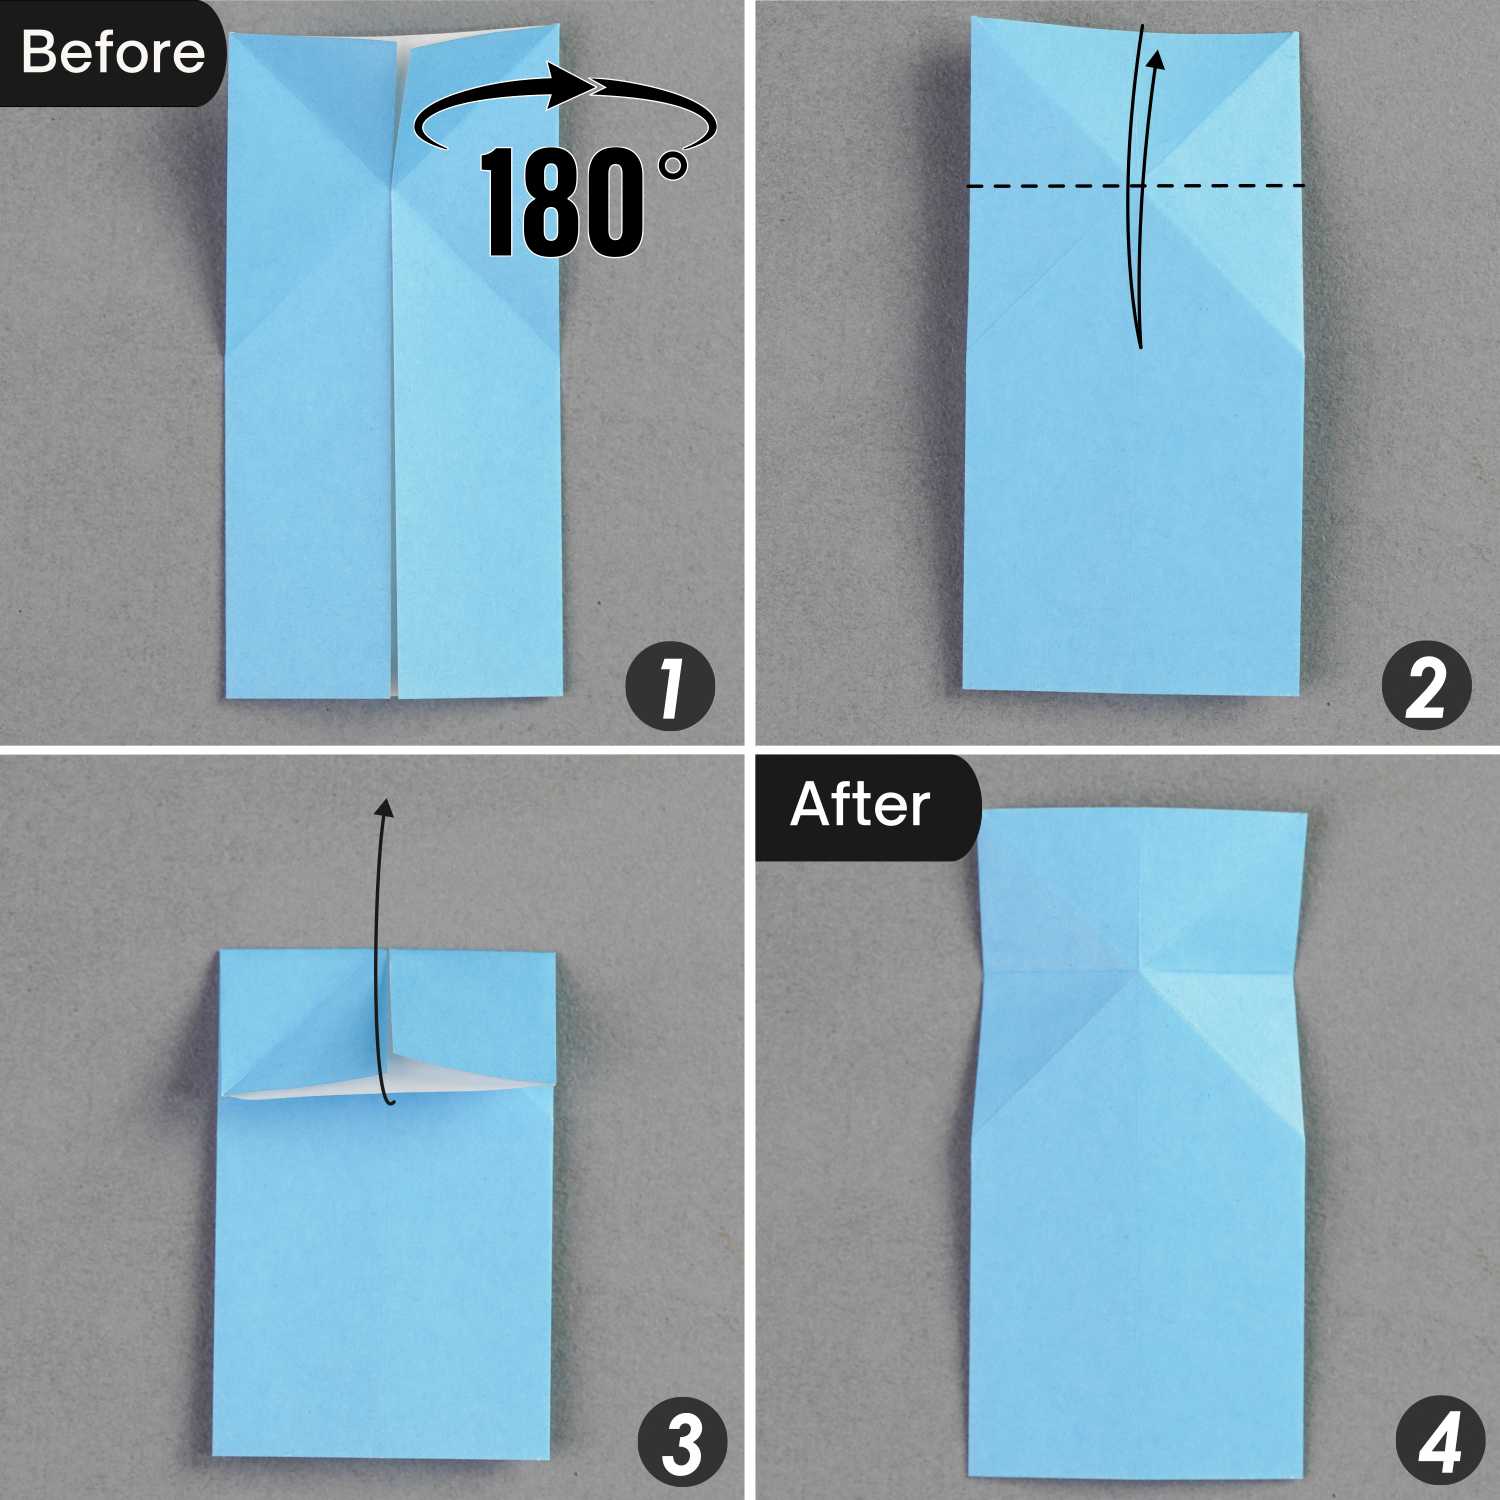
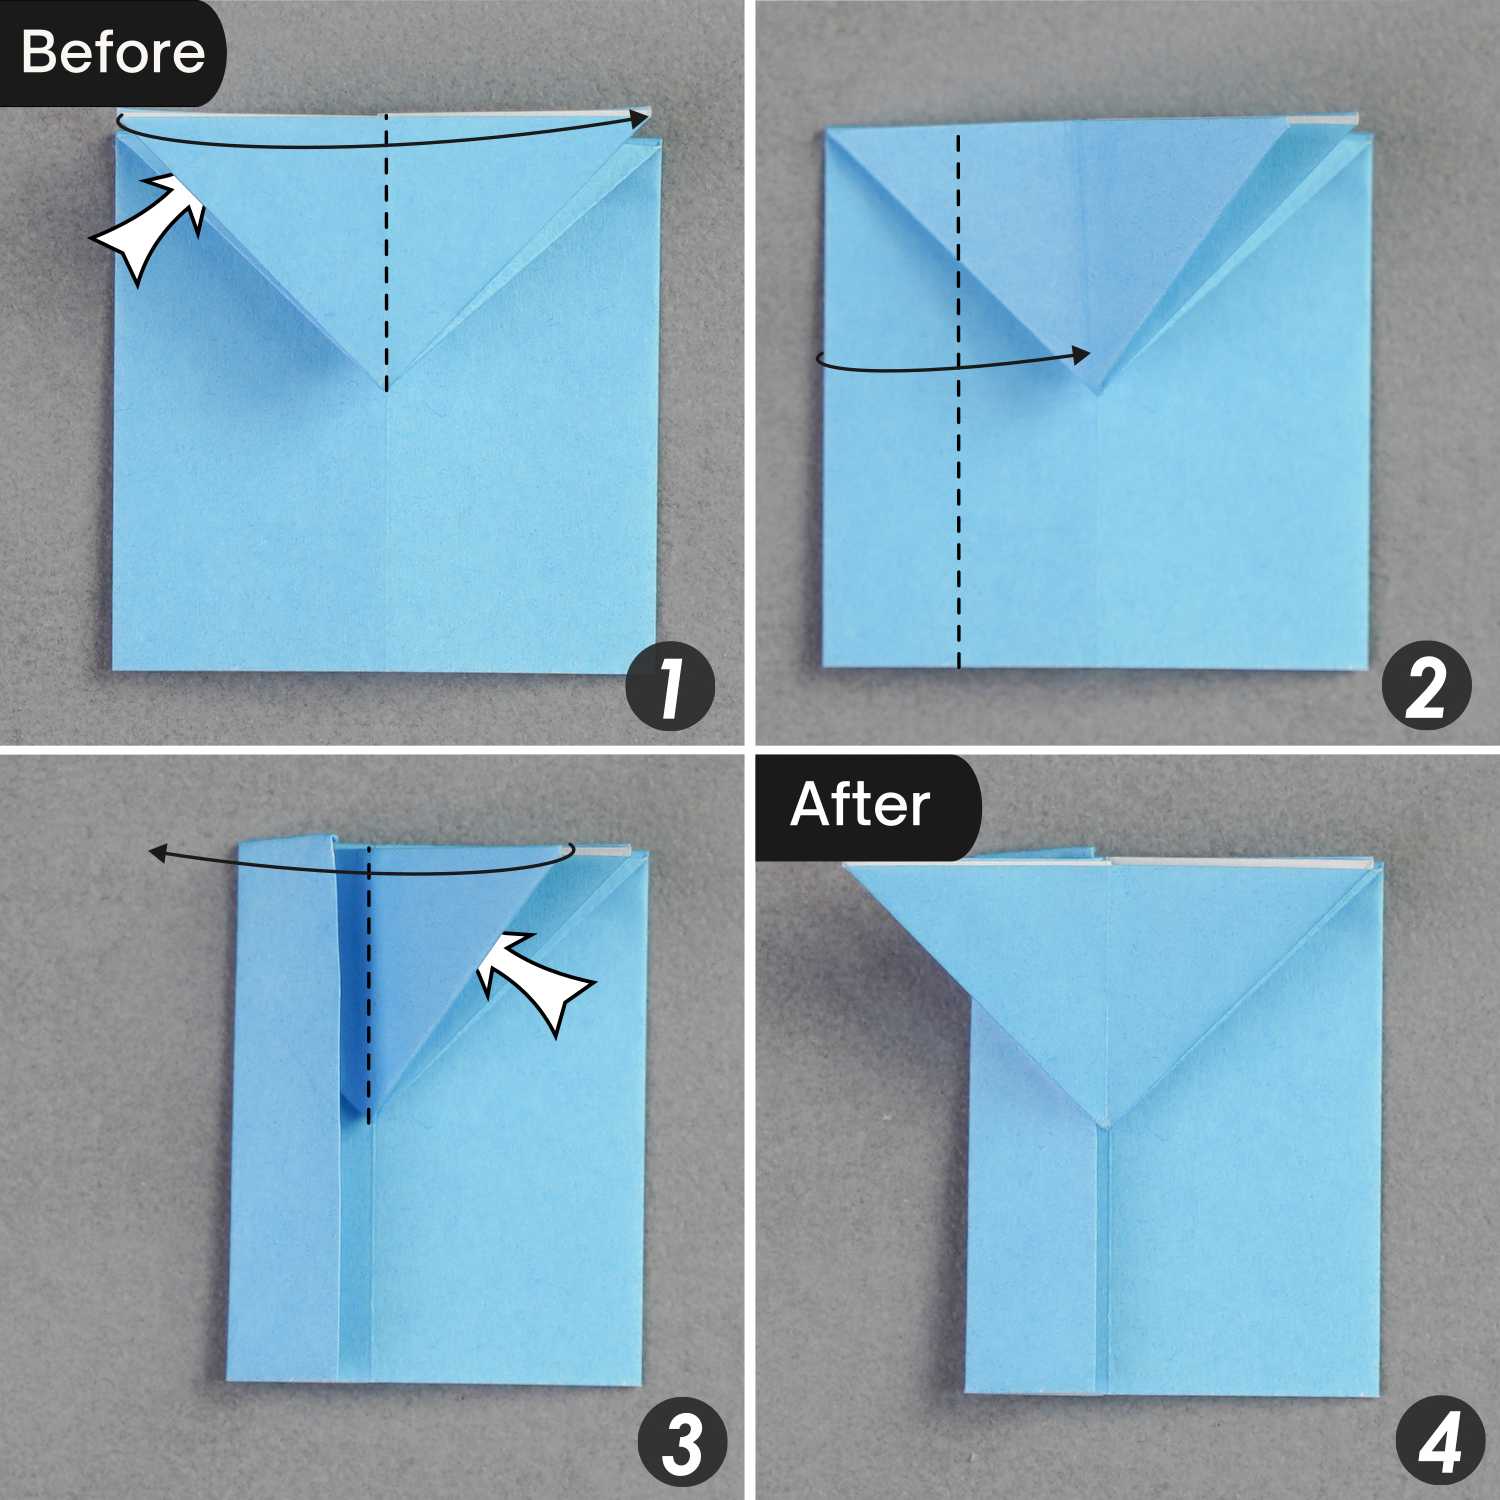
Step 4
Flip the paper over from front to back.
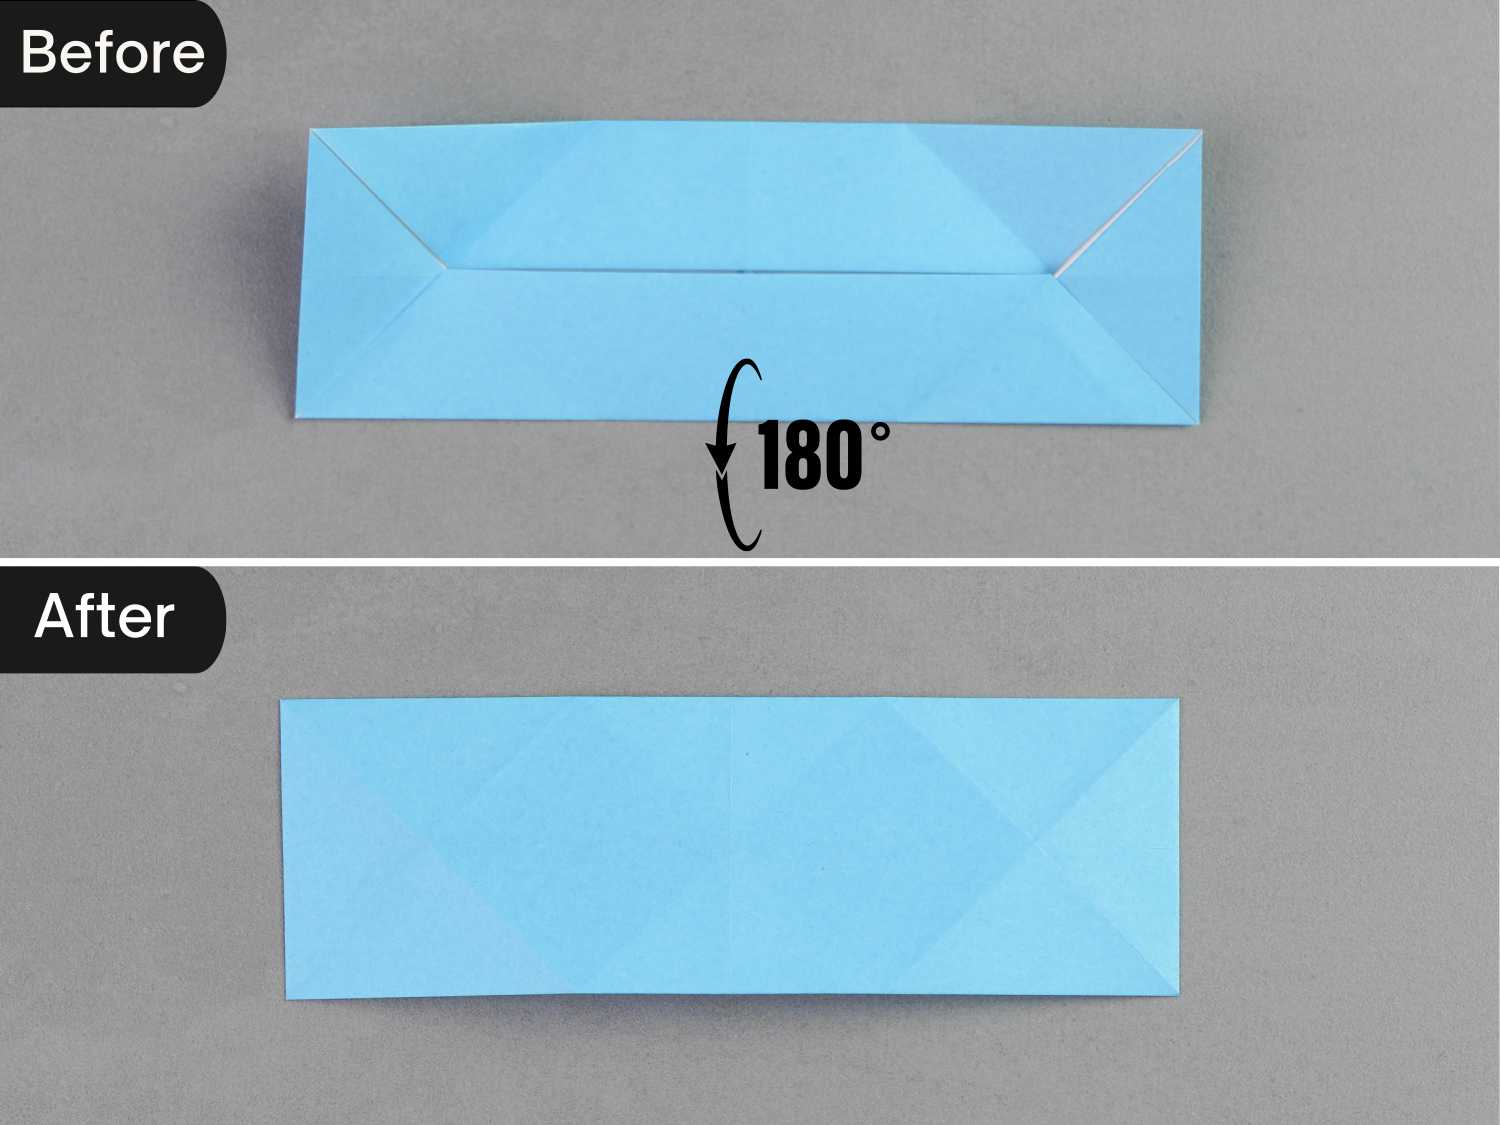
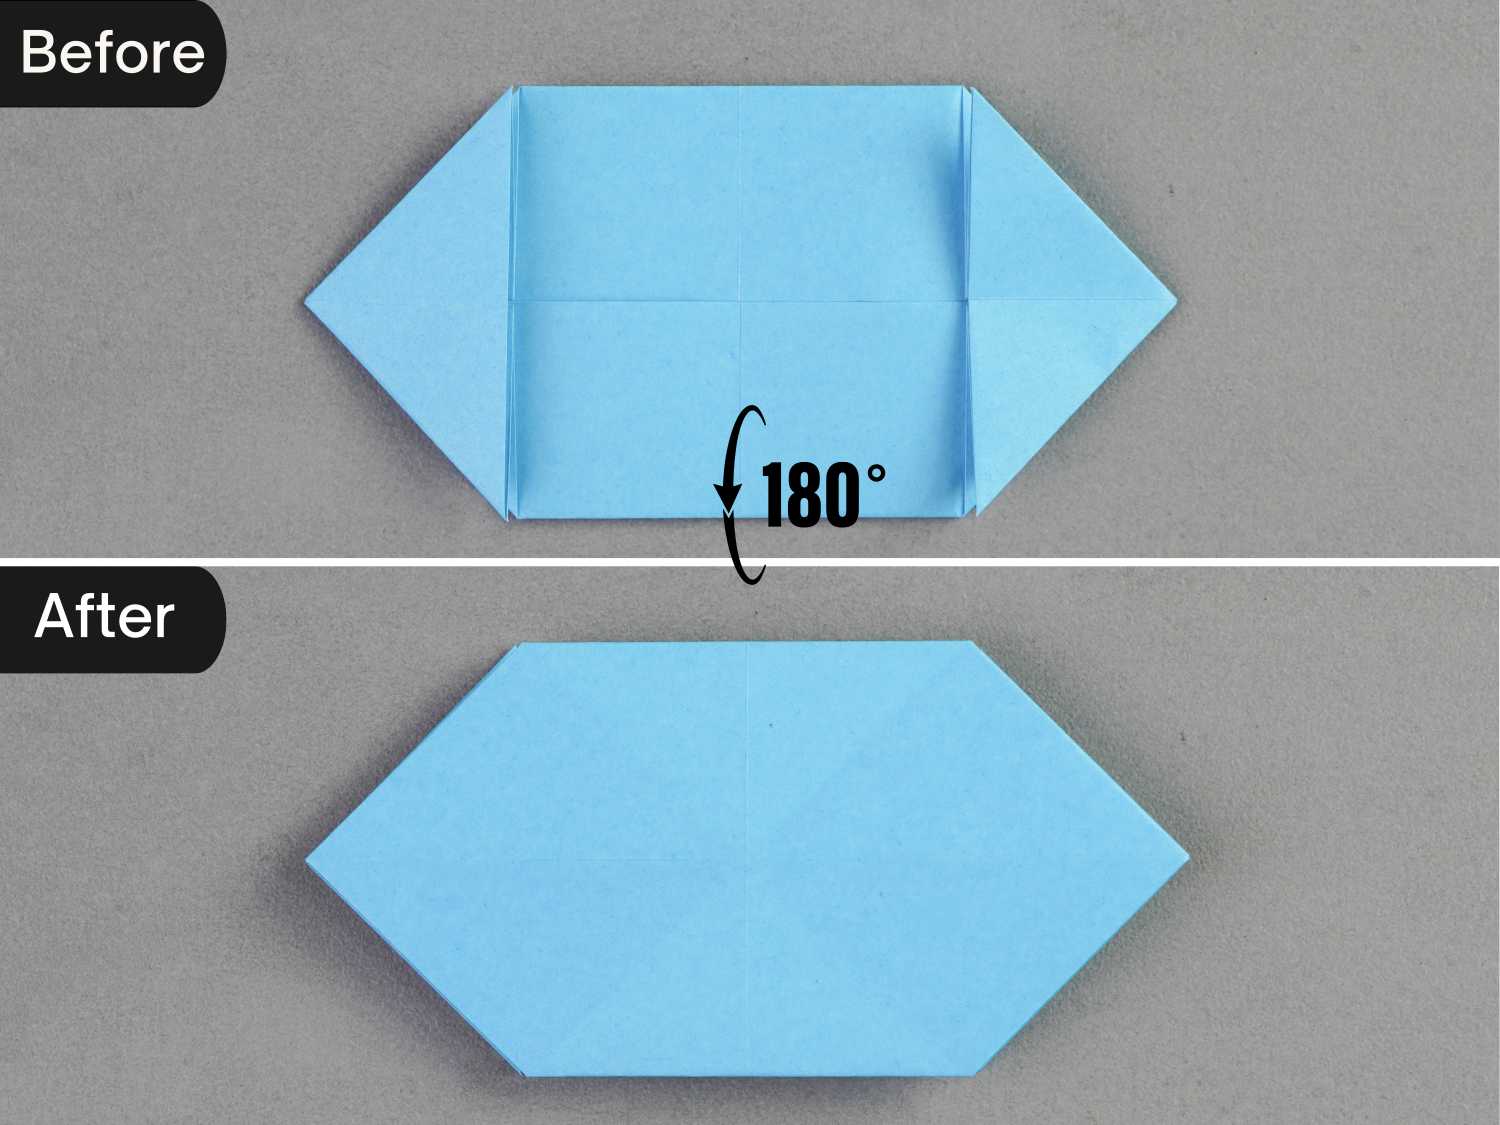
Step 5
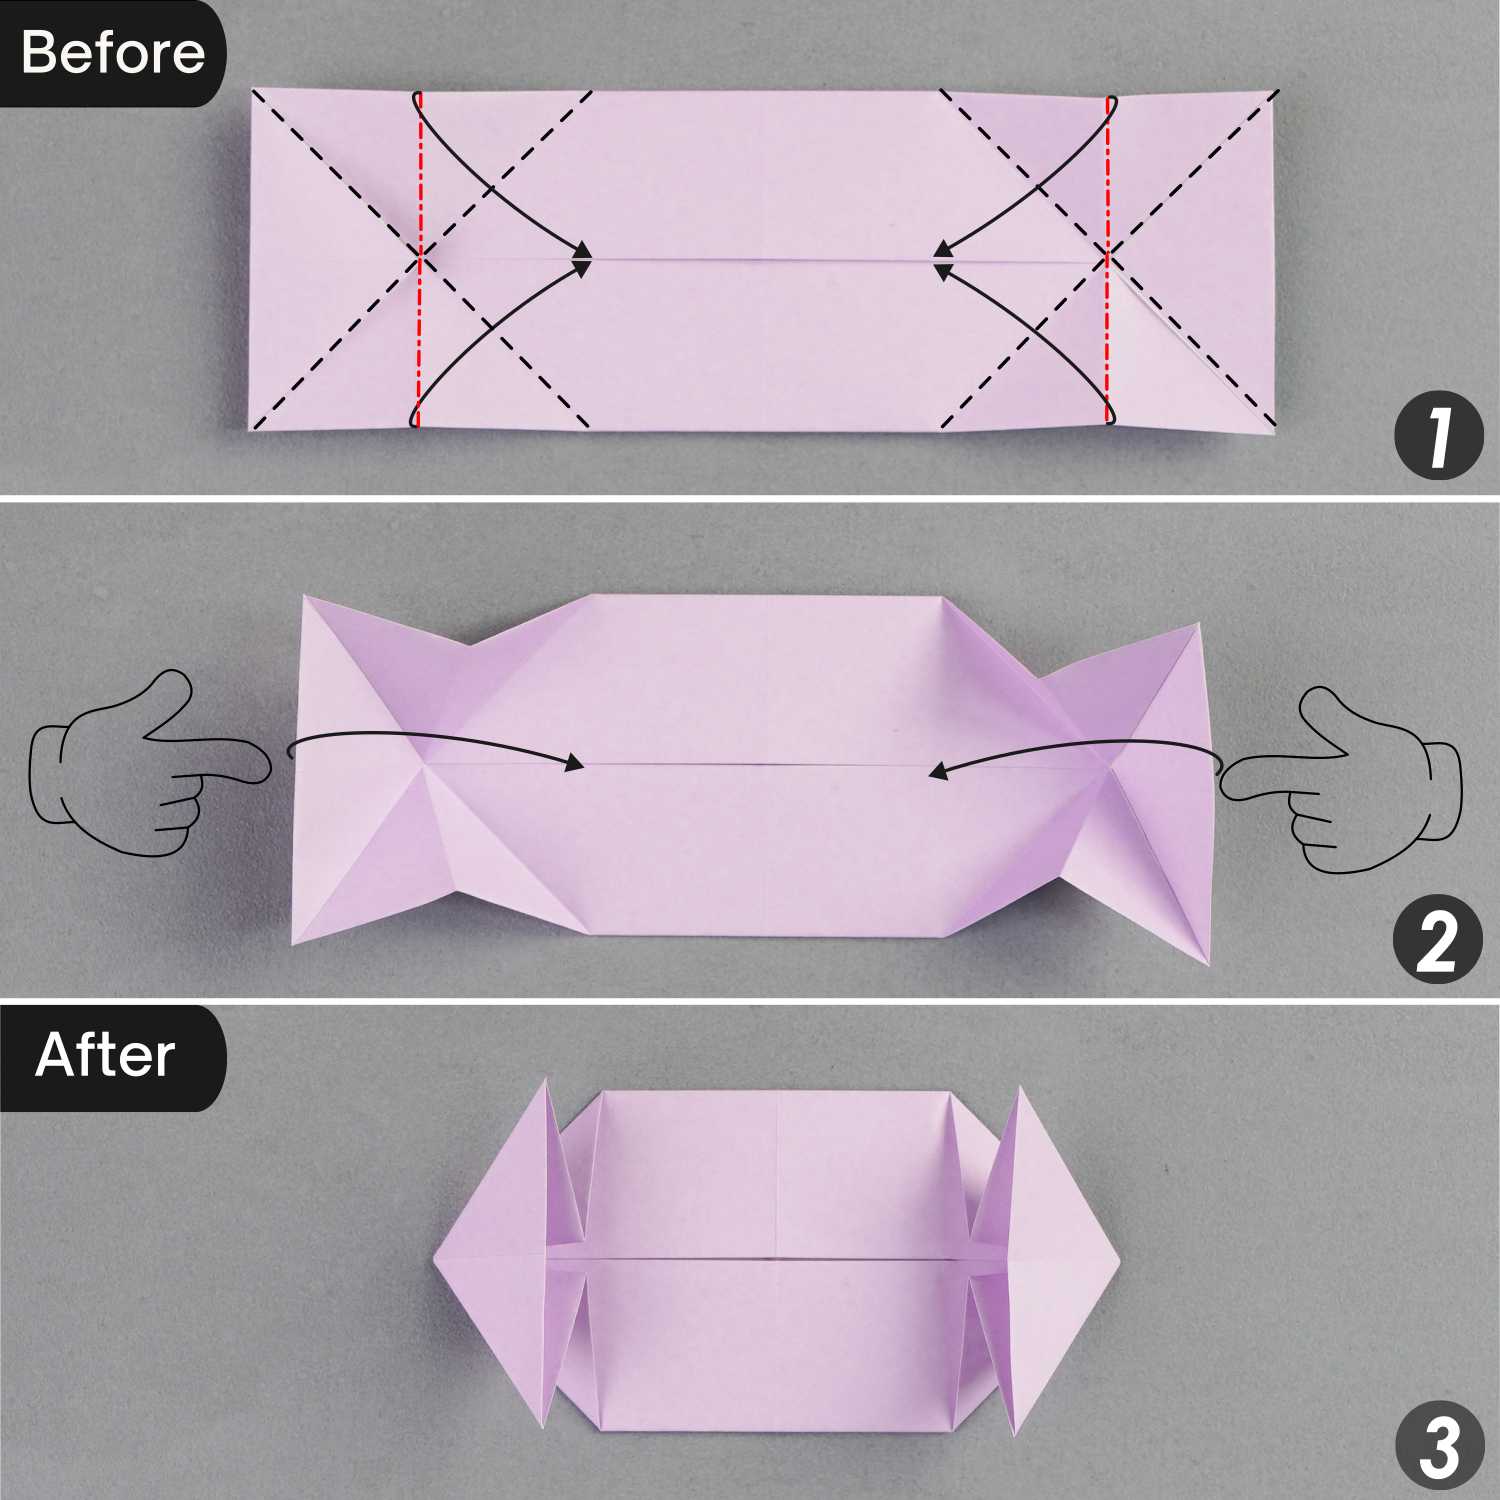
Fold the left and right edges along the dotted lines to create two creases, then unfold them. The dotted lines correspond to the vertical extension lines of the intersection point on the left and right sides.
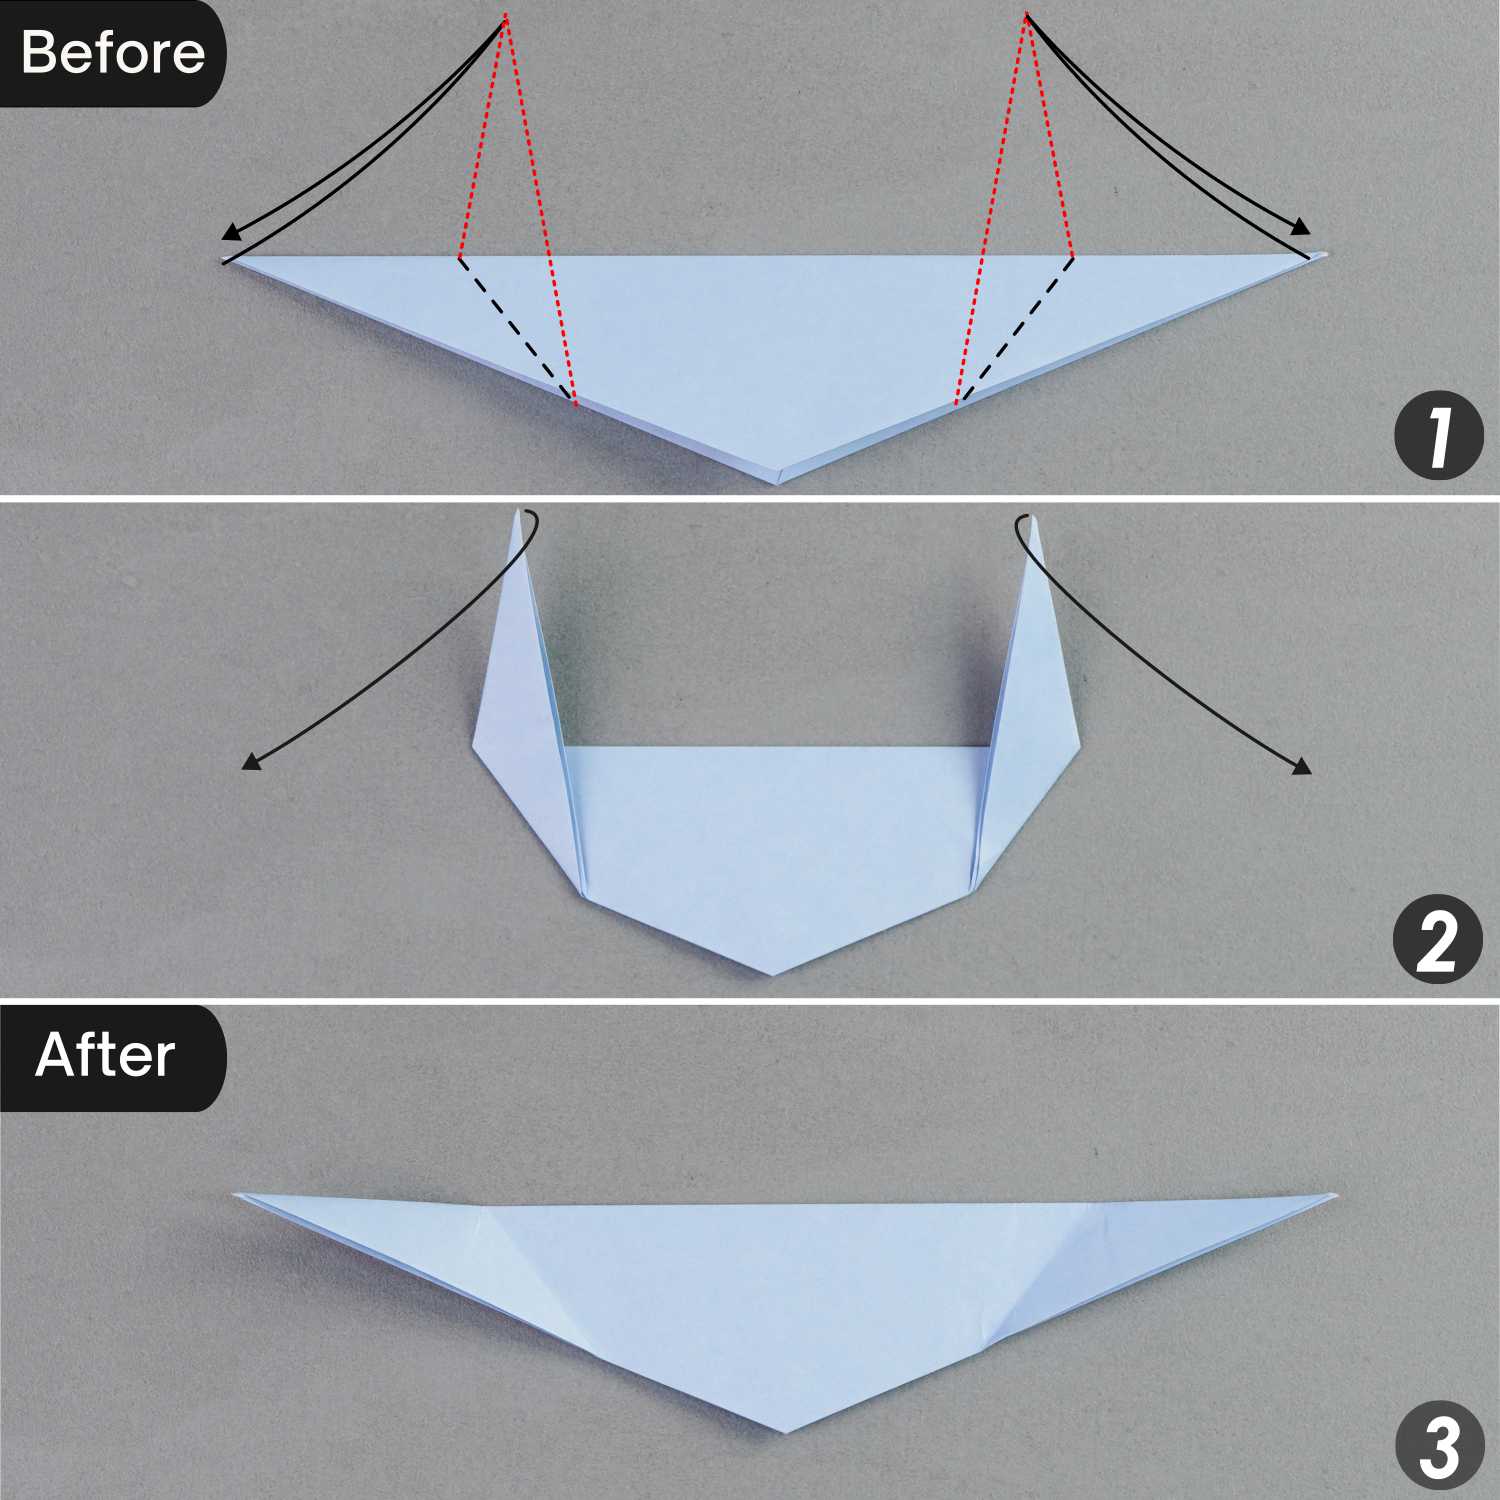
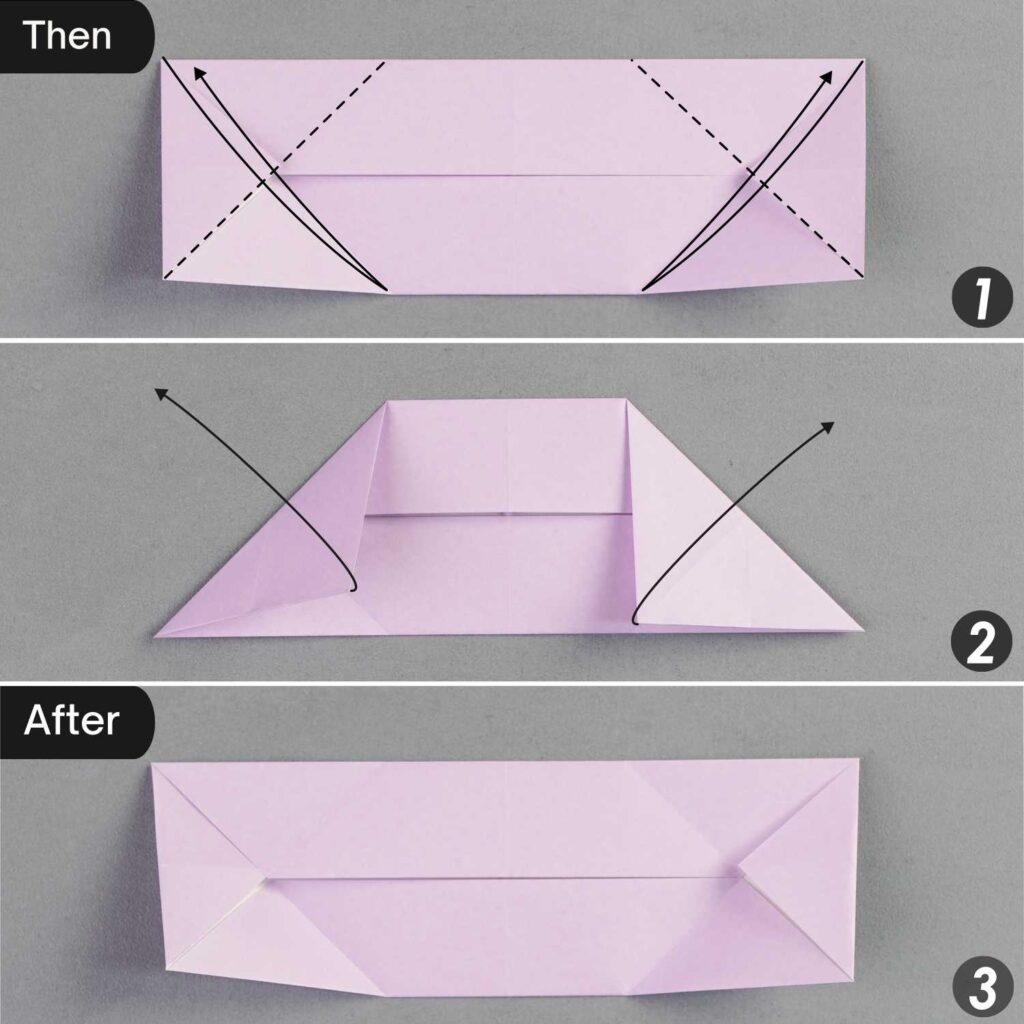
Step 6
Turn over the paper from front to back.
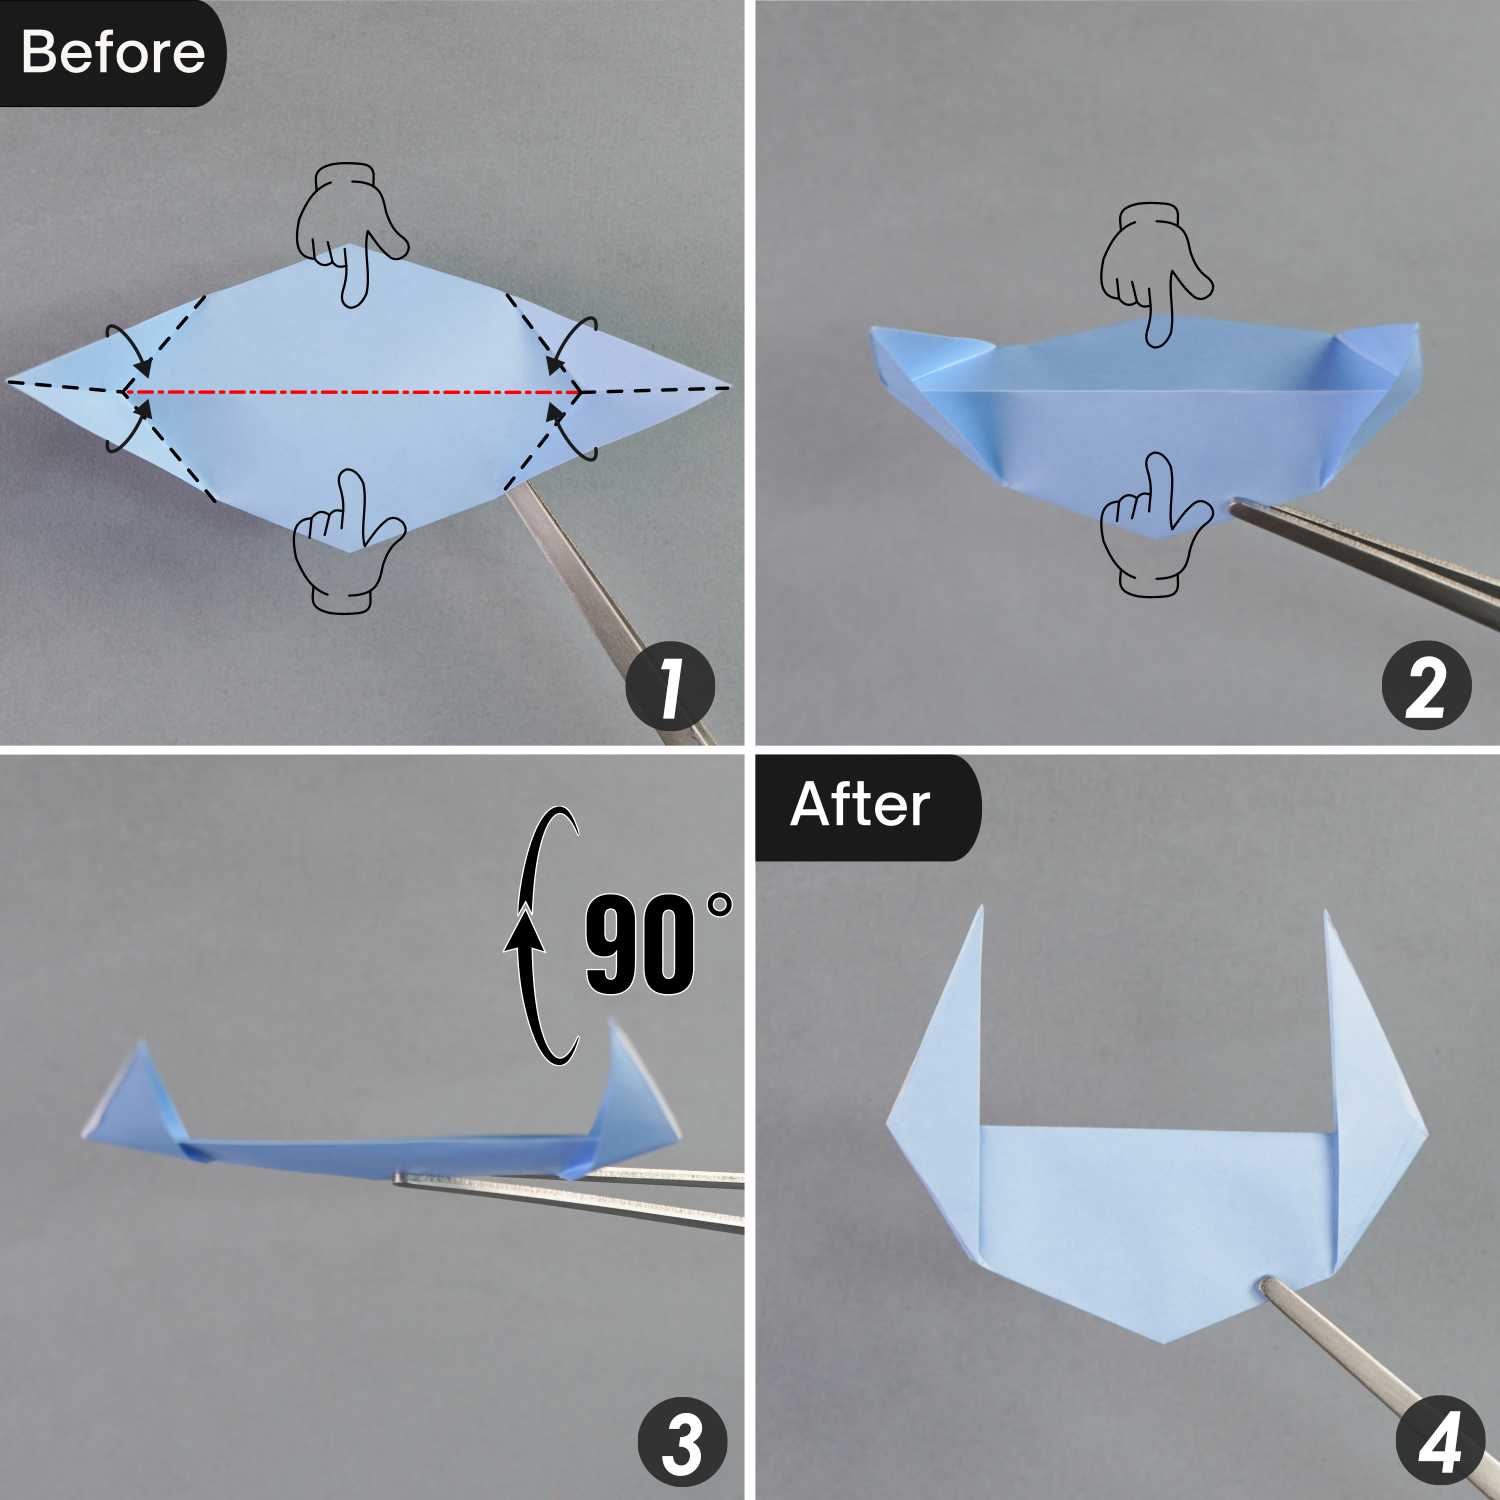
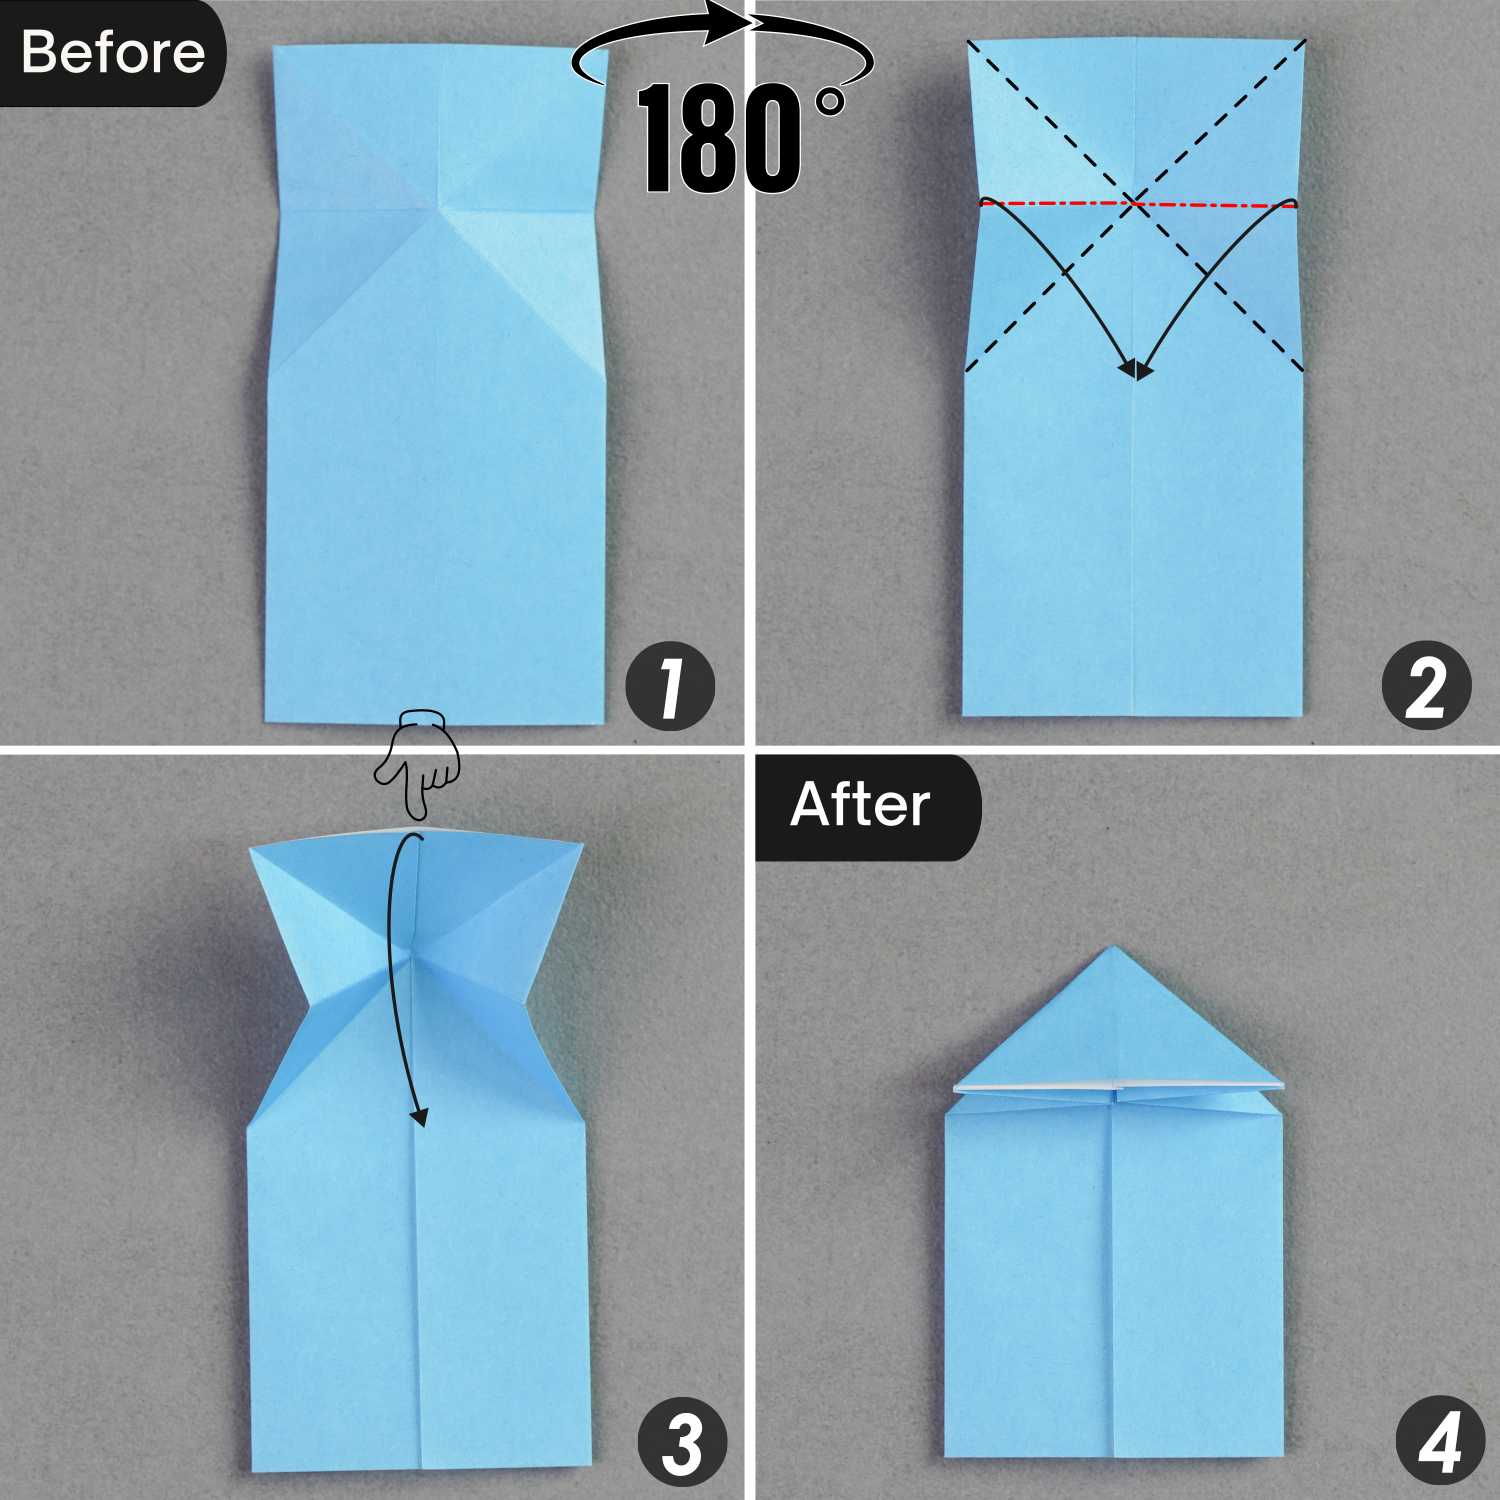
Step 7
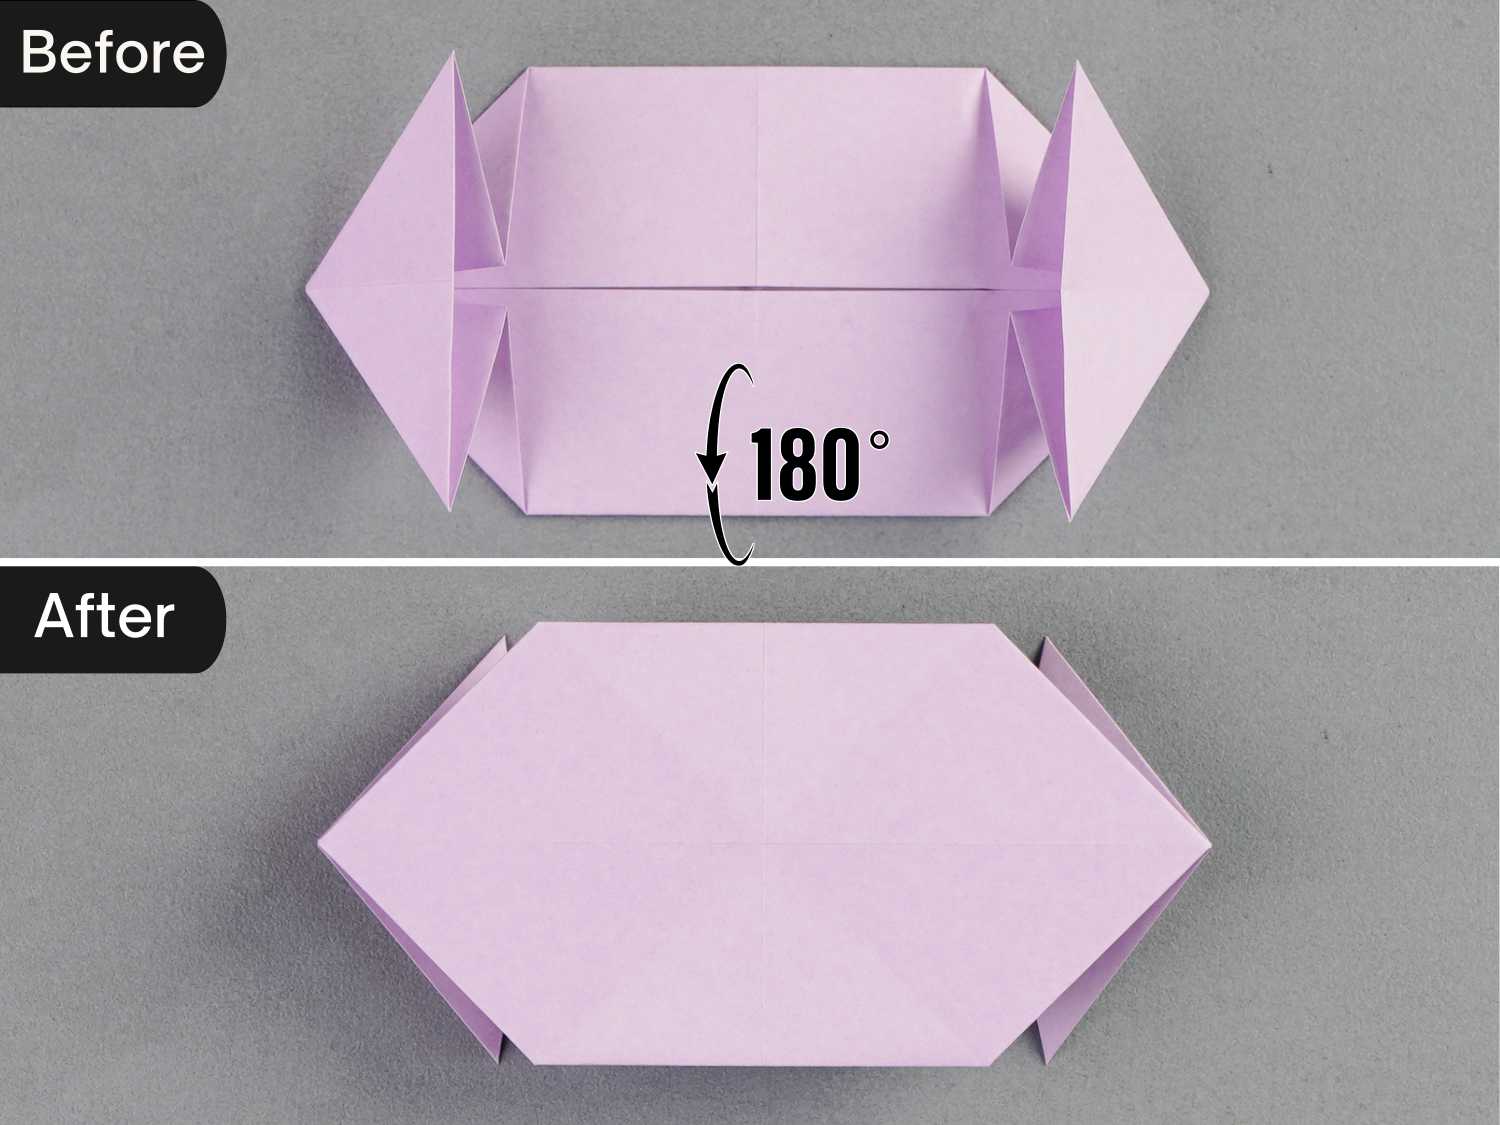
Valley fold the creases indicated by the black dotted lines and mountain fold the creases indicated by the red dotted lines, fold the left and right edges along the mountain creases, and flatten the fold to create a triangle on each side.
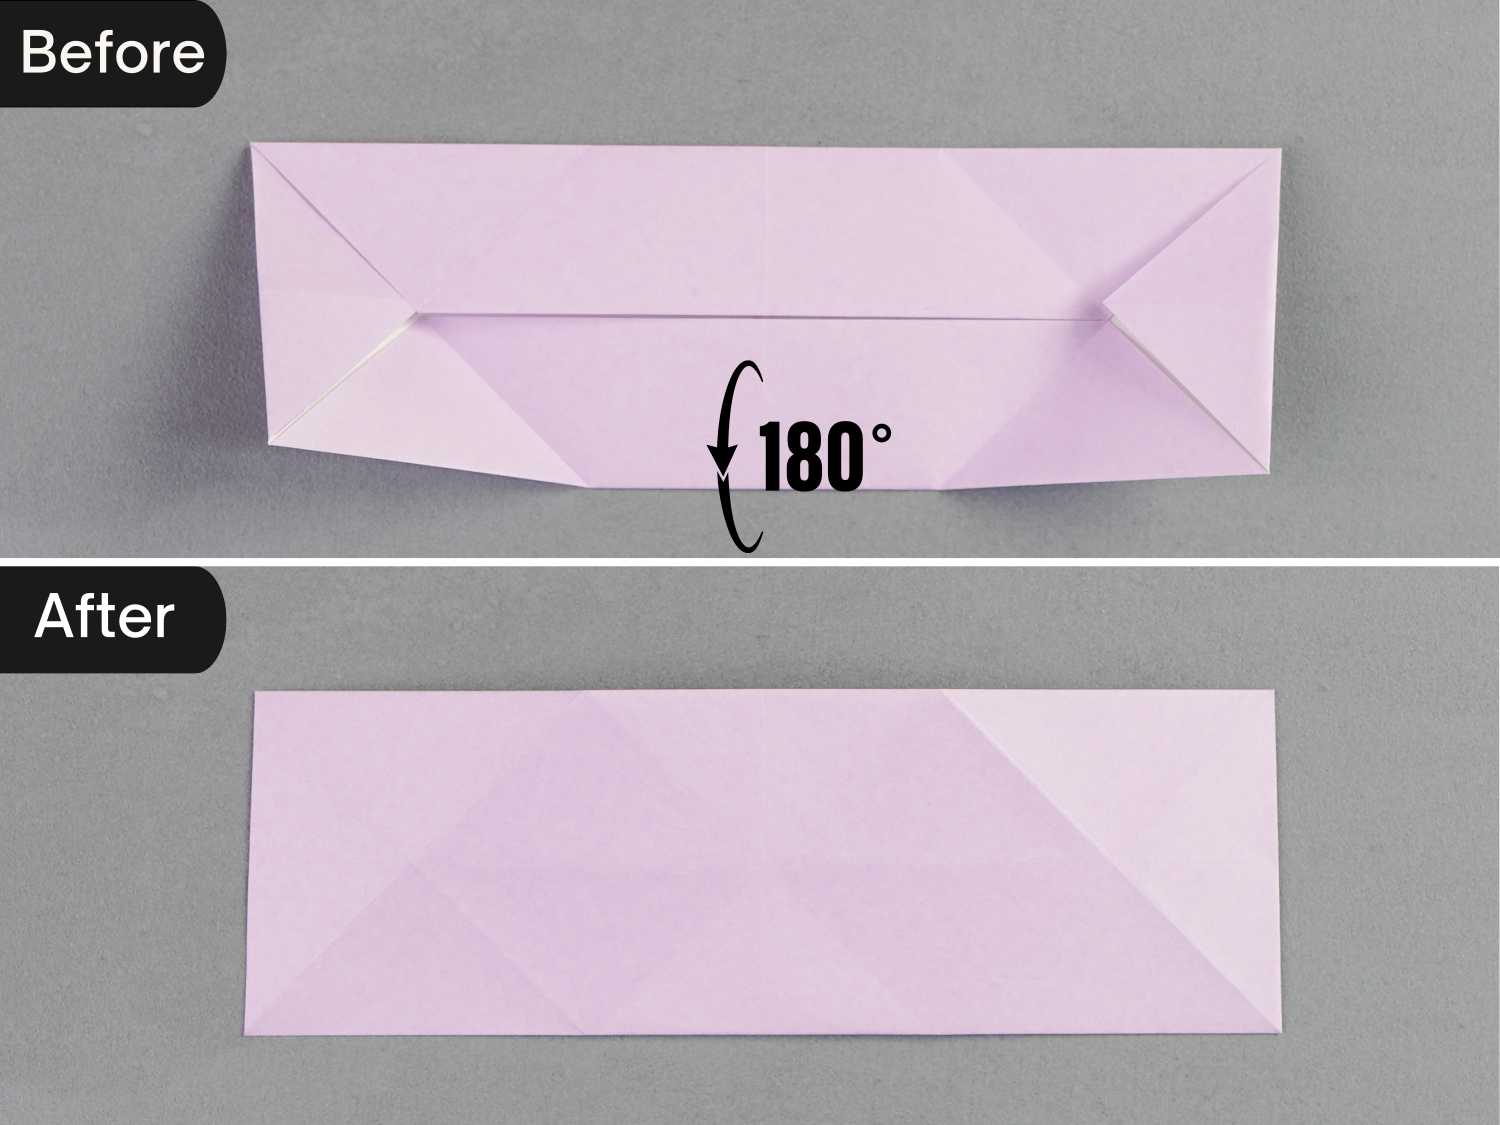
Step 8
Turn over the paper from front to back.
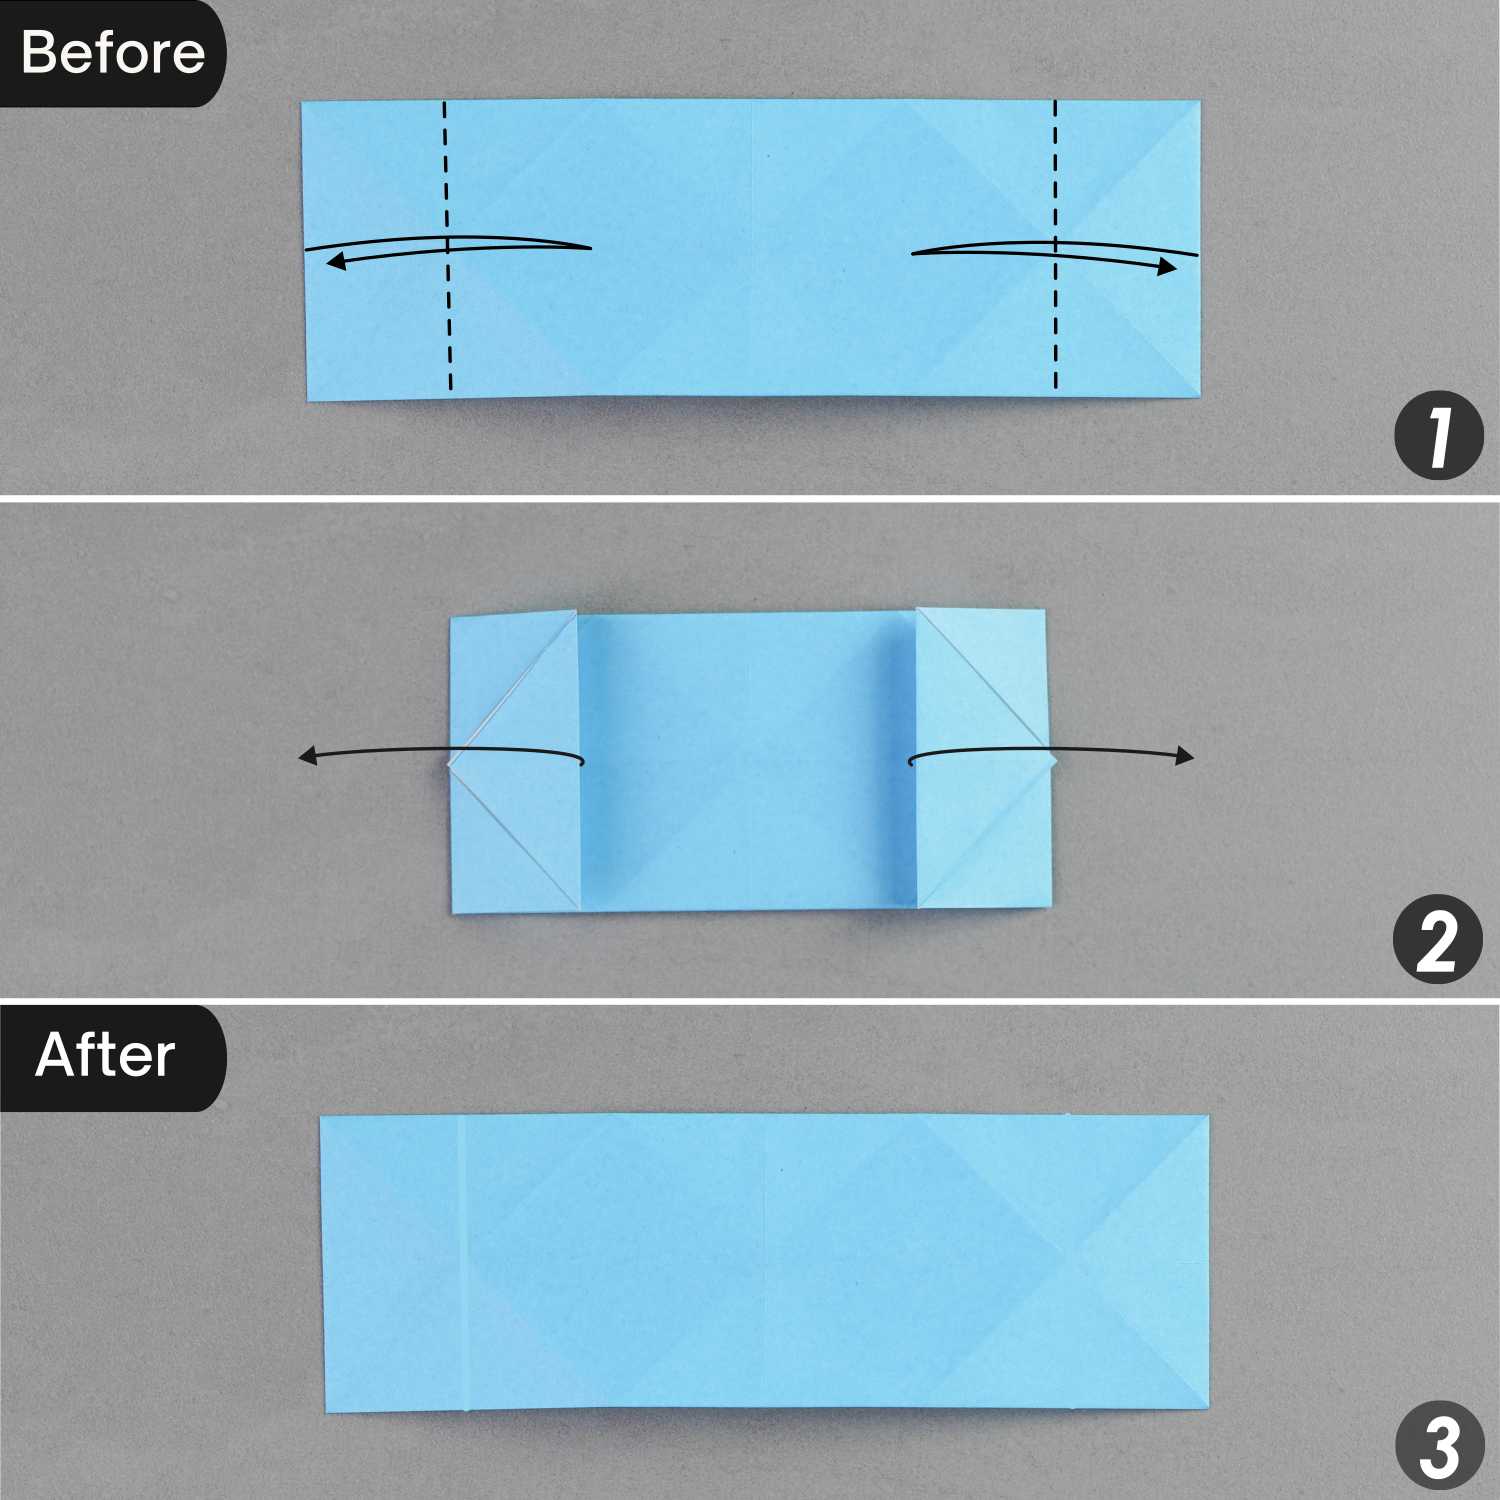
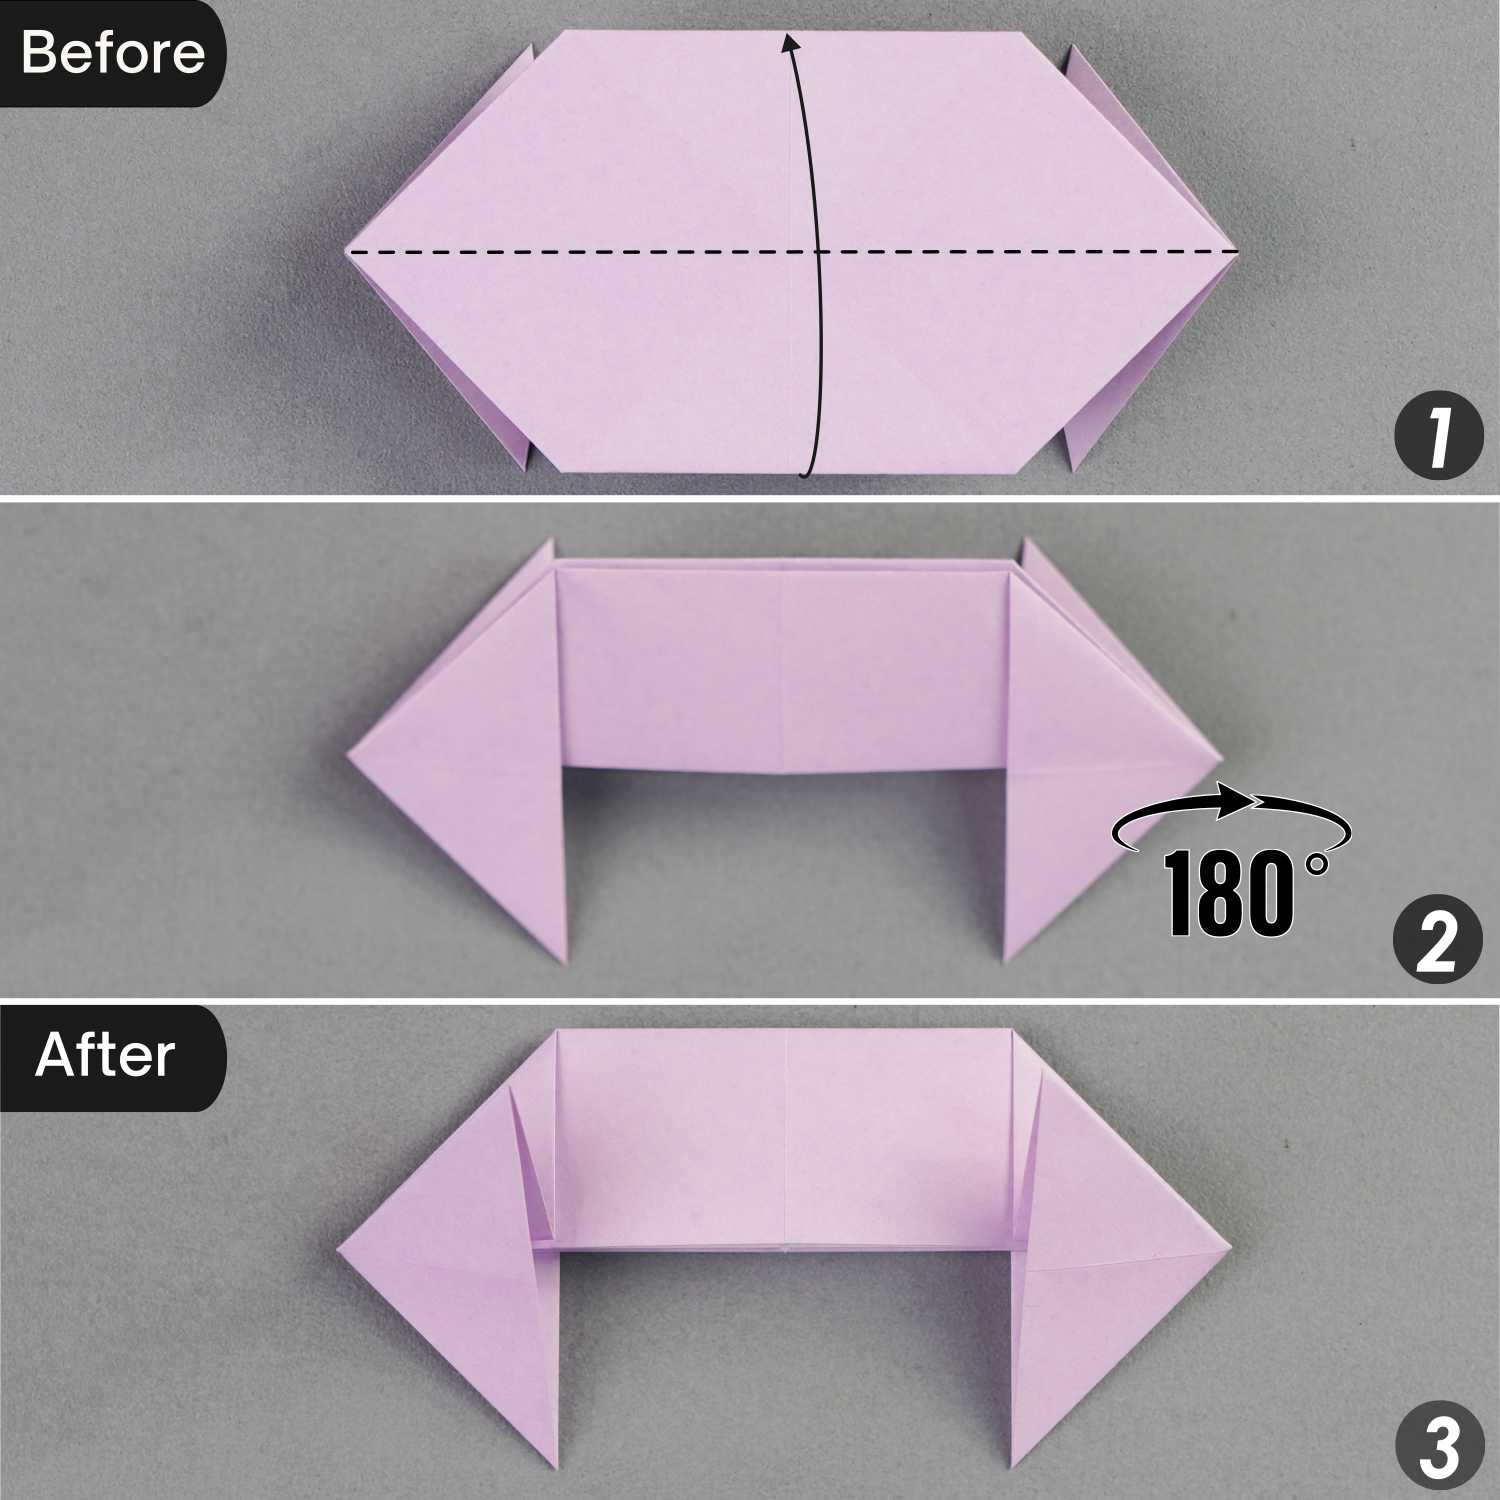
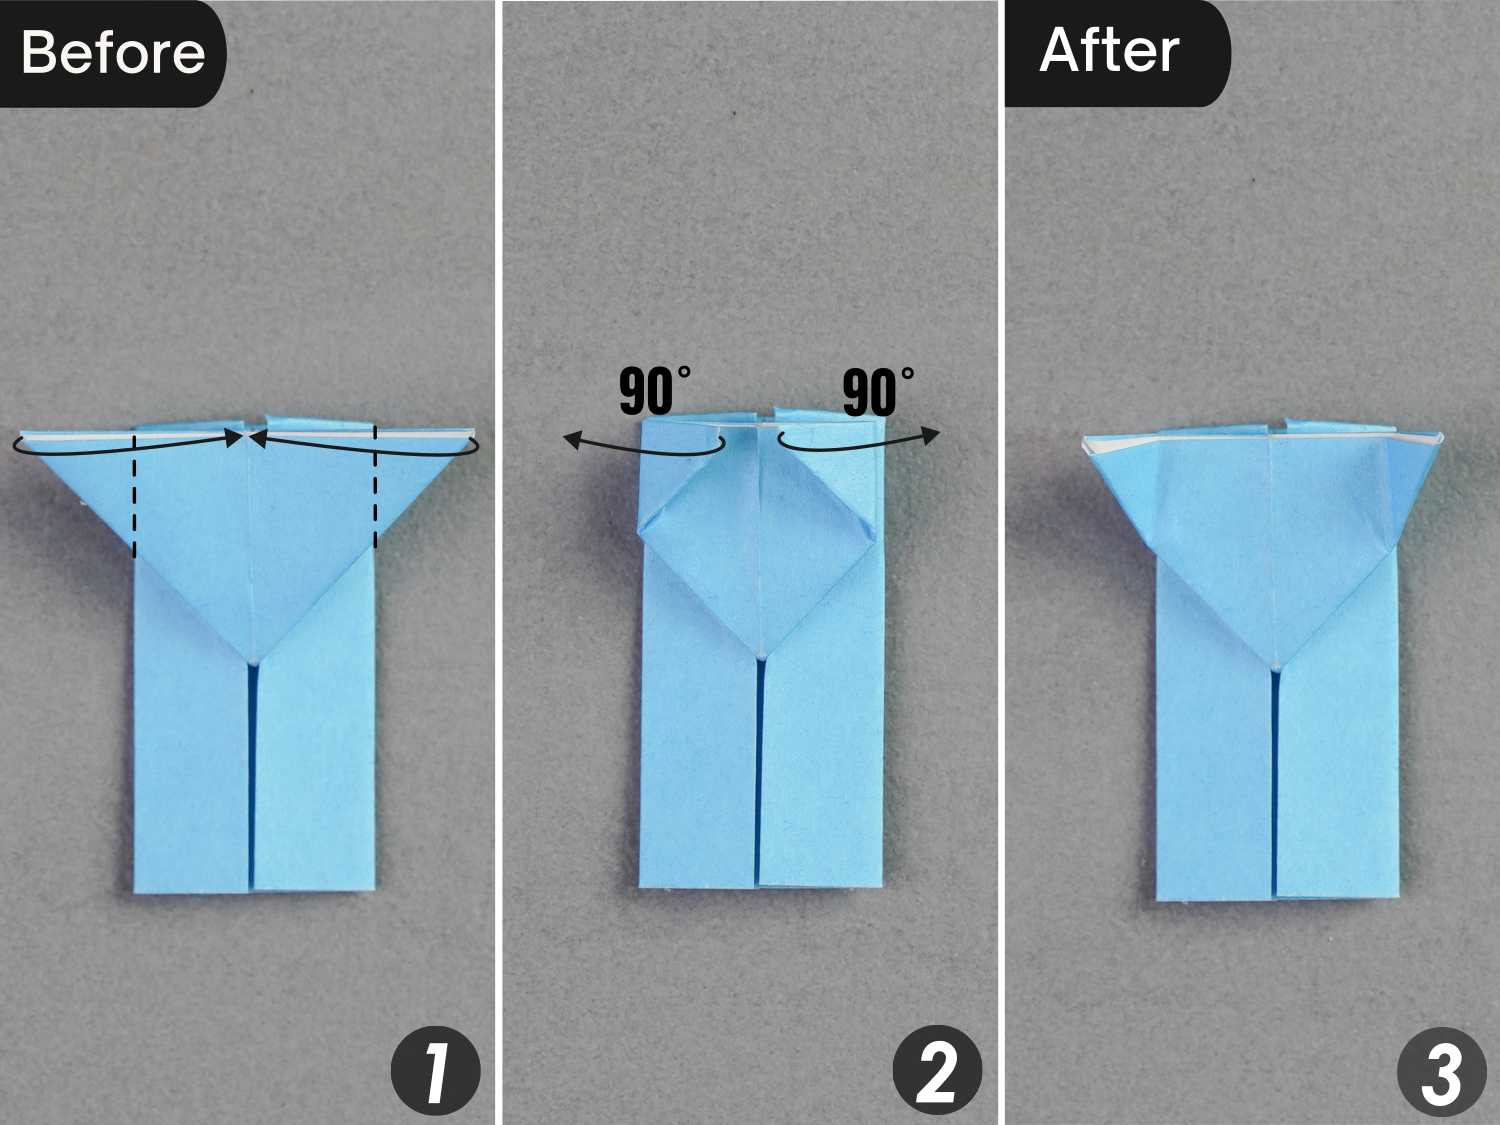
Step 9
Fold the top and bottom edges to align with the horizontal crease, and unfold them.
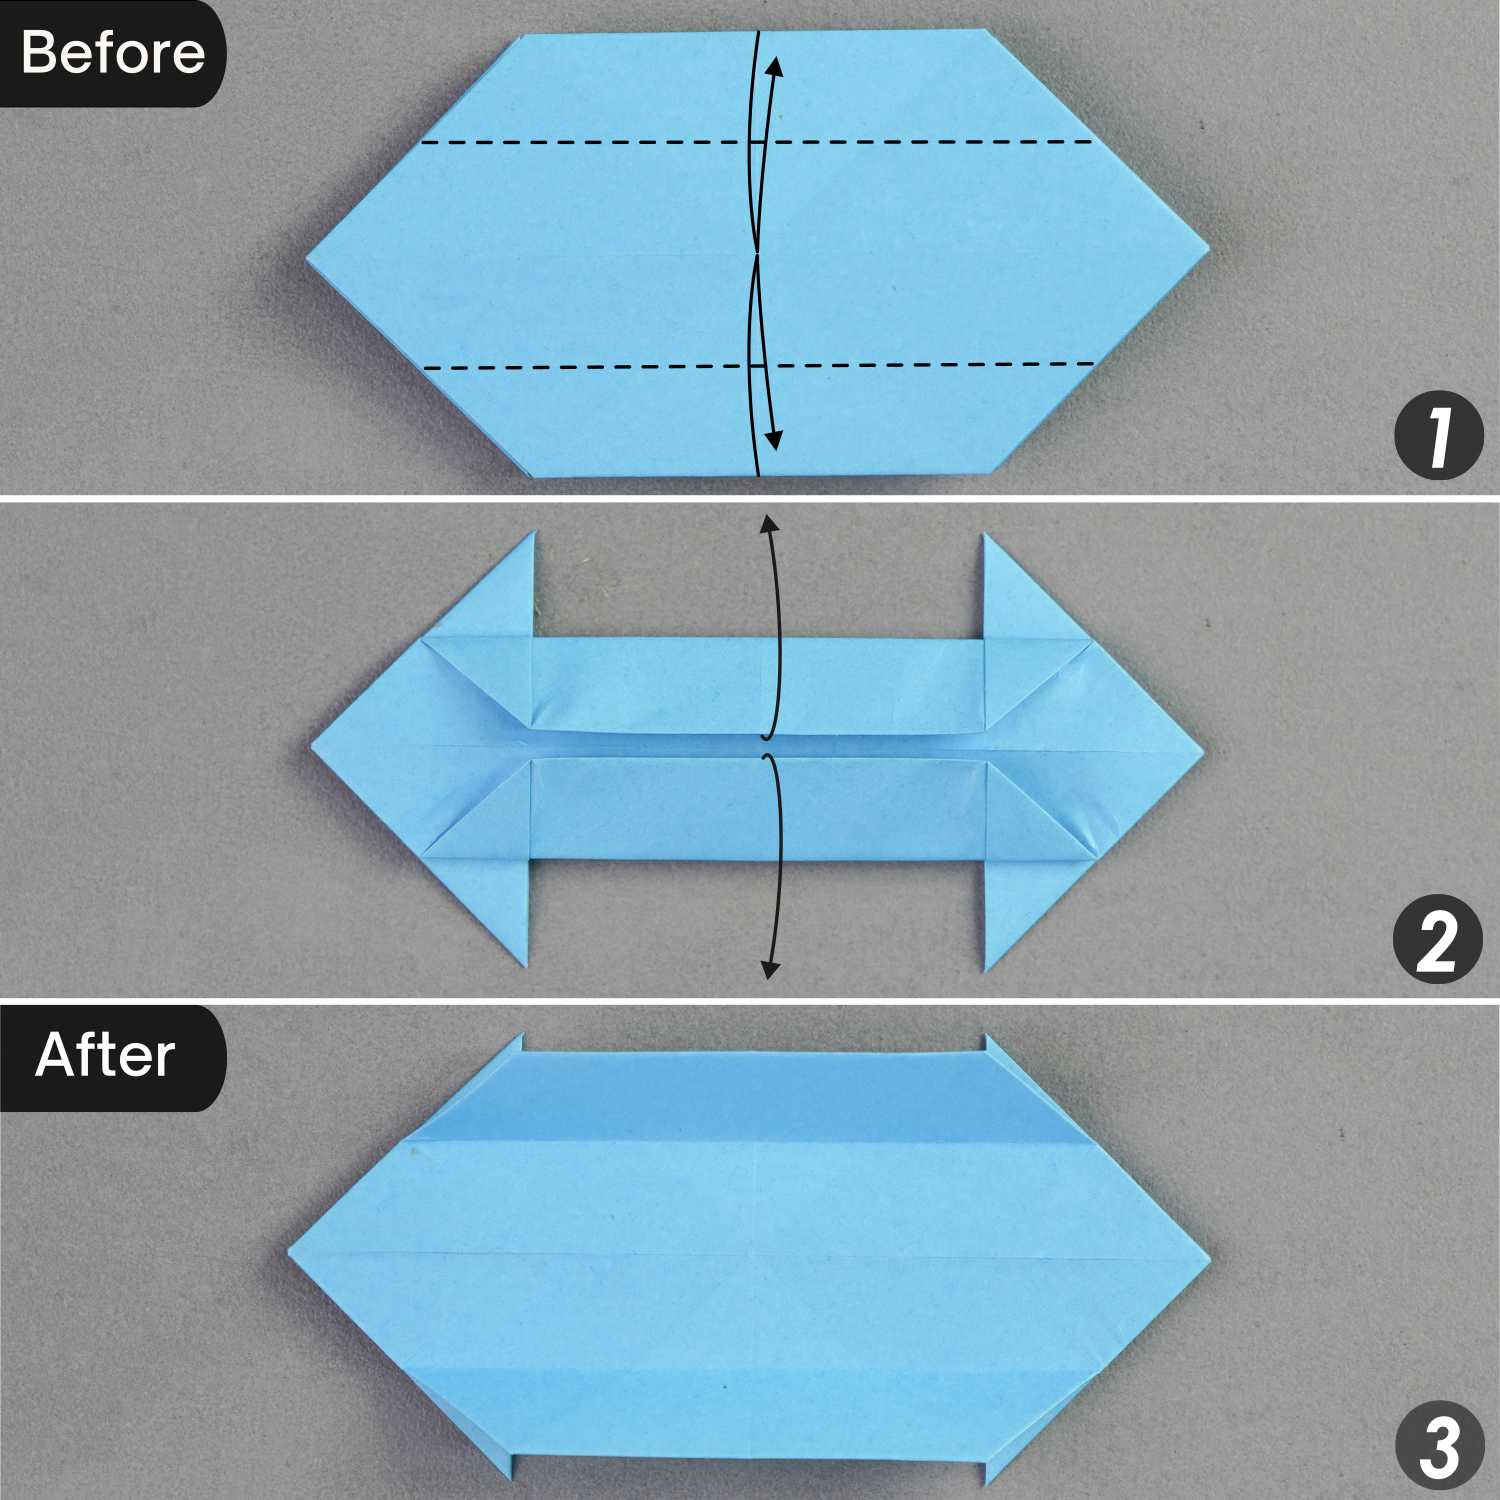
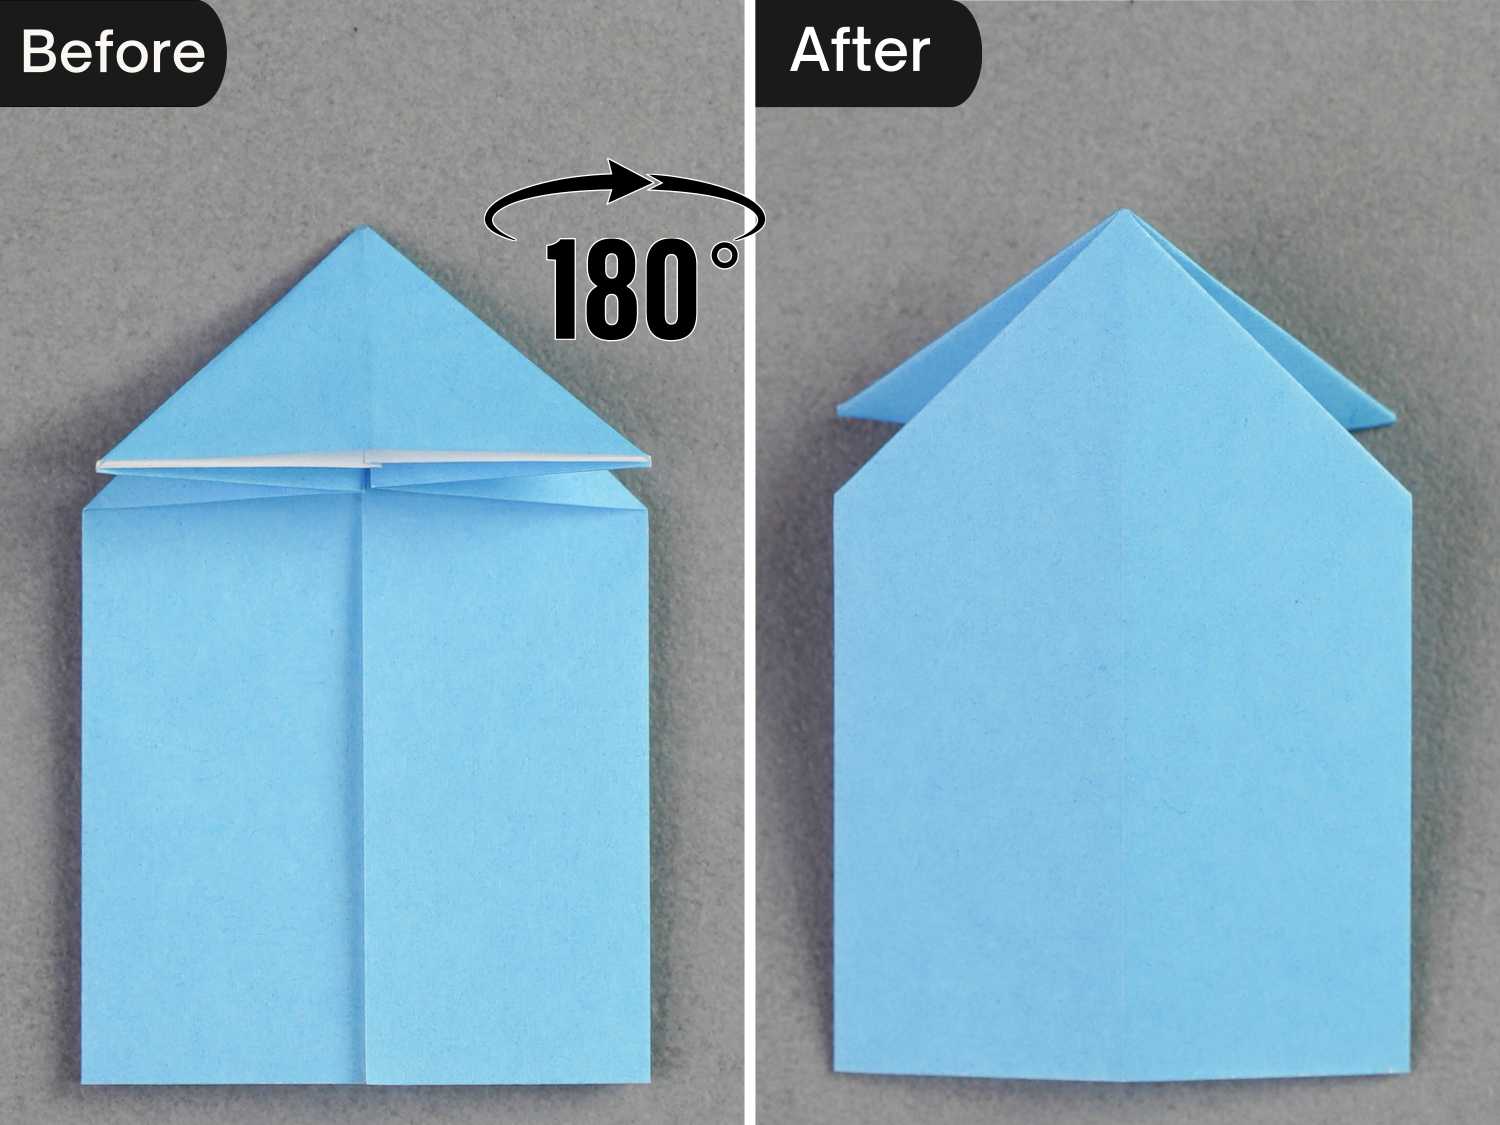
Step 10
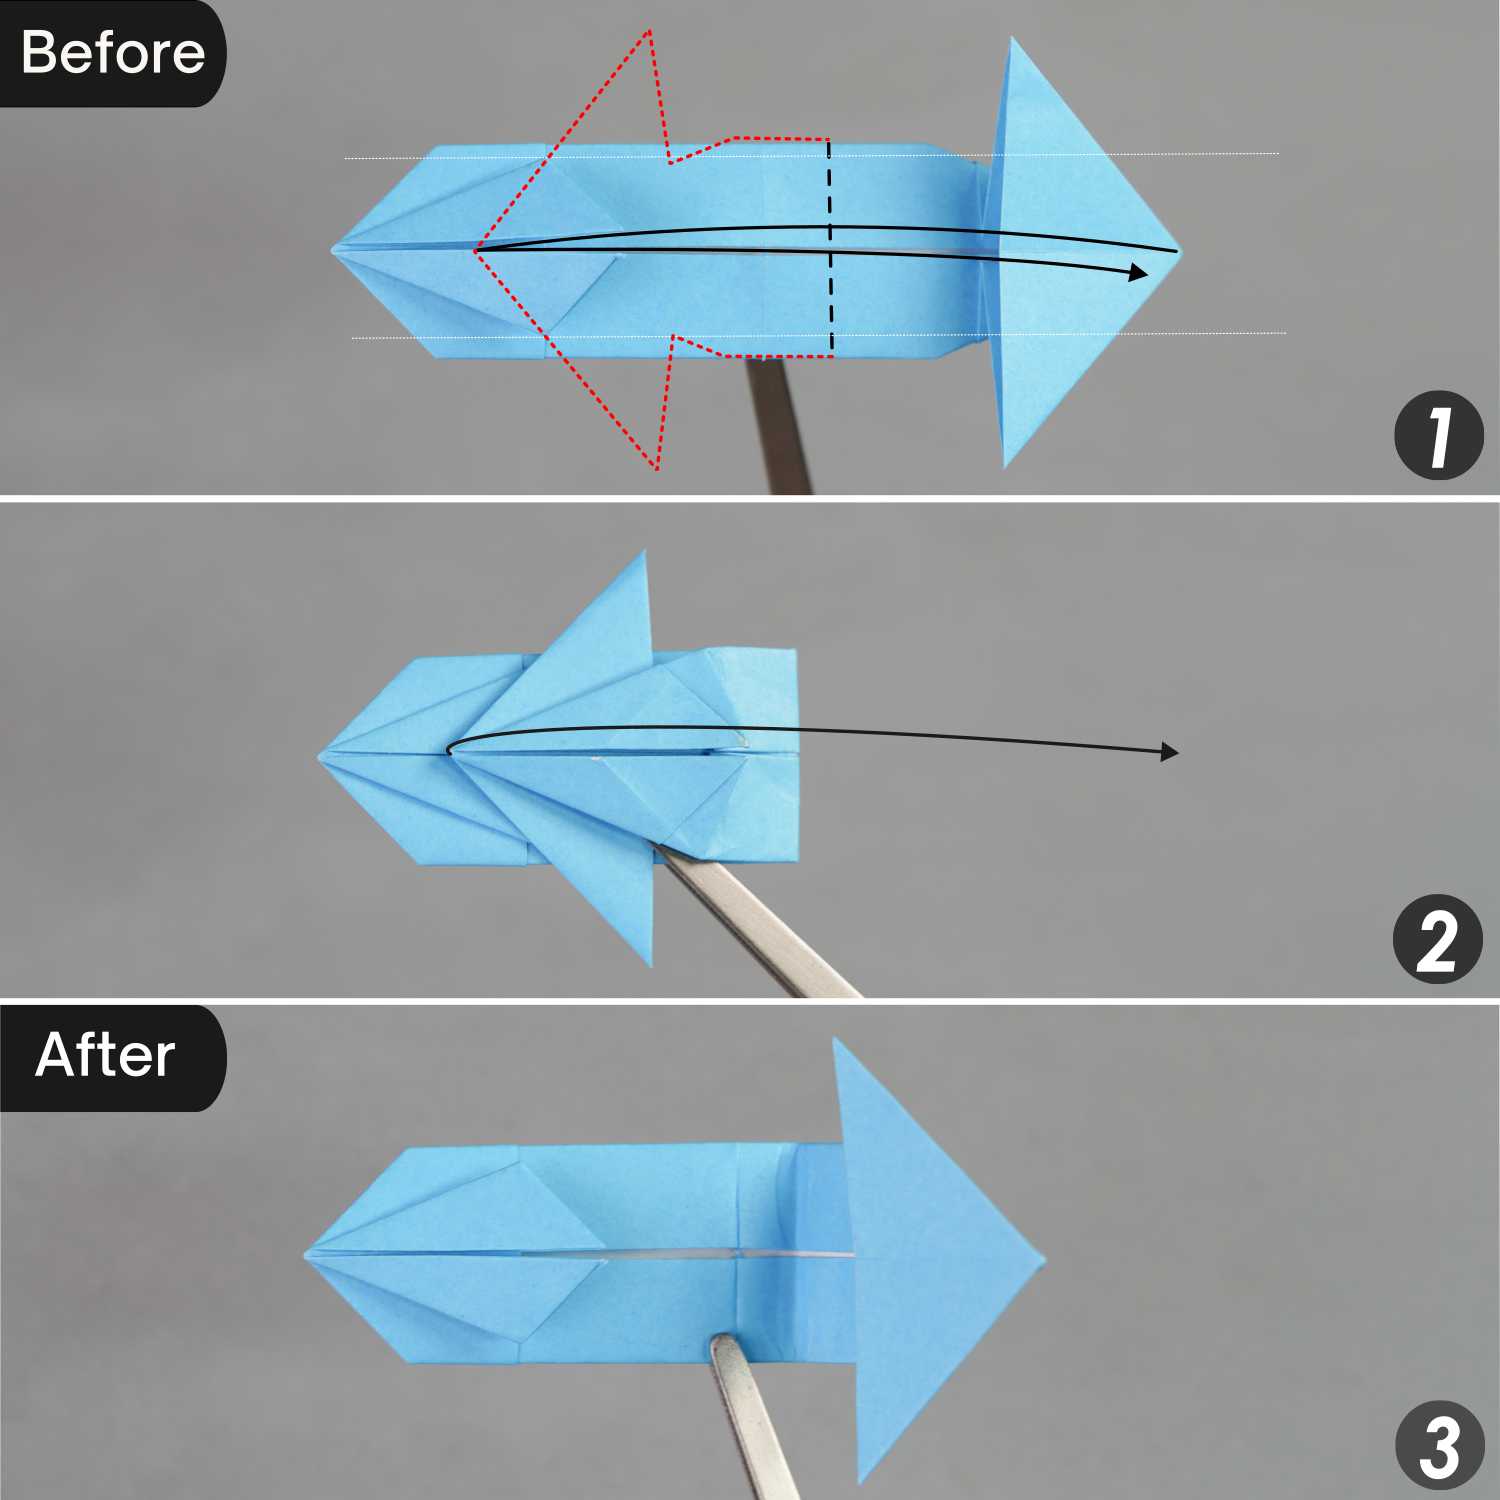
Fold the top and bottom right edges to align with the horizontal crease, then fold the top and bottom edges as you did in the previous step. This creates two arched corners, flatten them to the left along the red dotted line as shown in pictures three and four.
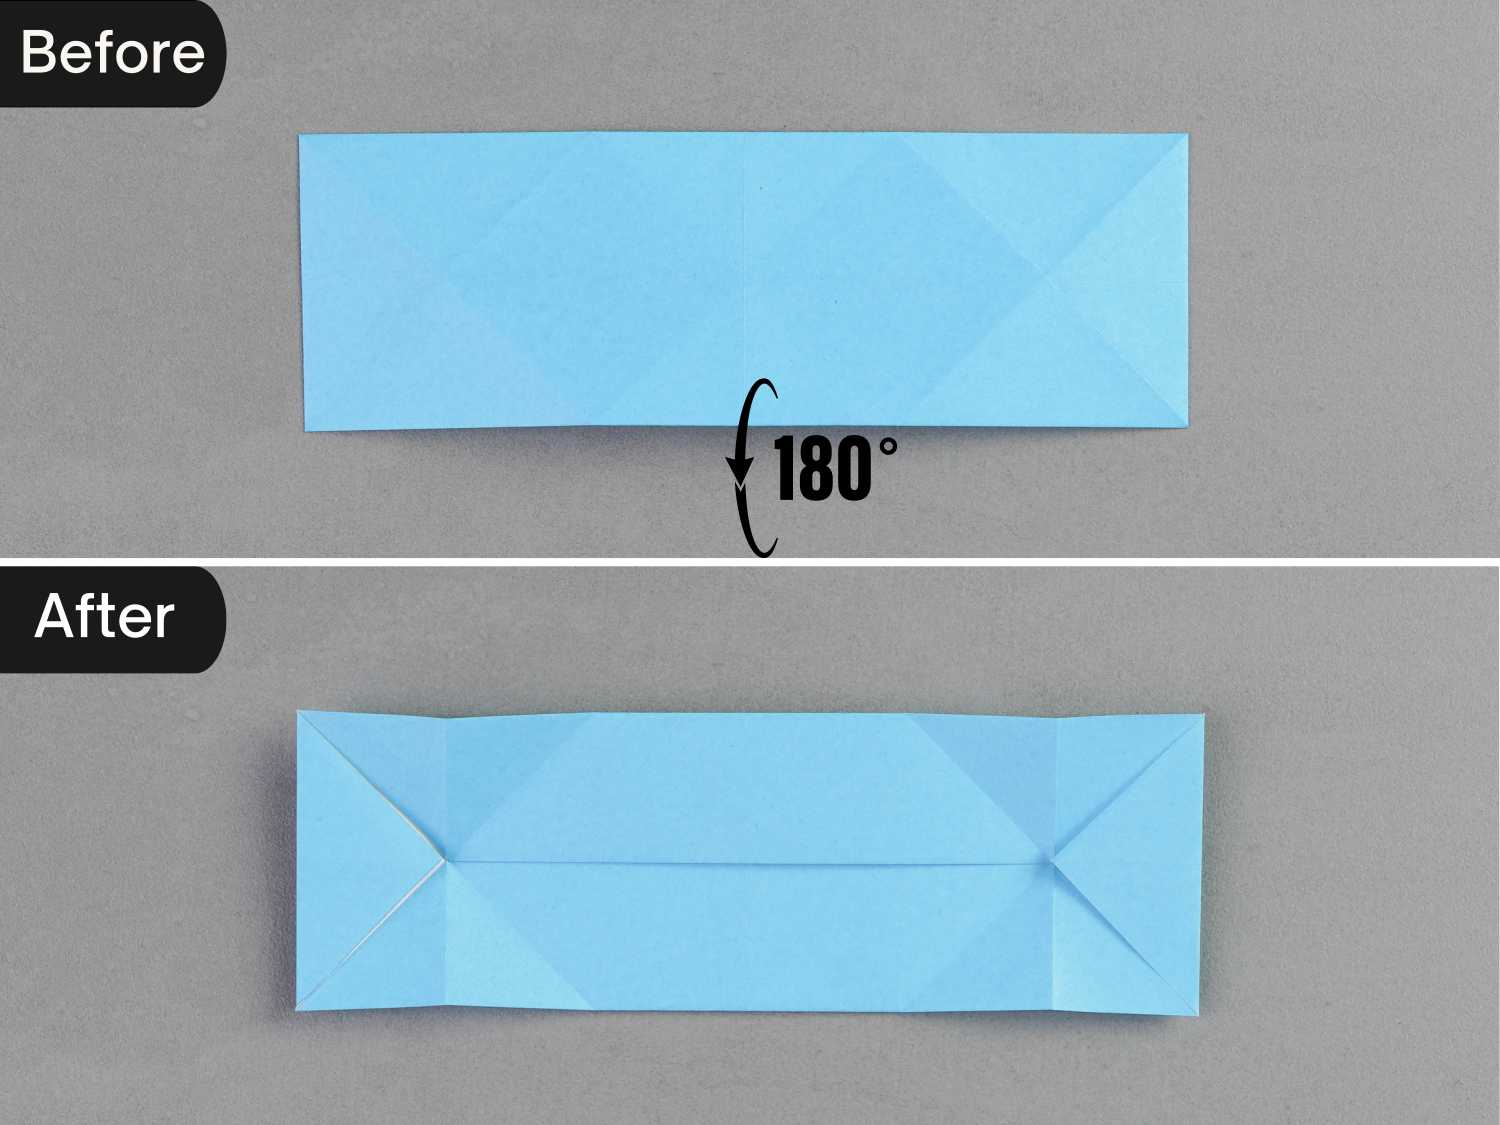
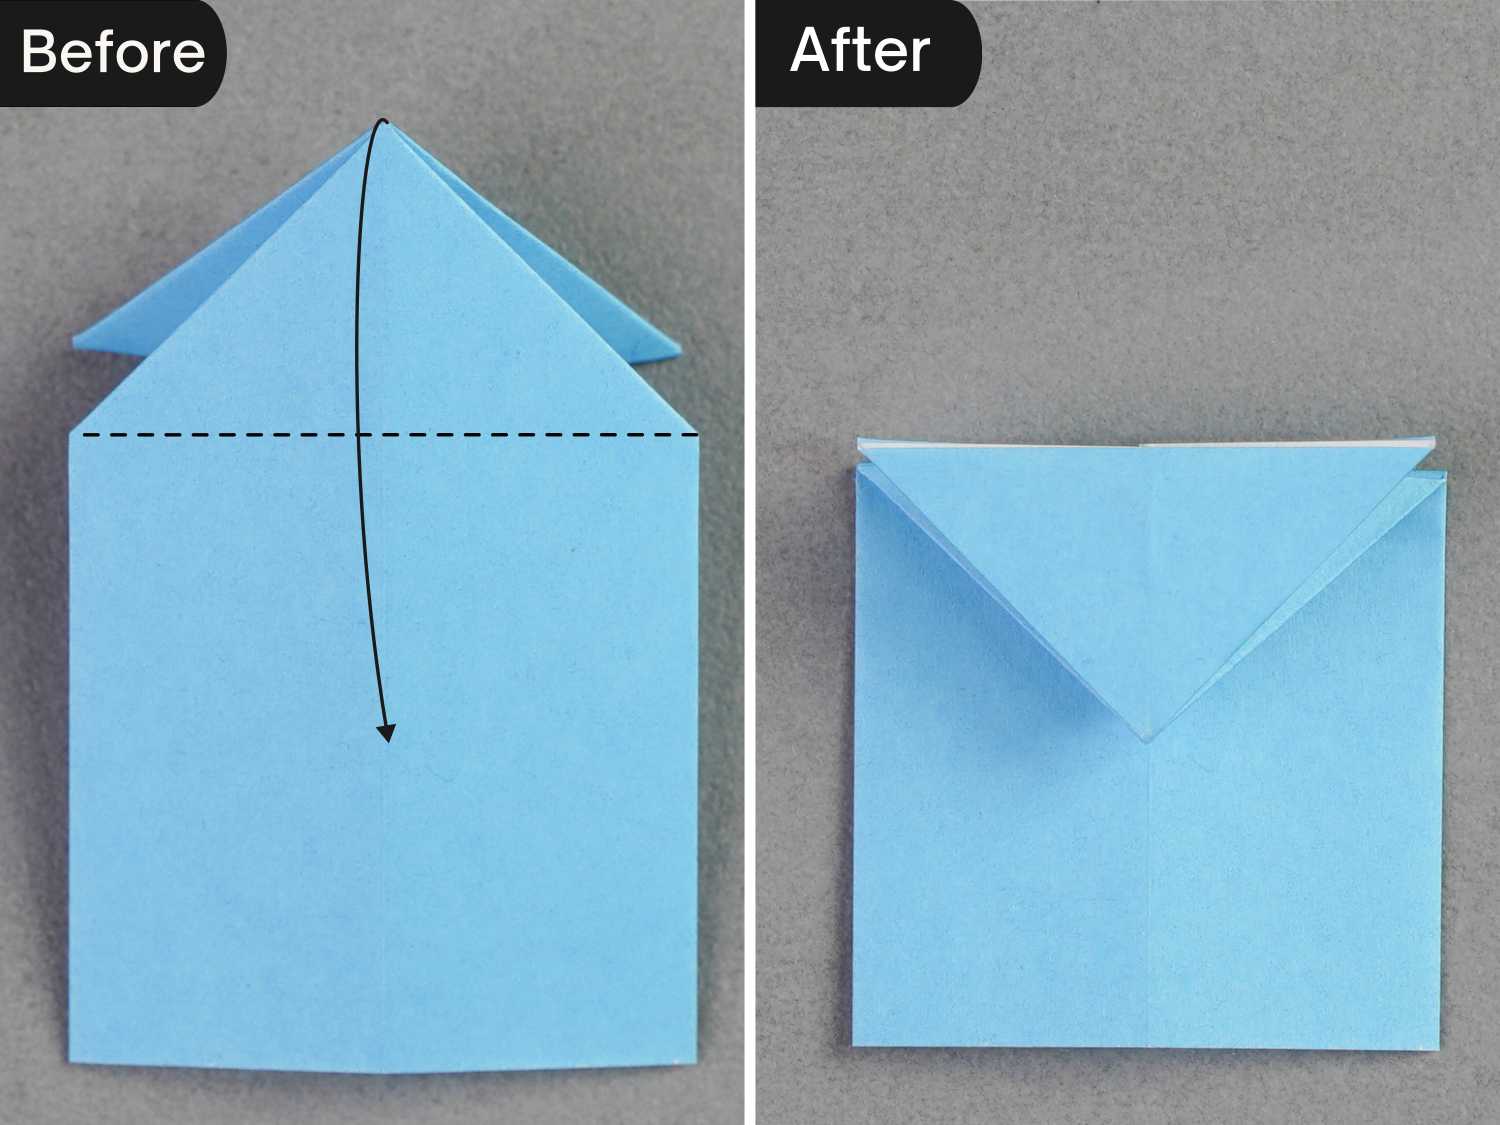
Step 11
Flip the paper from front to back, then fold the top and bottom left edges to align with the horizontal crease.
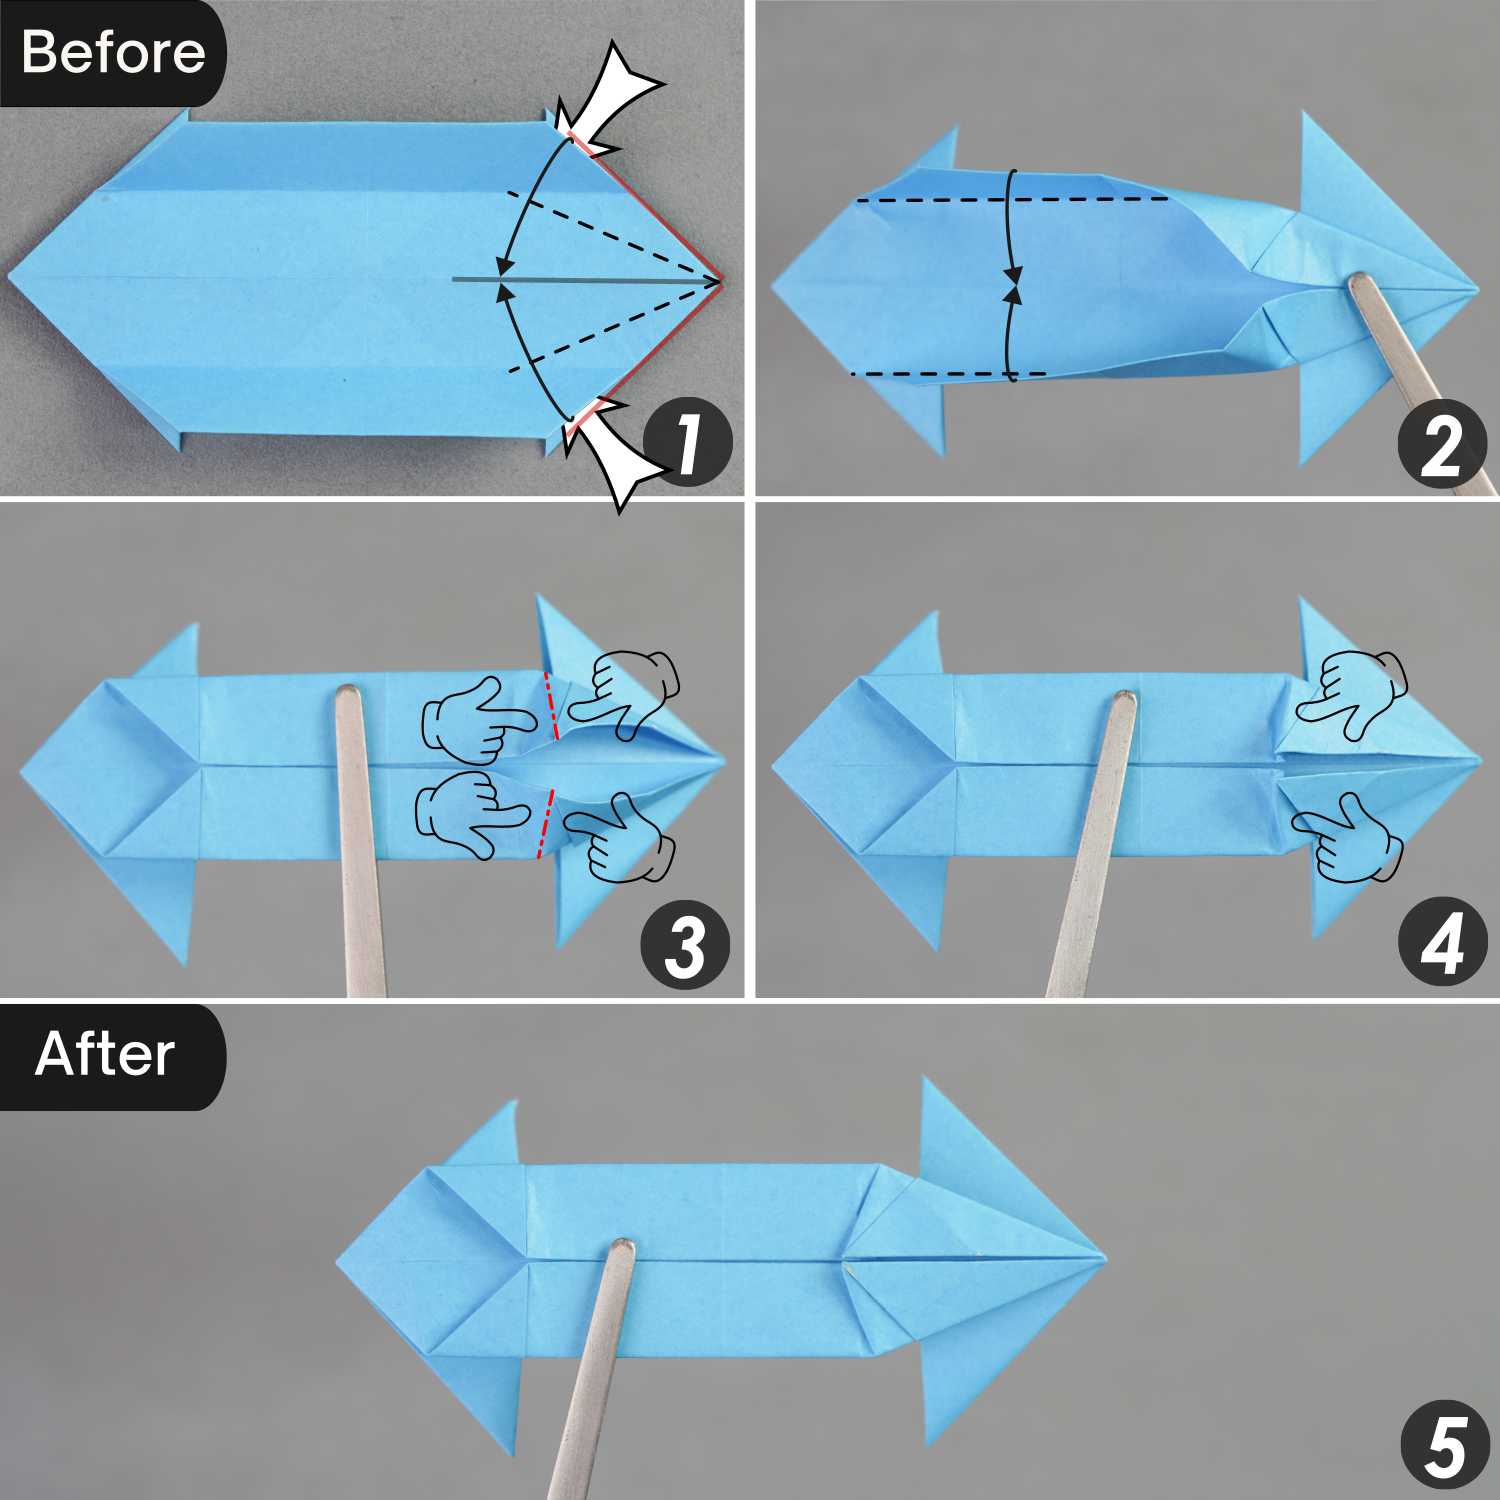
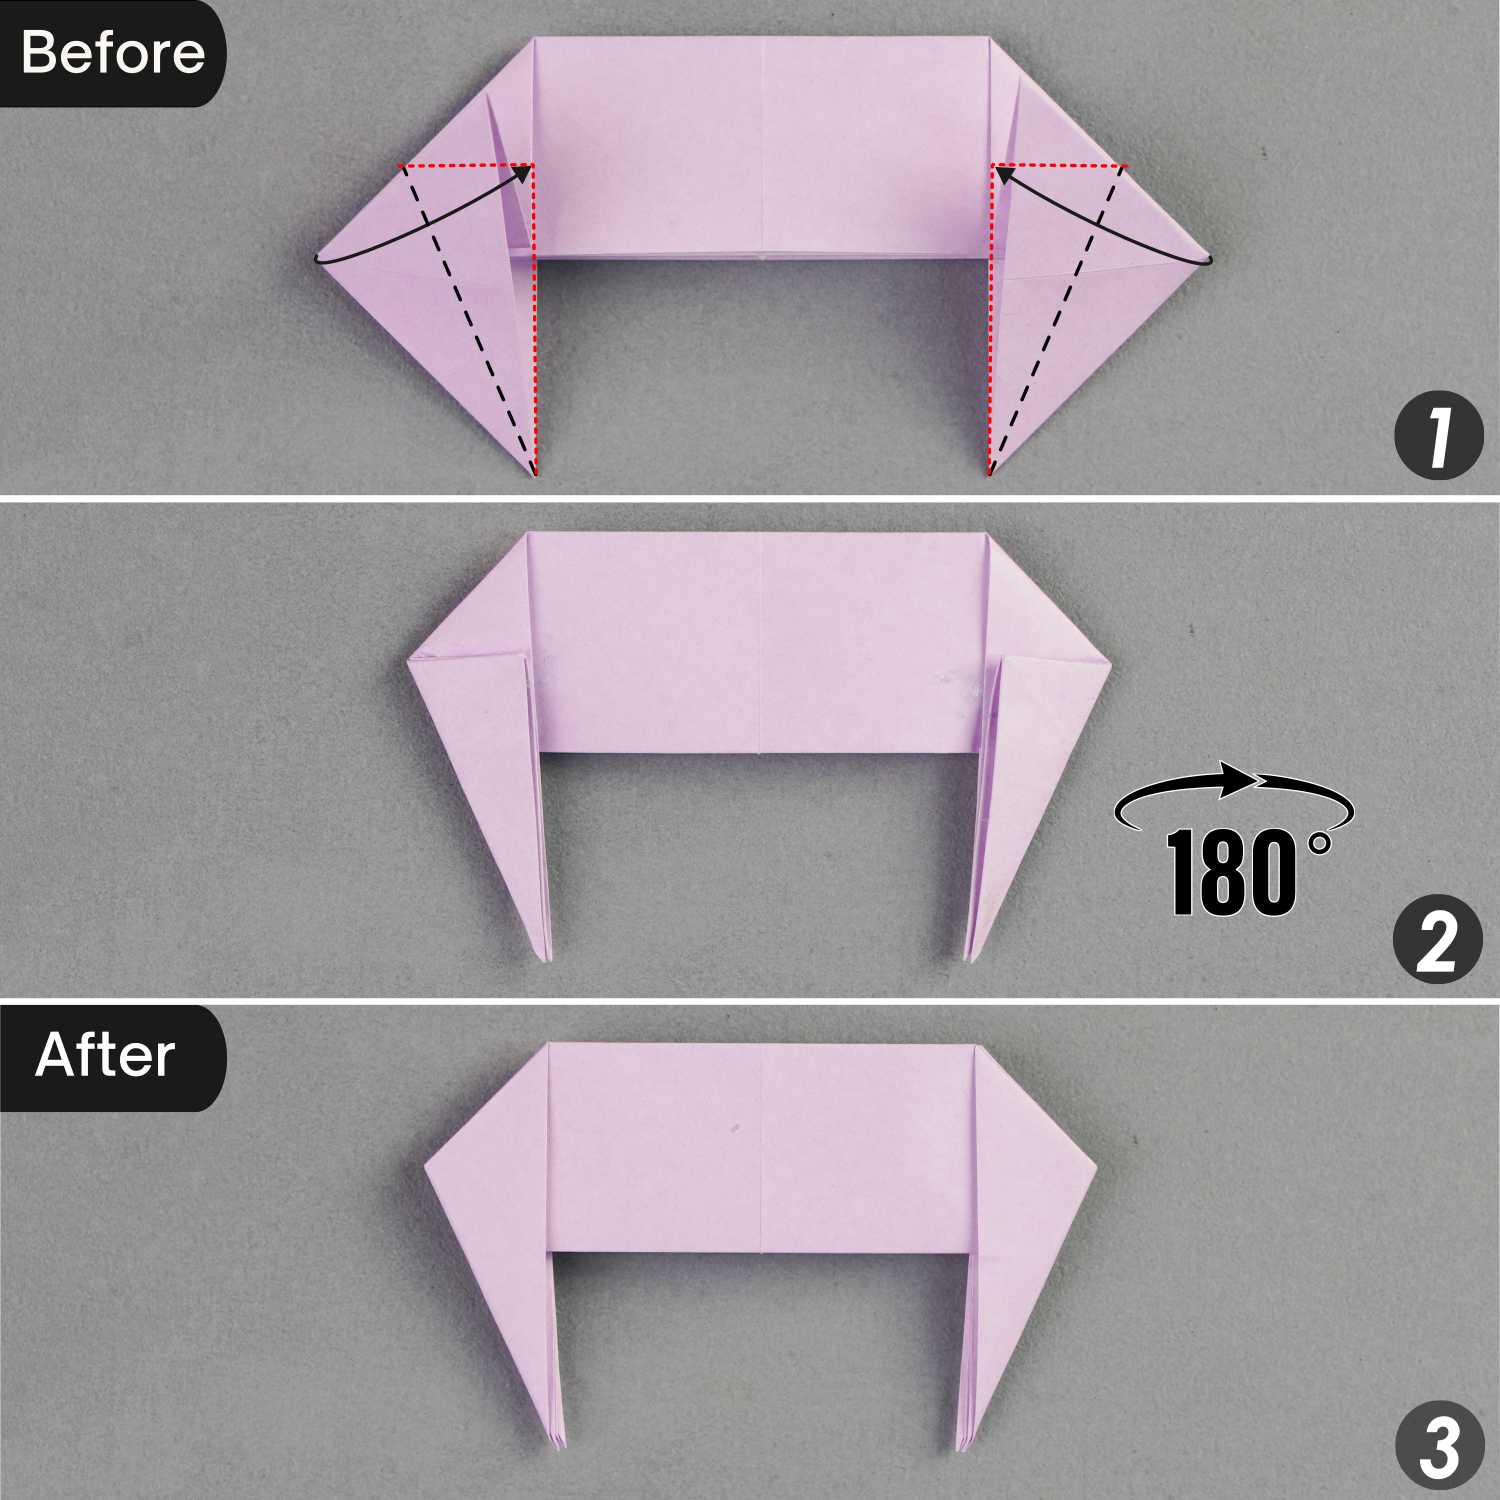
Step 12
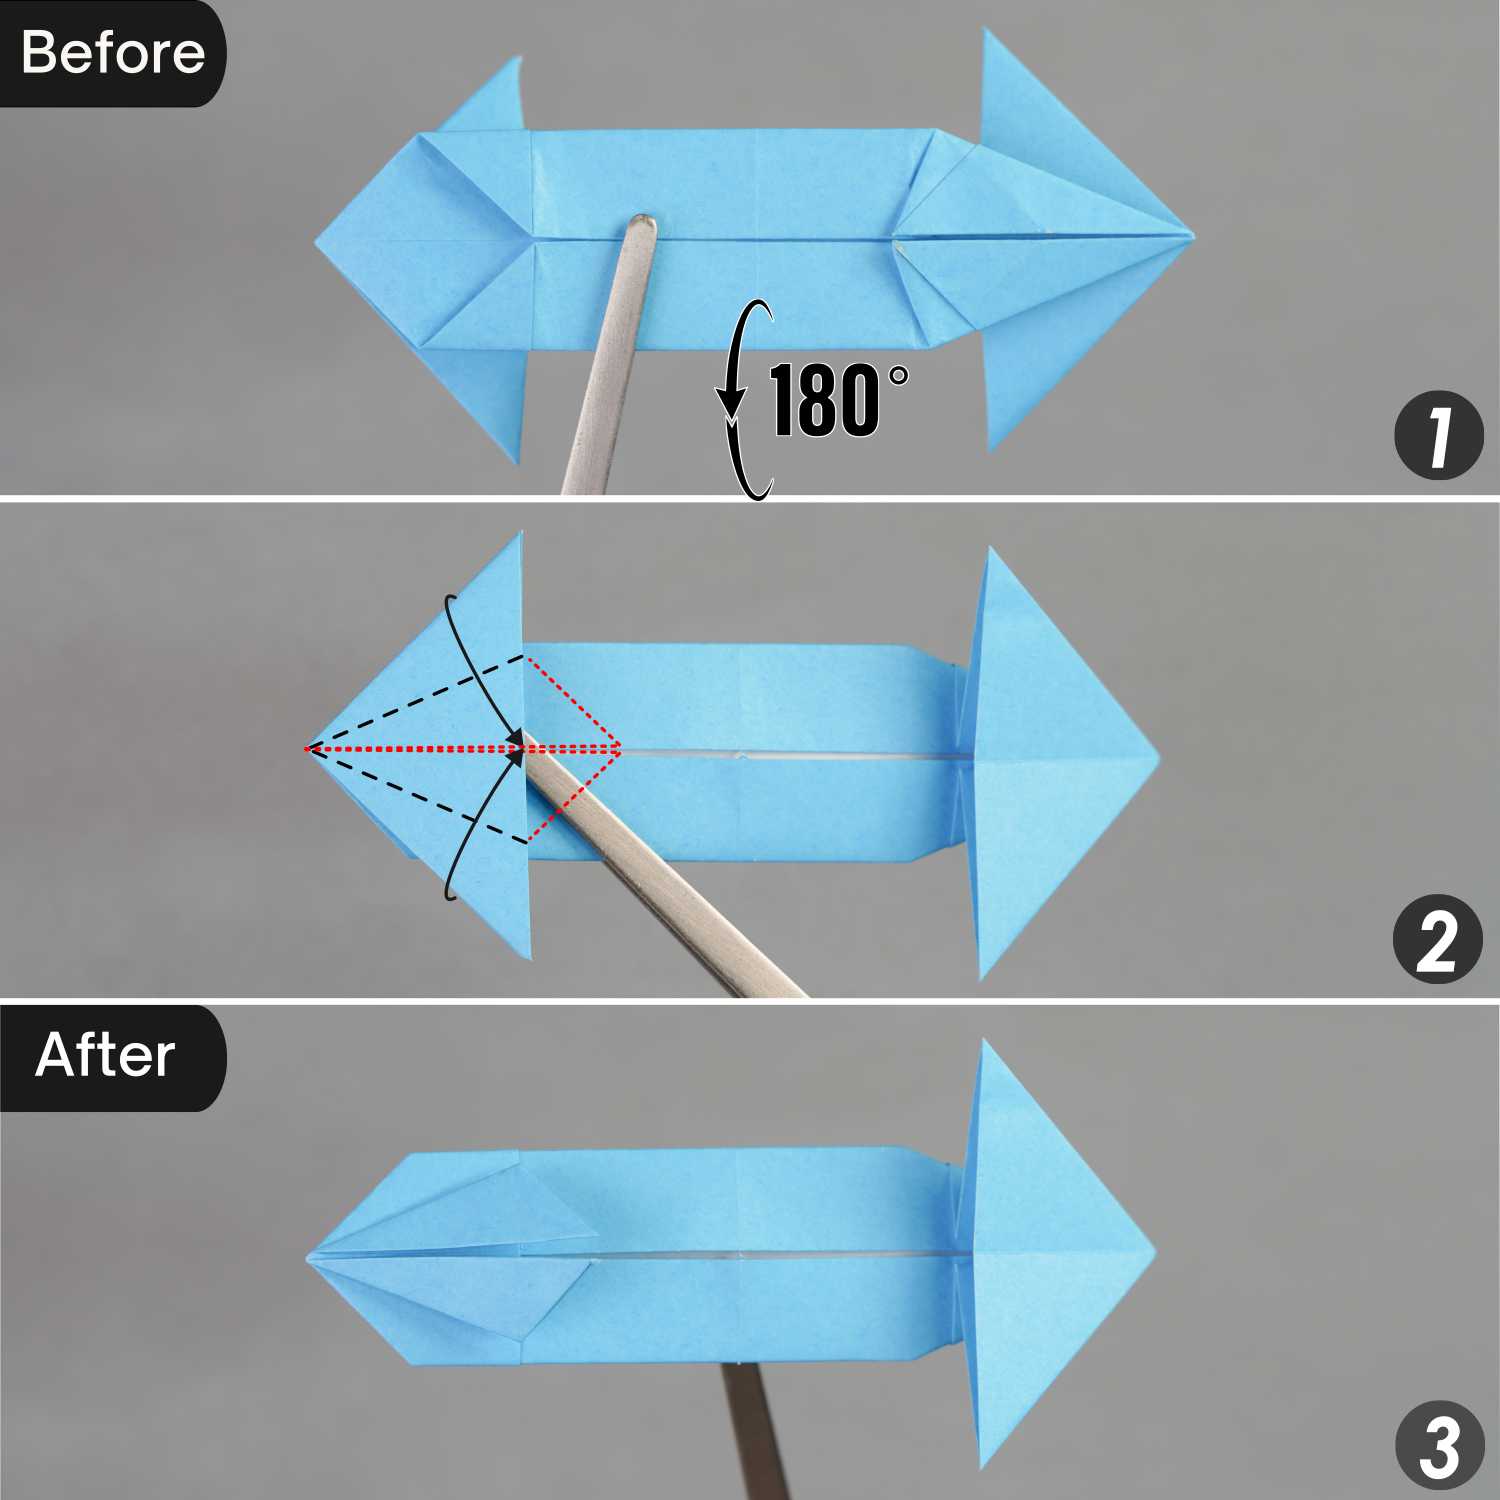
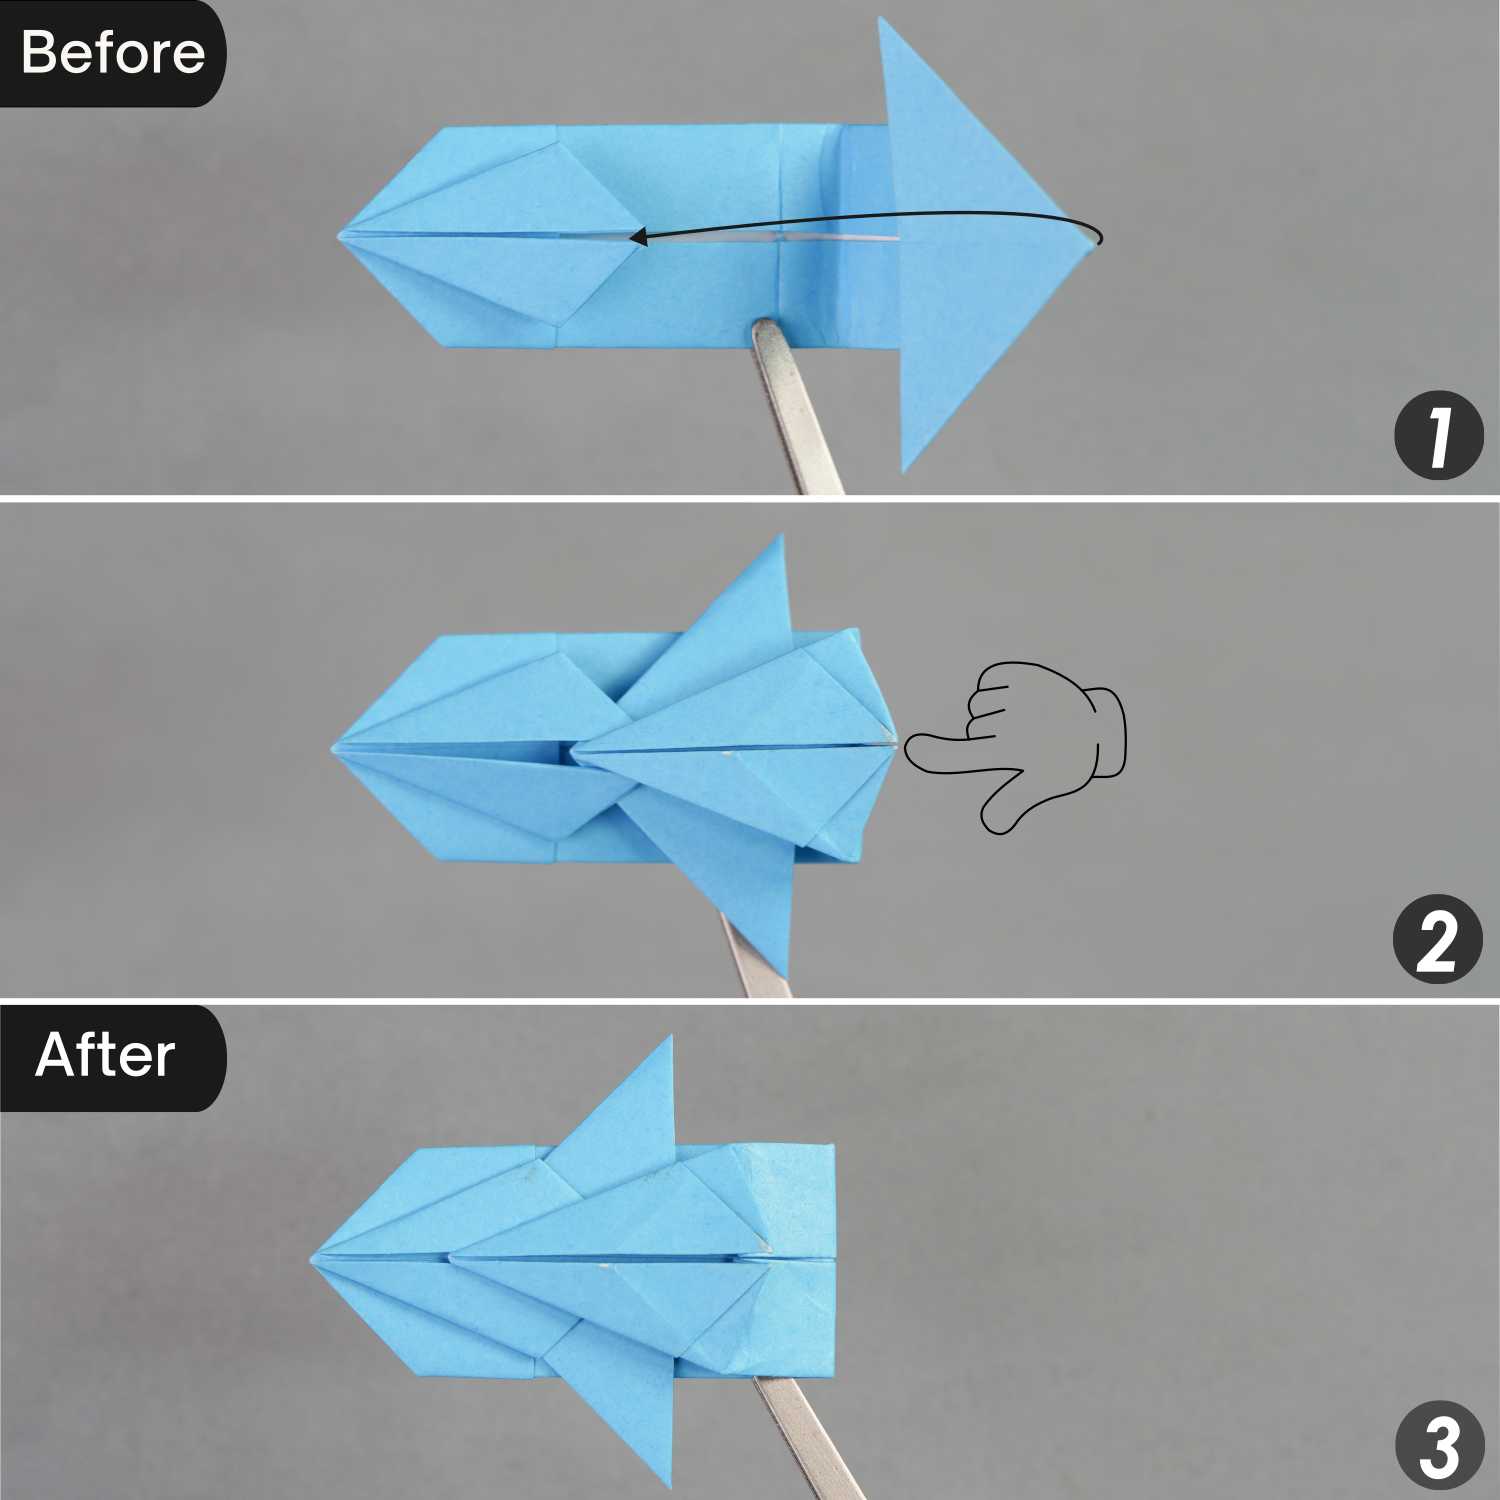
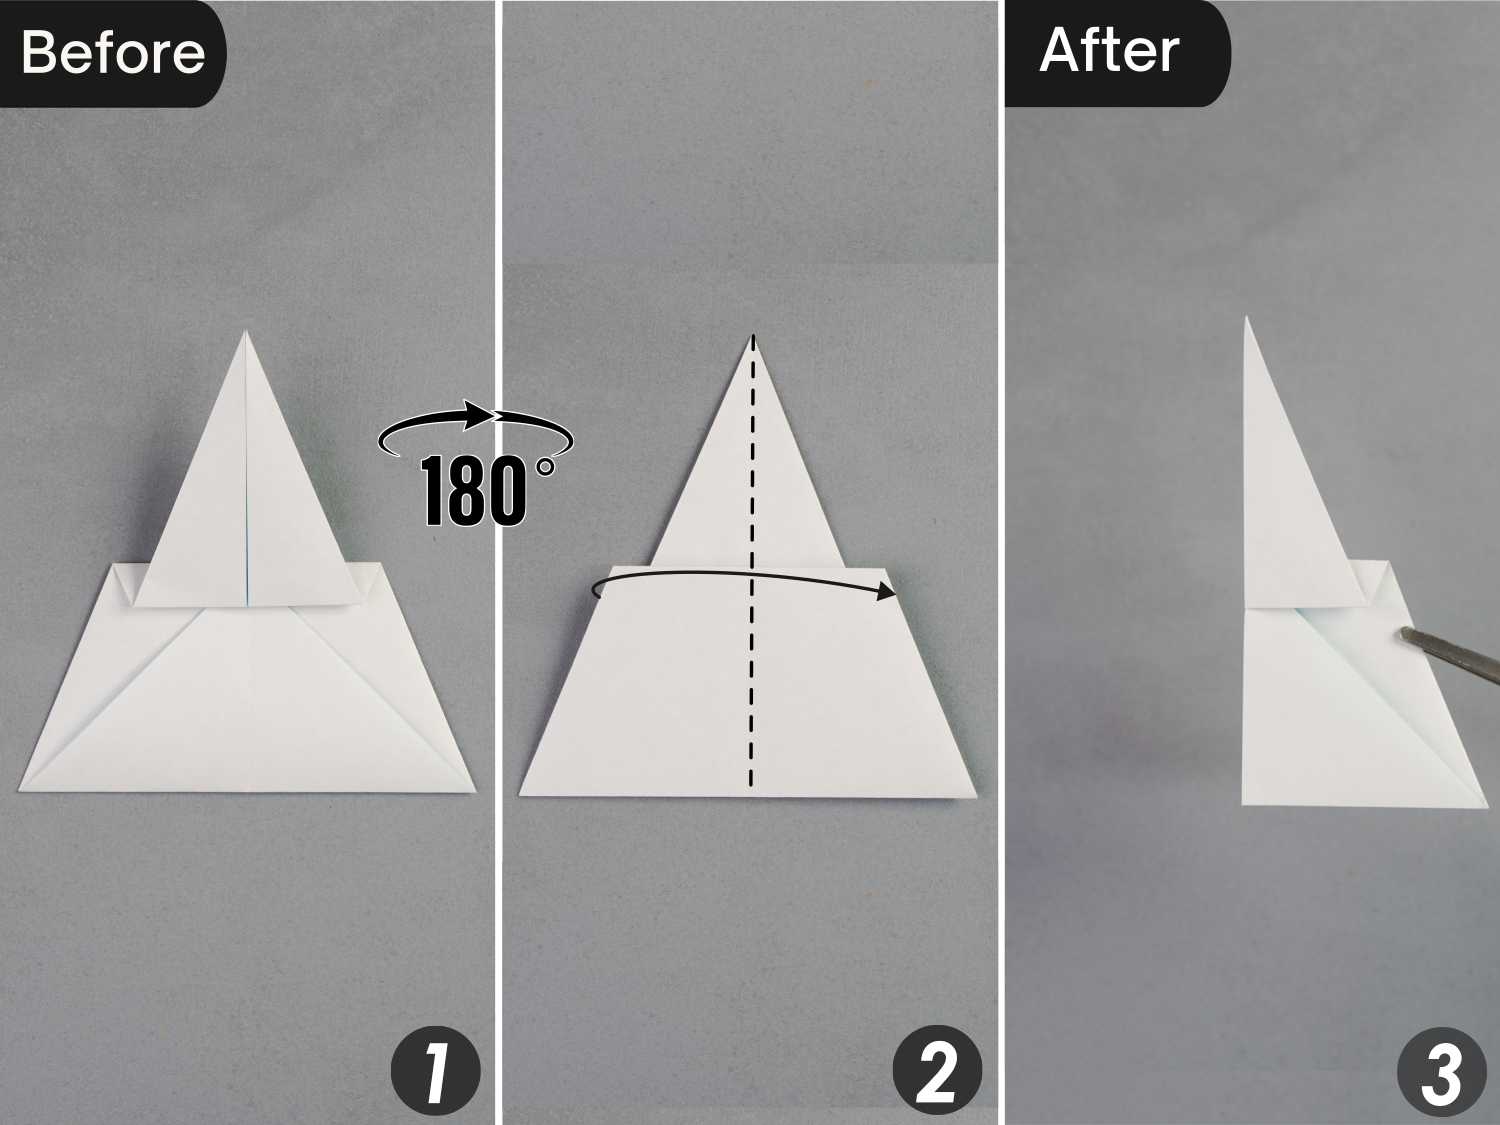
Fold the right corner toward the left side along the black dotted line, crease it well, and unfold it.
Step 13
Fold the right corner to the left again and sandwich the two flaps on the left side between the layers of the folded part.
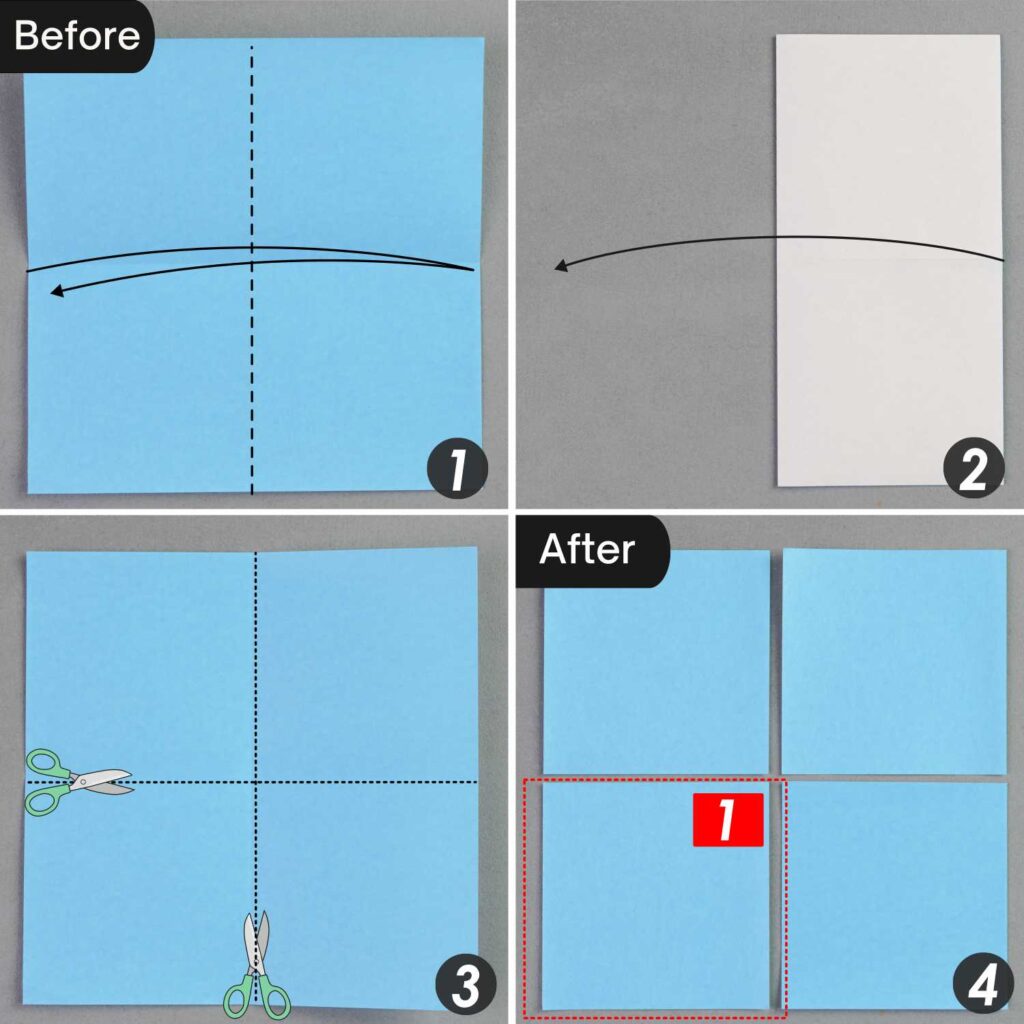
Origami Robot Shoulder
Step 1
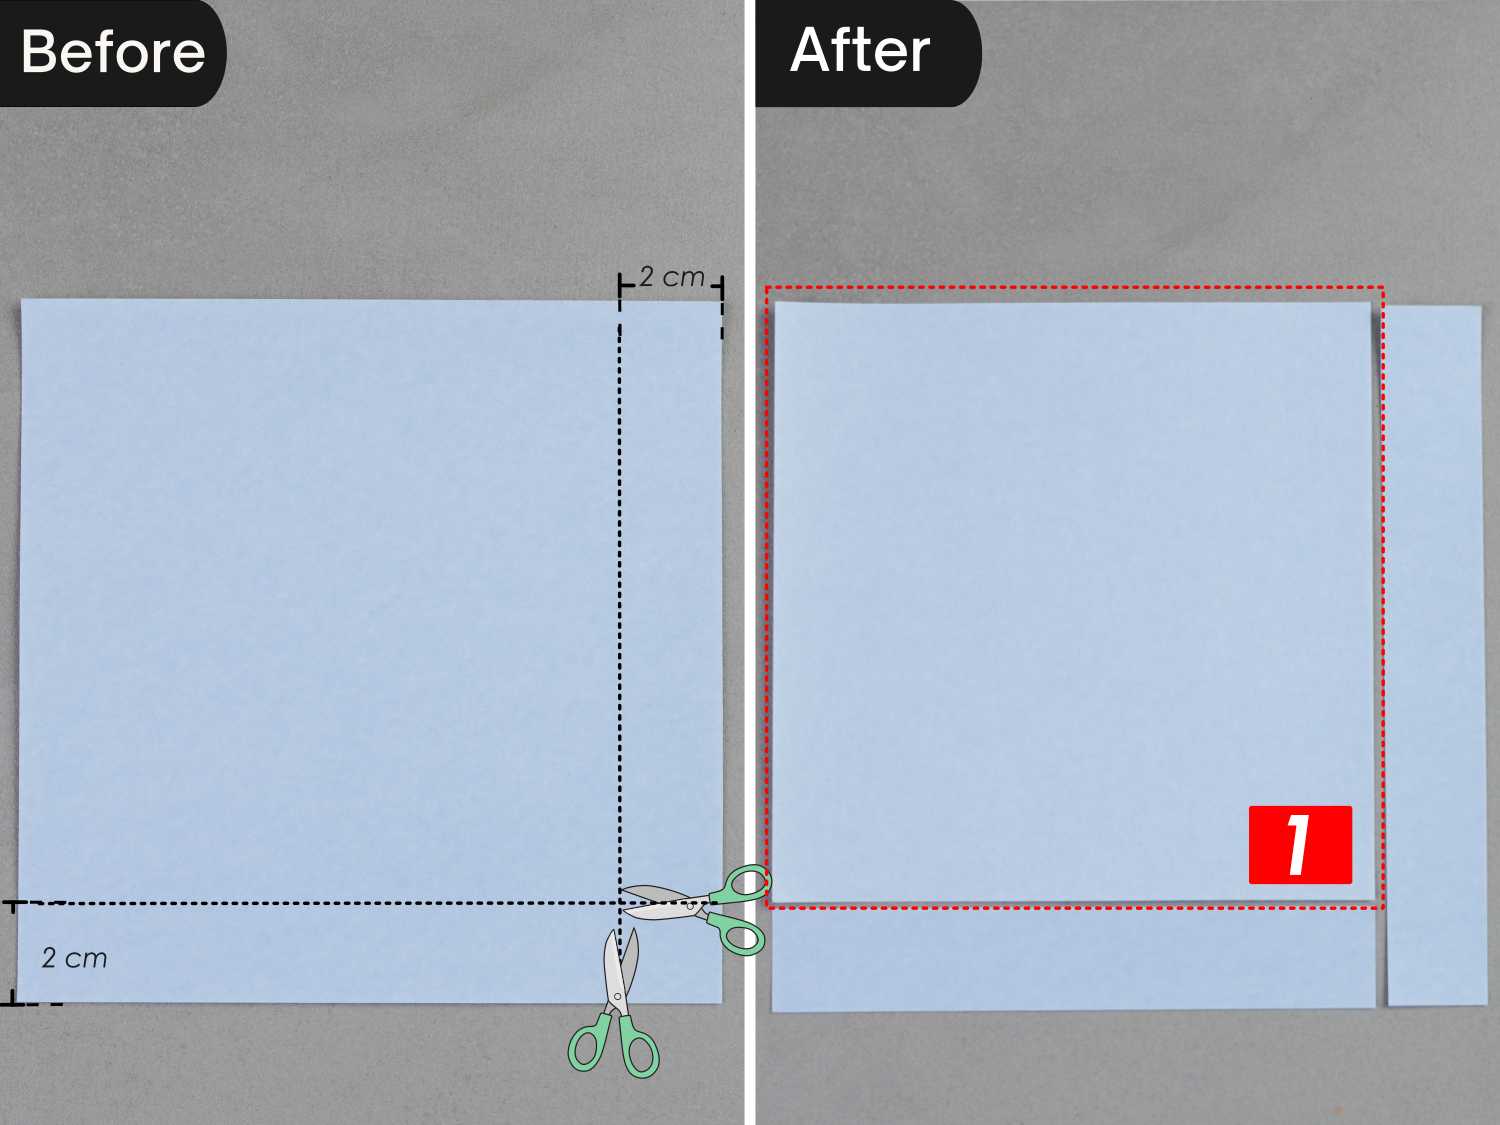
Take out another piece of paper, cut two 2 cm wide strips along the dotted line, and the remaining square paper marked with the number 1 is what you need to make the robot shoulder.
Step 2
Fold this paper in half horizontally, leaving a crease, and unfold it.
Step 3
Fold the top and bottom left edges to align with the horizontal crease, then fold the top and bottom right edges to align with the horizontal crease.
Step 4
Fold this paper in half horizontally from top to bottom.
Step 5
Fold up the left and right corners along the black dotted lines, and unfold them.
Step 6
Rotate the paper 90 degrees from front to back, then expand the bottom opening.
Step 7
Bring up the left and right corners along the creases you made in the previous step, then close the bottom opening, which means, valley fold the creases indicated by the black dotted lines, and mountain fold the crease indicated by the red dotted line.
Rotate the paper 90 degrees from back to front to lay it flat.
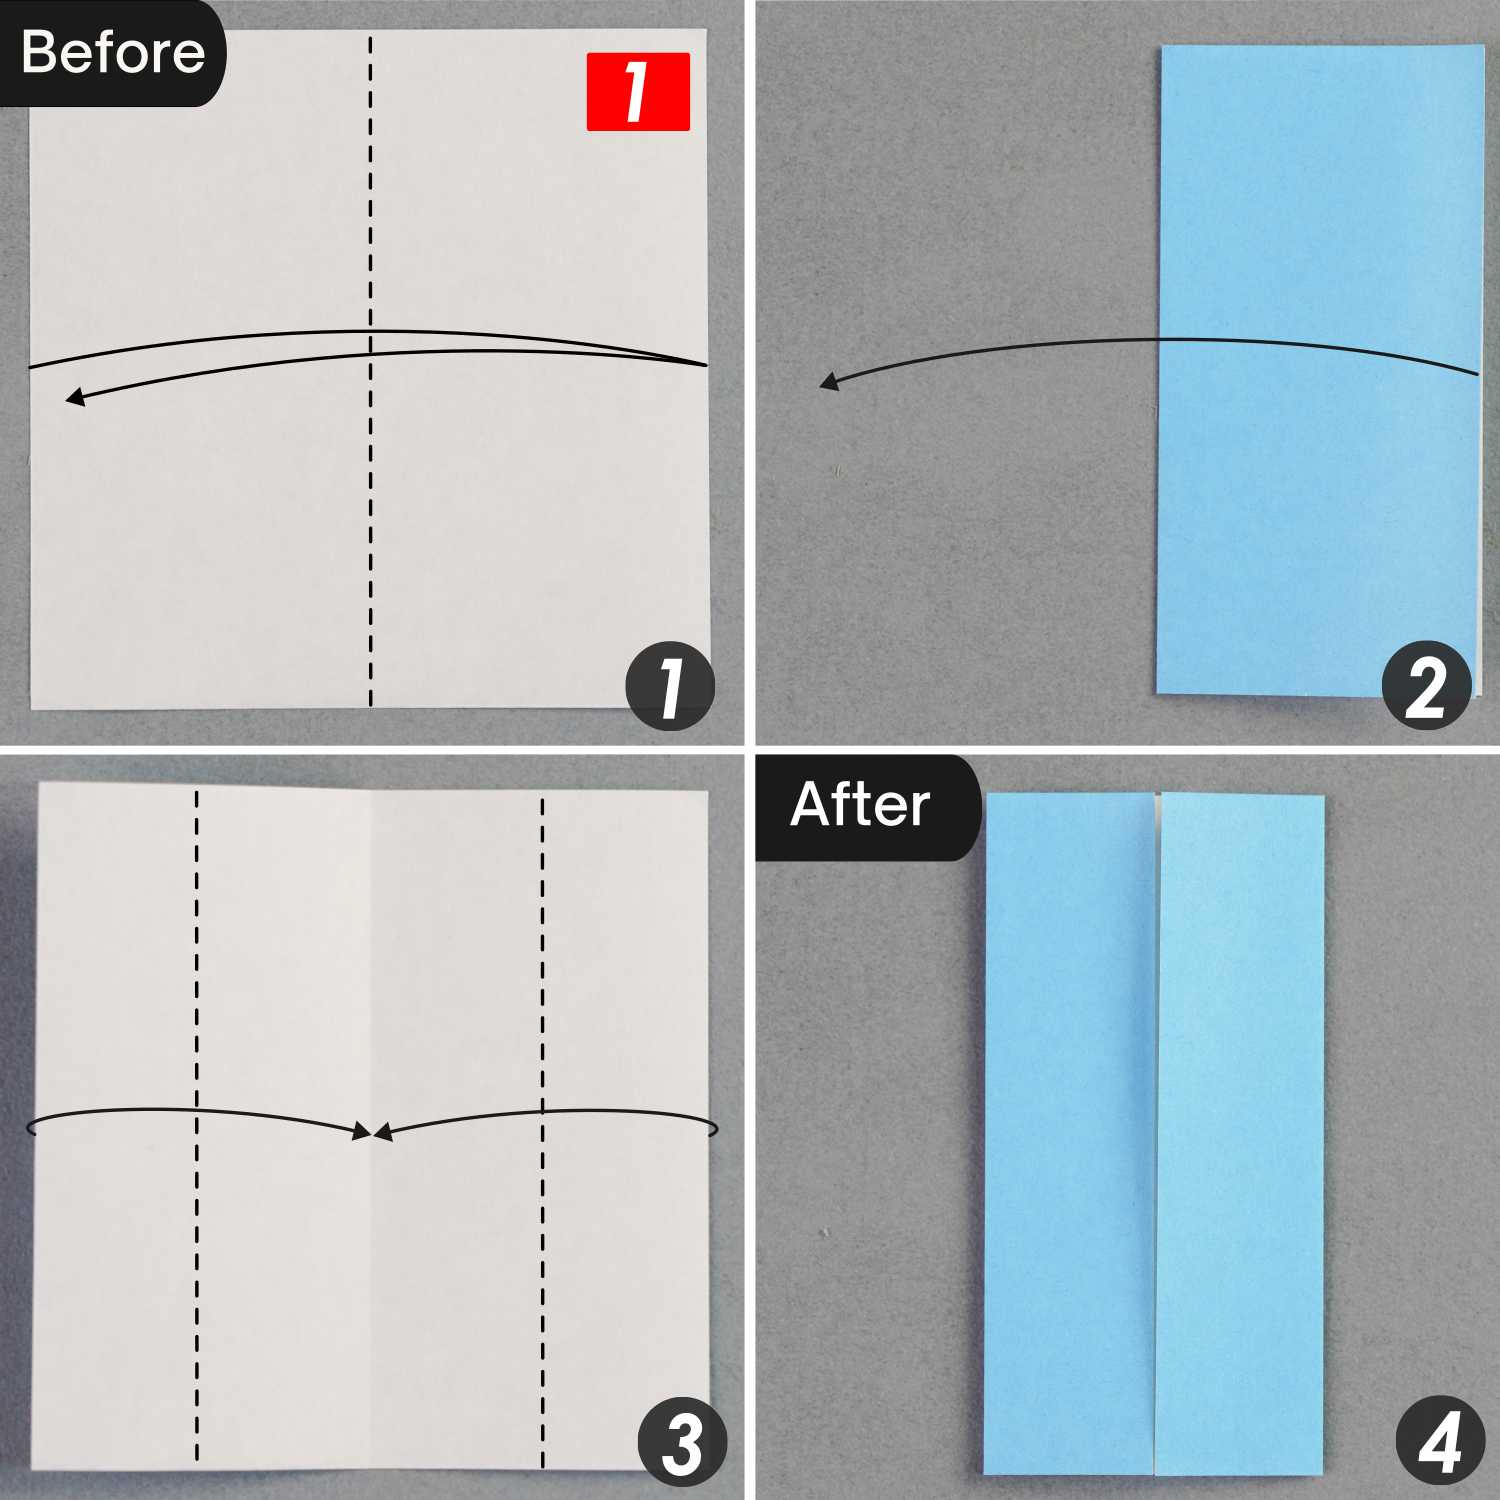
Origami Robot Arm
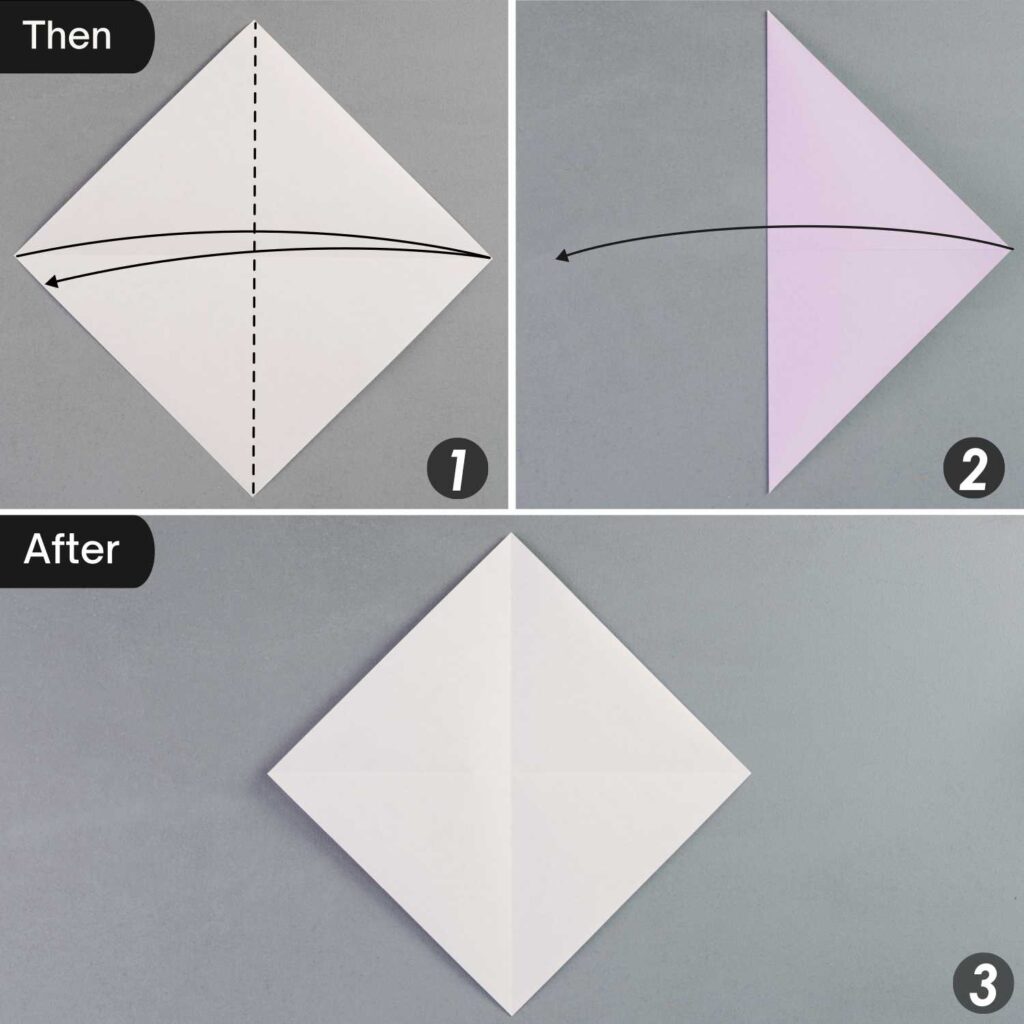
Step 1
Take out another piece of paper, fold it in half horizontally, leaving a crease, and unfold it.
Fold it in half horizontally, leaving a crease, and unfold it.
Step 2
Fold the bottom and top corners to meet the middle intersection point, then fold the top and bottom edges to align with the horizontal crease, and finally, fold the left and right corners along the dotted lines as shown in the third picture.
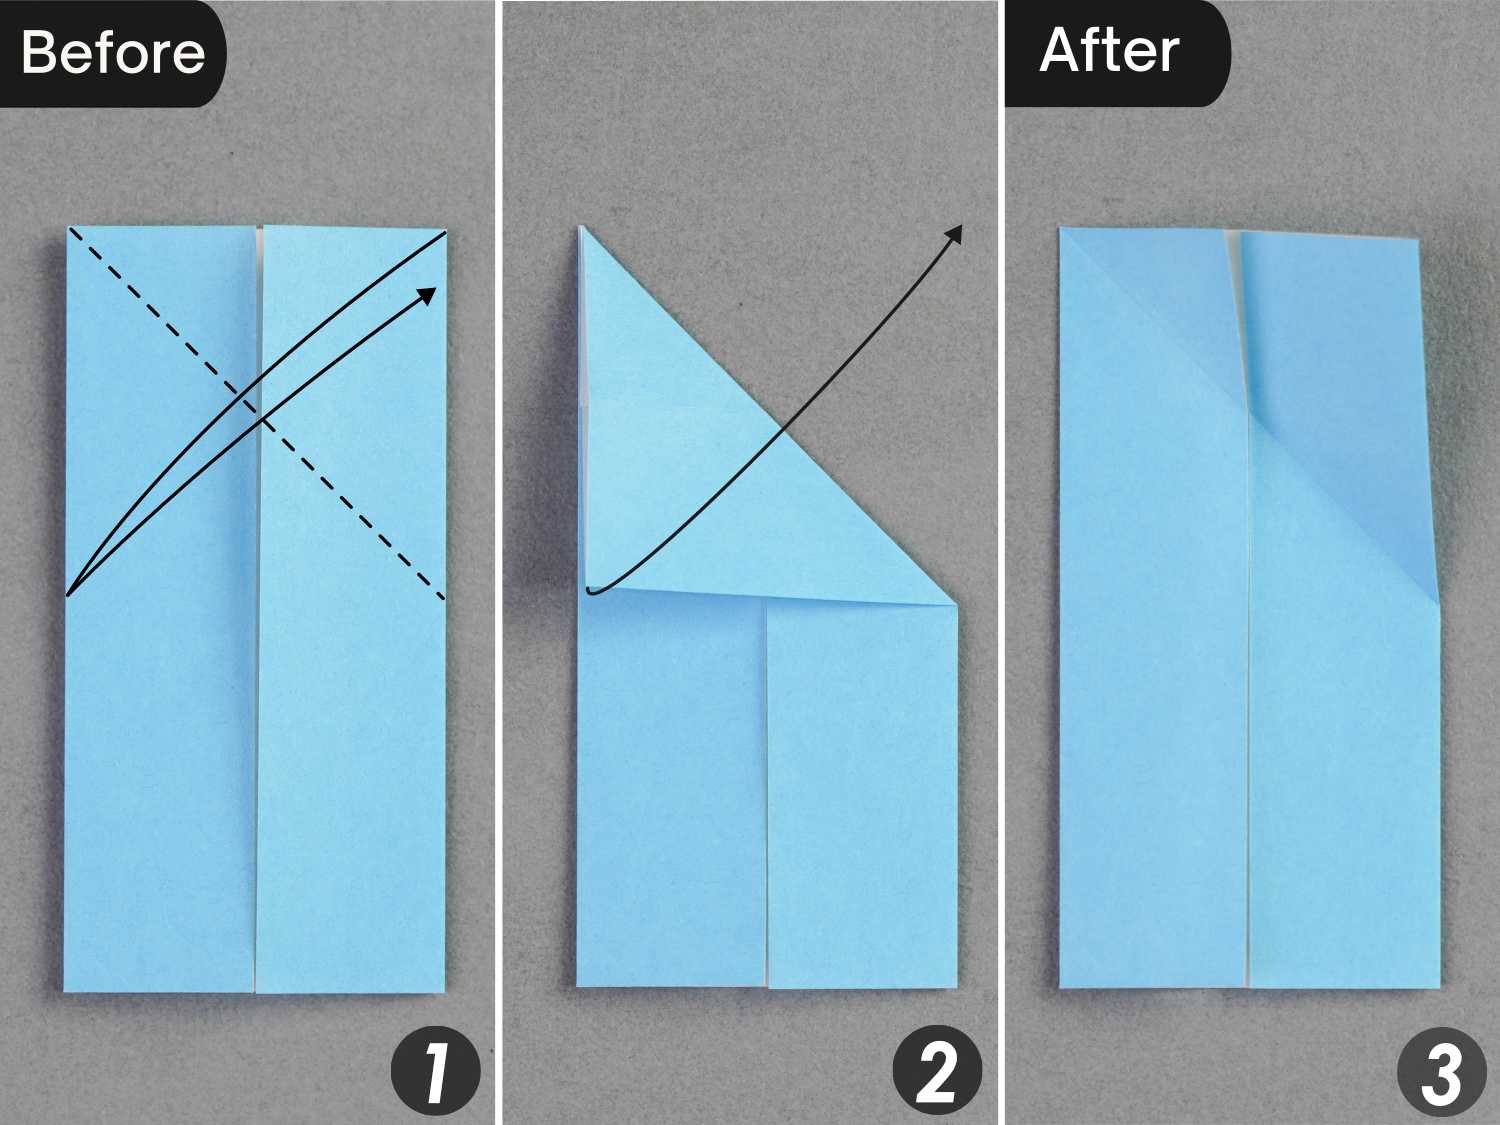
Step 3
Fold the bottom left and right corners diagonally along the dotted lines, leaving two creases, and unfold them.
Fold the top left and right corners diagonally along the dotted lines, leaving two creases, and unfold them.
Step 4
Flip the paper over from front to back.
Step 5
Fold the left and right edges along the dotted lines to create two creases, then unfold them. The dotted lines correspond to the vertical extension lines of the intersection point on the left and right sides.
Then, turn over the paper from front to back.
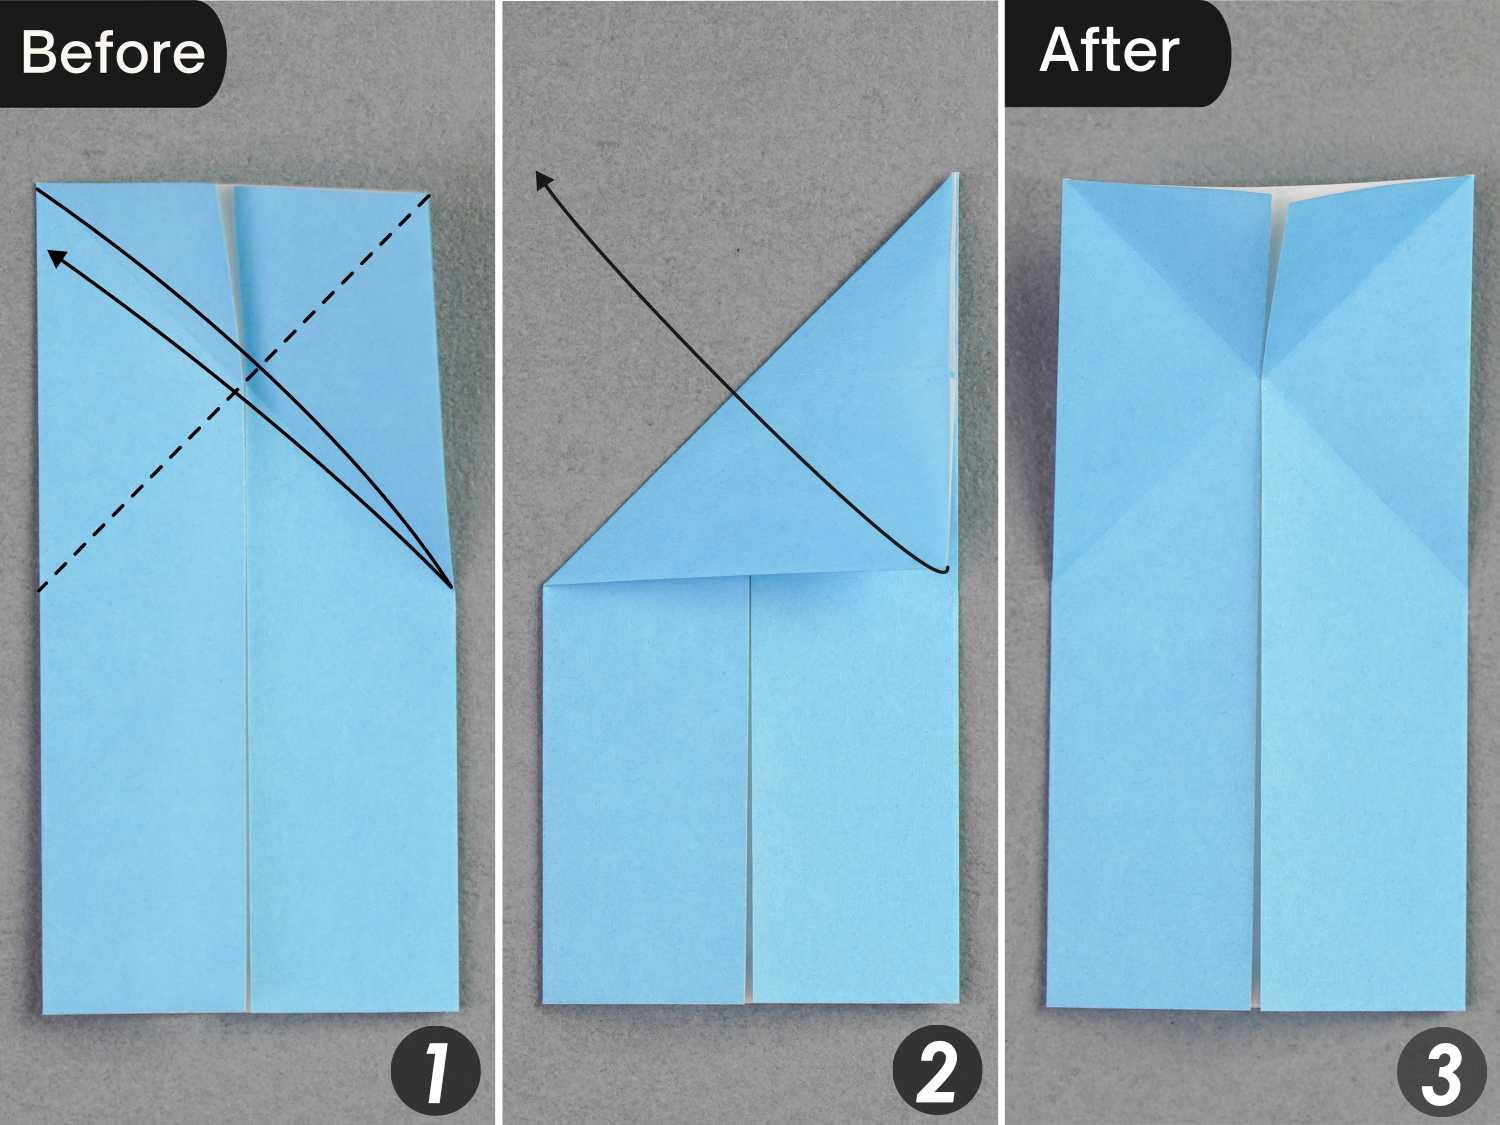
Step 6
Valley fold the creases indicated by the black dotted lines and mountain fold the creases indicated by the red dotted lines, fold the left and right edges along the mountain creases, and flatten the fold to create a triangle on each side.
Step 7
Turn over the paper from front to back.
Step 8
Fold the bottom edge to align with the top edge, then flip the paper over from left to right.
Step 9
Fold the bottom left and right edges to align with the vertical edge on each side, then rotate the paper 180 degrees from left to right.
Origami Robot Leg
Step 1
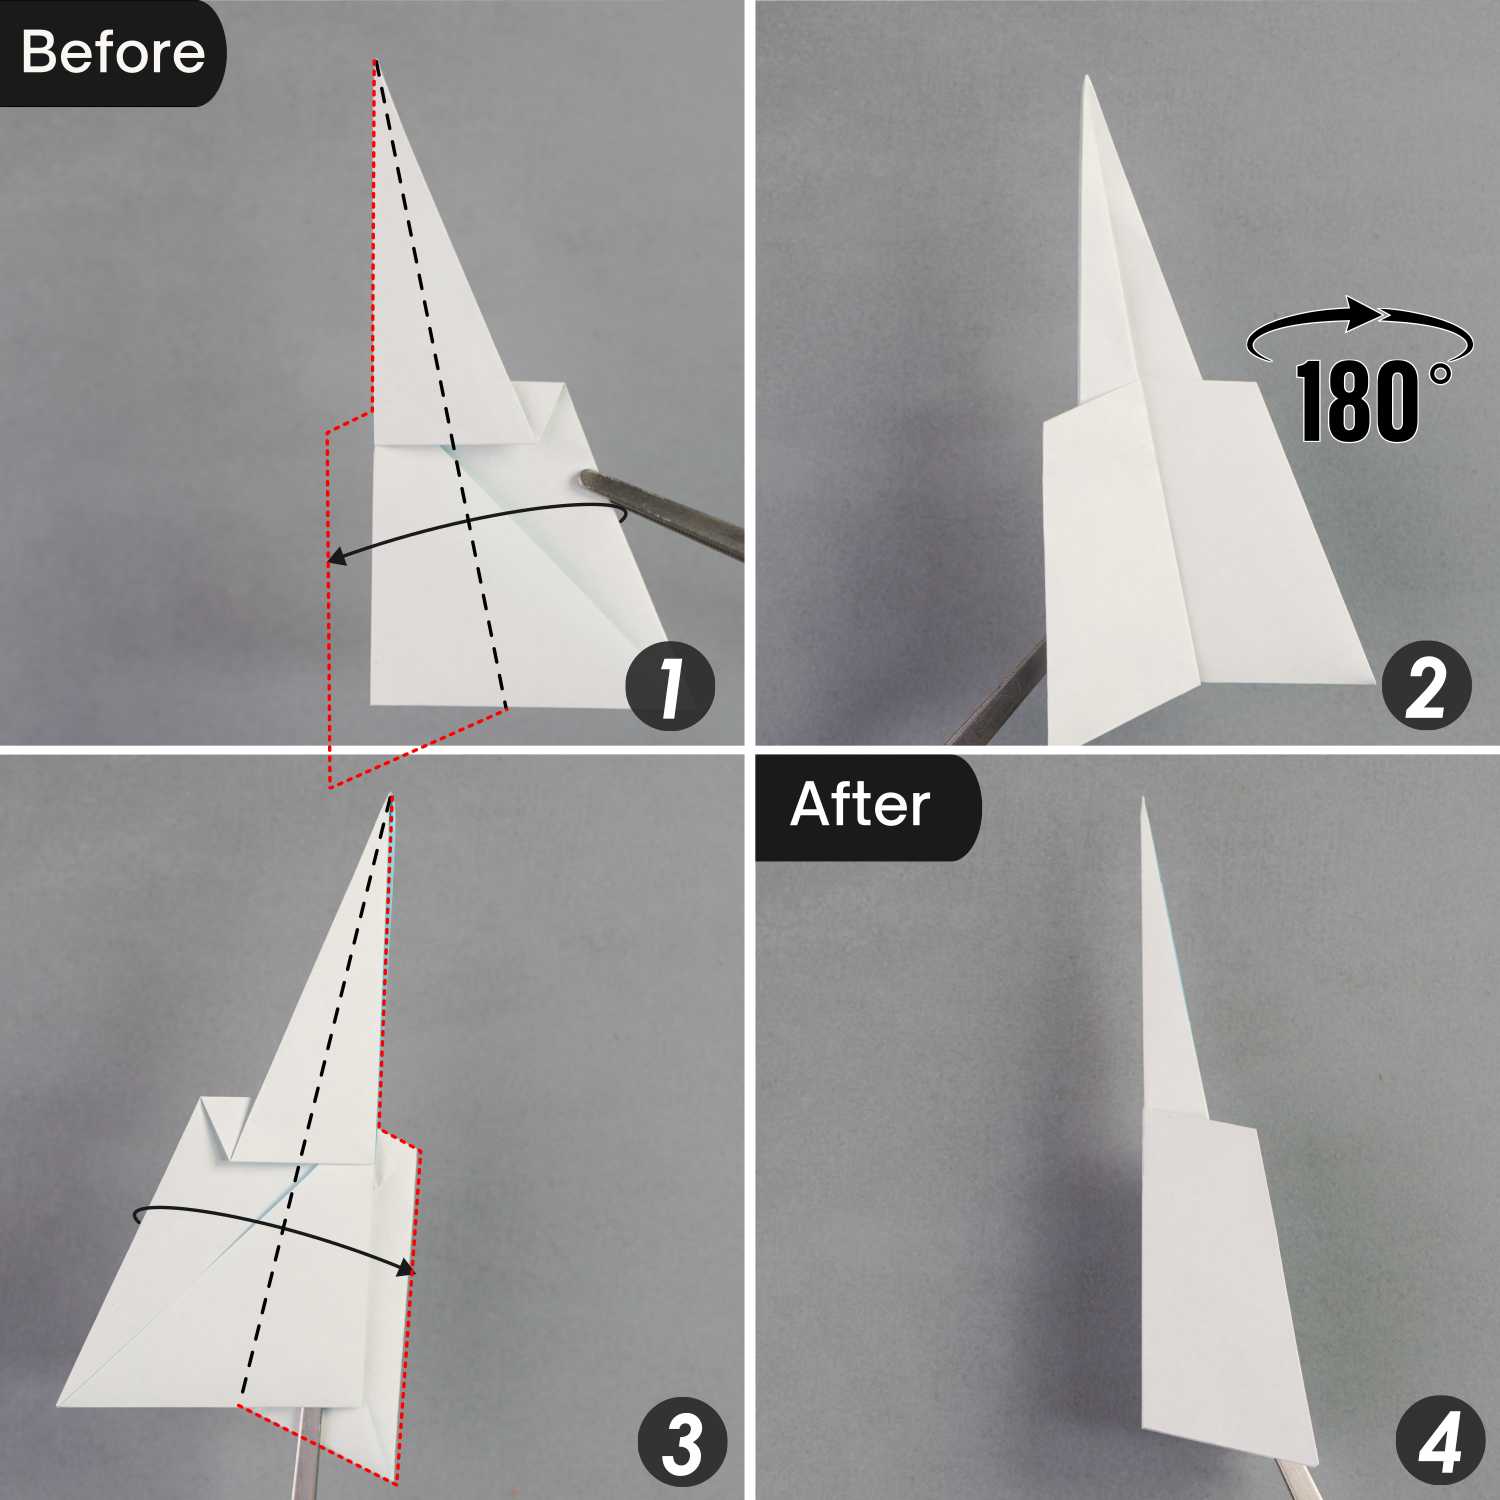
Place the paper with the desired display side face up, fold it in half vertically, leaving a crease, and unfold it.
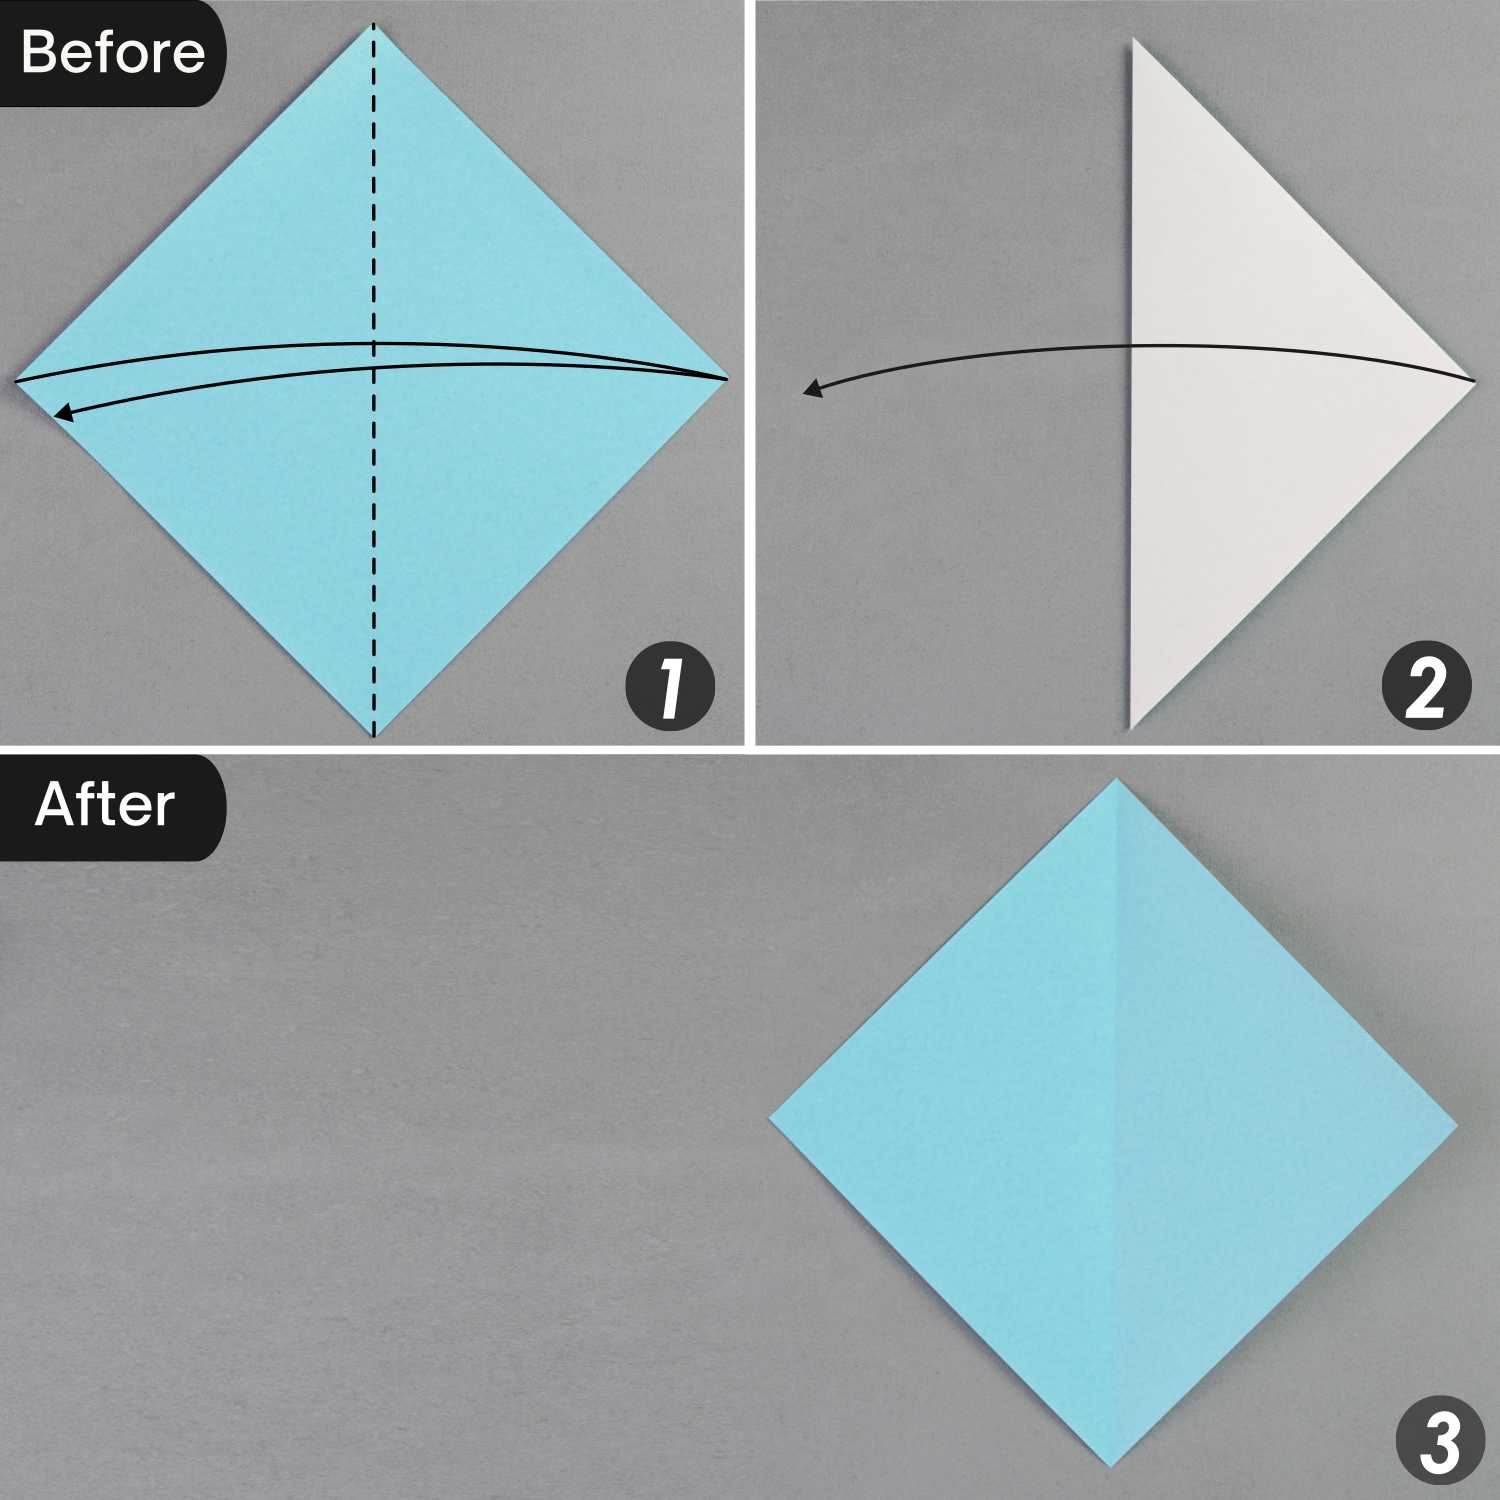
Step 2
Fold the top left and right edges to align with the vertical crease, then fold up the bottom triangle.
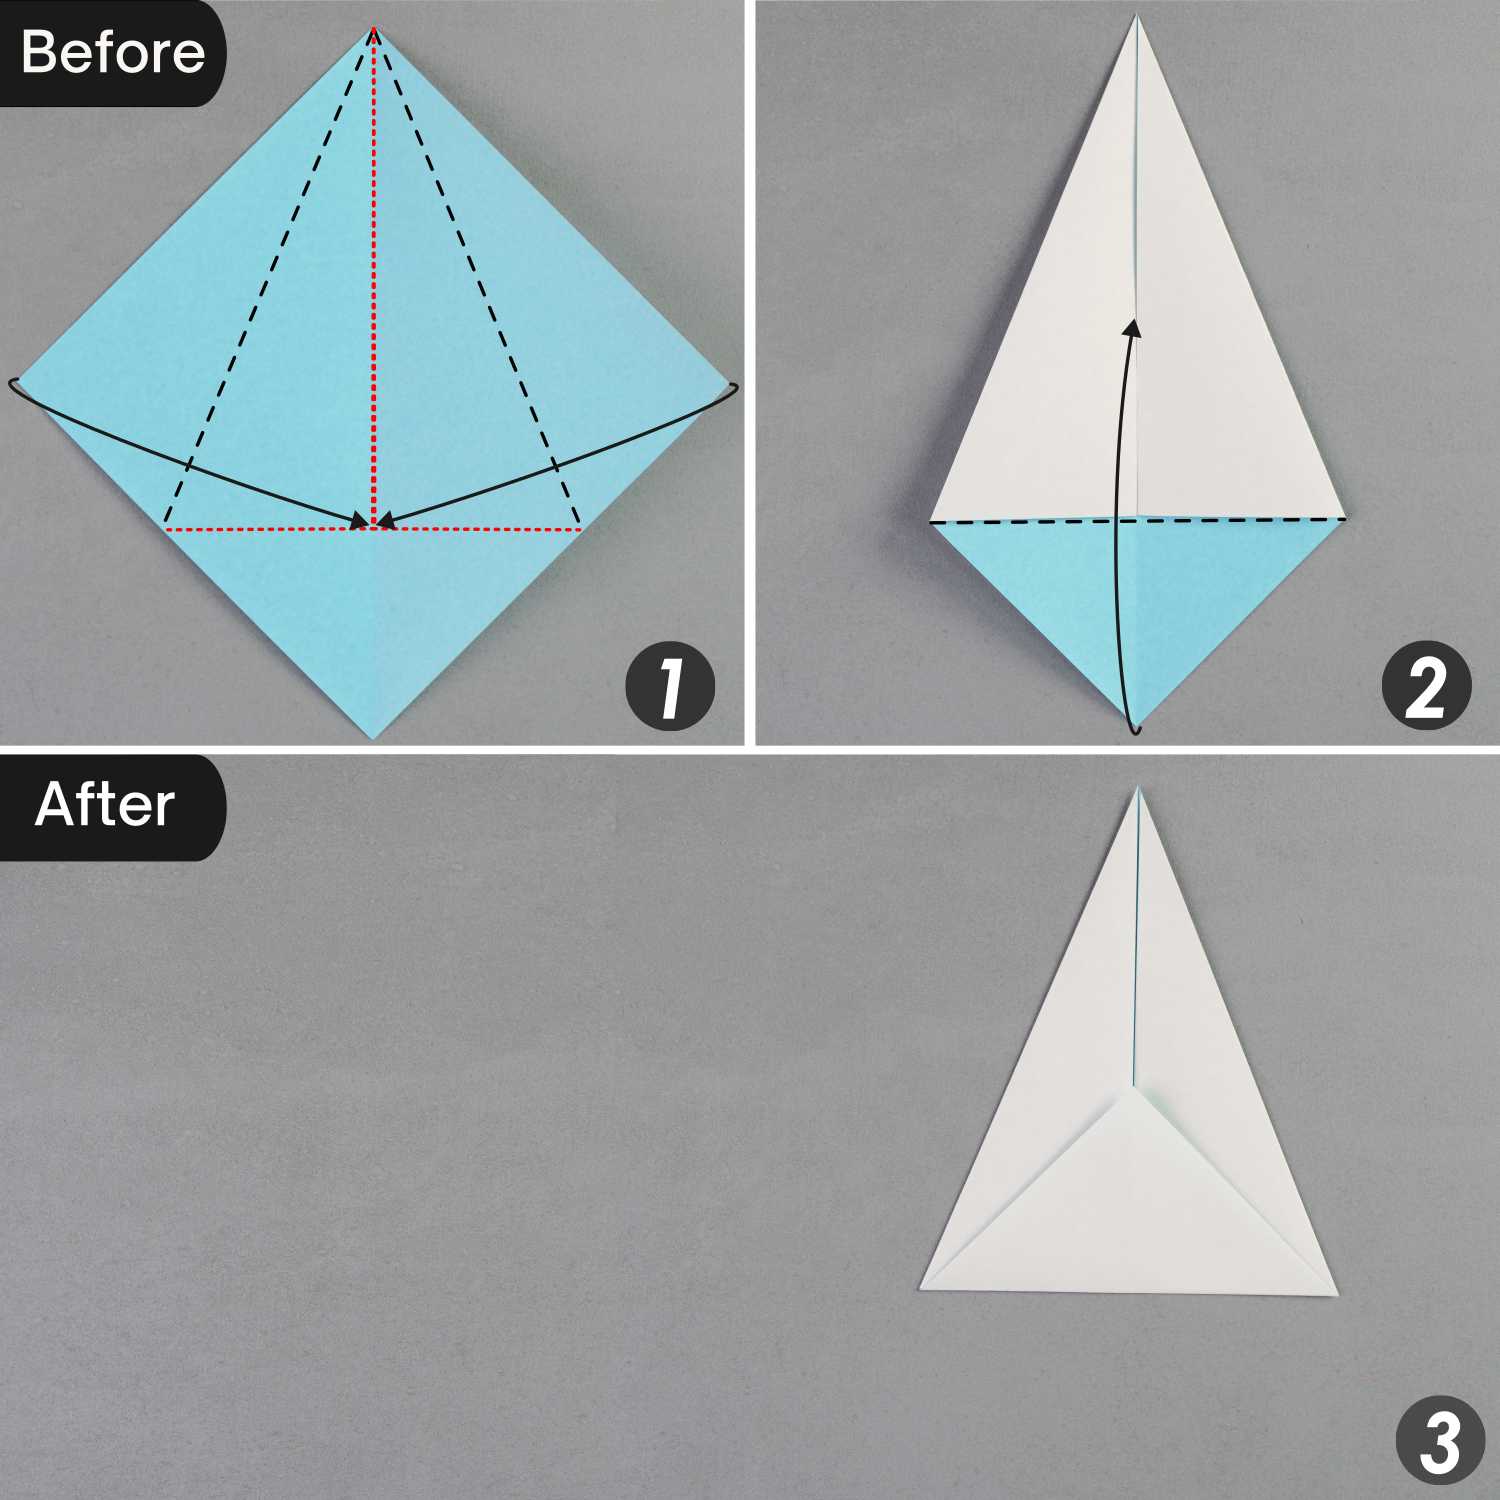
Step 3
Fold the top corner to meet the bottom edge’s center point, leaving a crease, and unfold it.
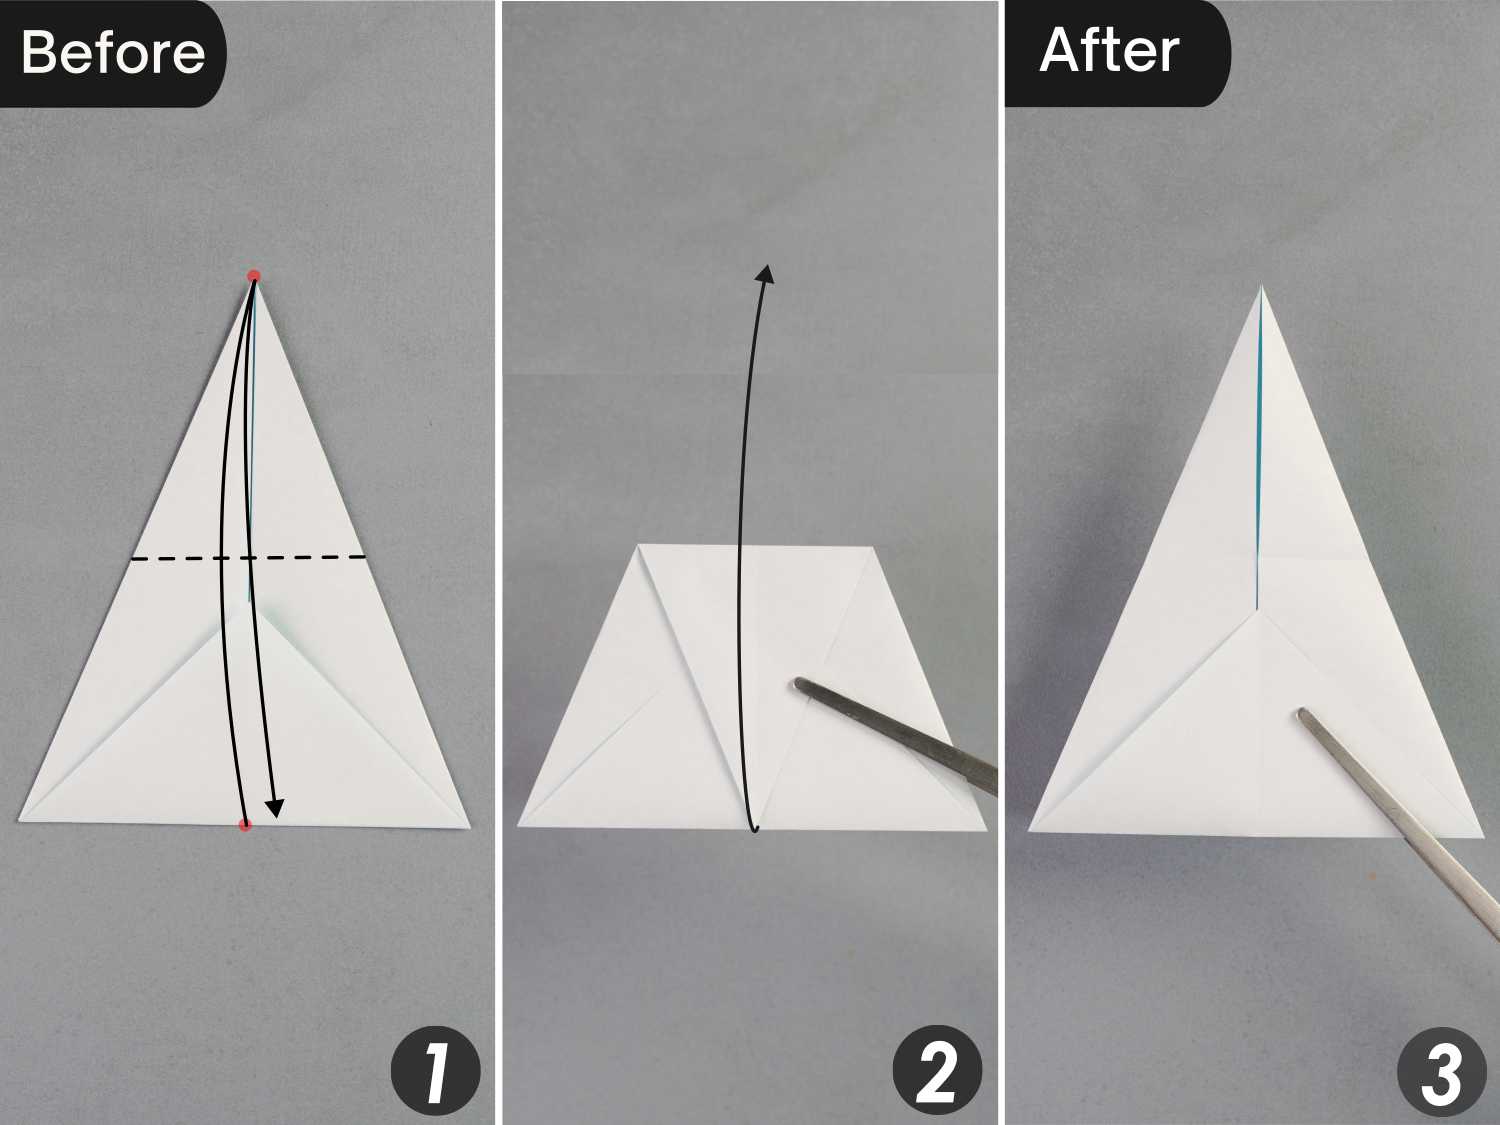
Step 4
Fold down the top corner again along the black dotted line that runs horizontally from the top corner of the bottom triangle. Then, fold this corner back to the top side along the crease you made in the previous step.

Step 5
Flip the paper over from left to right, then fold it in half vertically from left to right.
Step 6
Fold the right edge of the top layer to the left side along the black dotted line, then rotate the paper 180 degrees from left to right, and fold the left edge of the layer on this side to the right side along the black dotted line.
Step 7
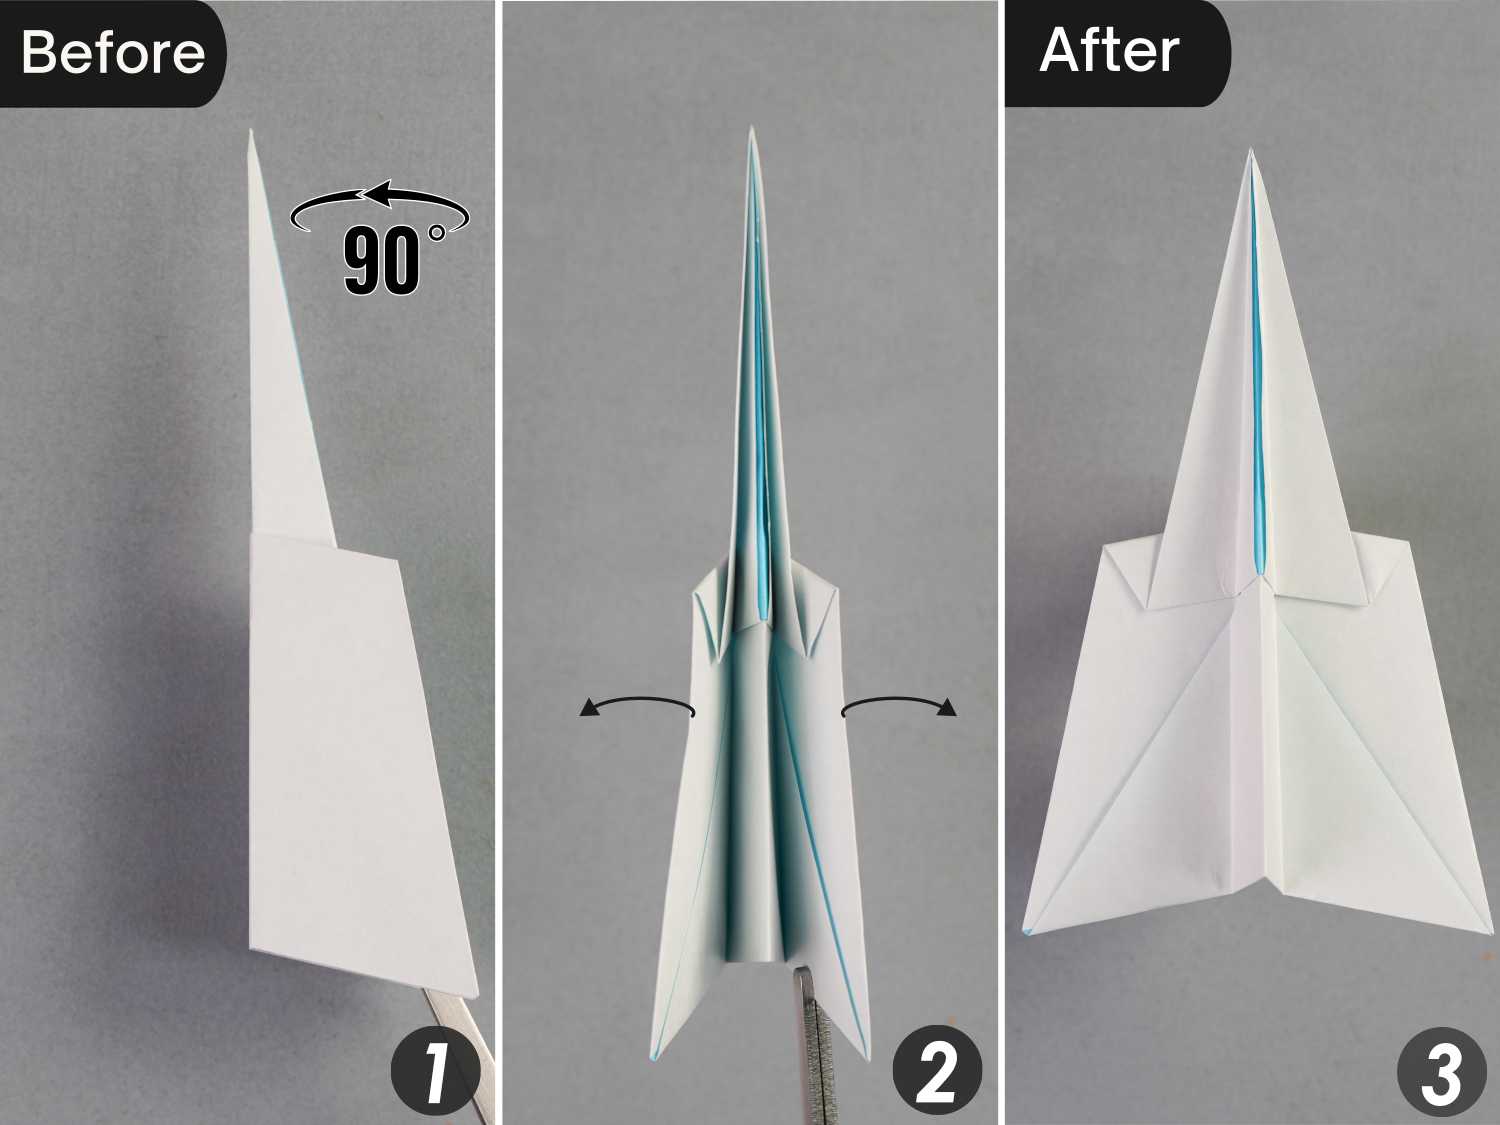
Rotate the paper 90 degrees from right to left, then press down the left and right layers.
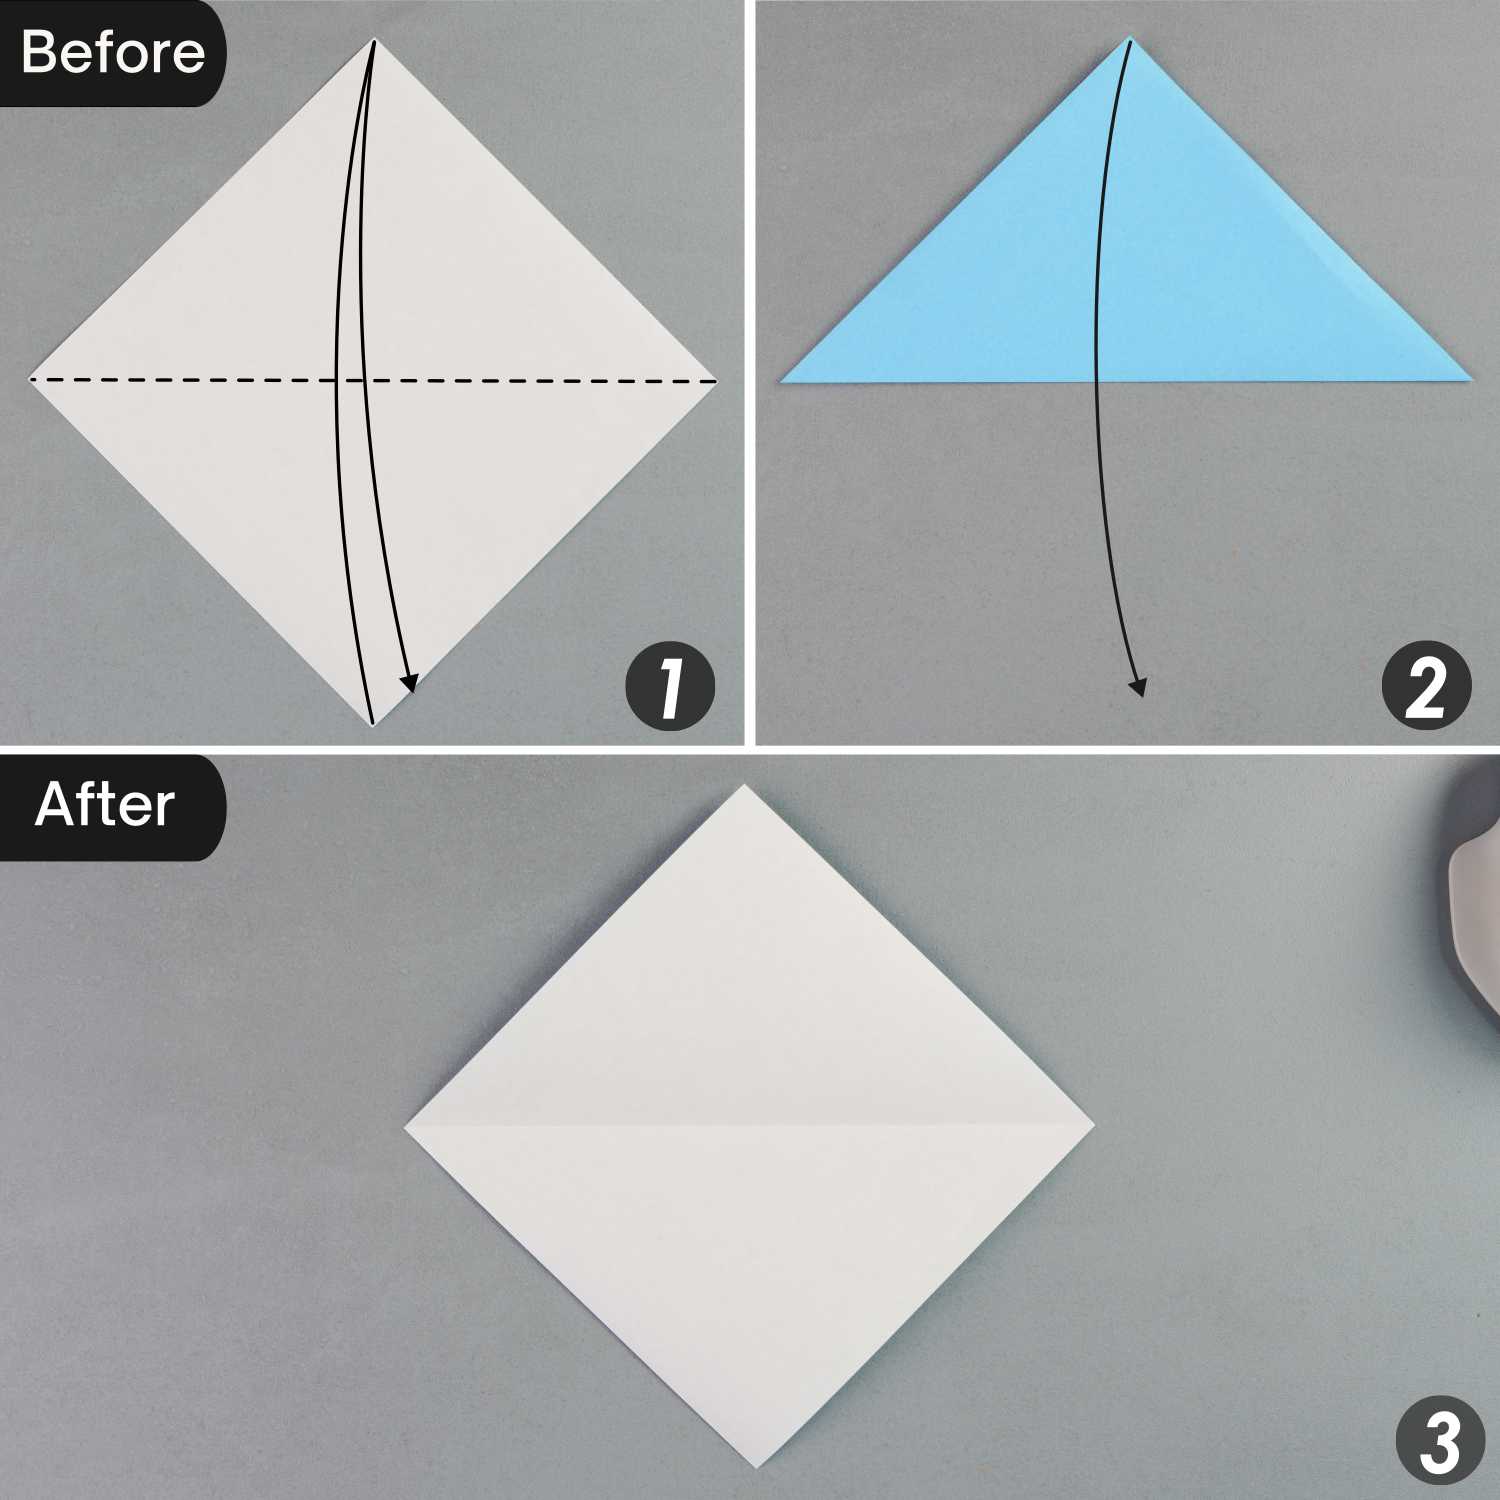
Origami Robot Head
Step 1
Take another piece of paper and fold it in half horizontally, leaving a crease, and unfold it.
Fold the paper in half vertically, leaving a crease, and unfold it. Then, cut the paper along these two creases to get four small squares, and one of them is all you need.
Step 2
Fold this small square paper in half vertically, leaving a crease, and unfold it. Then, fold the left and right edges to align with the vertical crease.
Step 3
Fold the top edge to align with the left edge, and unfold it.
Step 4
Fold the top edge to align with the right edge, and unfold it.
Step 5
Flip the paper from left to right, then fold down the top edge along the dotted line, which horizontally extends from the intersection point formed by the creases, leaving a crease, and unfold it.
Step 6
Turn over the paper from left to right, and valley fold the crease indicated by the black dotted lines, mountain fold the crease indicated by the red line. Then, fold down the top edge along the mountain crease, lift, and press down the two ends of the mountain crease. Flatten the fold to create a small triangle.
Step 7
Flip the paper from left to right.
Step 8
Fold down the top triangle.
Step 9
Fold the left corner of the top triangle to the right, then fold the left edge of the paper to align with the middle vertical crease, and then restore the top triangle.
Step 10
Repeat this for the right side.
Fold the right corner of the top triangle to the left, then fold the right edge of the paper to align with the middle vertical crease, and then restore the top triangle.

Step 11
Fold the top triangle’s left and right corners to meet its top edge’s midpoint, then unfold them for 90 degrees to get two stand-up flaps. This is the robot head.
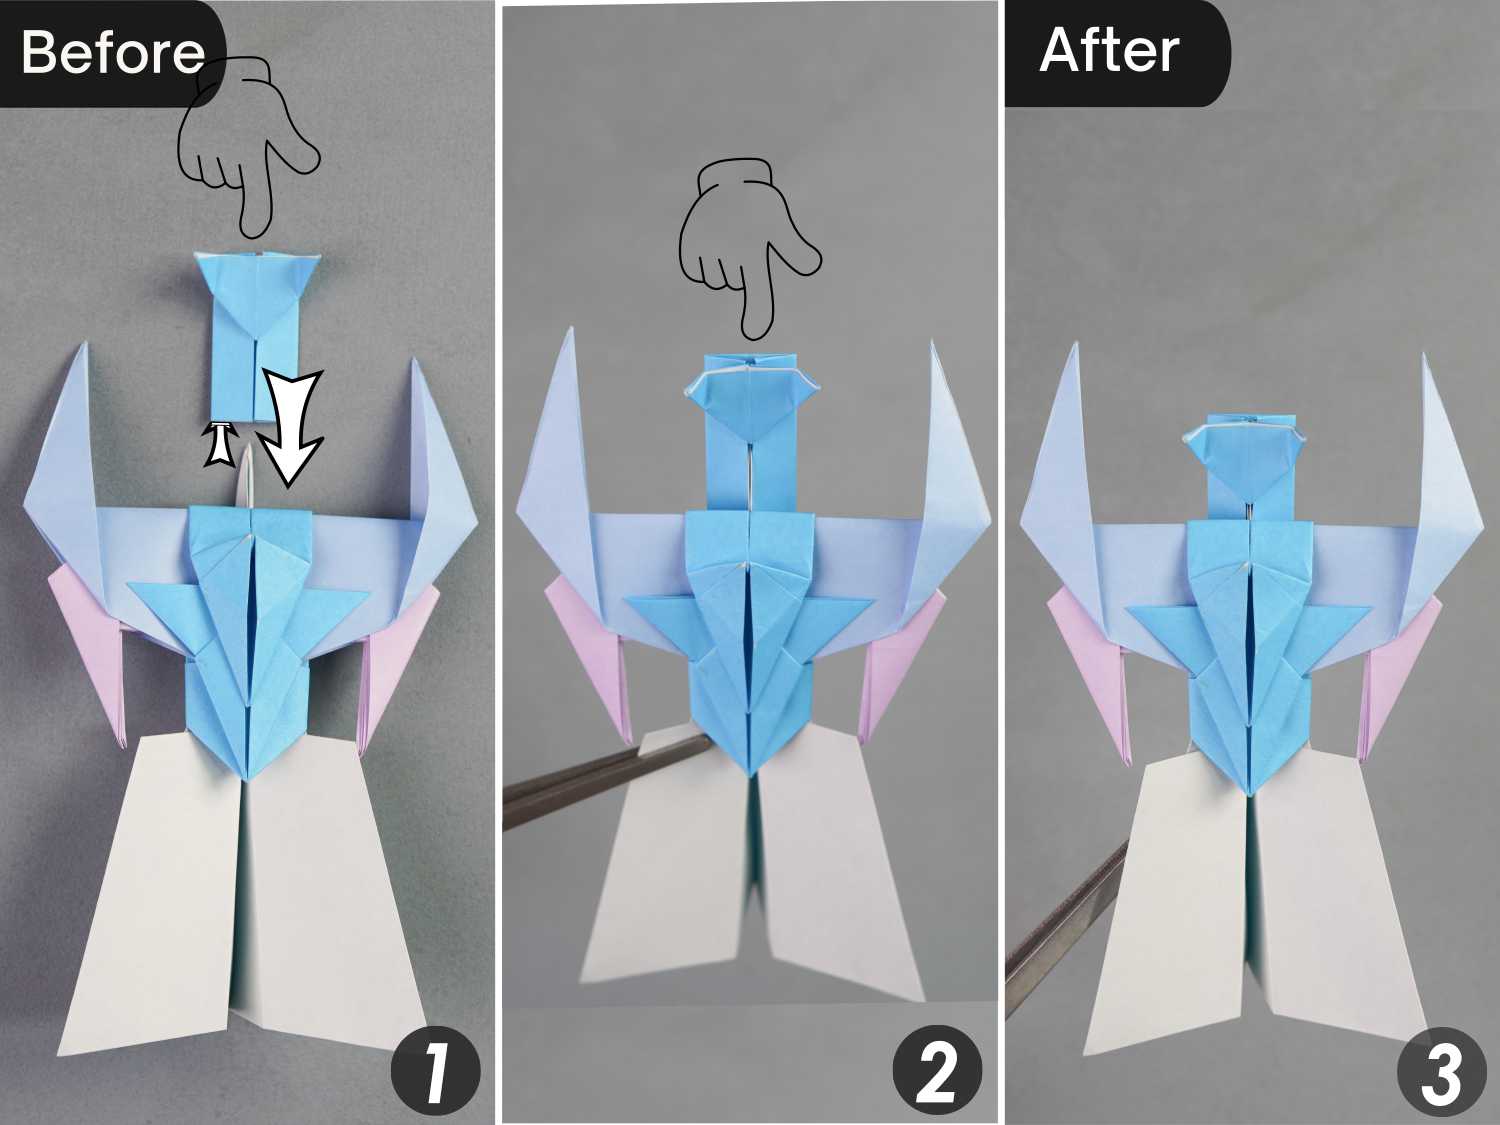
Combine Origami Robot
Step 1
Assemble the shoulder and arm.
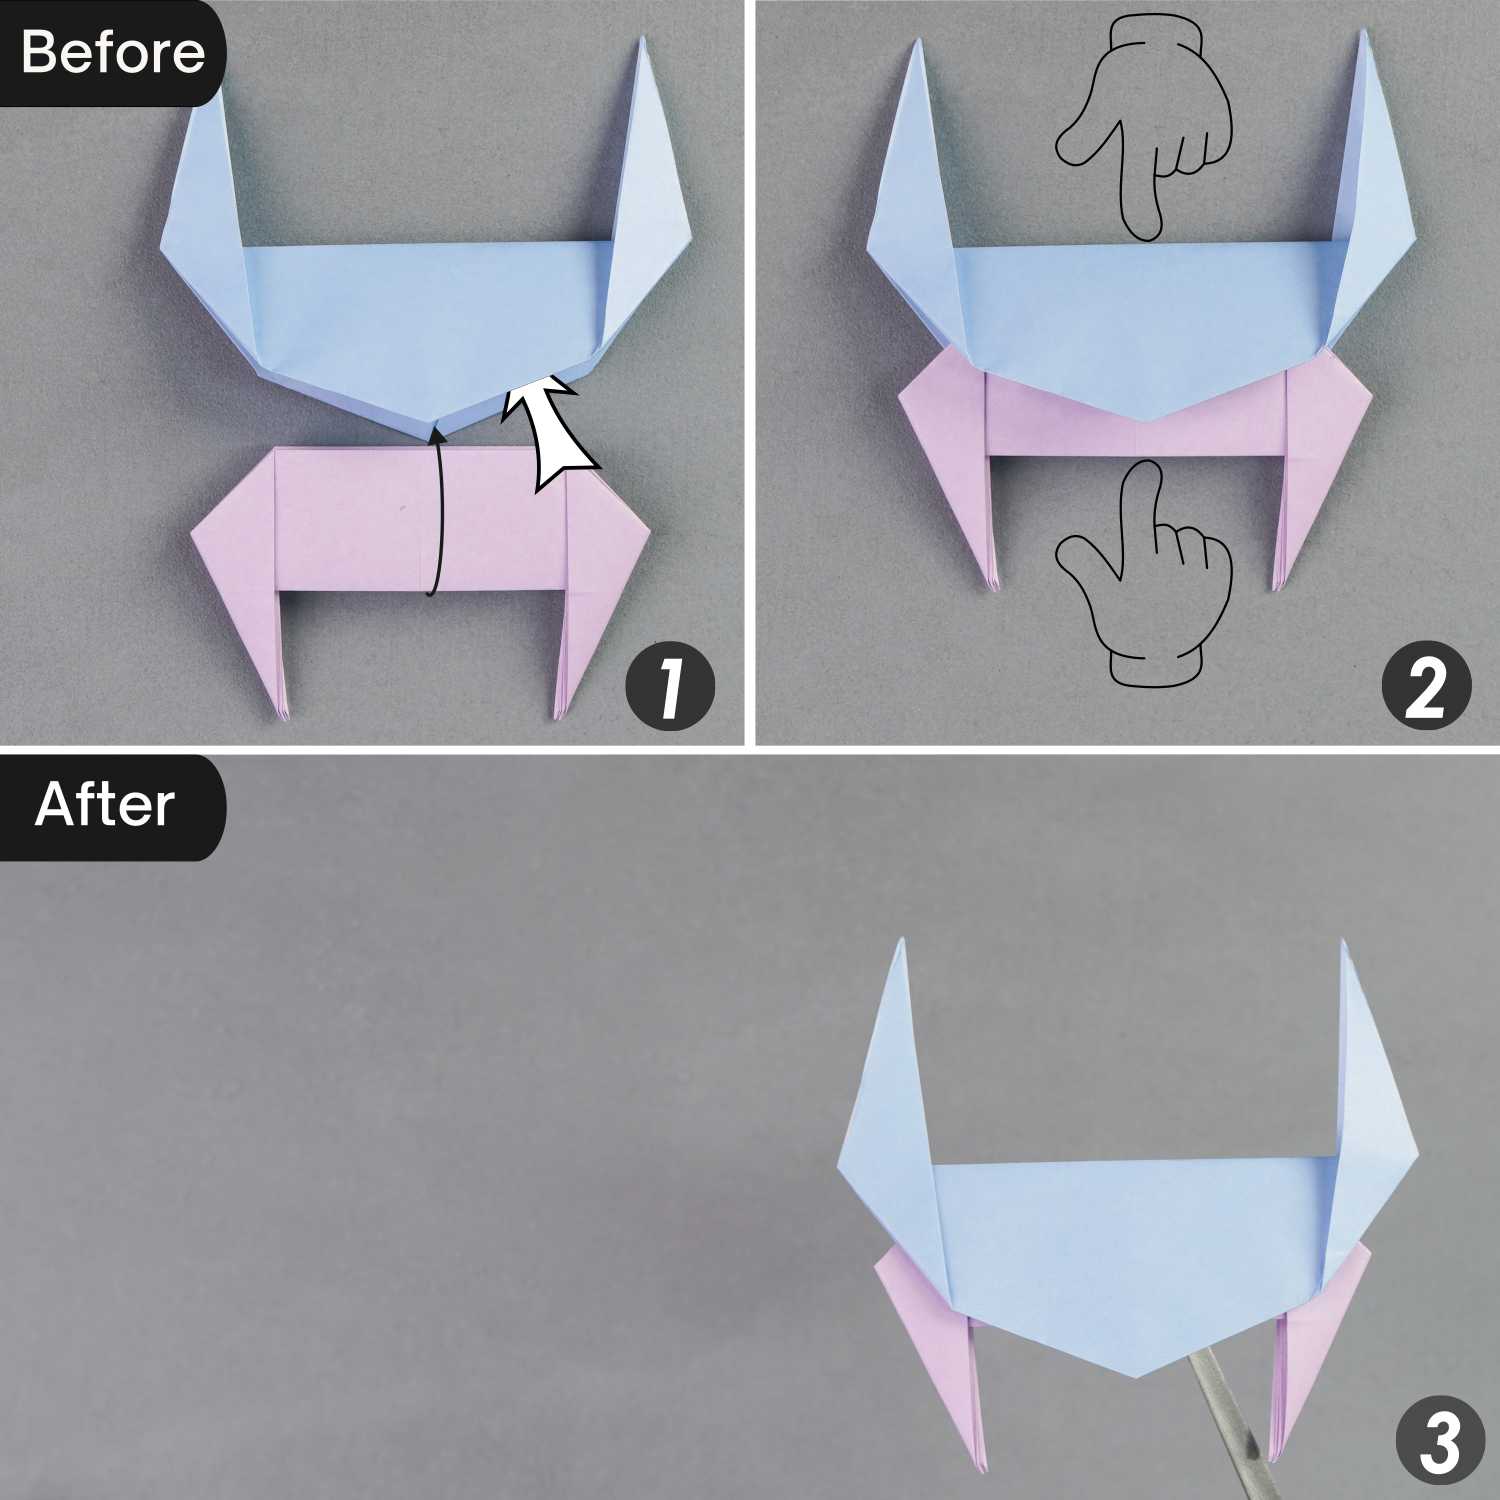
Step 2
Unfold the trunk part’s top layer and place the assembled part on it, then restore the trunk and secure it well. These three parts will be assembled together firmly.
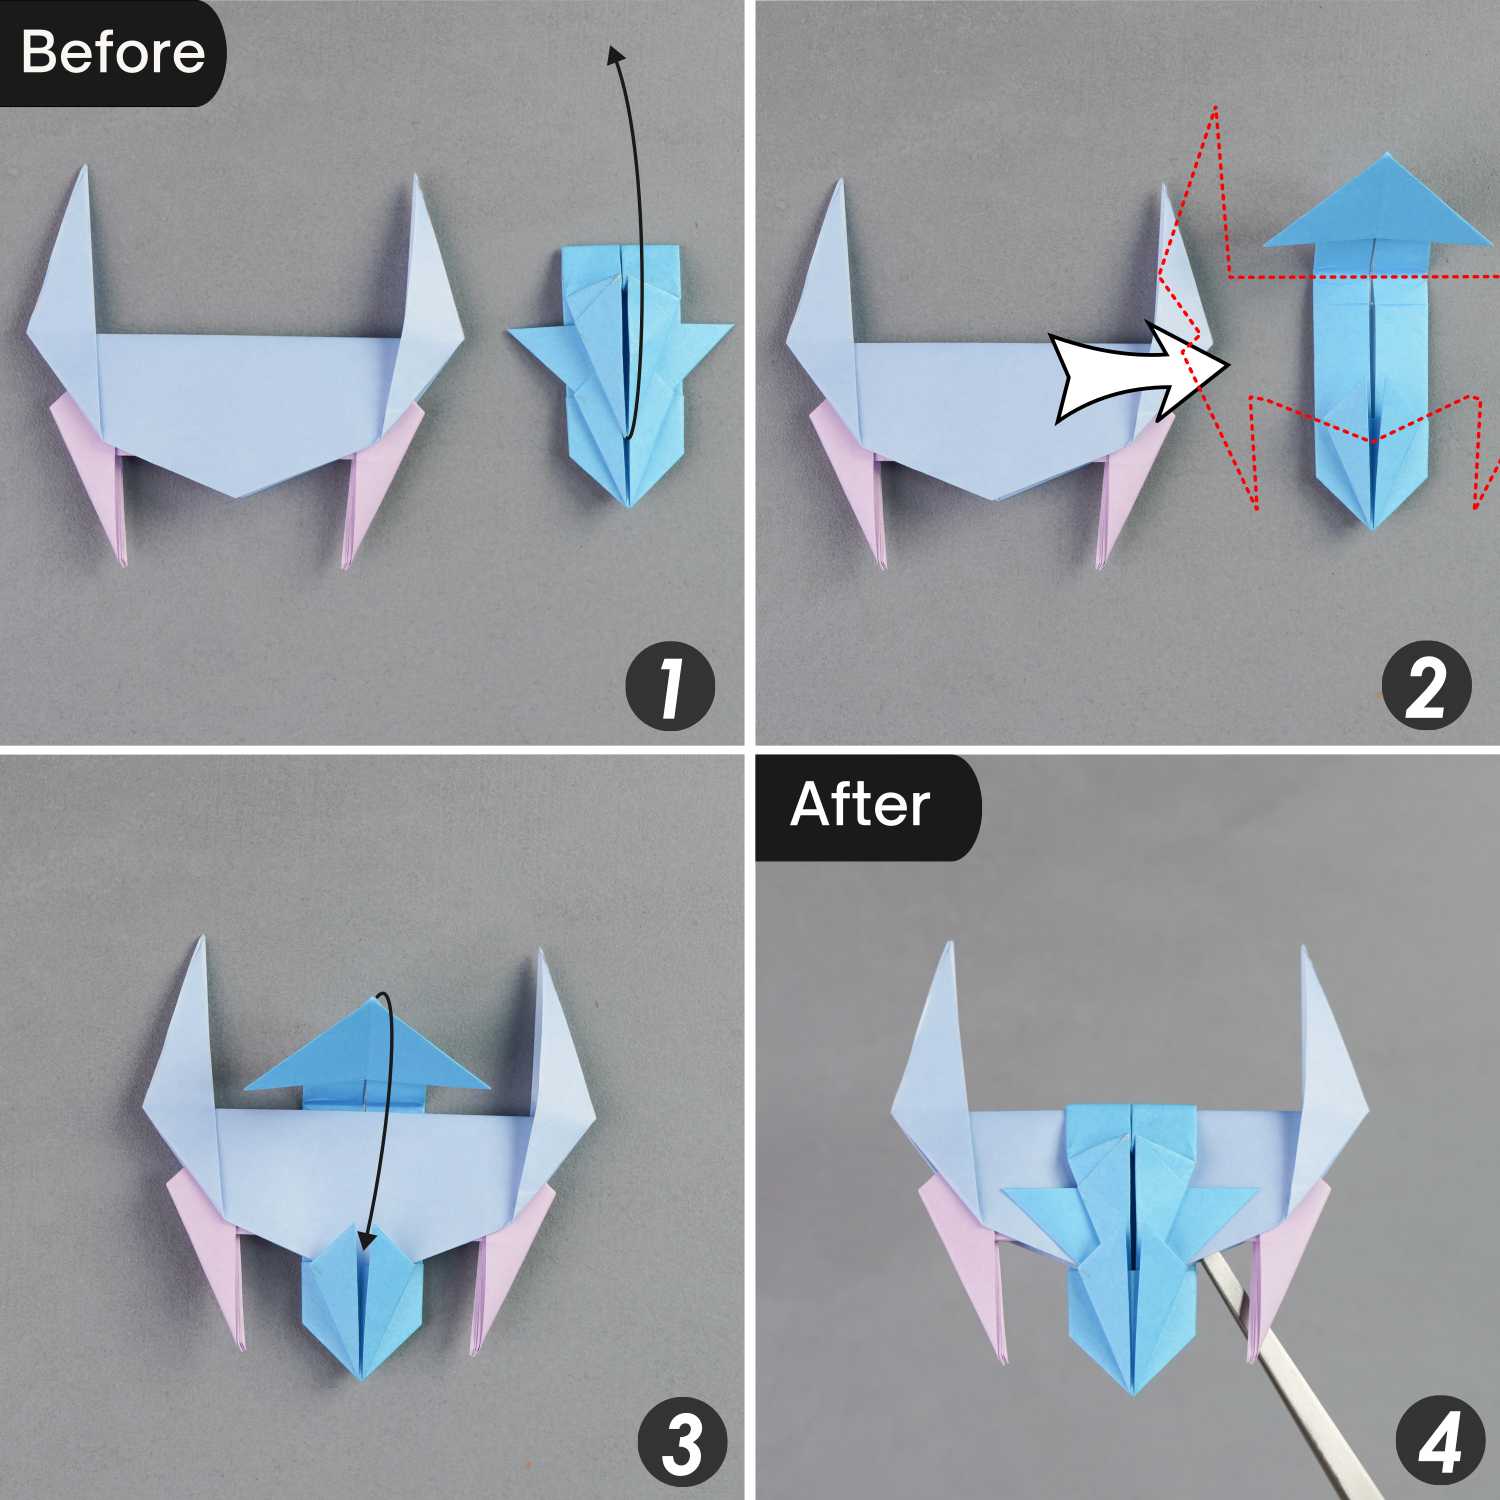
Step 3
Rotate the assembled part 180 degrees from left to right, then assemble the leg part.
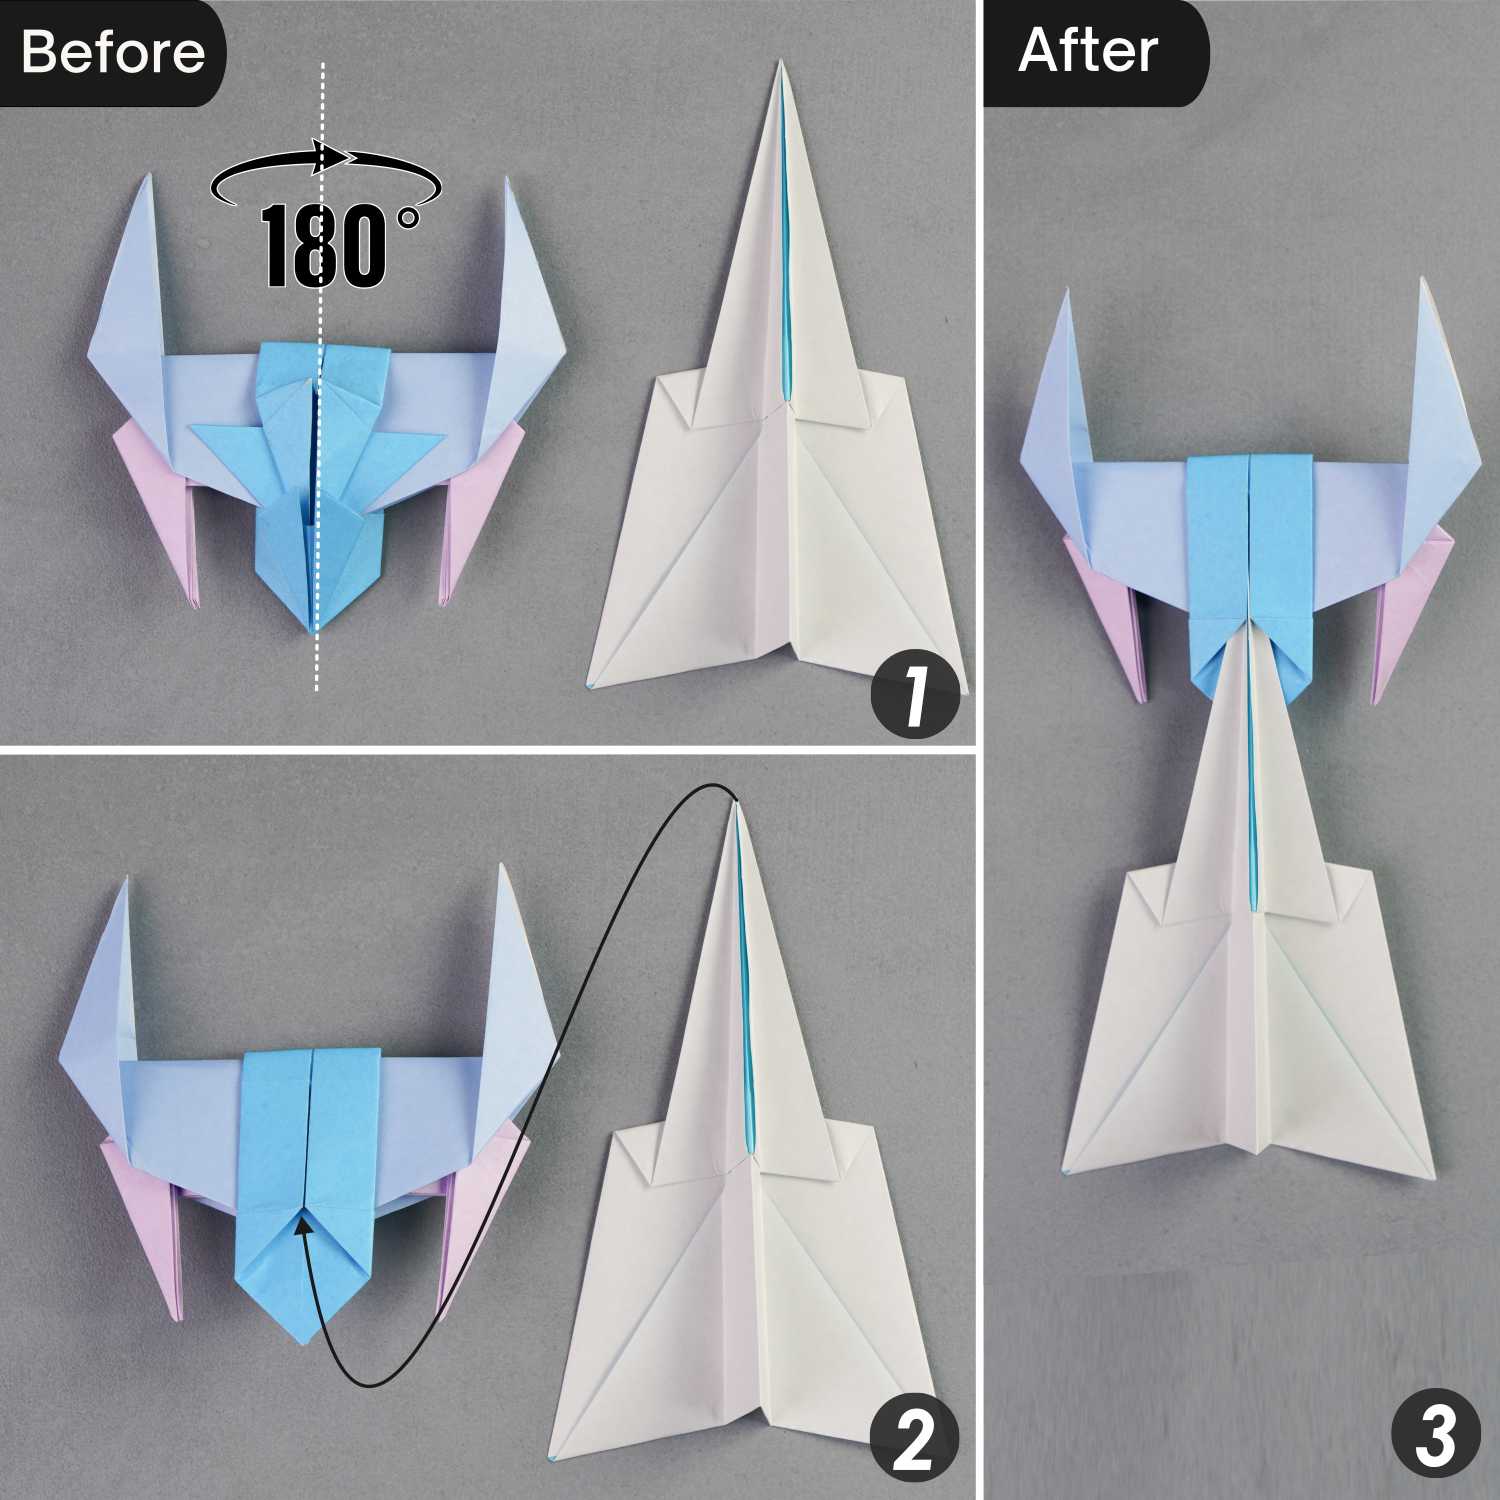
Step 4
Push the leg part upward until the top of the leg is slightly exposed.
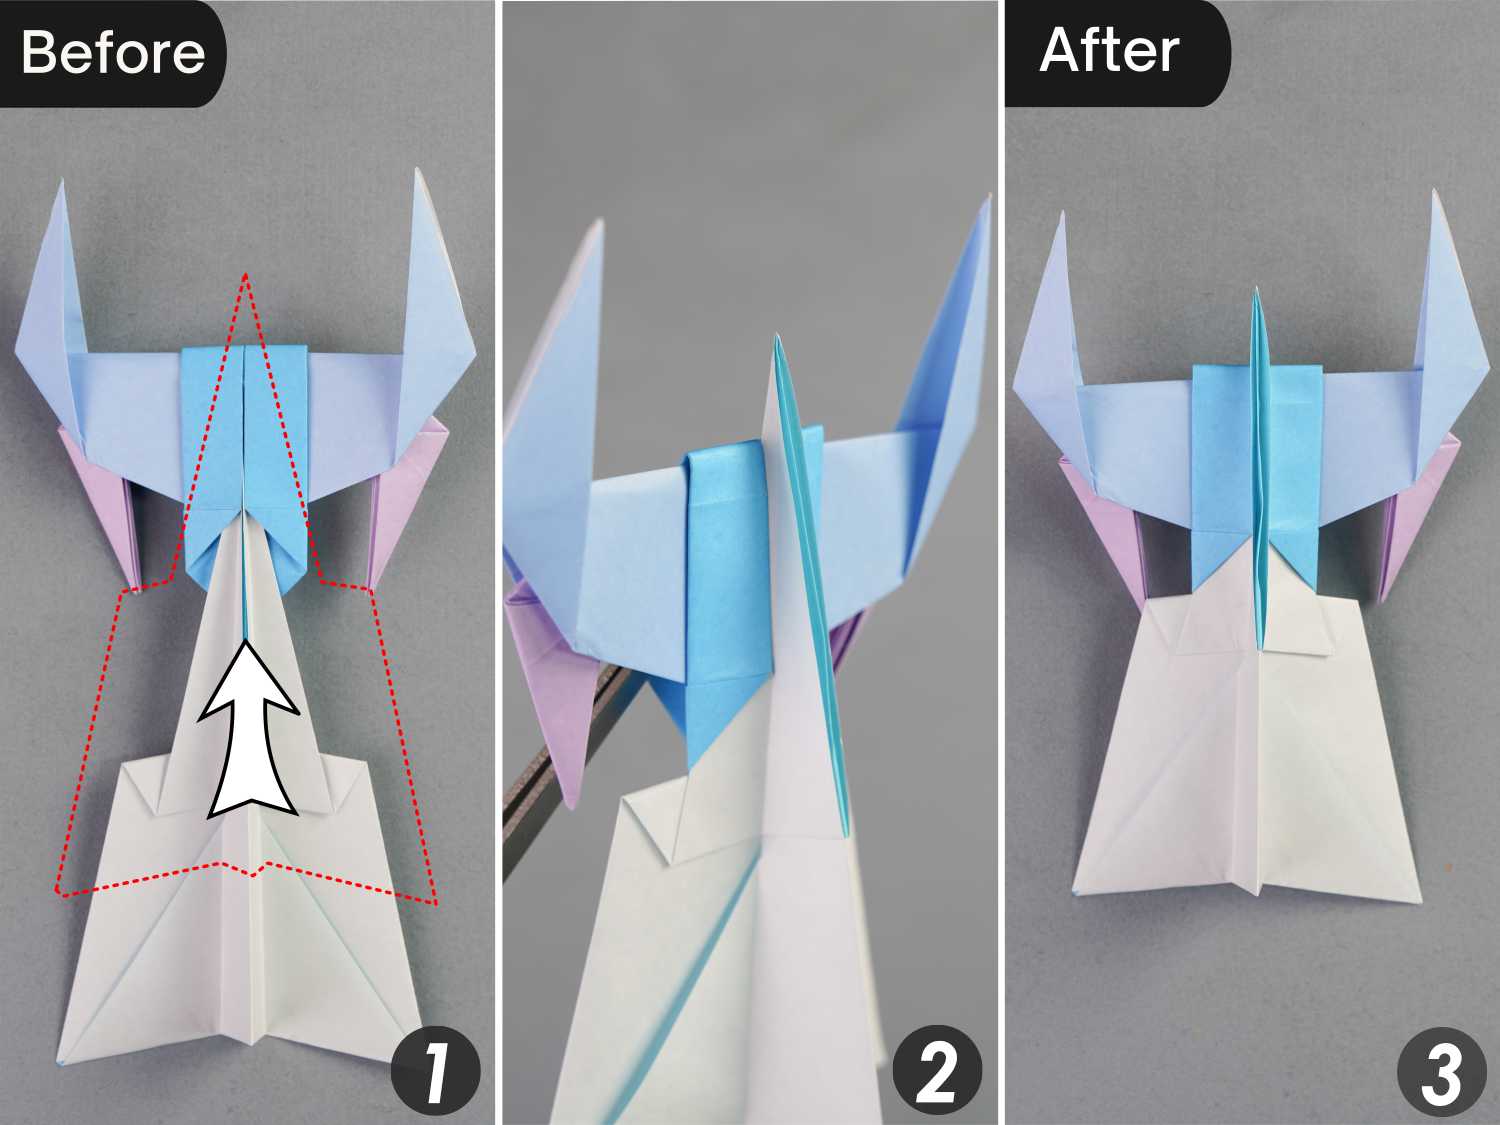
Step 5
Turn over the assembled part from left to right, and finally, assemble the head.