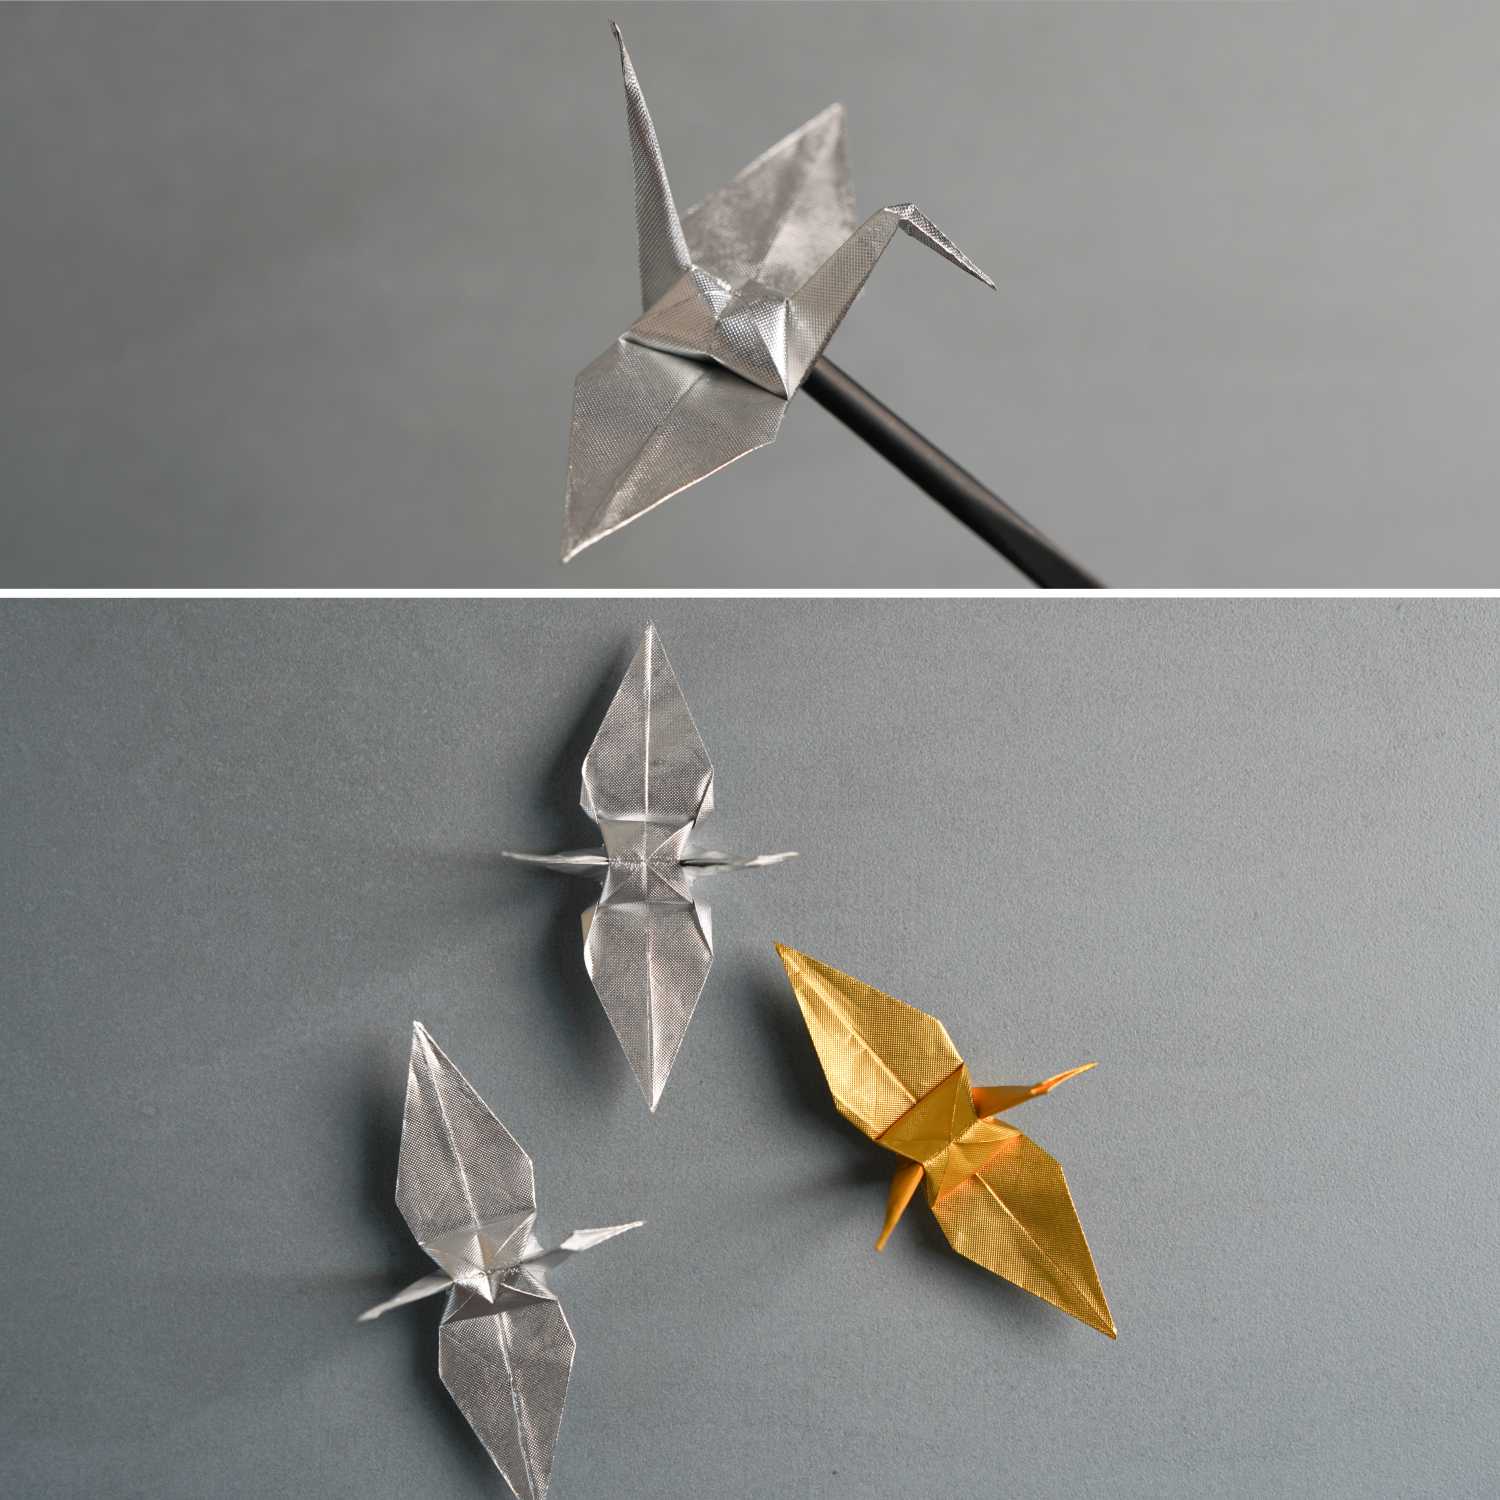
Gum Wrapper Origami Crane Step-by-Step Instruction
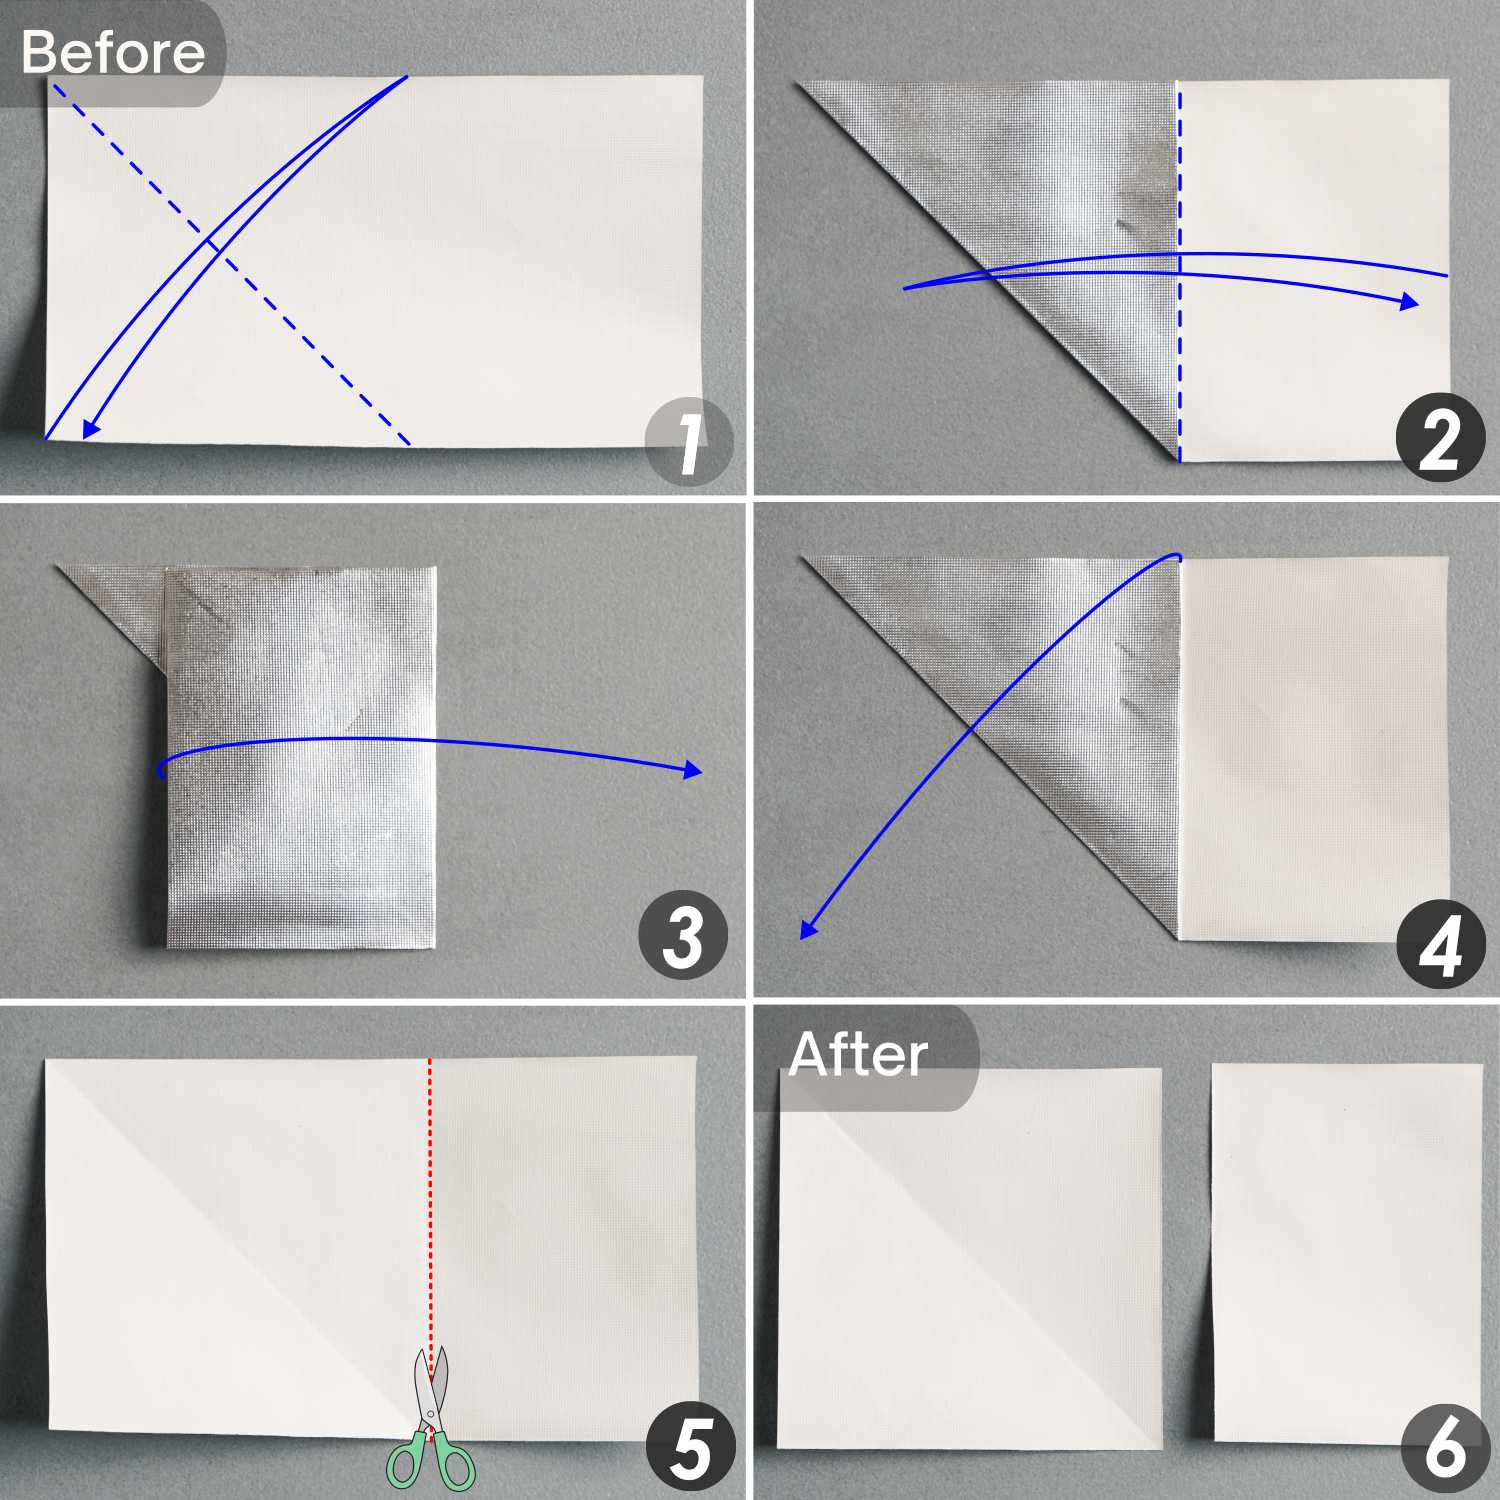
Step 1
Fold the left edge of the rectangle gum wrapper to align with the top edge, then fold the right edge to the left side. Crease well and expand the paper, cut the paper along the vertical crease to get a square paper.
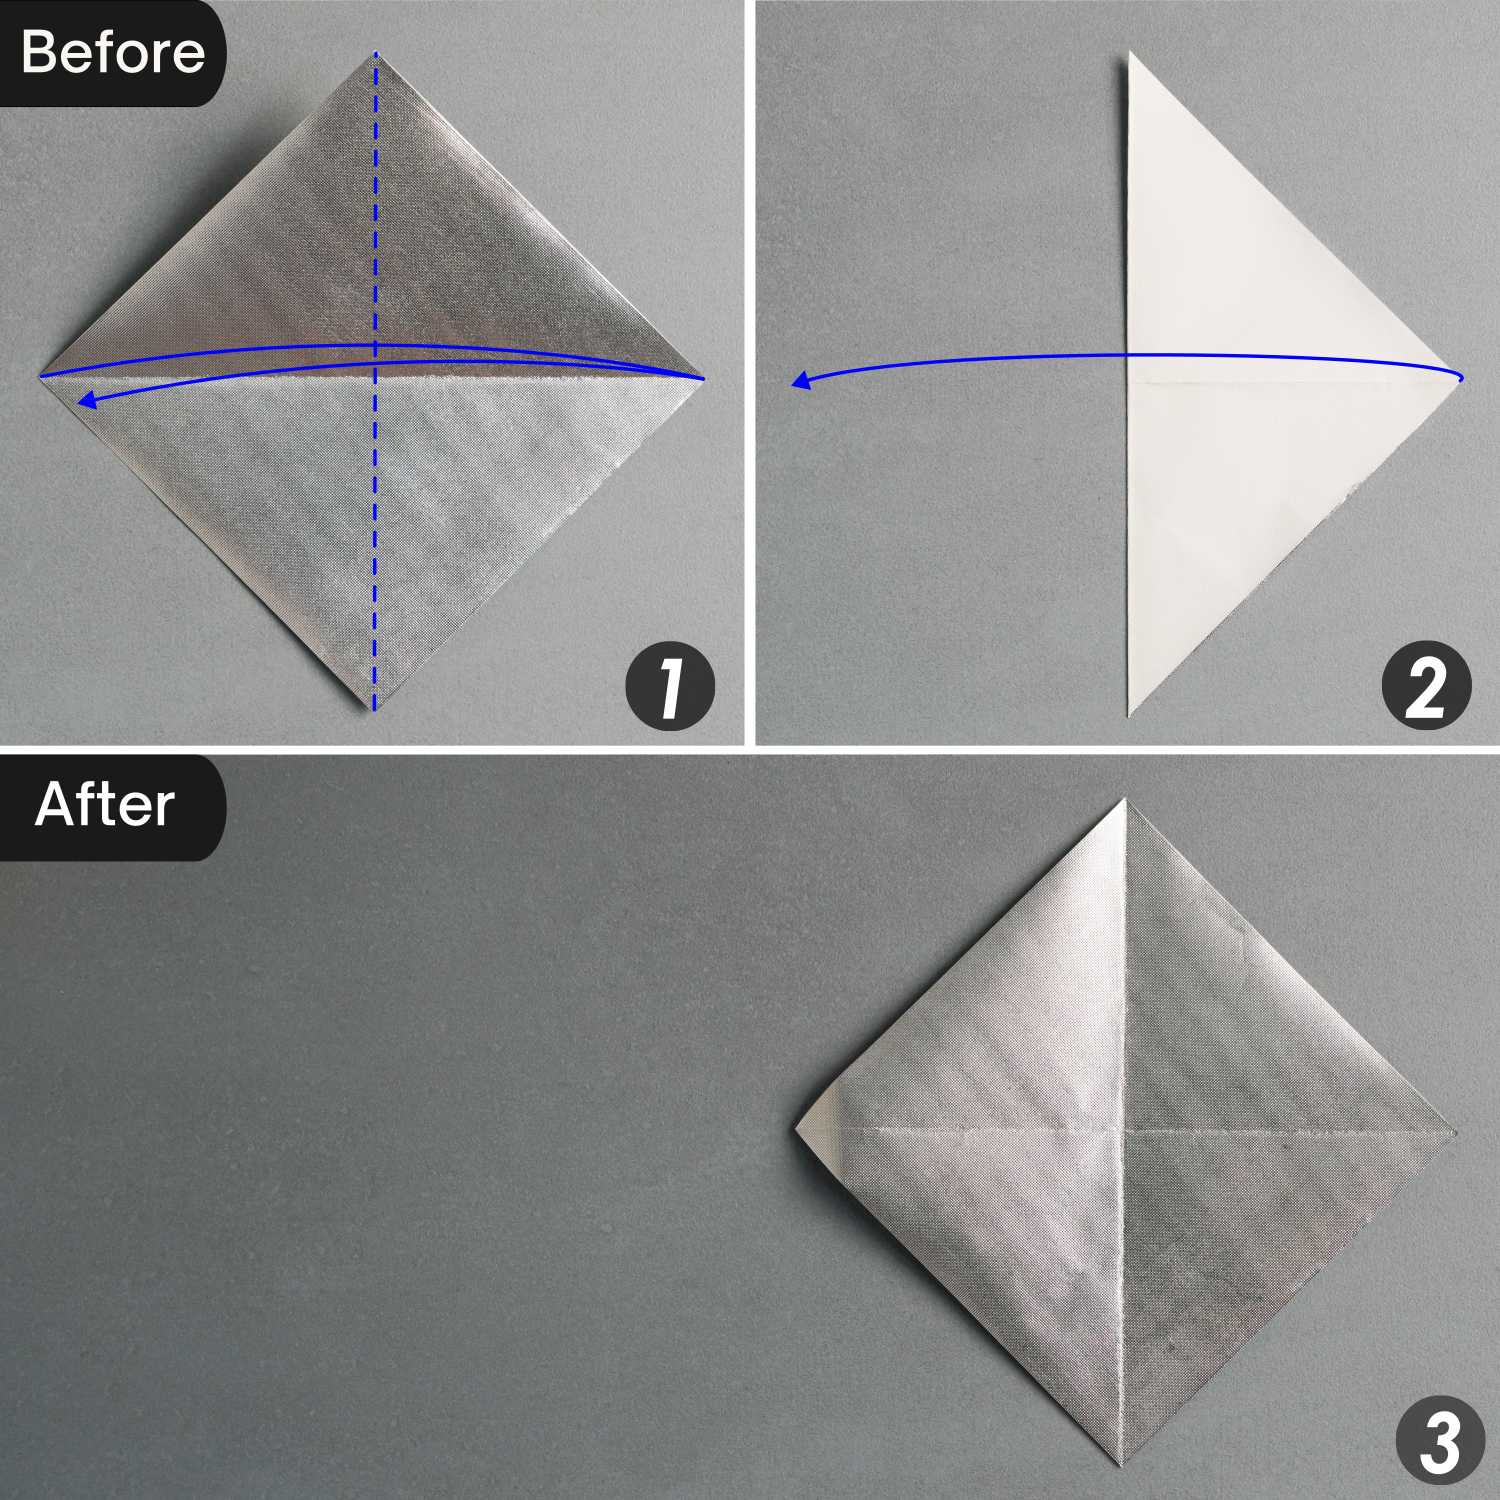
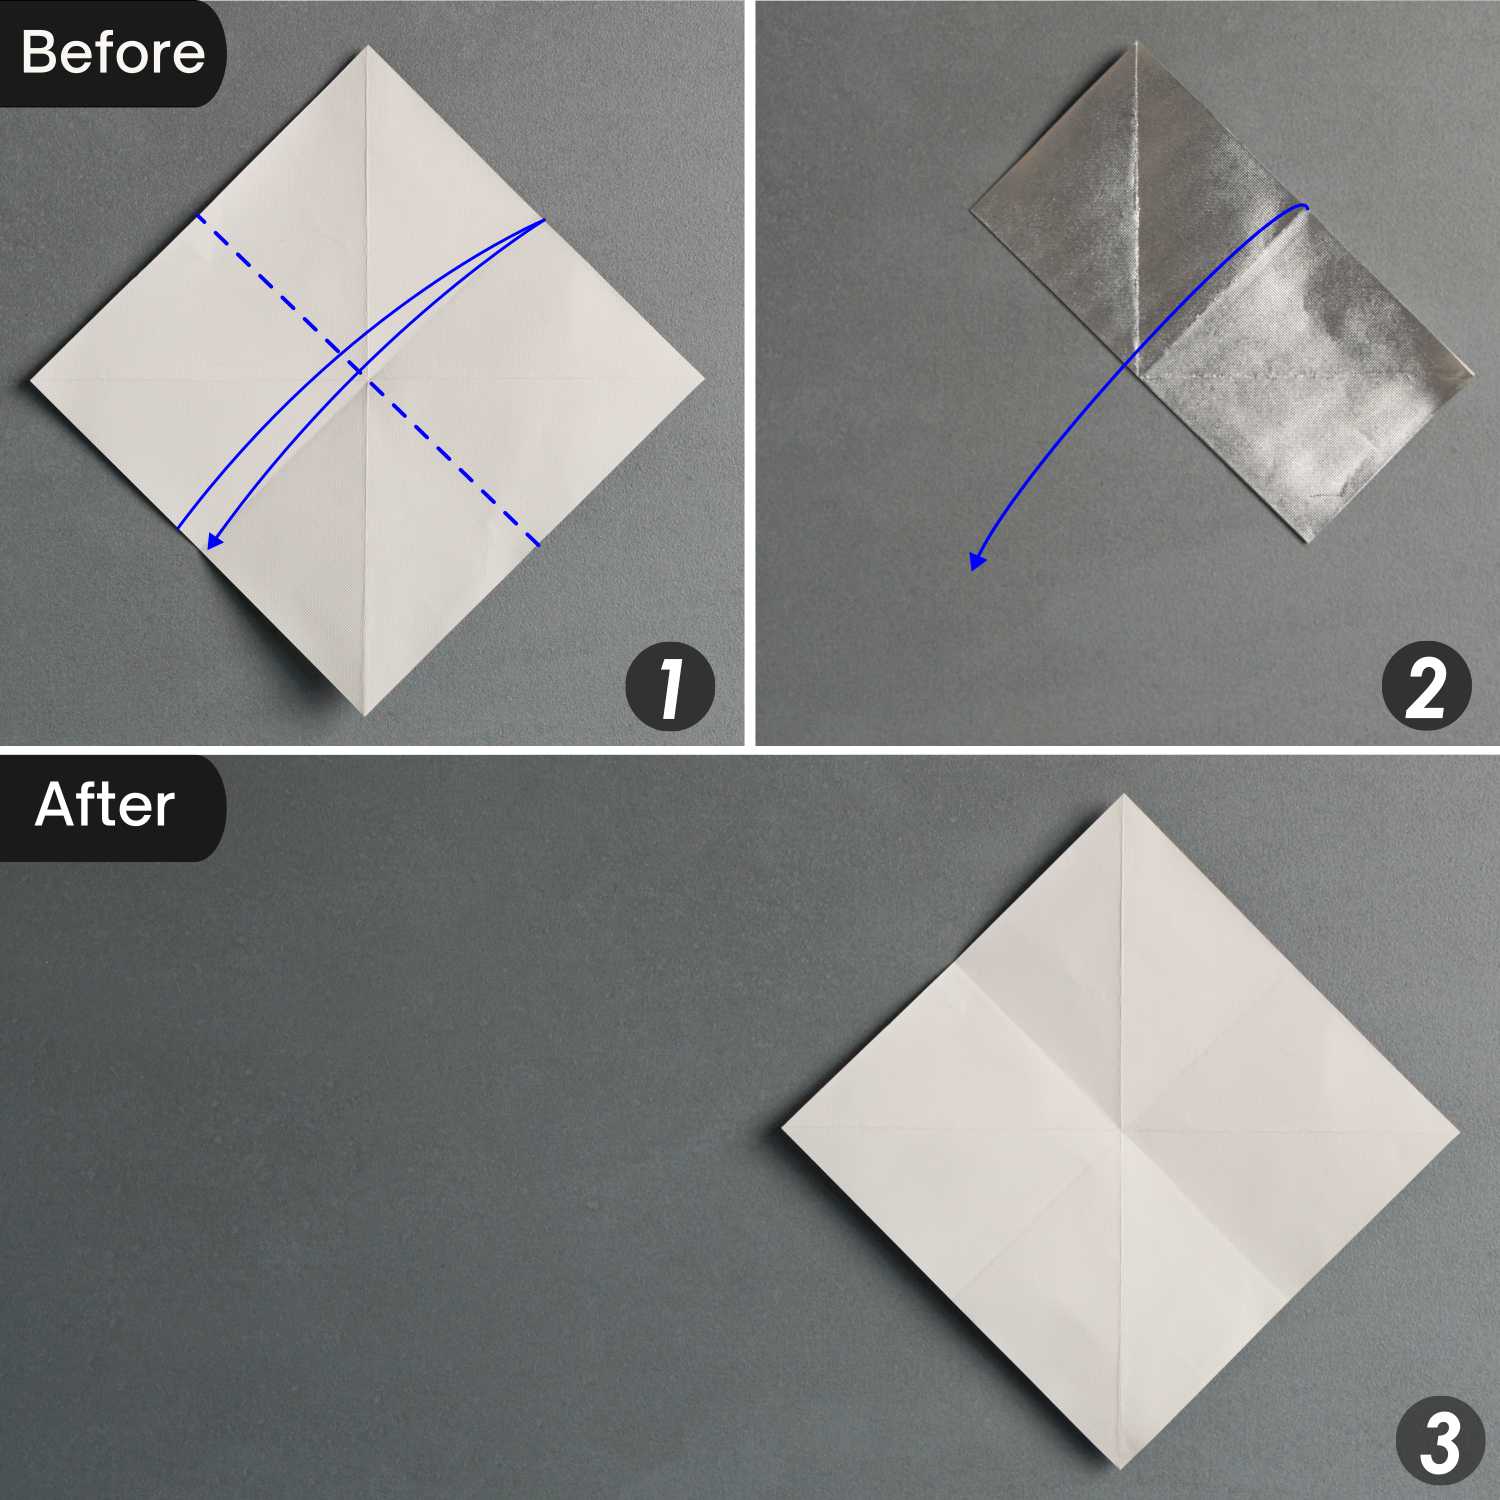
Step 2
Place the square gum wrapper with the desired display side face up, fold it in half horizontally, leaving a crease, and unfold it.

Step 3
Fold it in half vertically, leaving a crease, and unfold it.
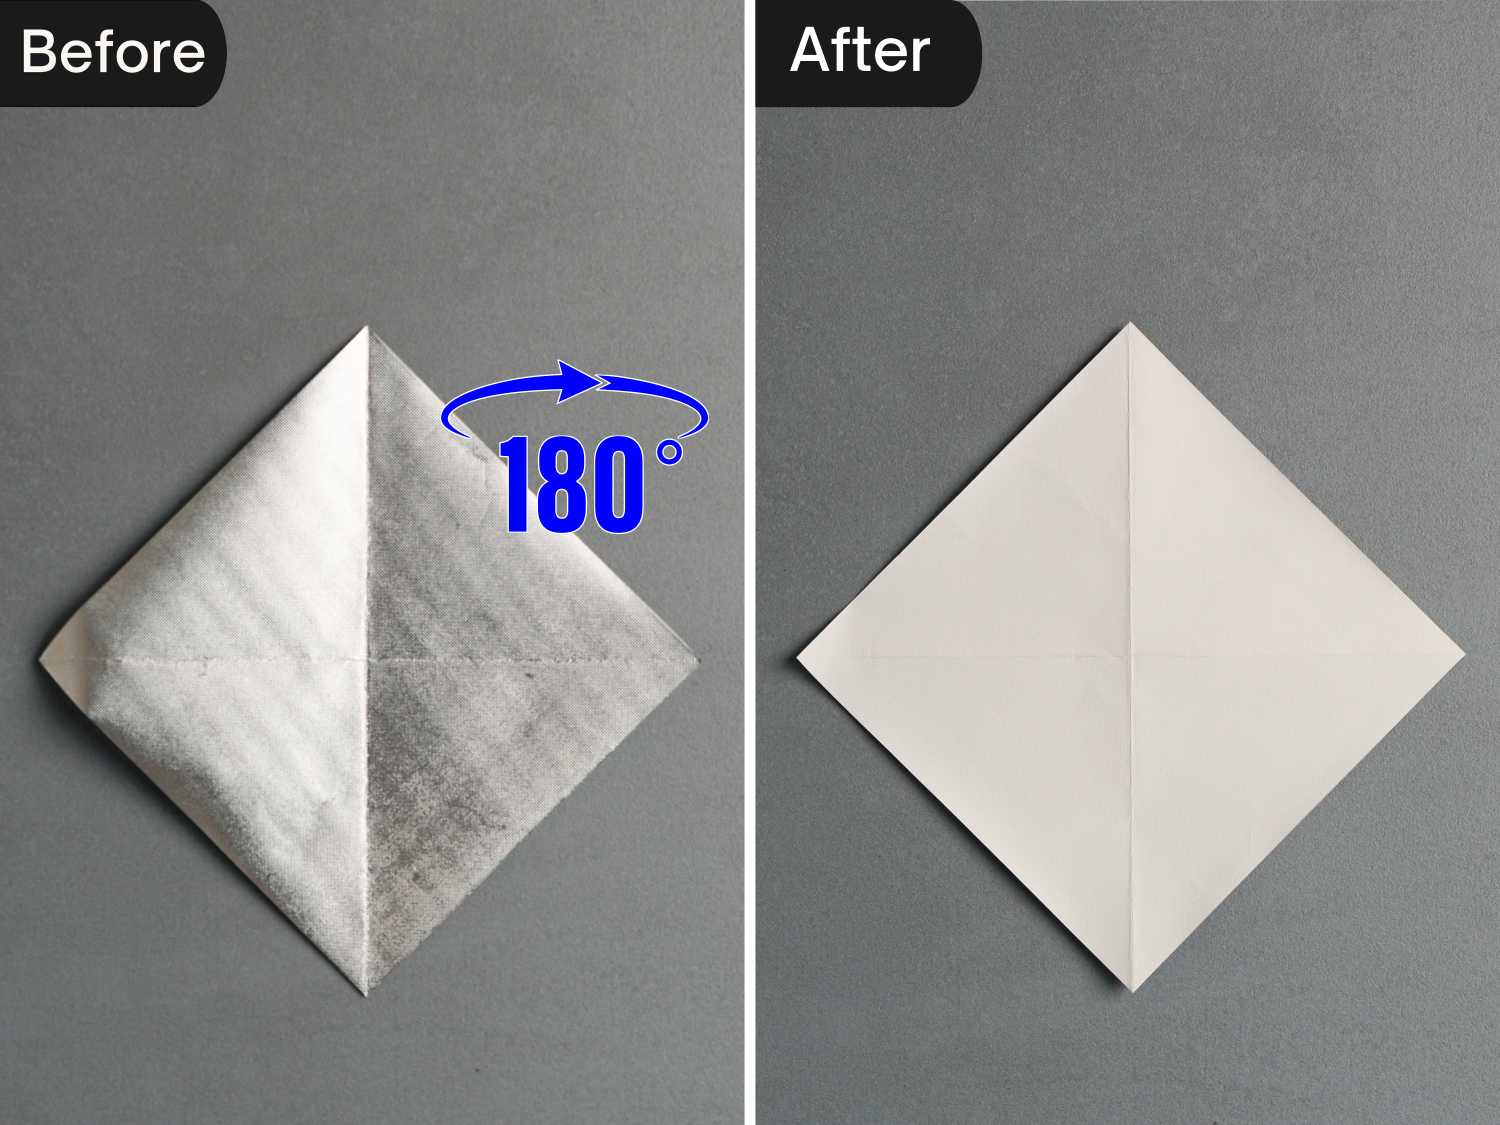
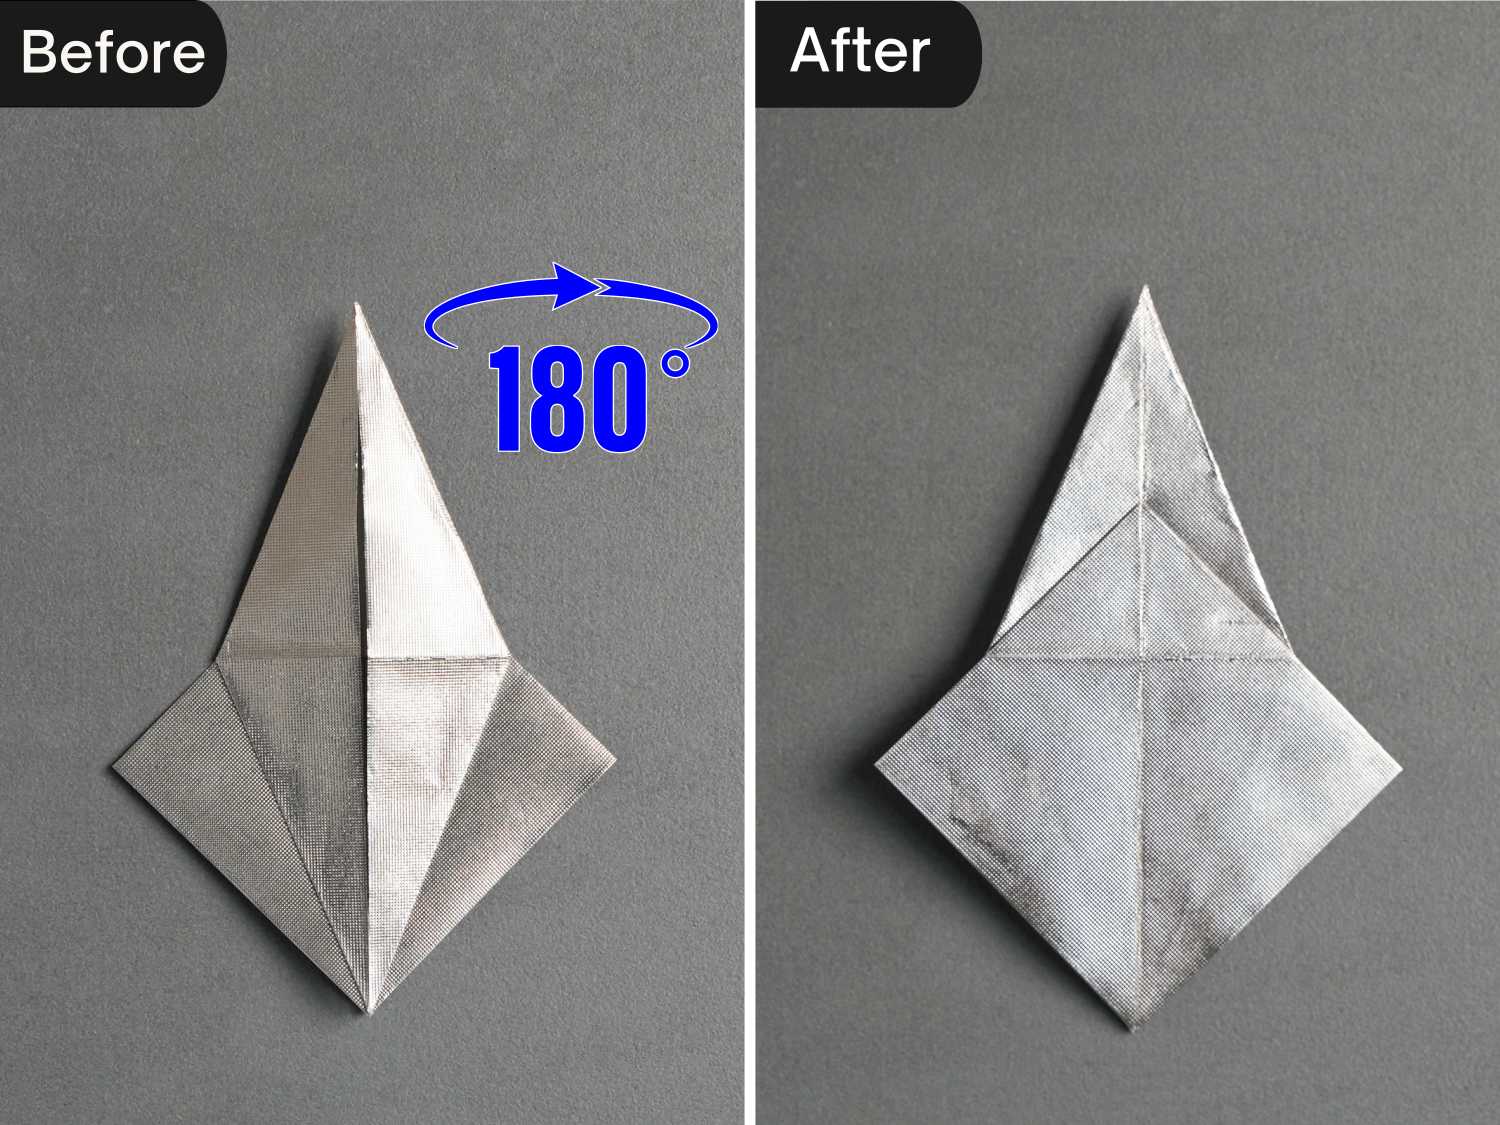
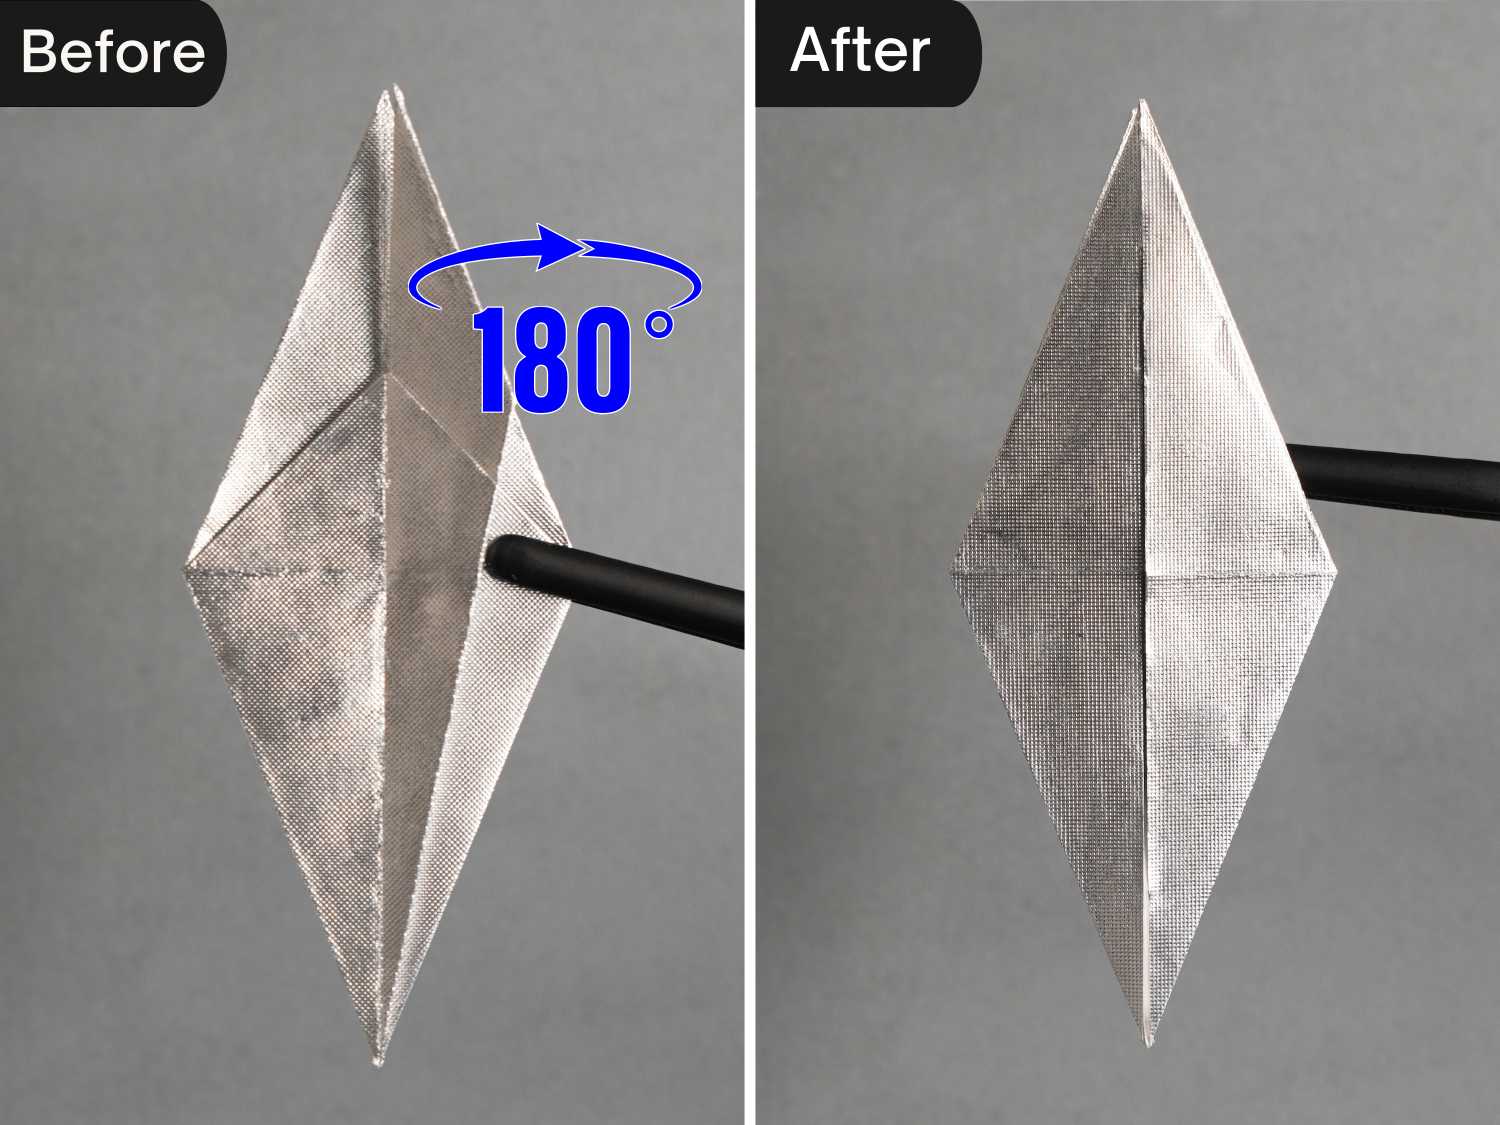
Step 4
Flip the paper from left to right.
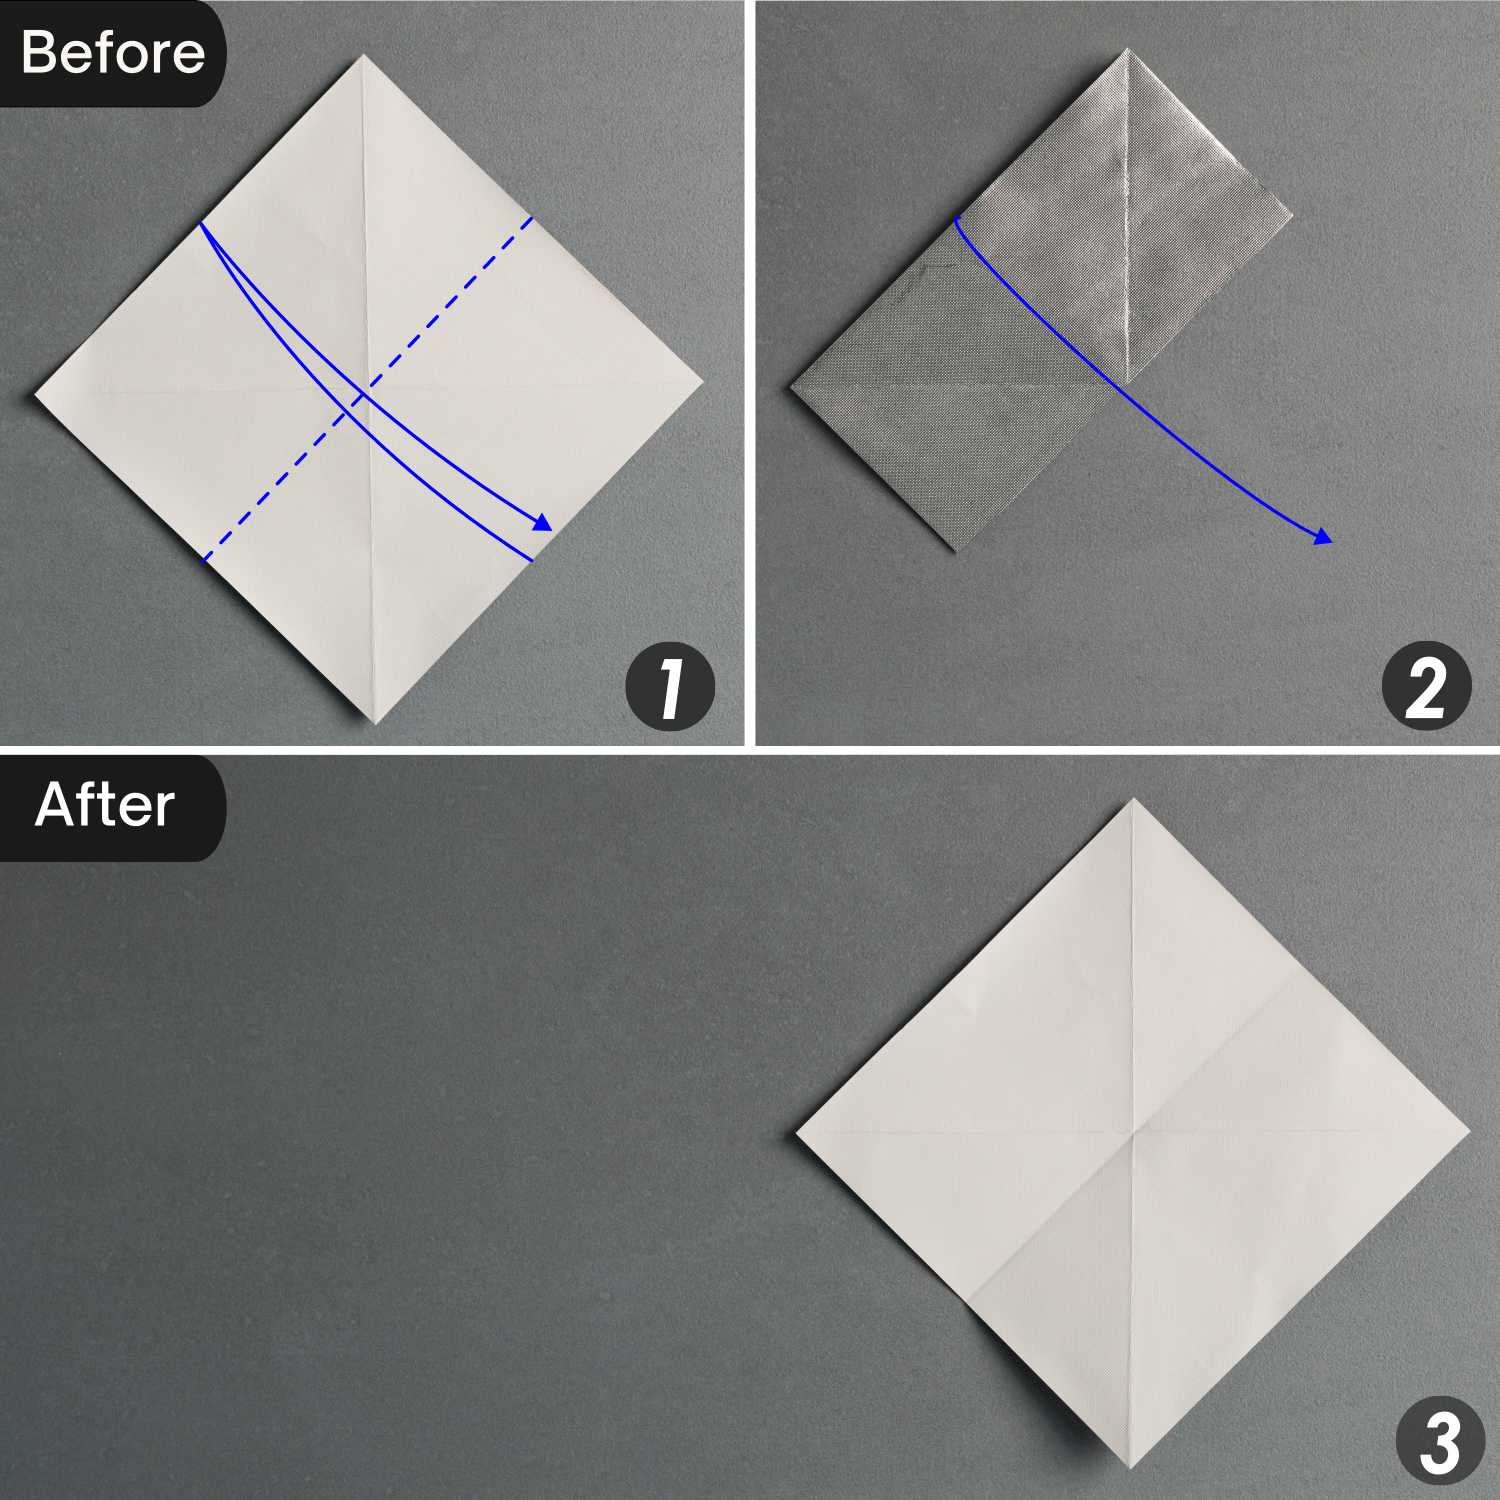
Step 5
Fold the bottom right edge to align with the top left edge, leaving a crease, and unfold it.
Step 6
Fold the bottom left edge to align with the top right edge, leaving a crease, and unfold it.
Step 7
Take the left, right, and top corners, and push them to meet the bottom corner. Flatten the fold to get a smaller square.
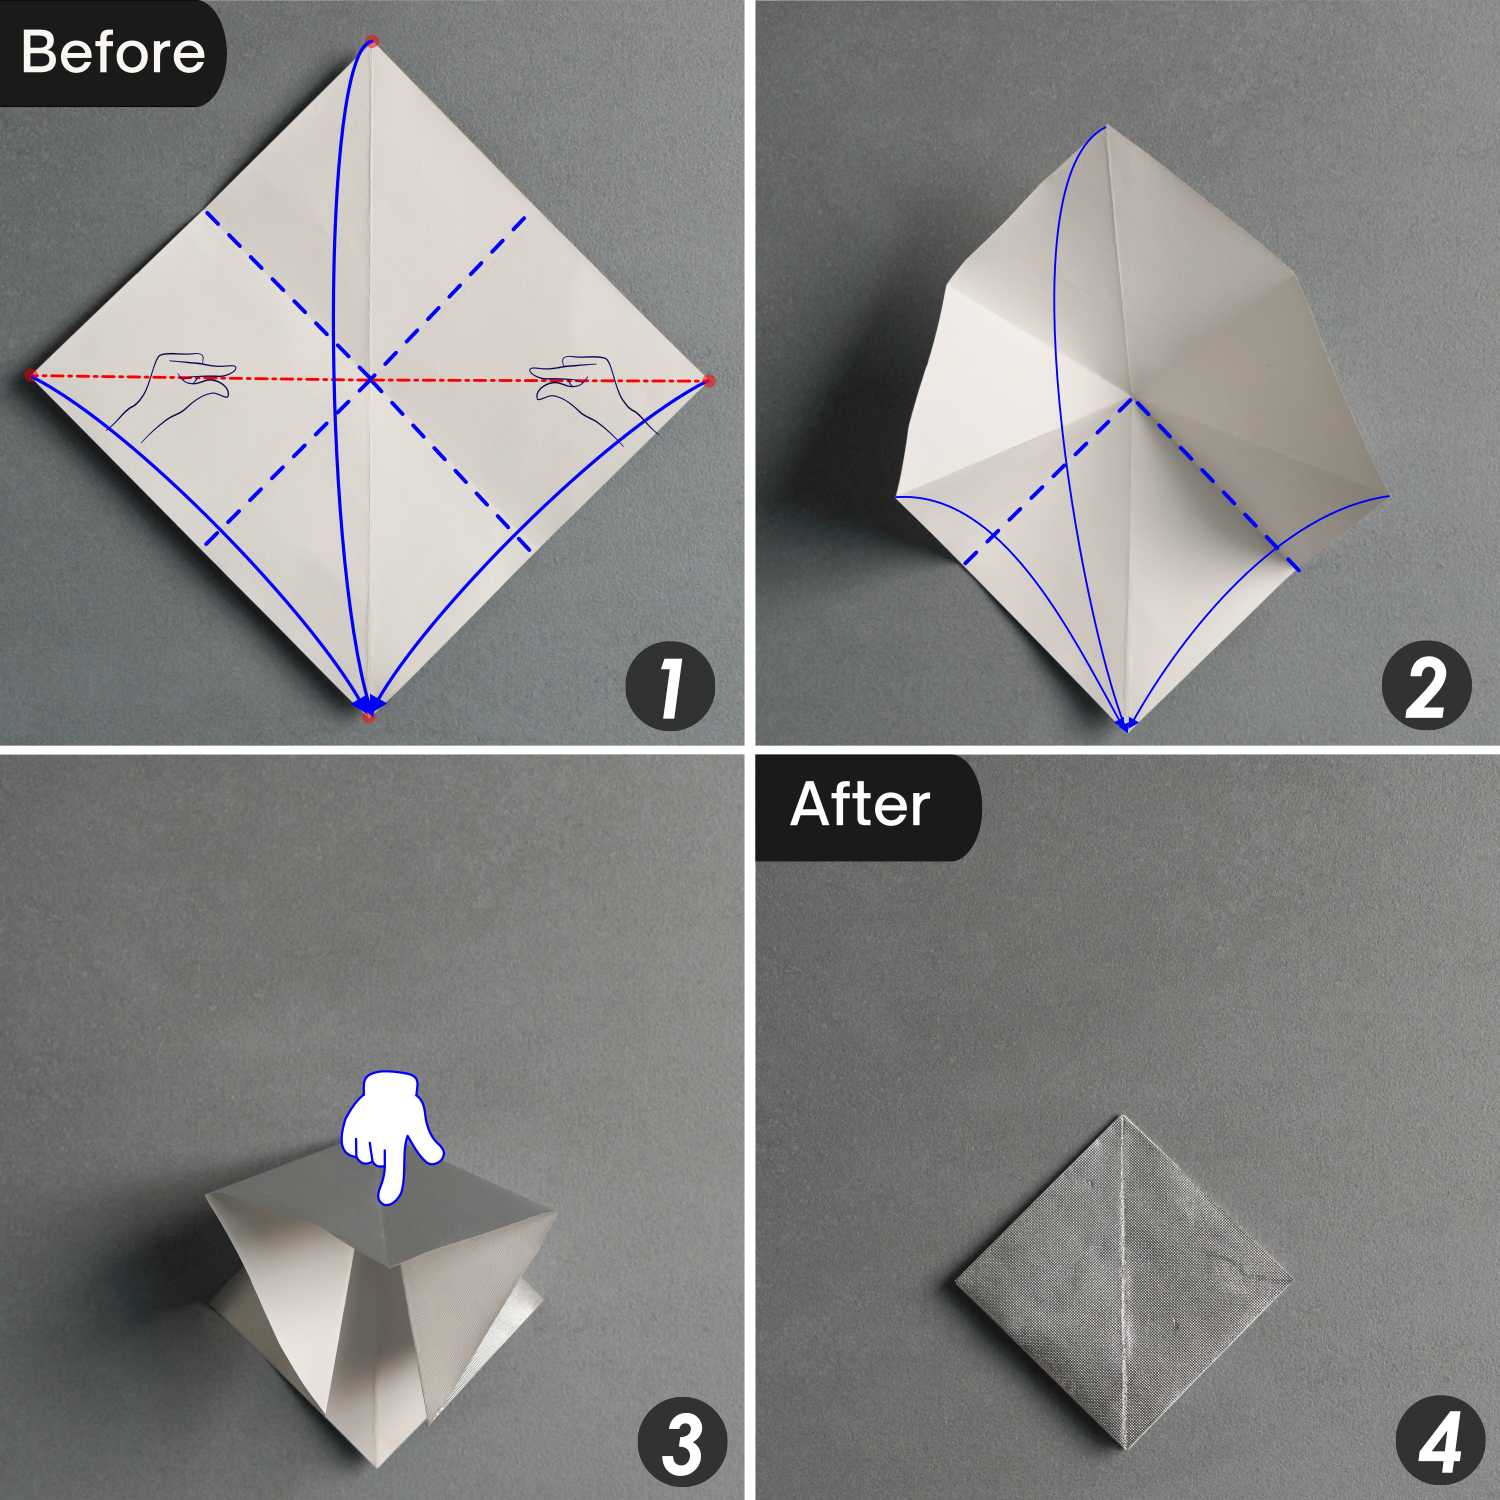
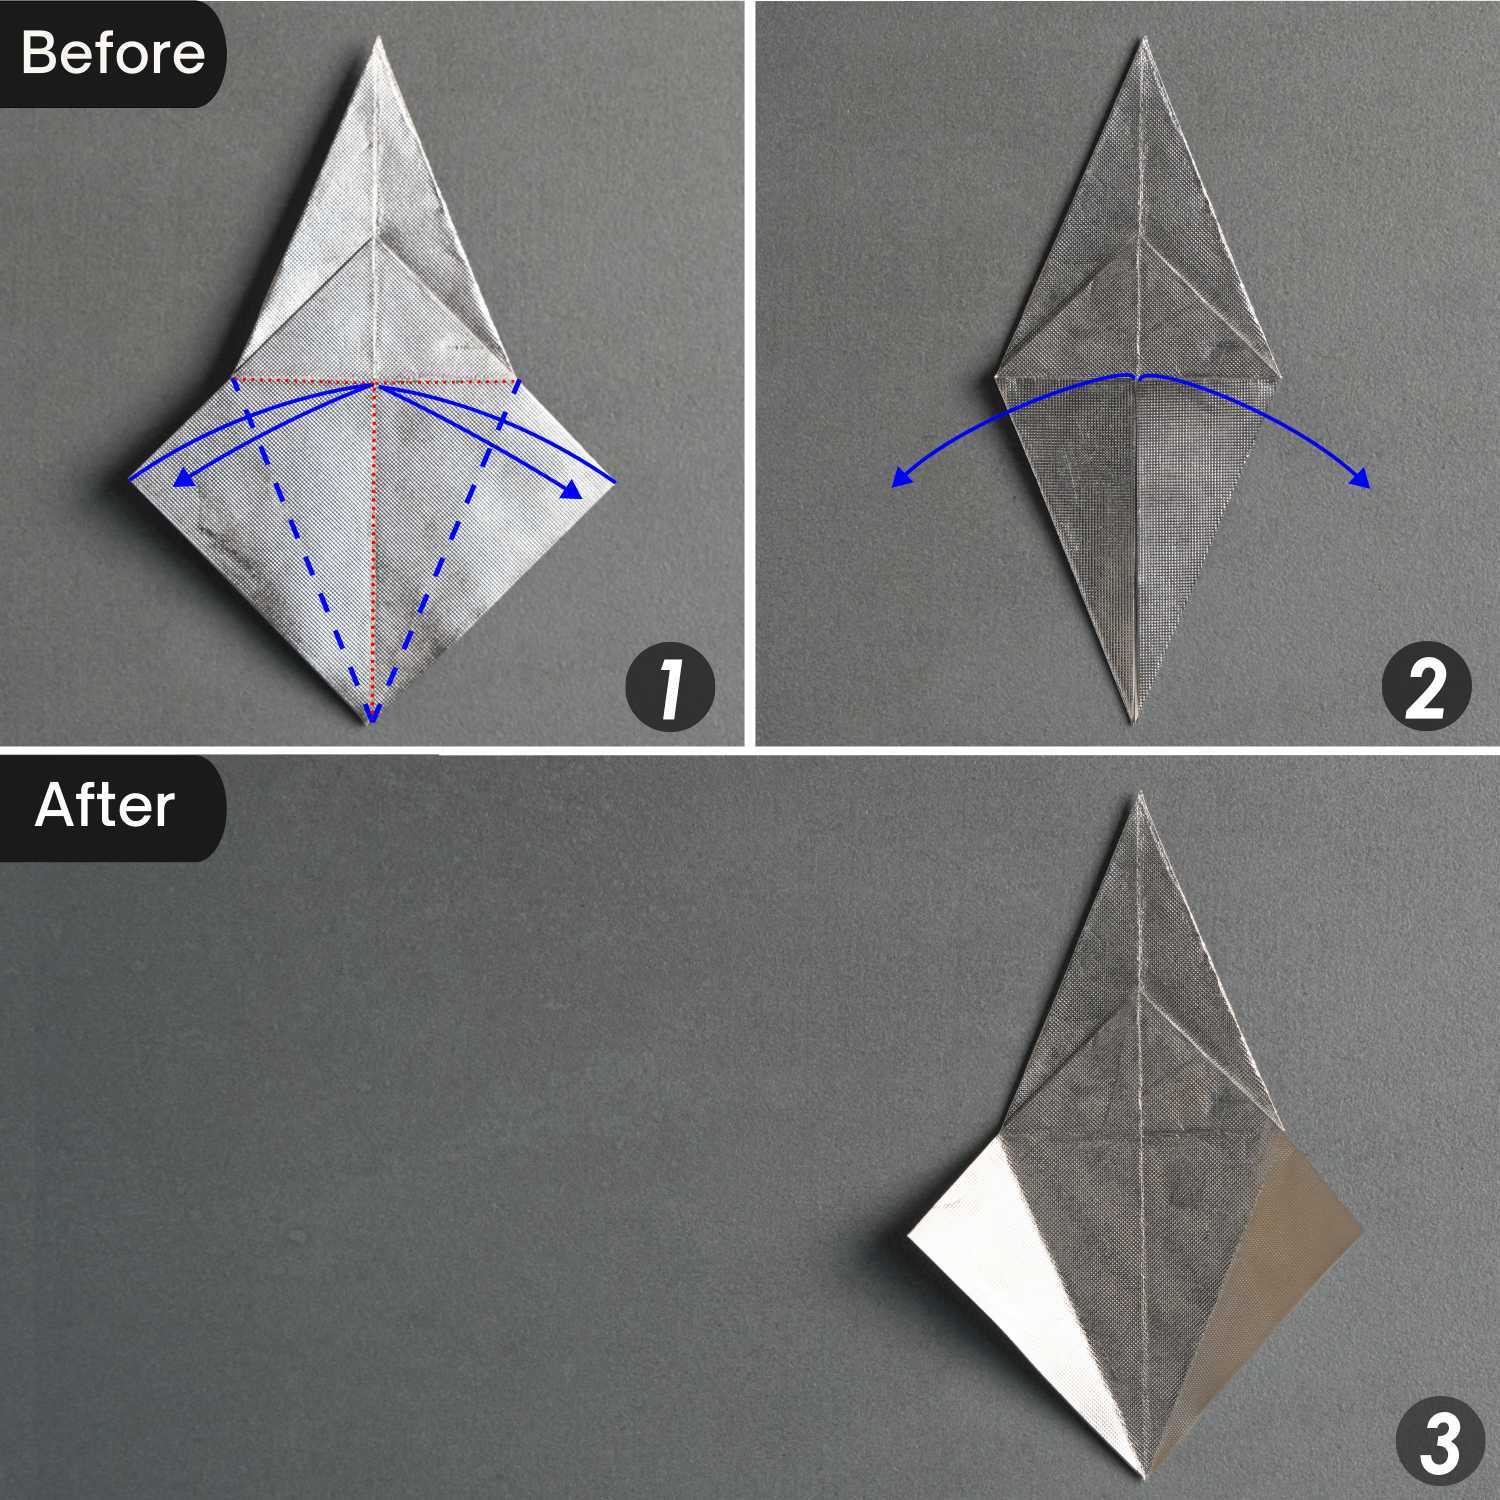
Step 8
Fold the bottom left and right edges to align with the center vertical crease, crease them well, and unfold them.
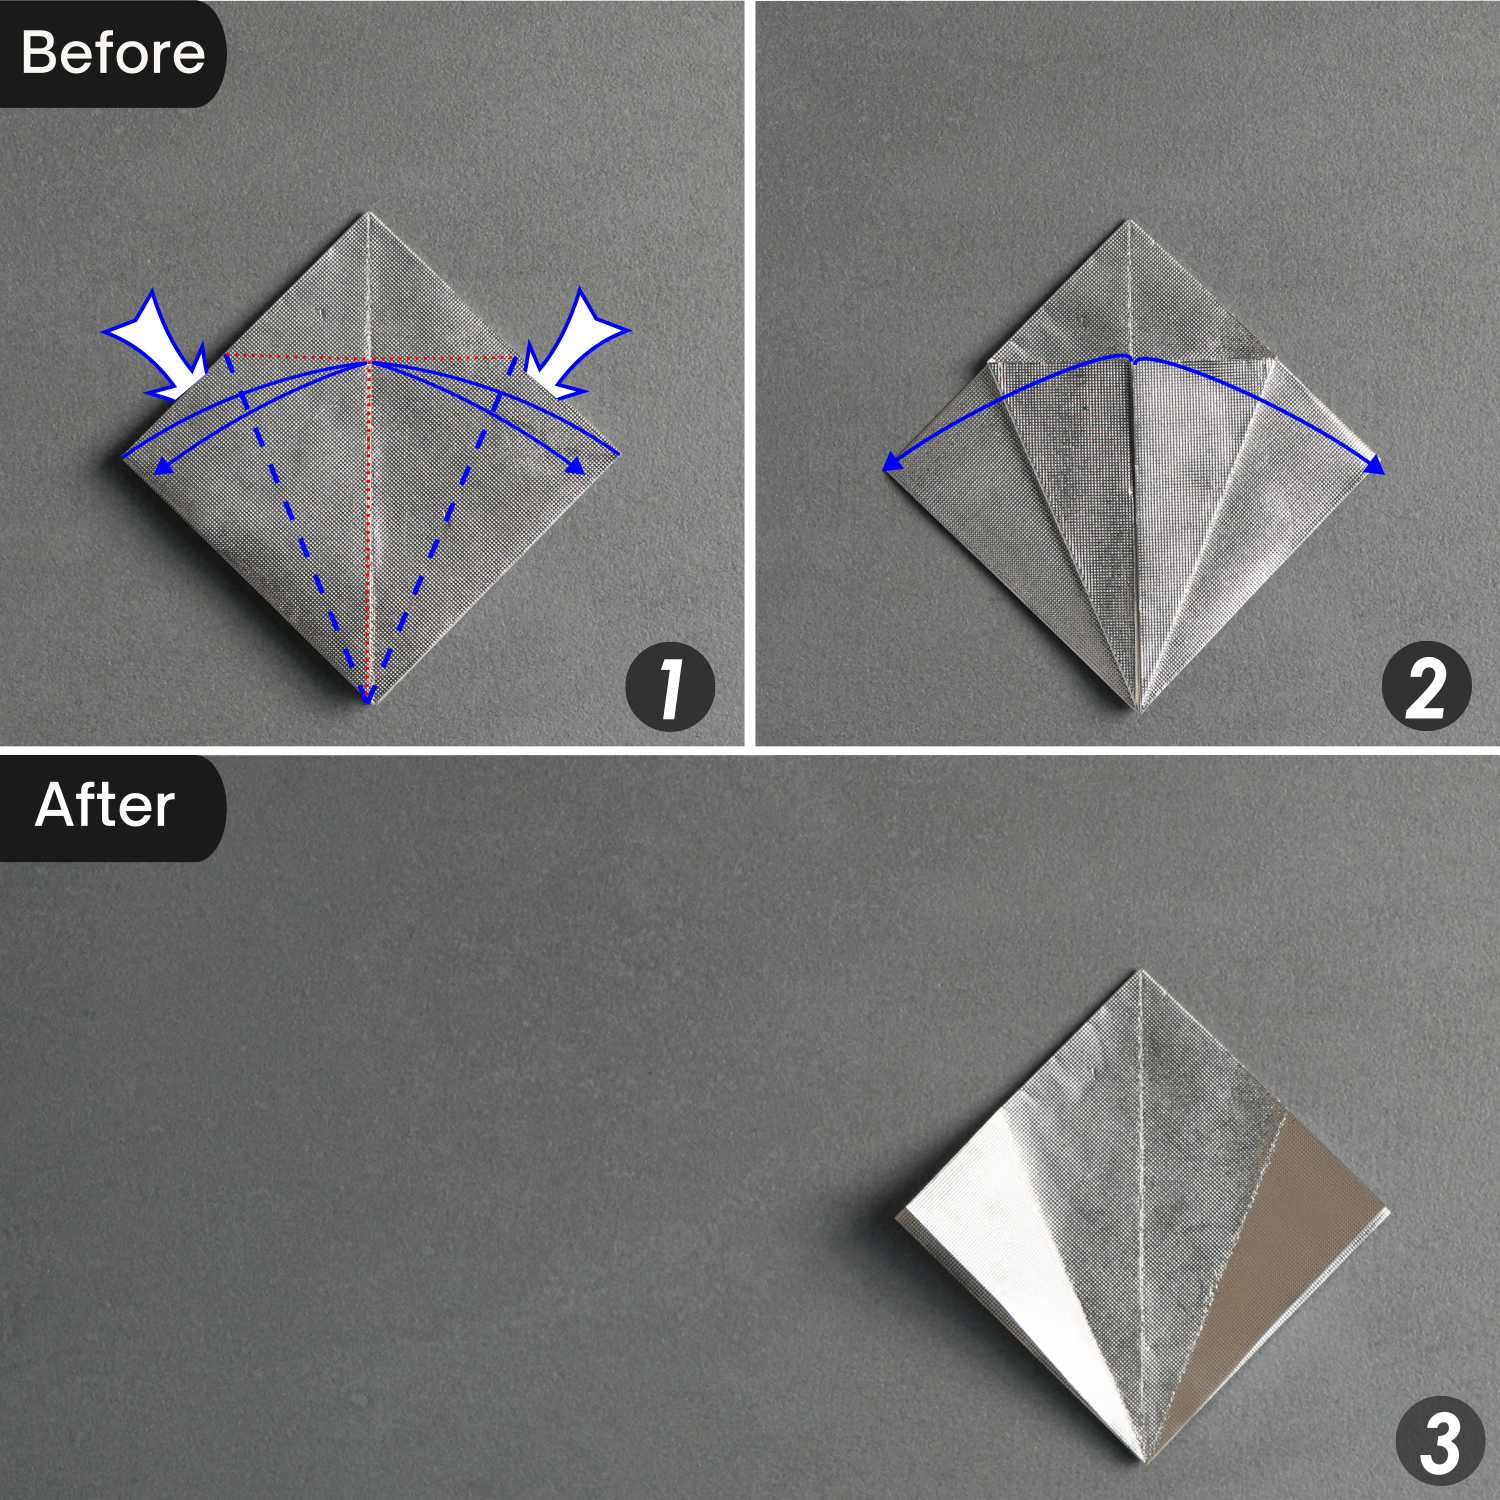
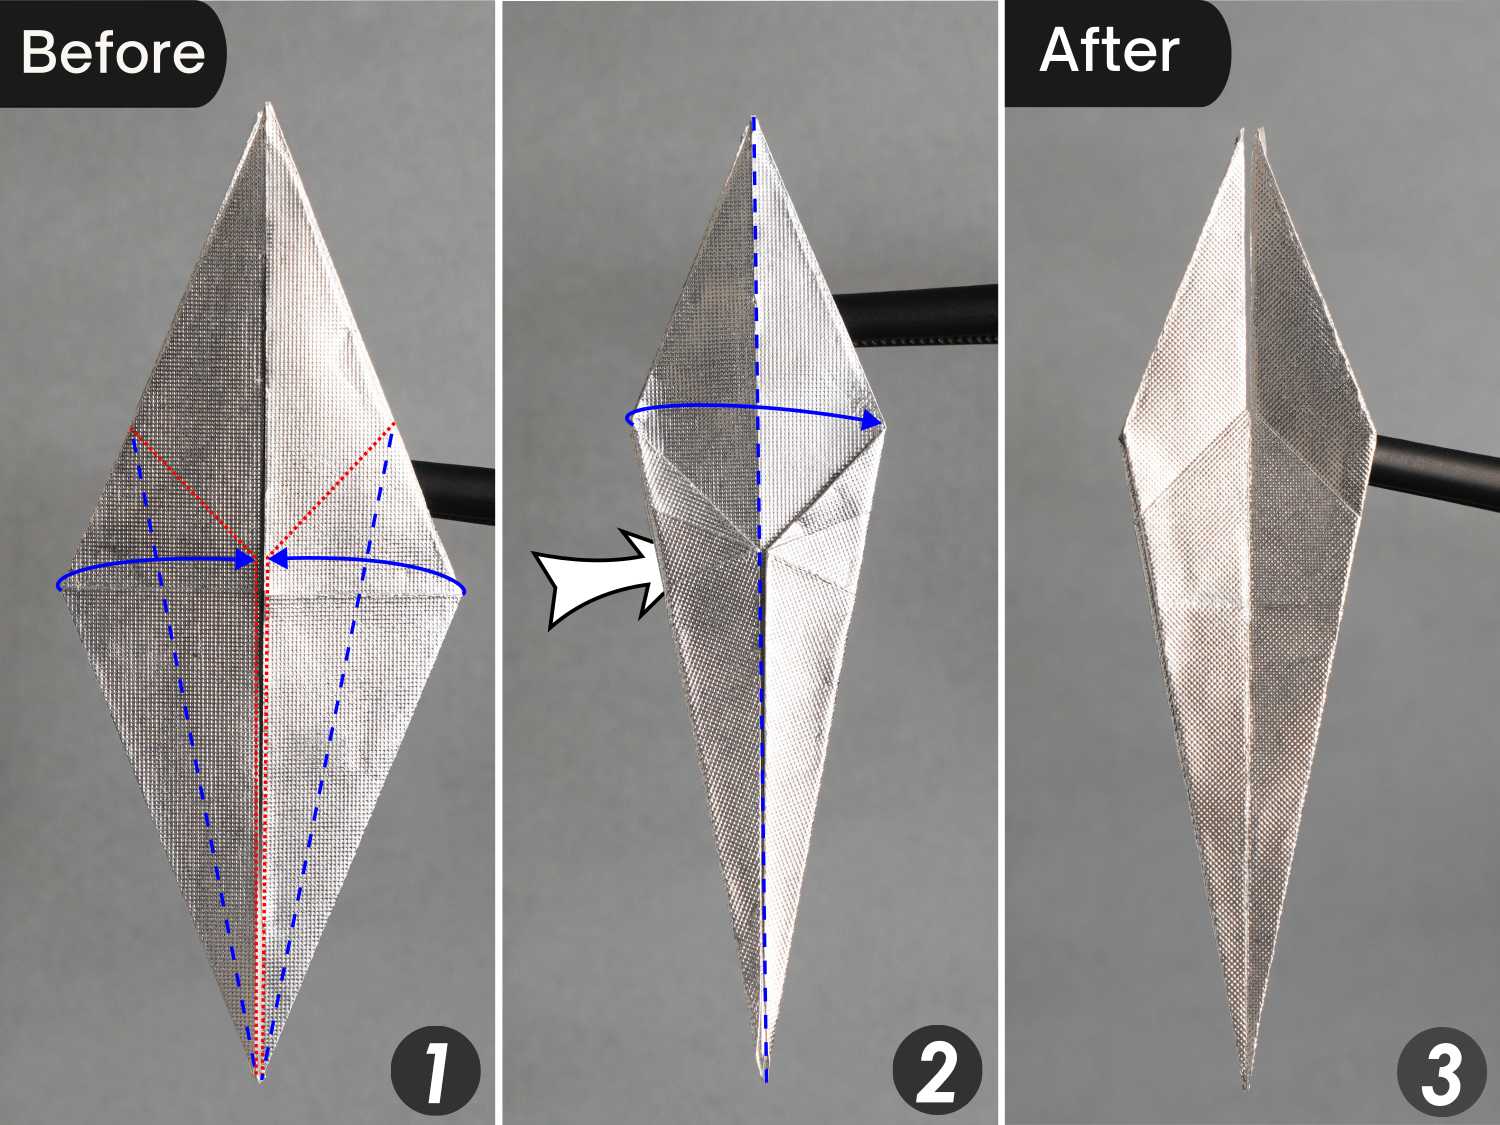
Step 9
Fold down the top corner along the dotted line connecting two red spots, leaving a crease, and unfold it.

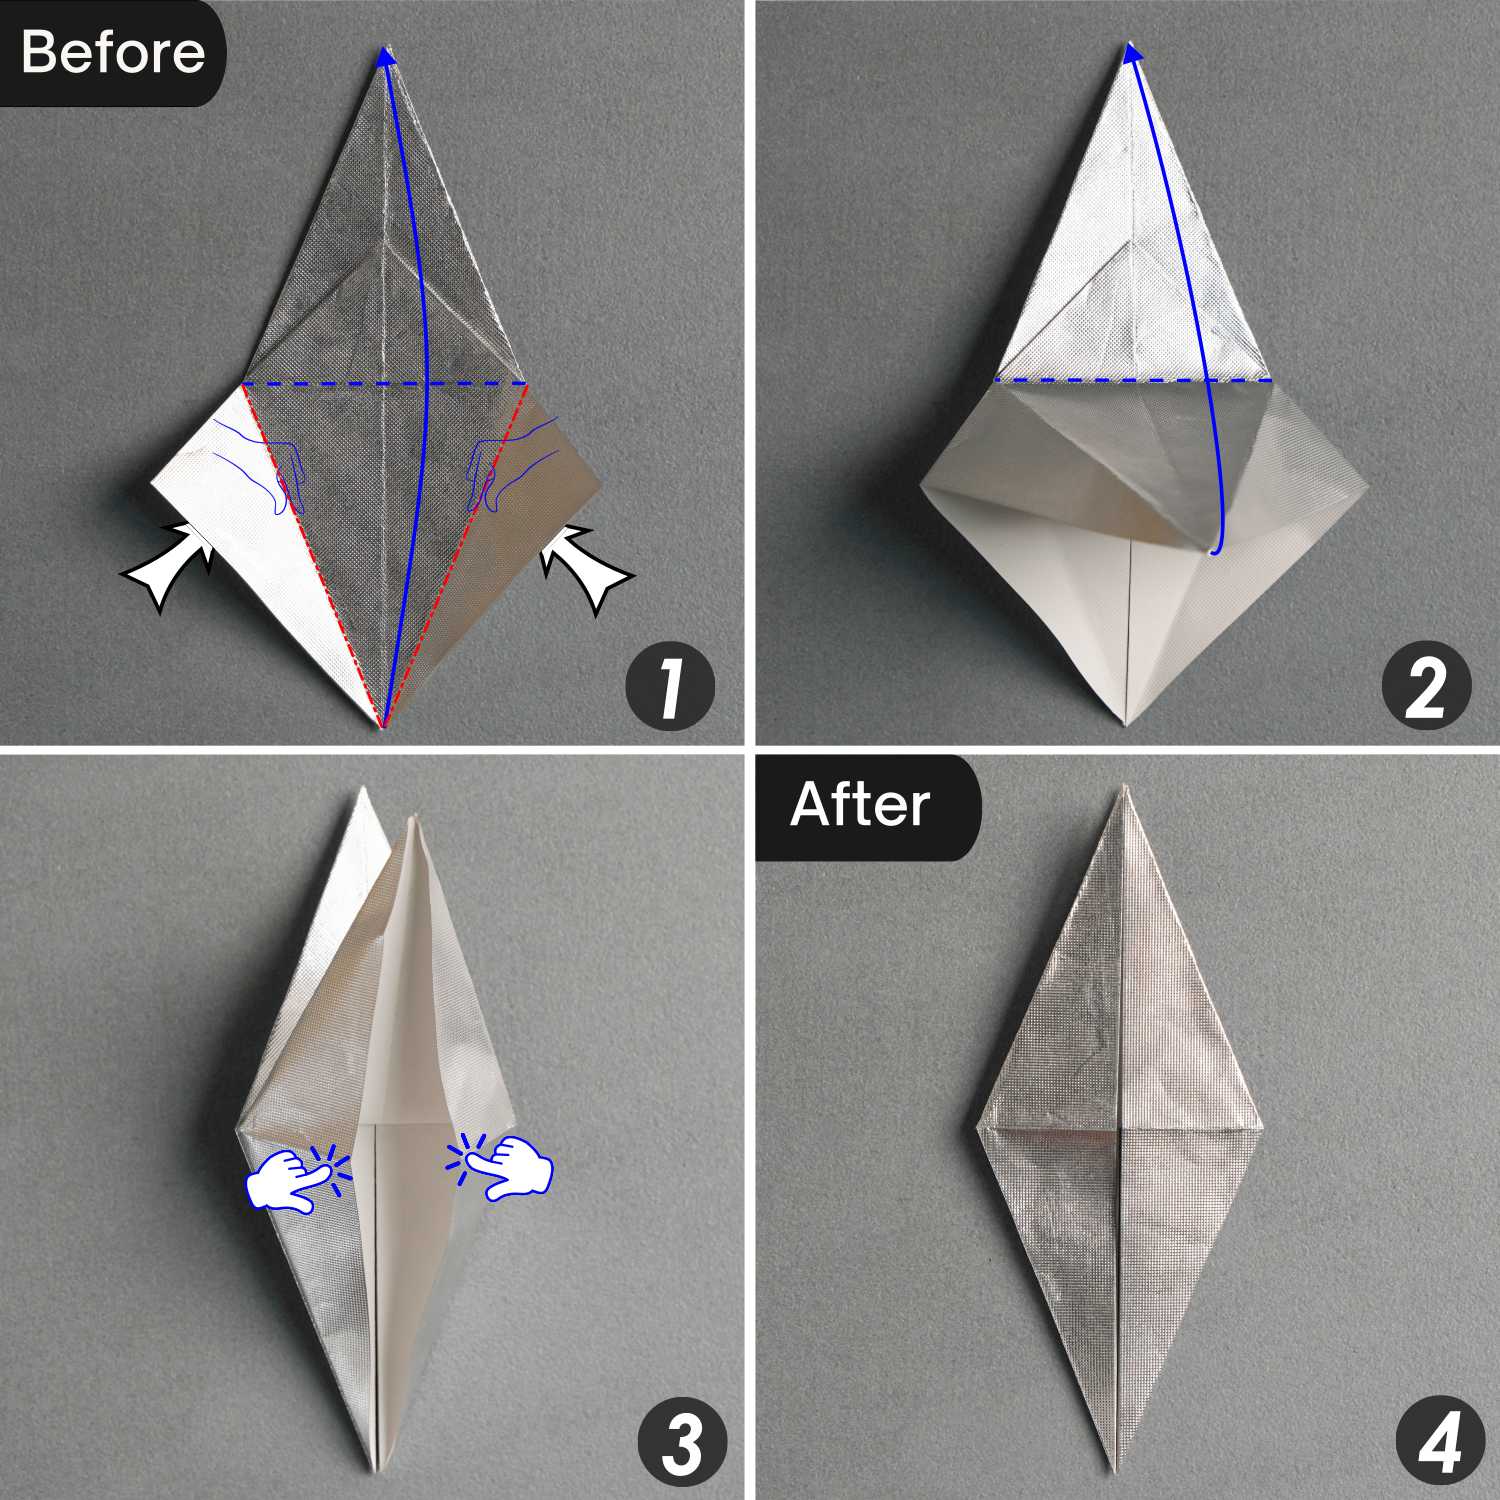
Step 10
Fold the bottom point of the top layer up along the crease you just made to open the pocket, and mountain fold the creases indicated by the red dotted lines.
While take the left and right corners, and fold them to the center. Finally, flatten the fold.
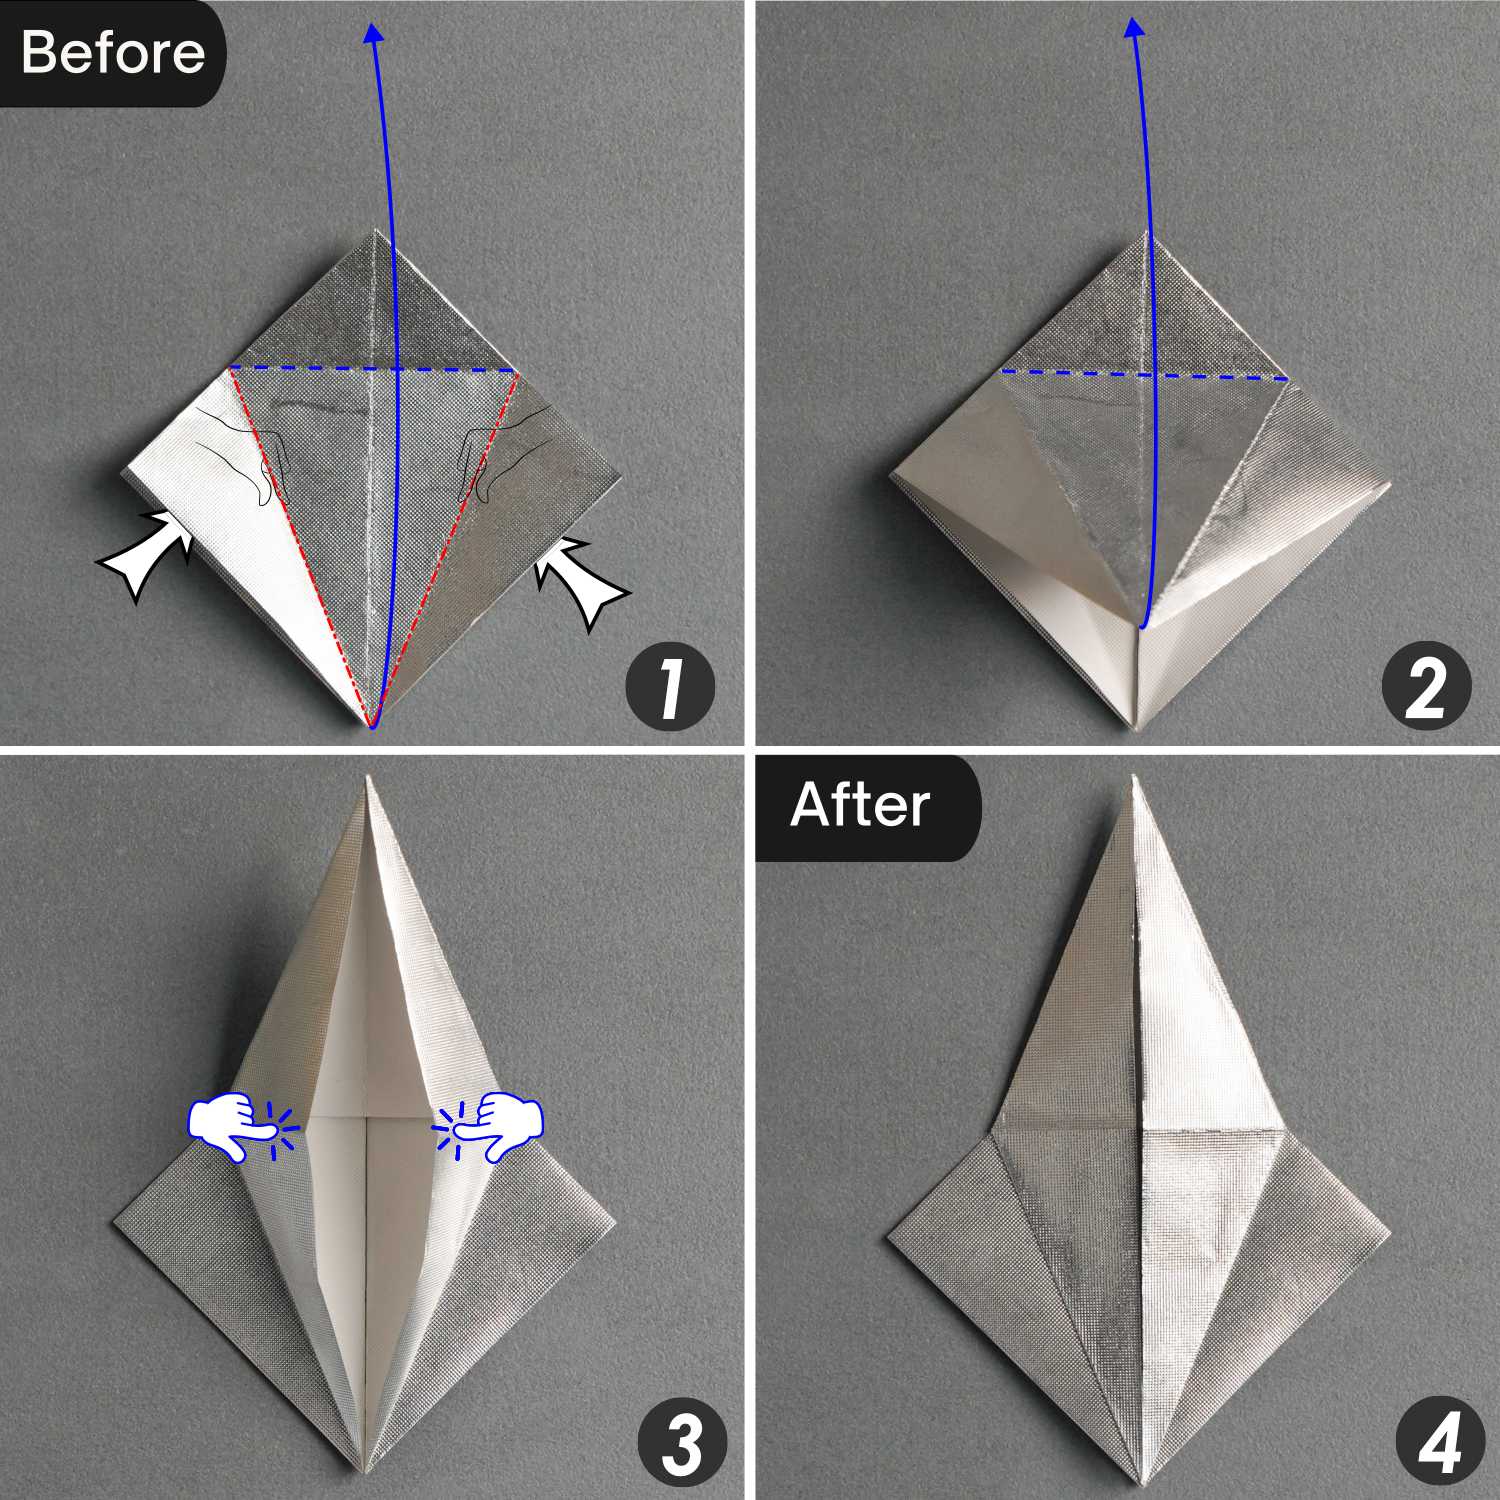
Step 11
Flip the paper from left to right.
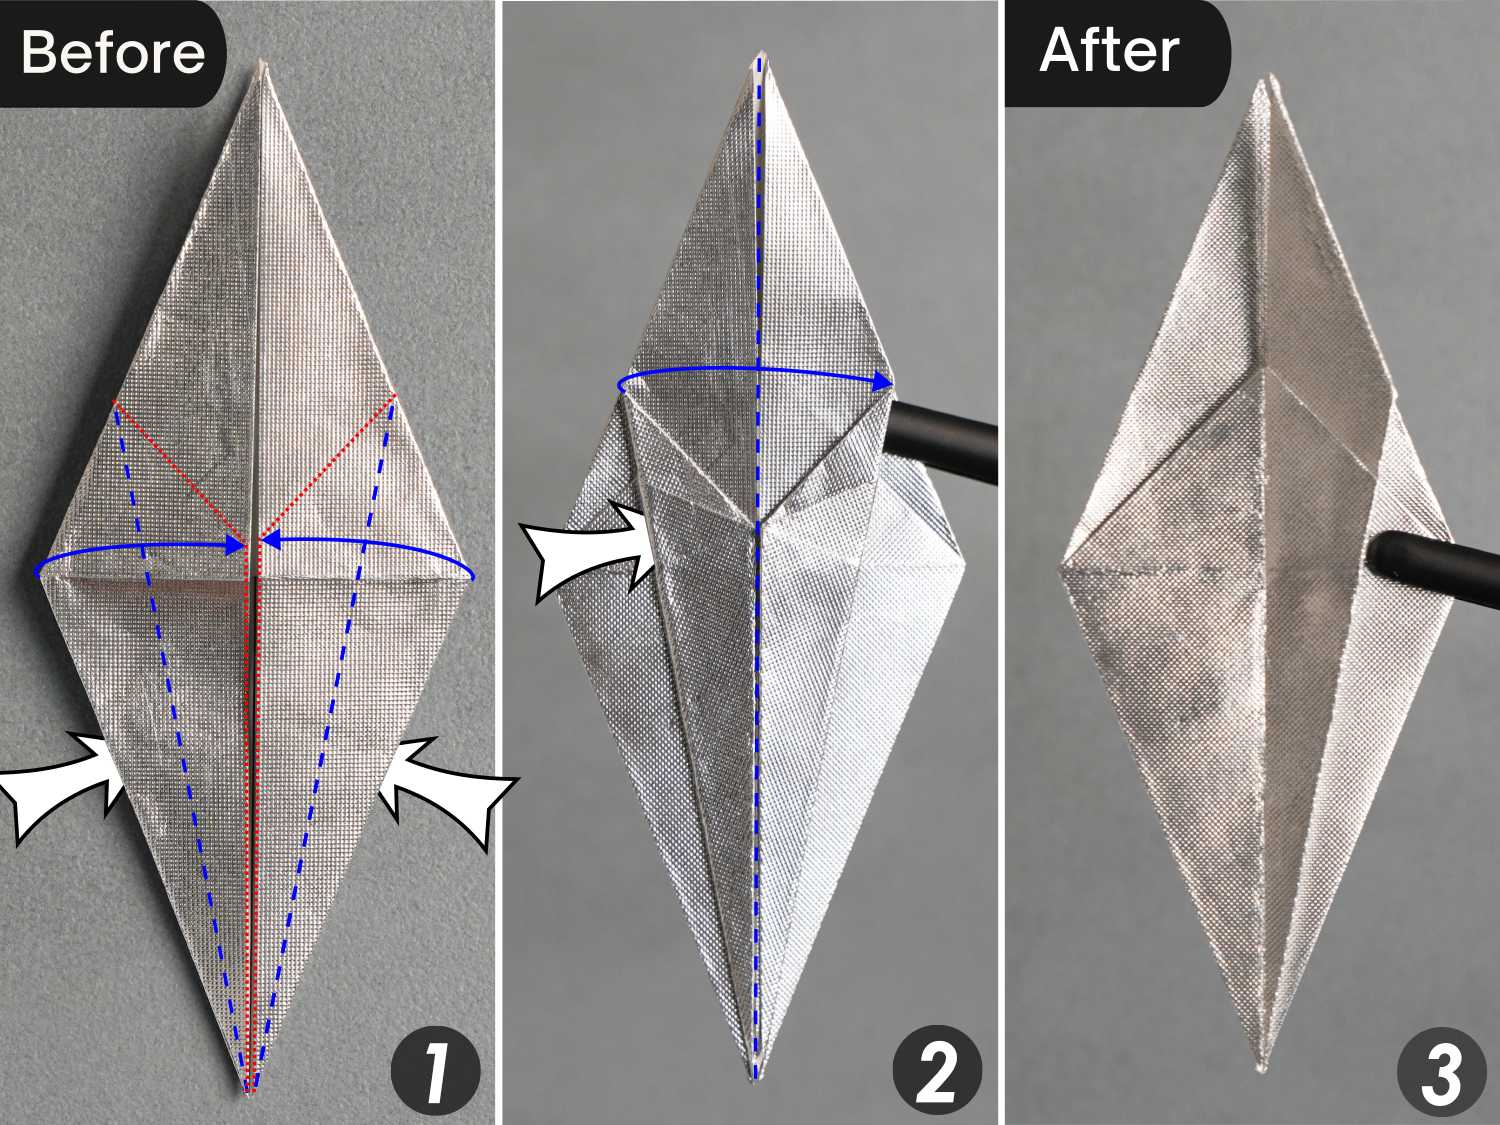
Step 12
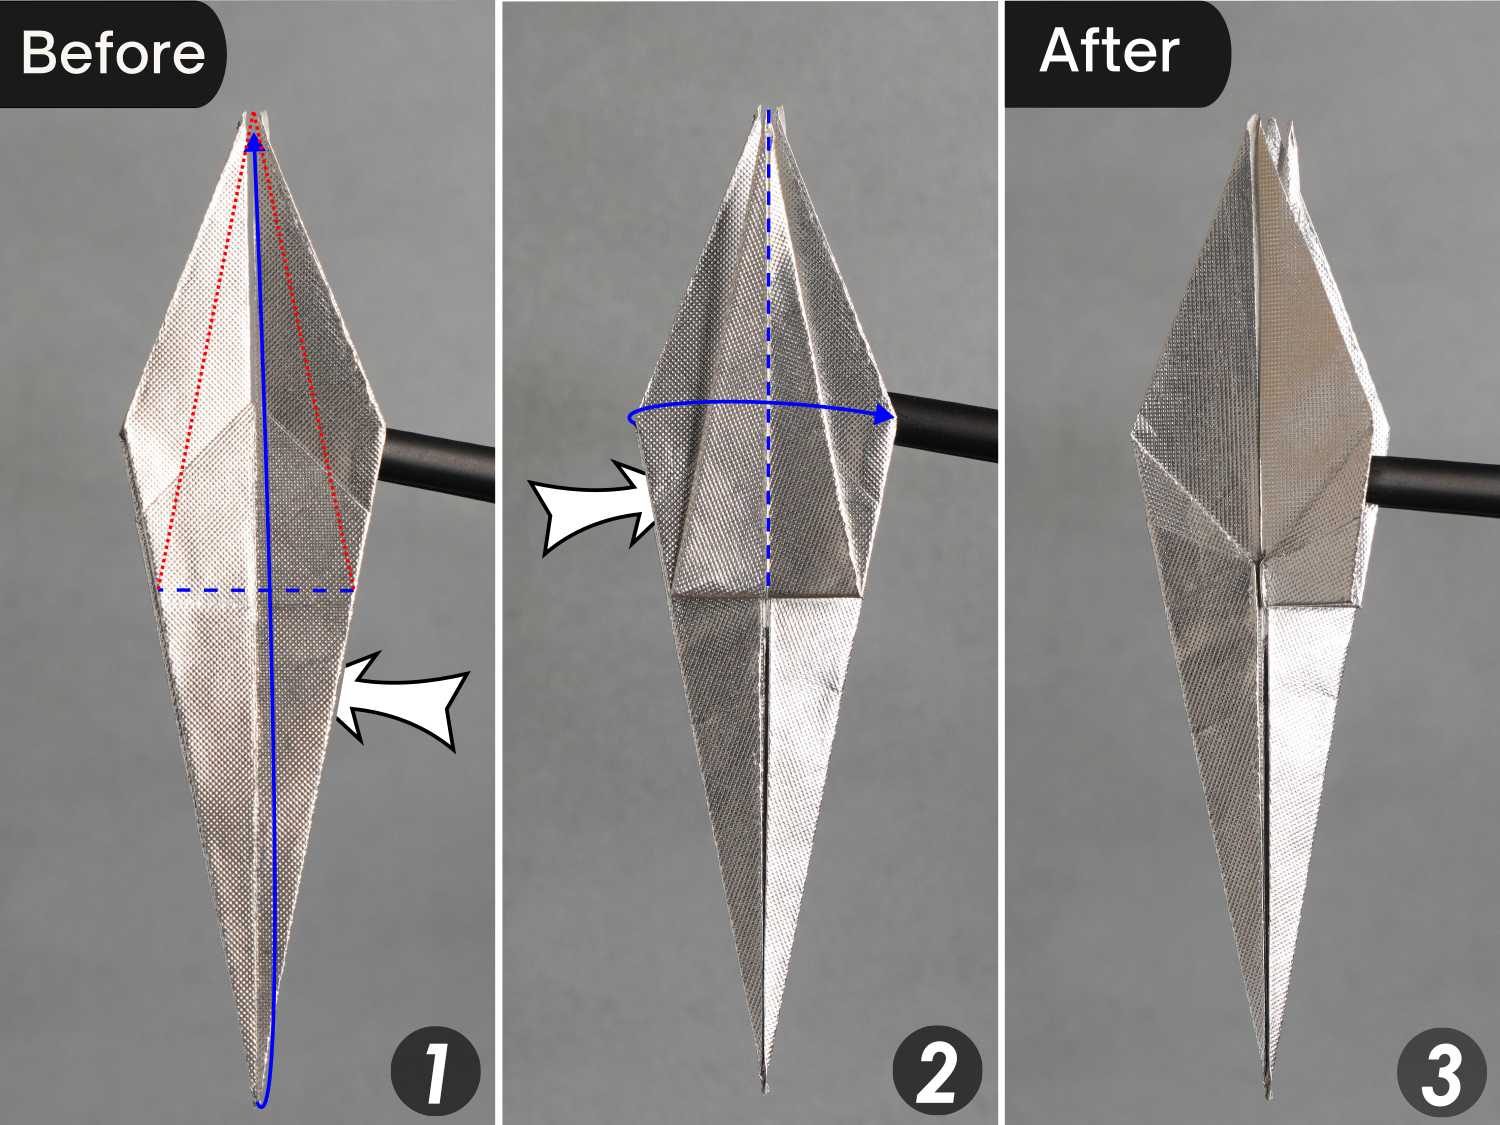
Fold the bottom left and right edges to align with the center vertical crease. Crease them well, and unfold them.
Step 13
Repeat step 10.
Fold the bottom point of the top layer up along the crease you just made to open the pocket, and mountain fold the creases indicated by the red dotted lines.
While take the left and right corners, and fold them to the center. Finally, flatten it.
Step 14
Fold the bottom left and right edges to align with the center vertical line, then fold the top layer on the left side to the right side.
Step 15
Flip the paper from left to right.
Step 16
Repeat step 14.
Fold the bottom left and right edges to align with the center vertical line, then fold the top layer on the left side to the right side.
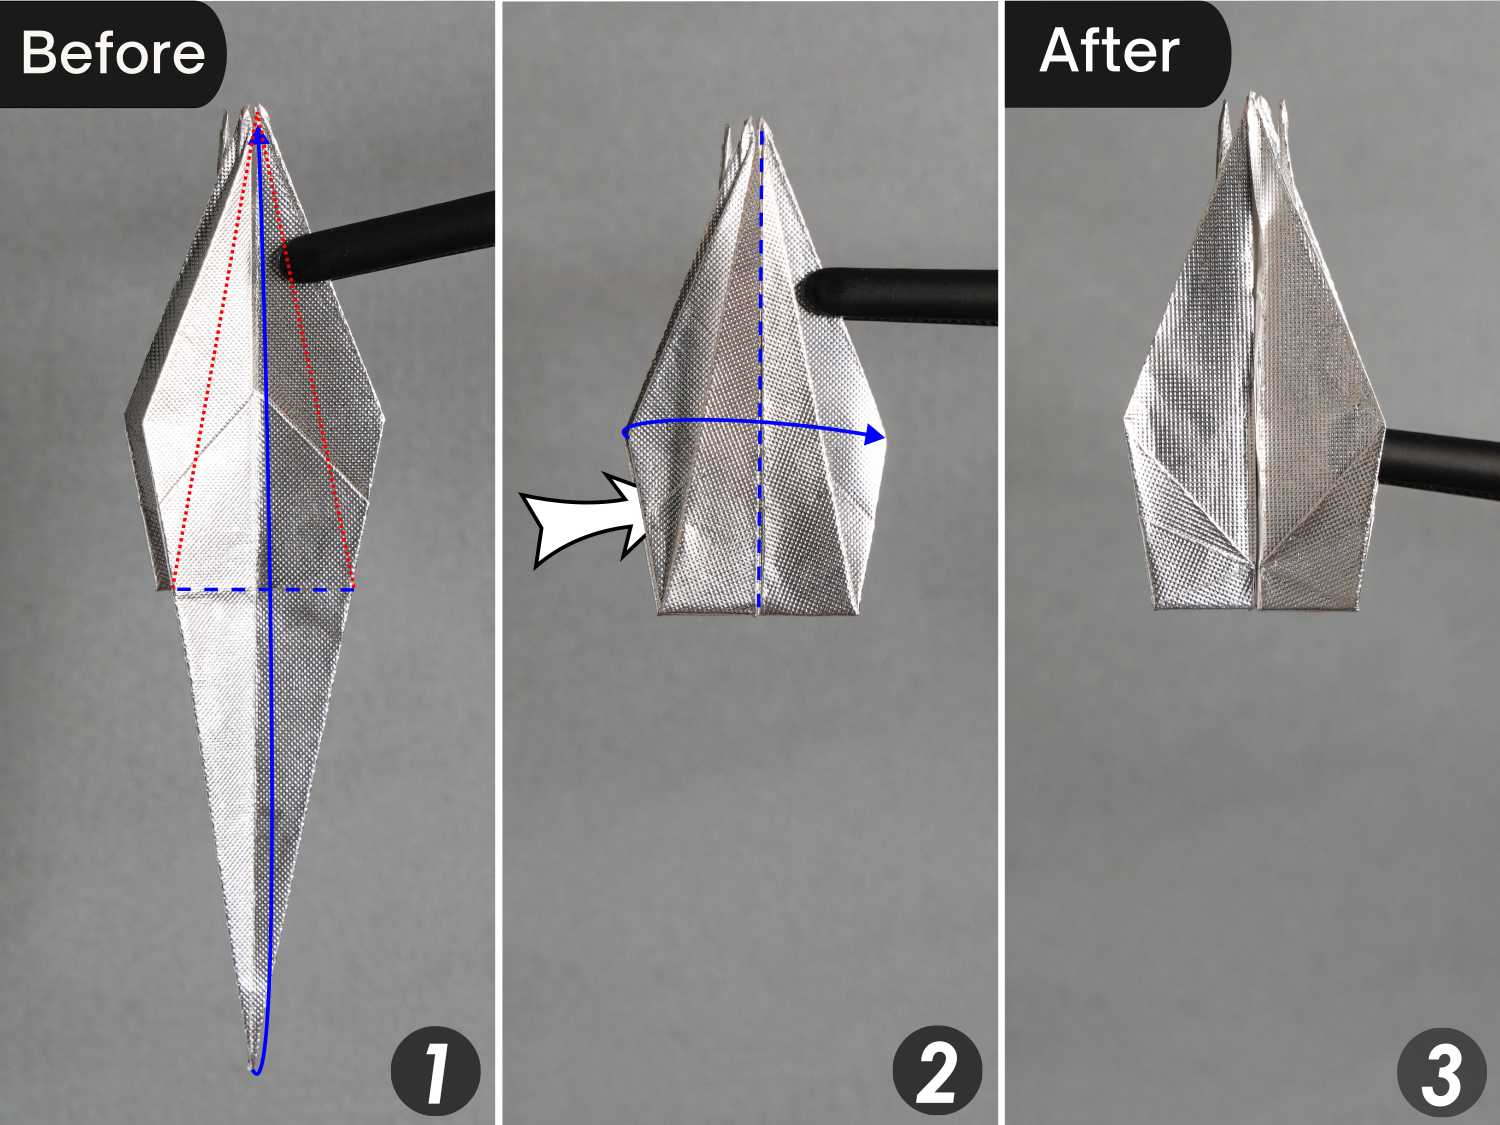
Step 17
Fold up the bottom corner of the top flap to meet the top corner, then fold the top layer on the left side to the right side.
Step 18
Turn the paper over from left to right.

Step 19
Repeat step 17.
Fold up the bottom corner to meet the top corner, then fold the top layer on the left side to the right side.
Step 20
Pull the top and bottom layers to the sides to inflate the center part; they would serve as the crane’s two wings.
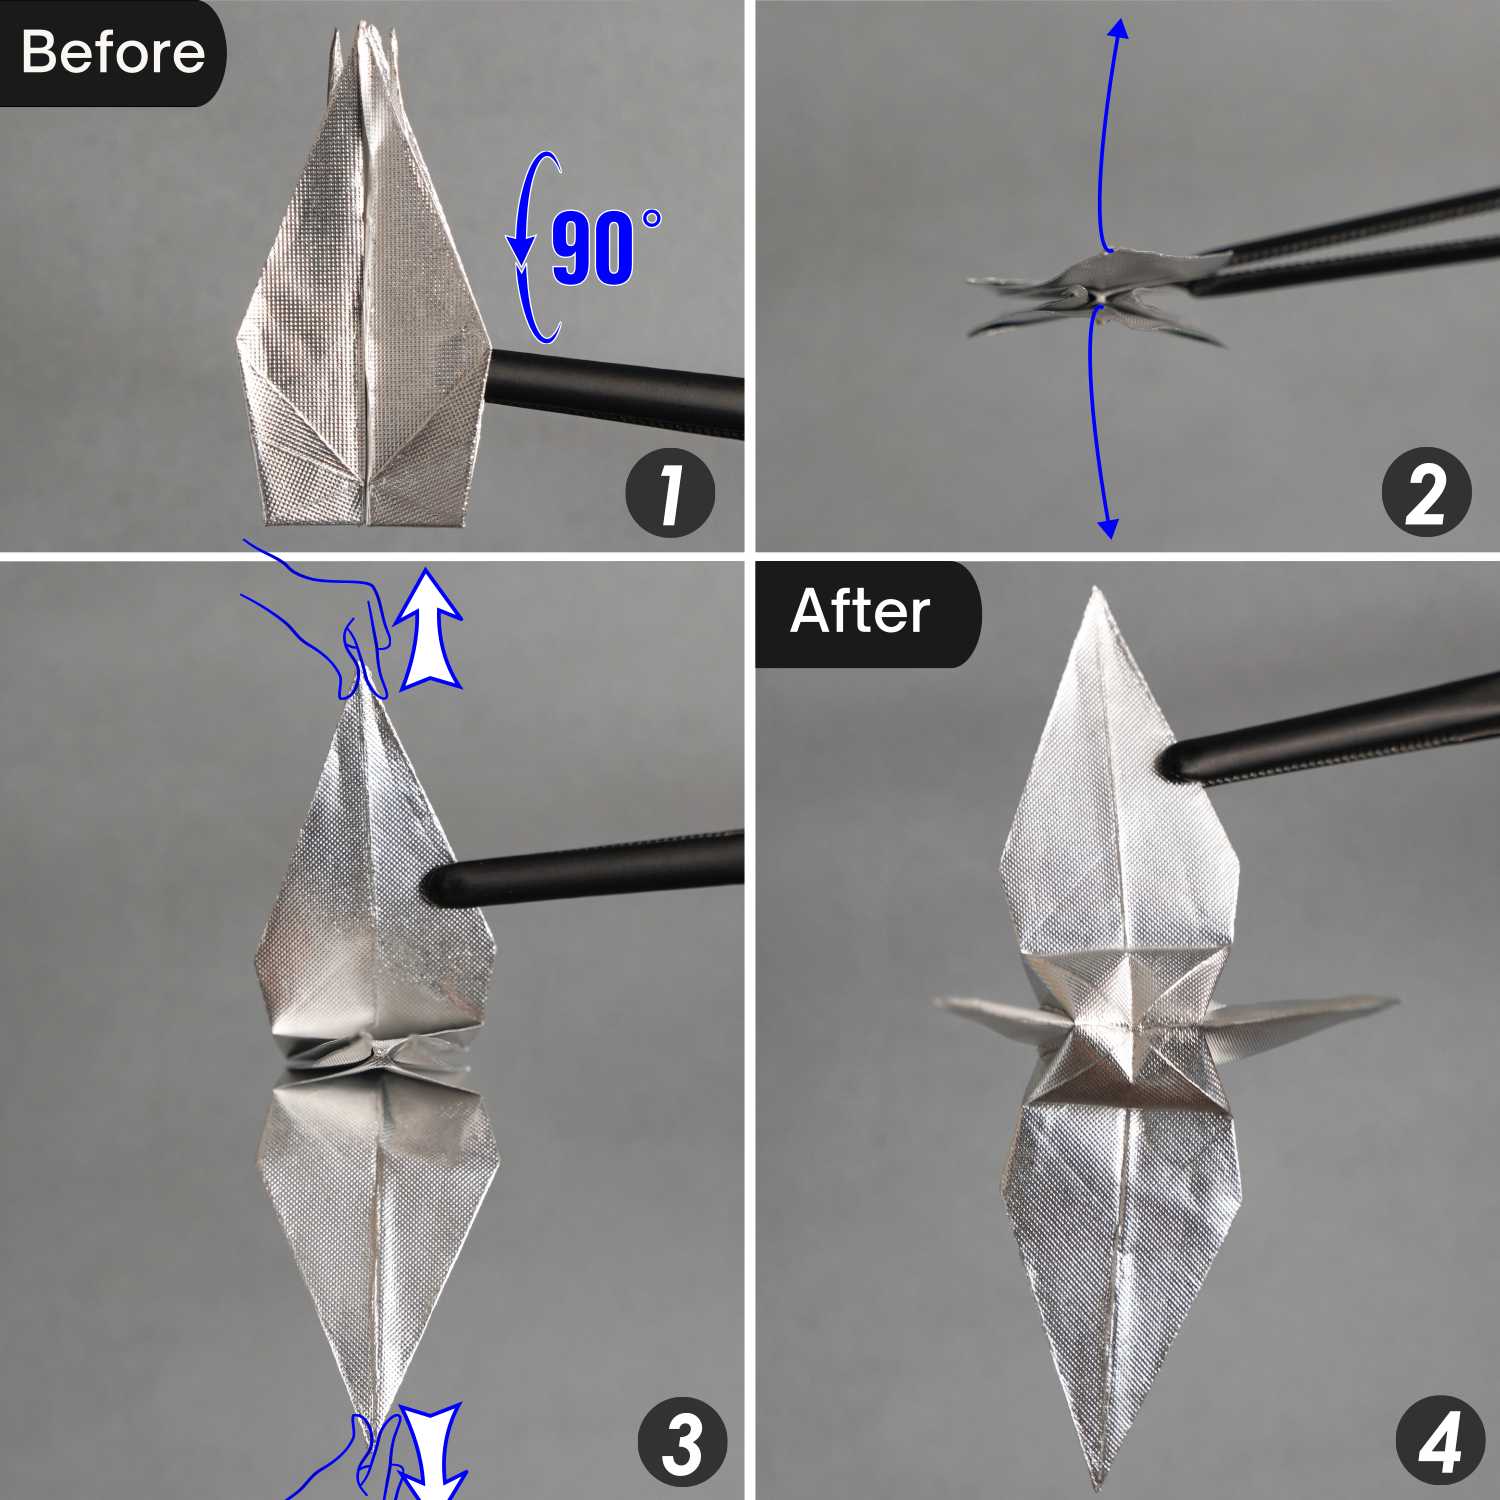
Step 21
Fold down the tip of the right flap along the red dotted line [picture 1], then valley fold the center horizontal crease of this folded section to complete the folding of the head. [picture 2].
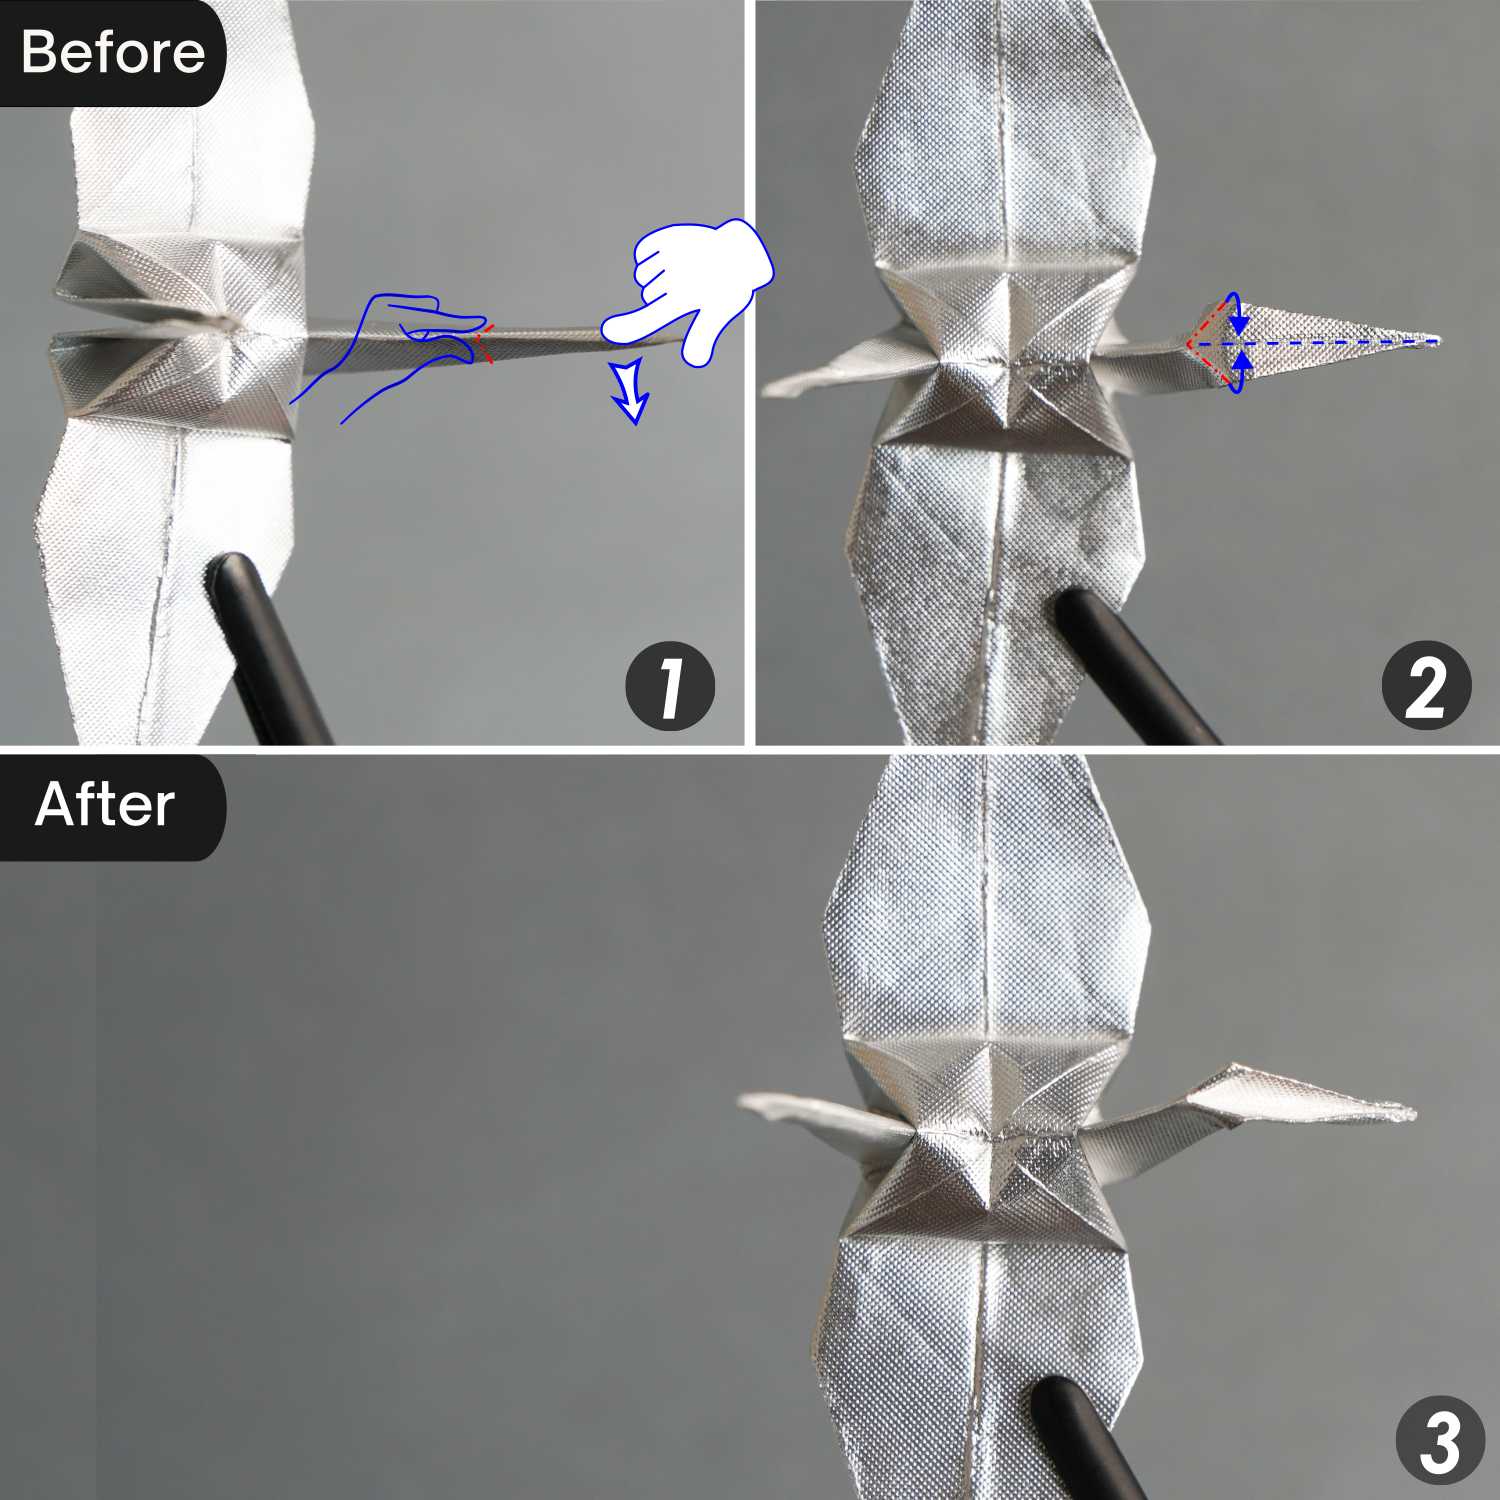
Step 22
This is the final shape of your gum wrapper origami crane.