Easy Dollar Bill Origami Owl Instruction
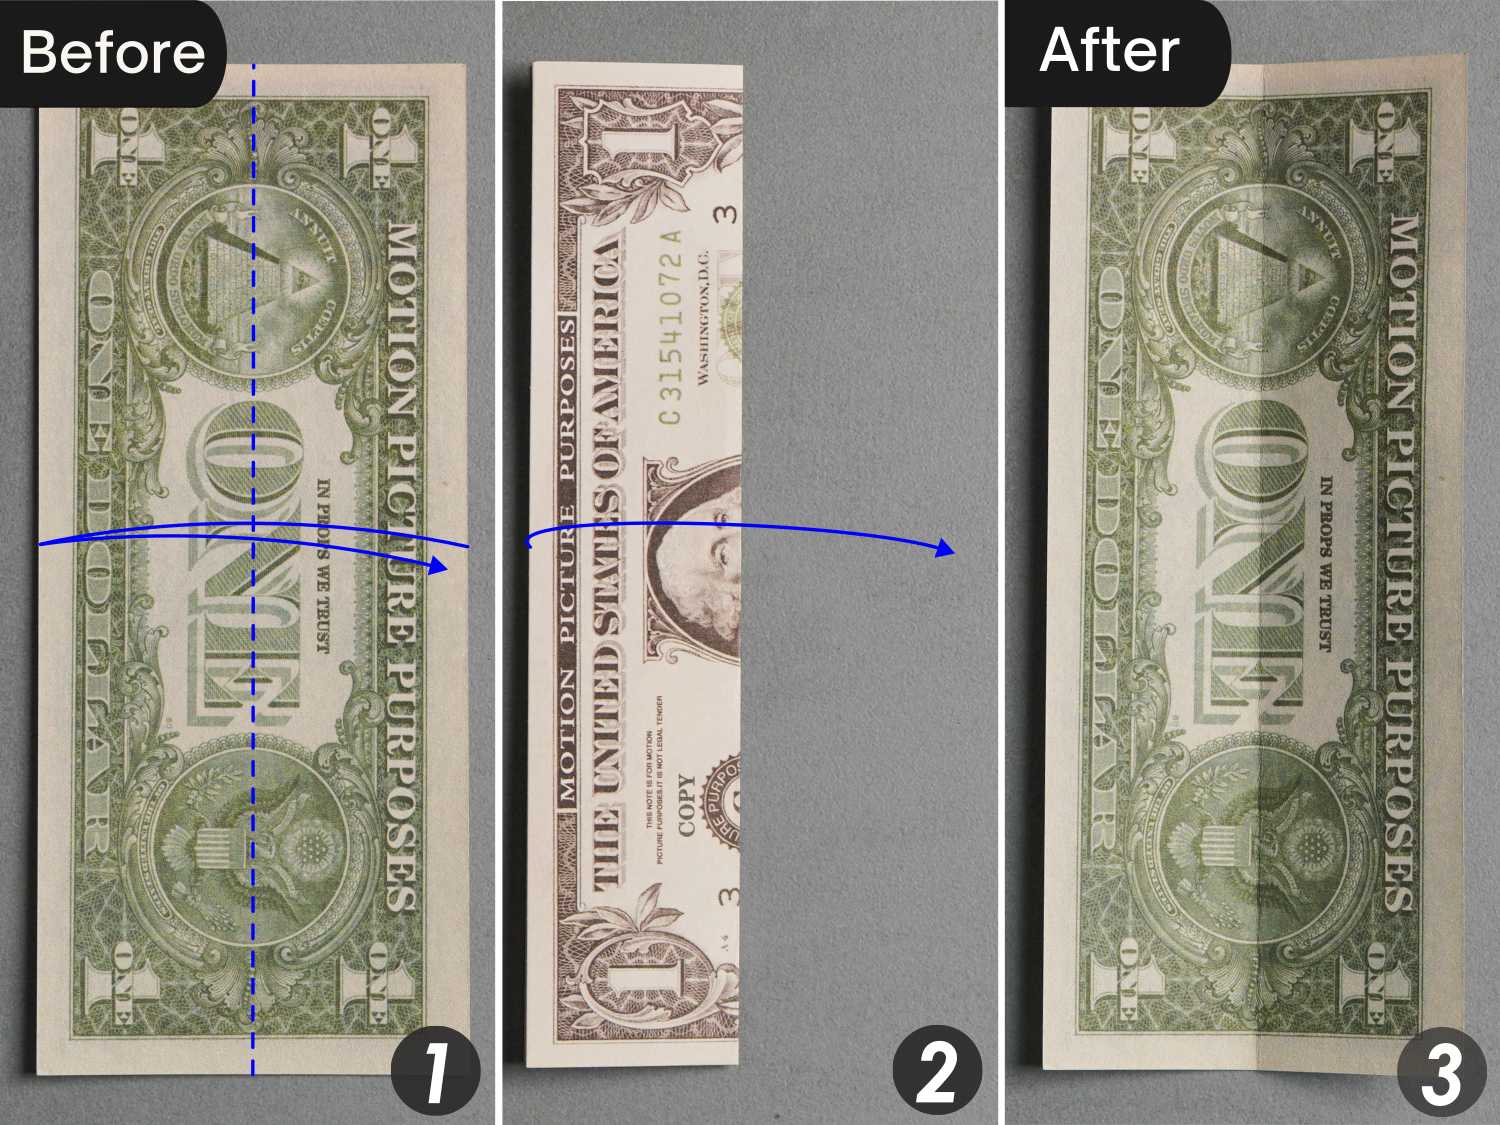
Step 1
Fold the bill in half vertically, leaving a crease, and unfold it.
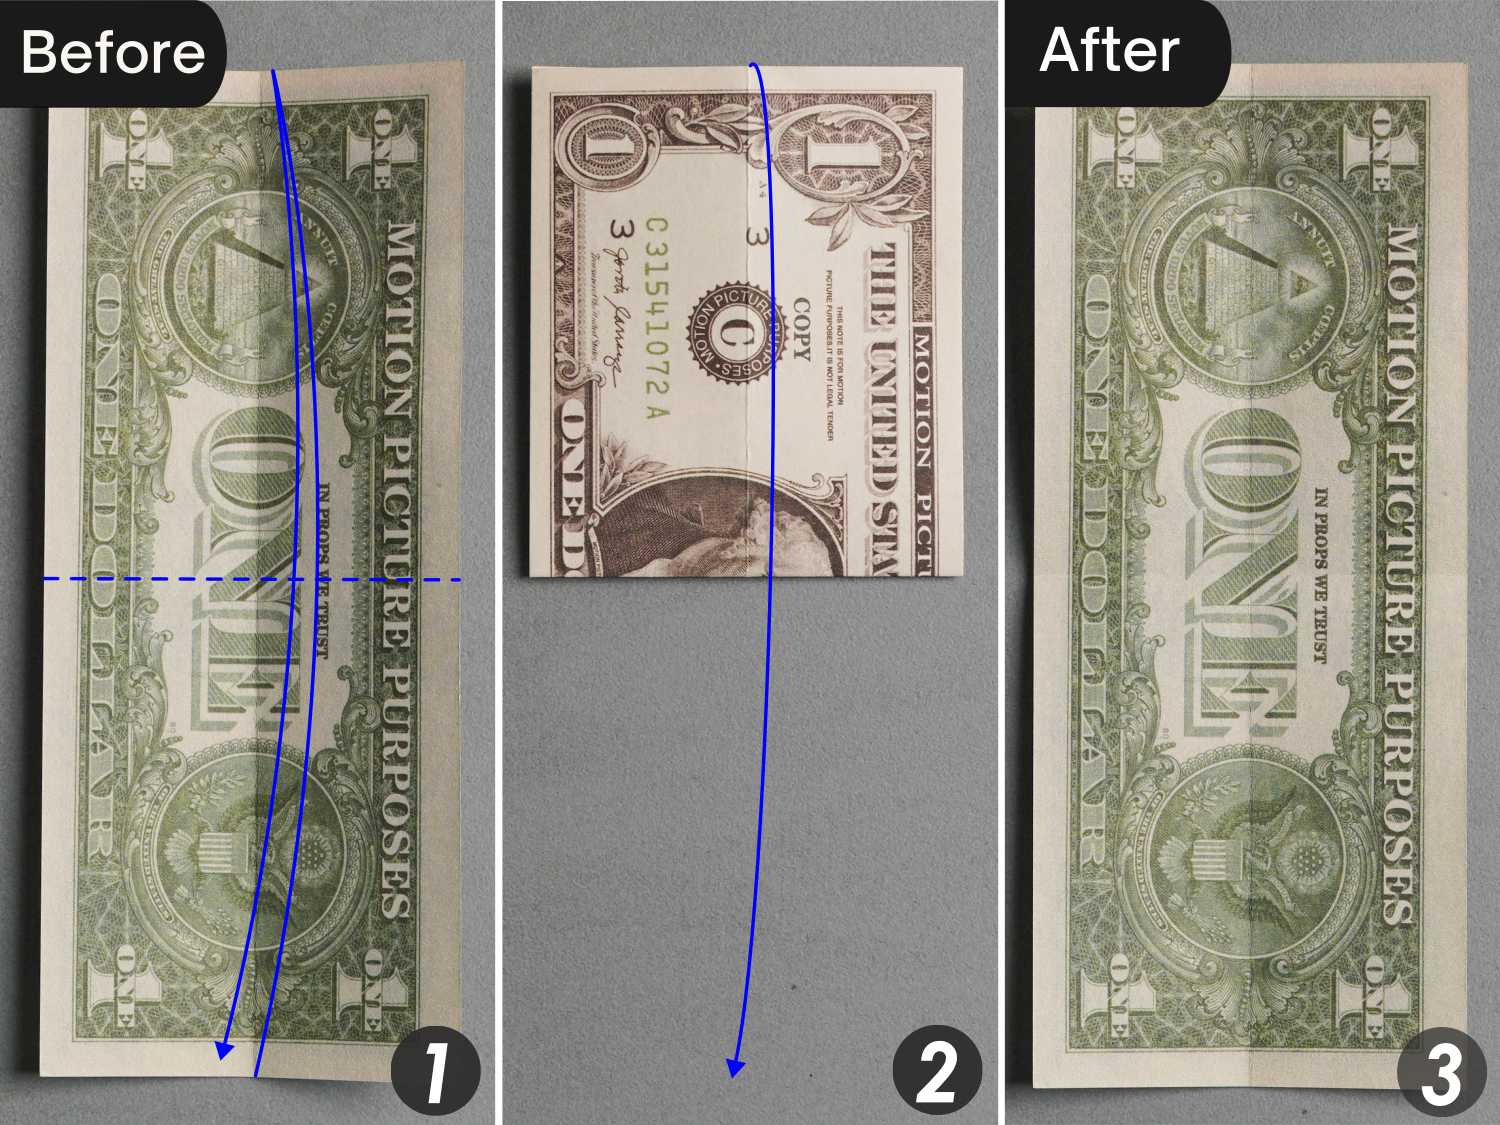
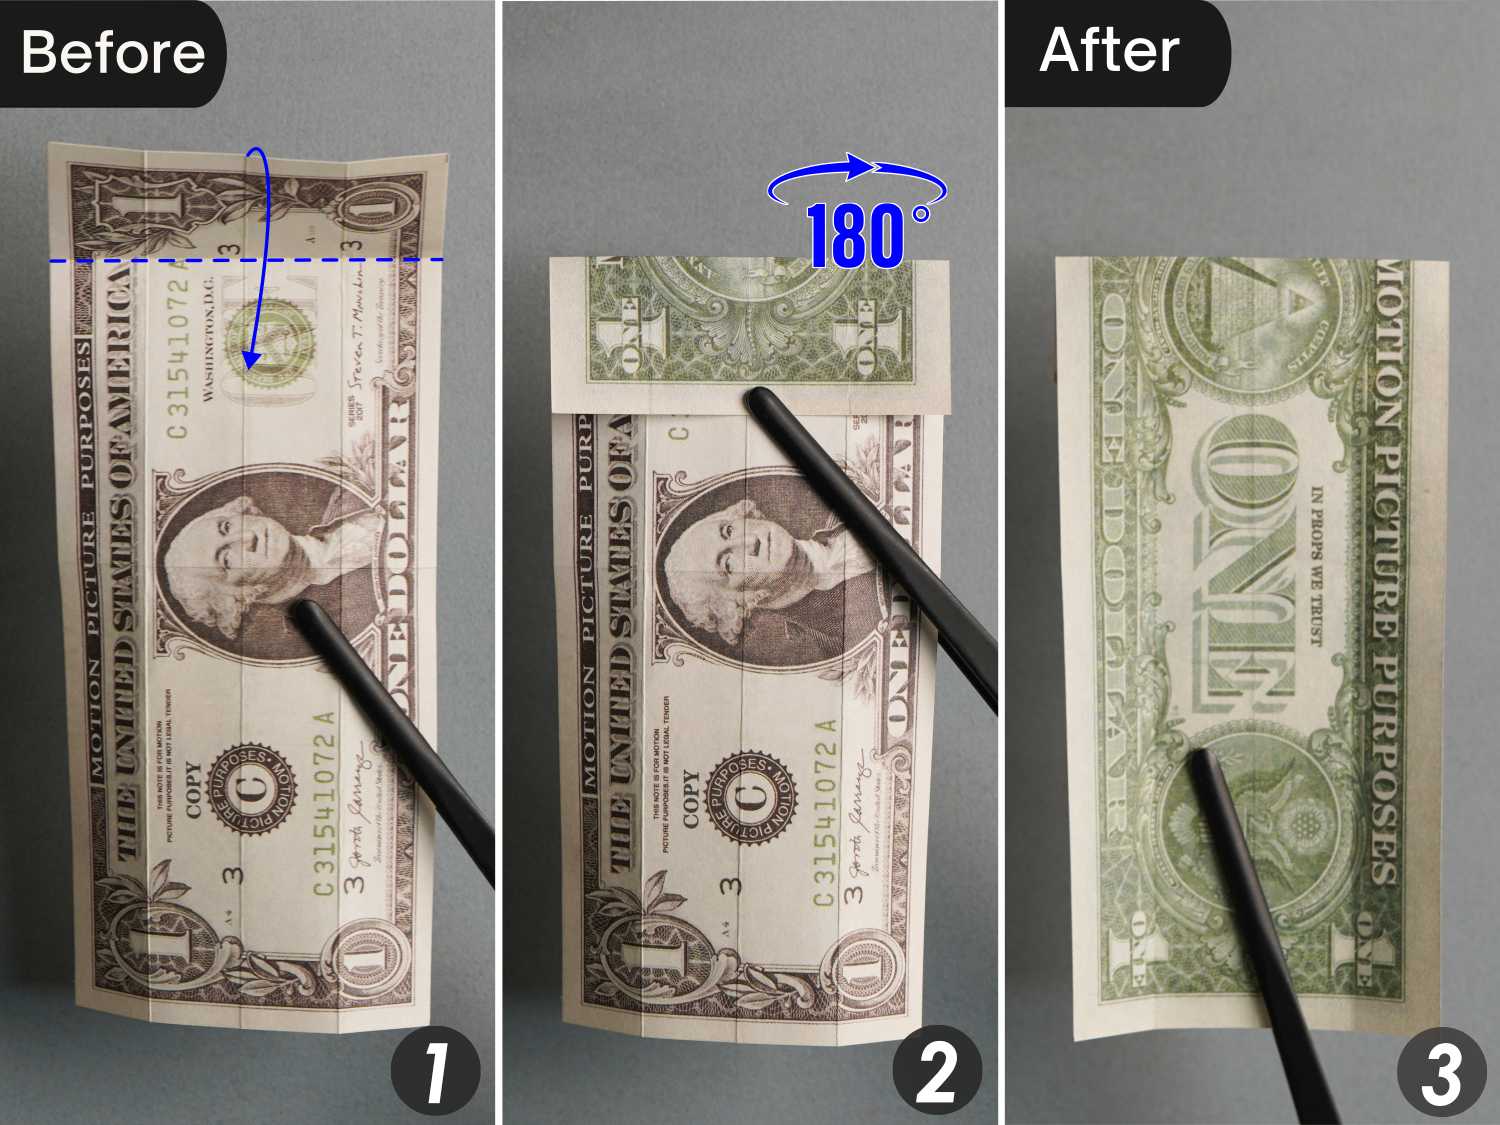
Step 2
Fold the bill in half horizontally, leaving a crease, and unfold it.
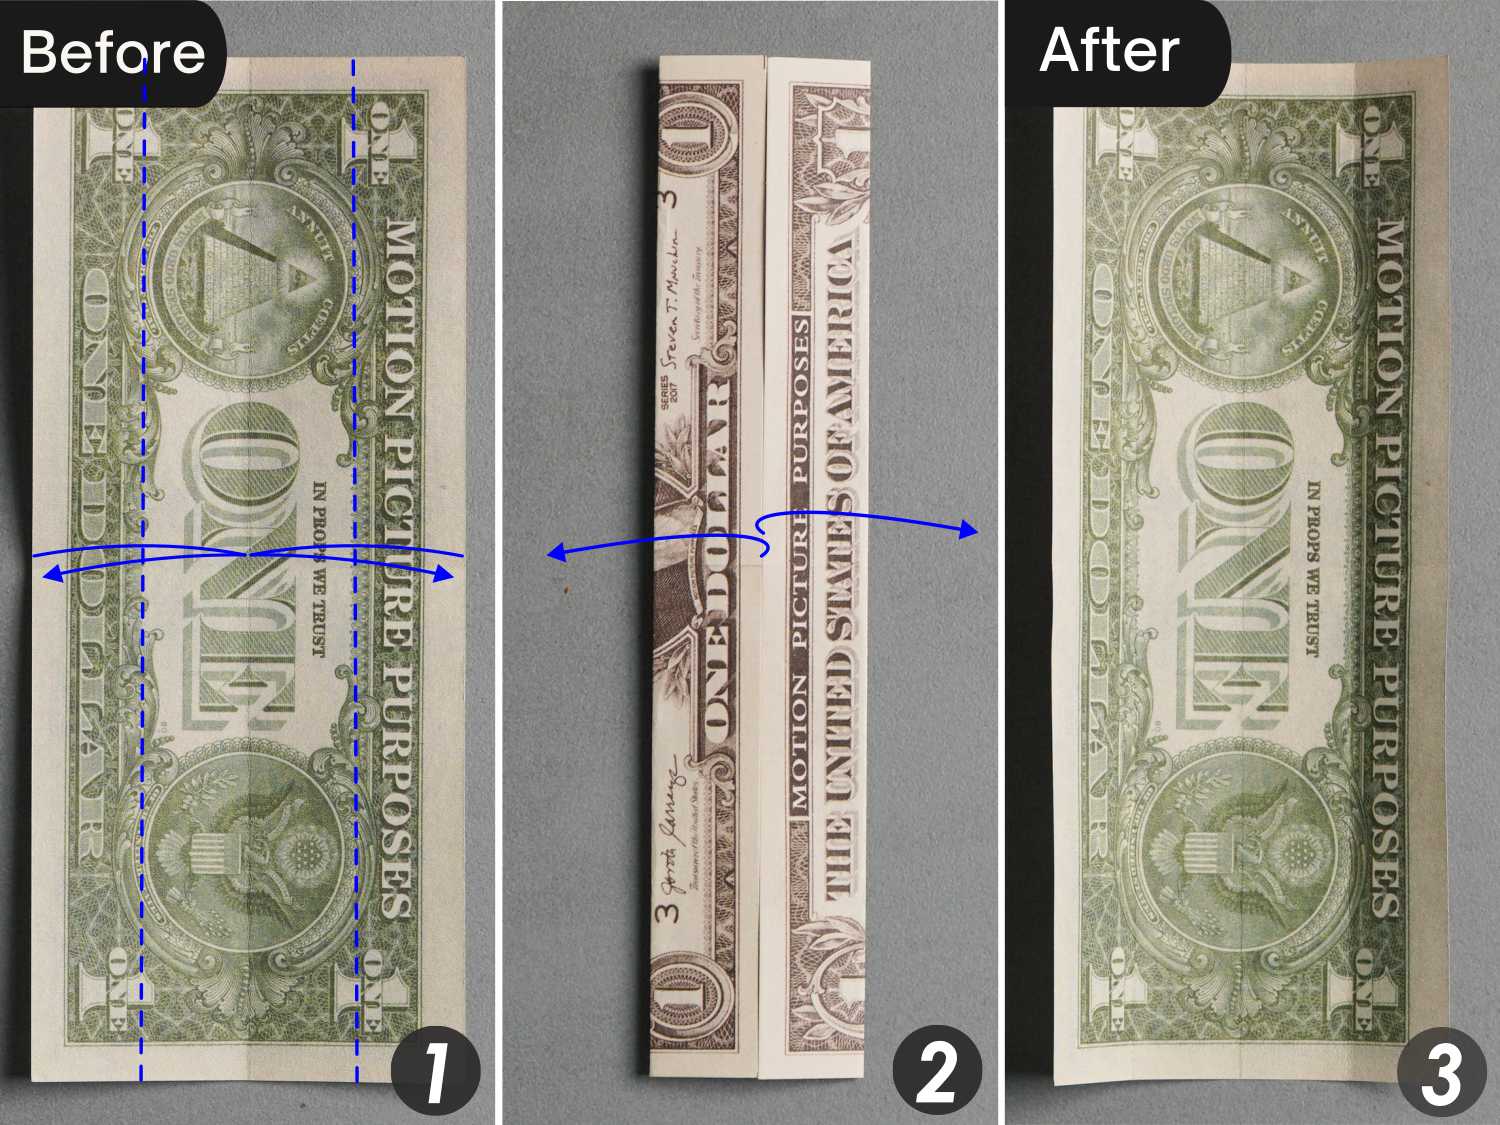
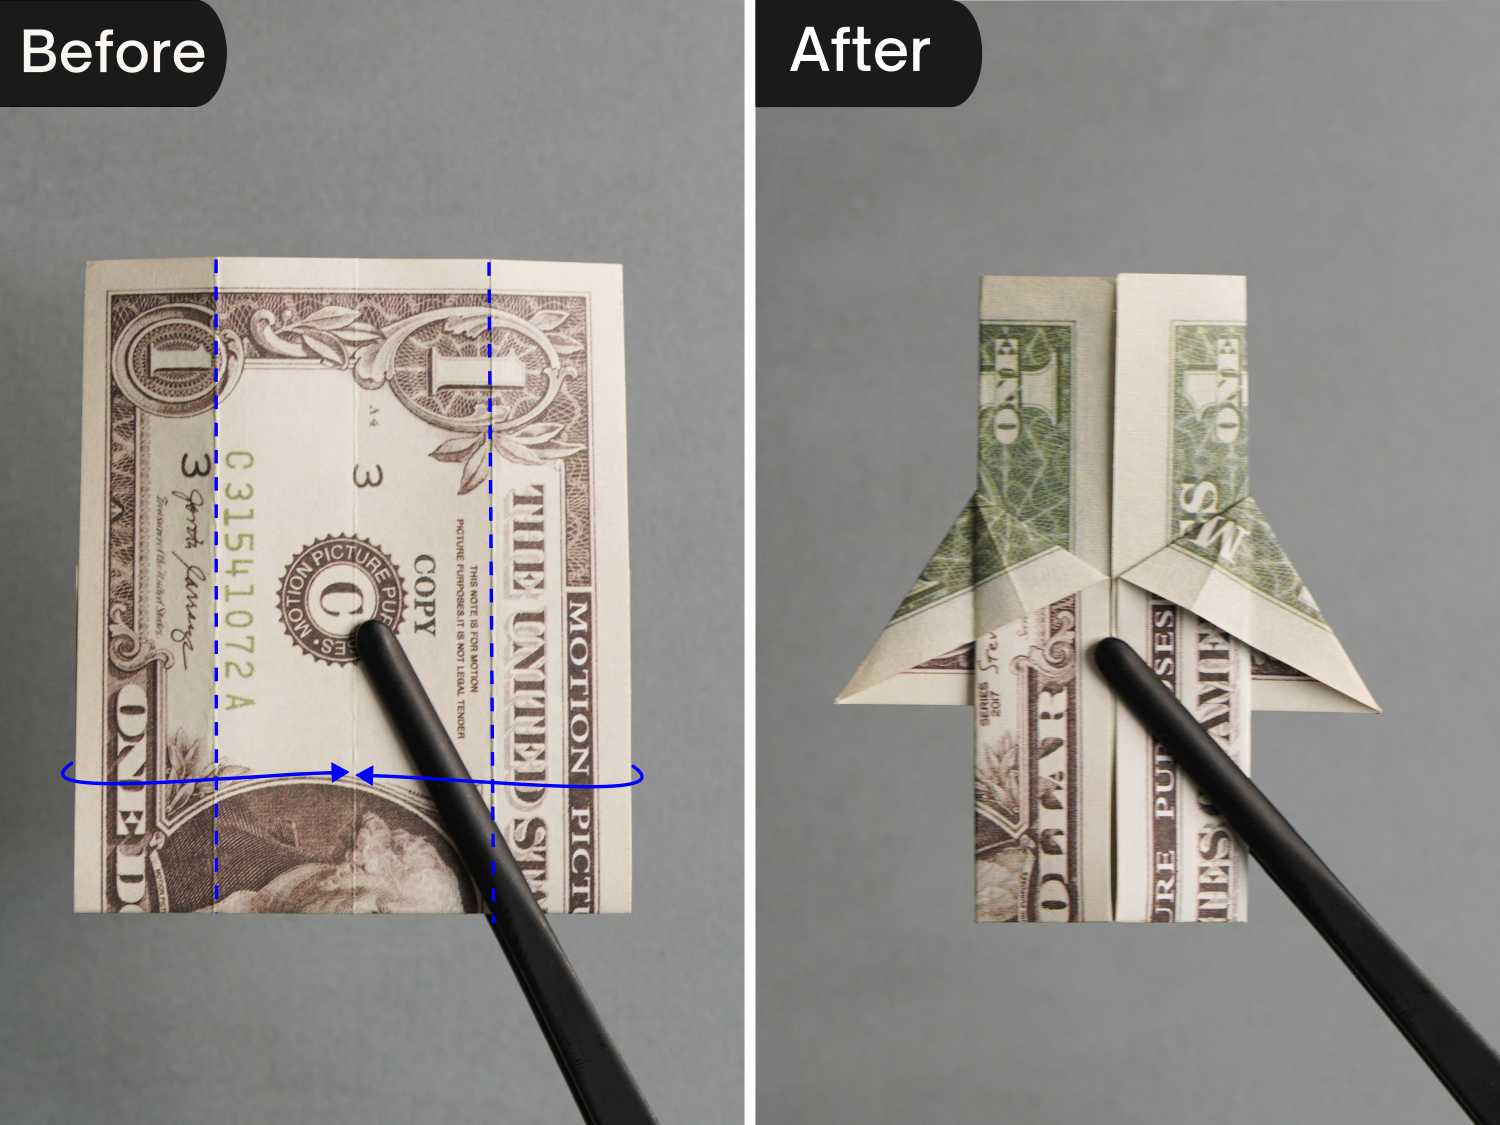
Step 3
Fold the left and right edges to align with the vertical crease, crease them well, and unfold them.
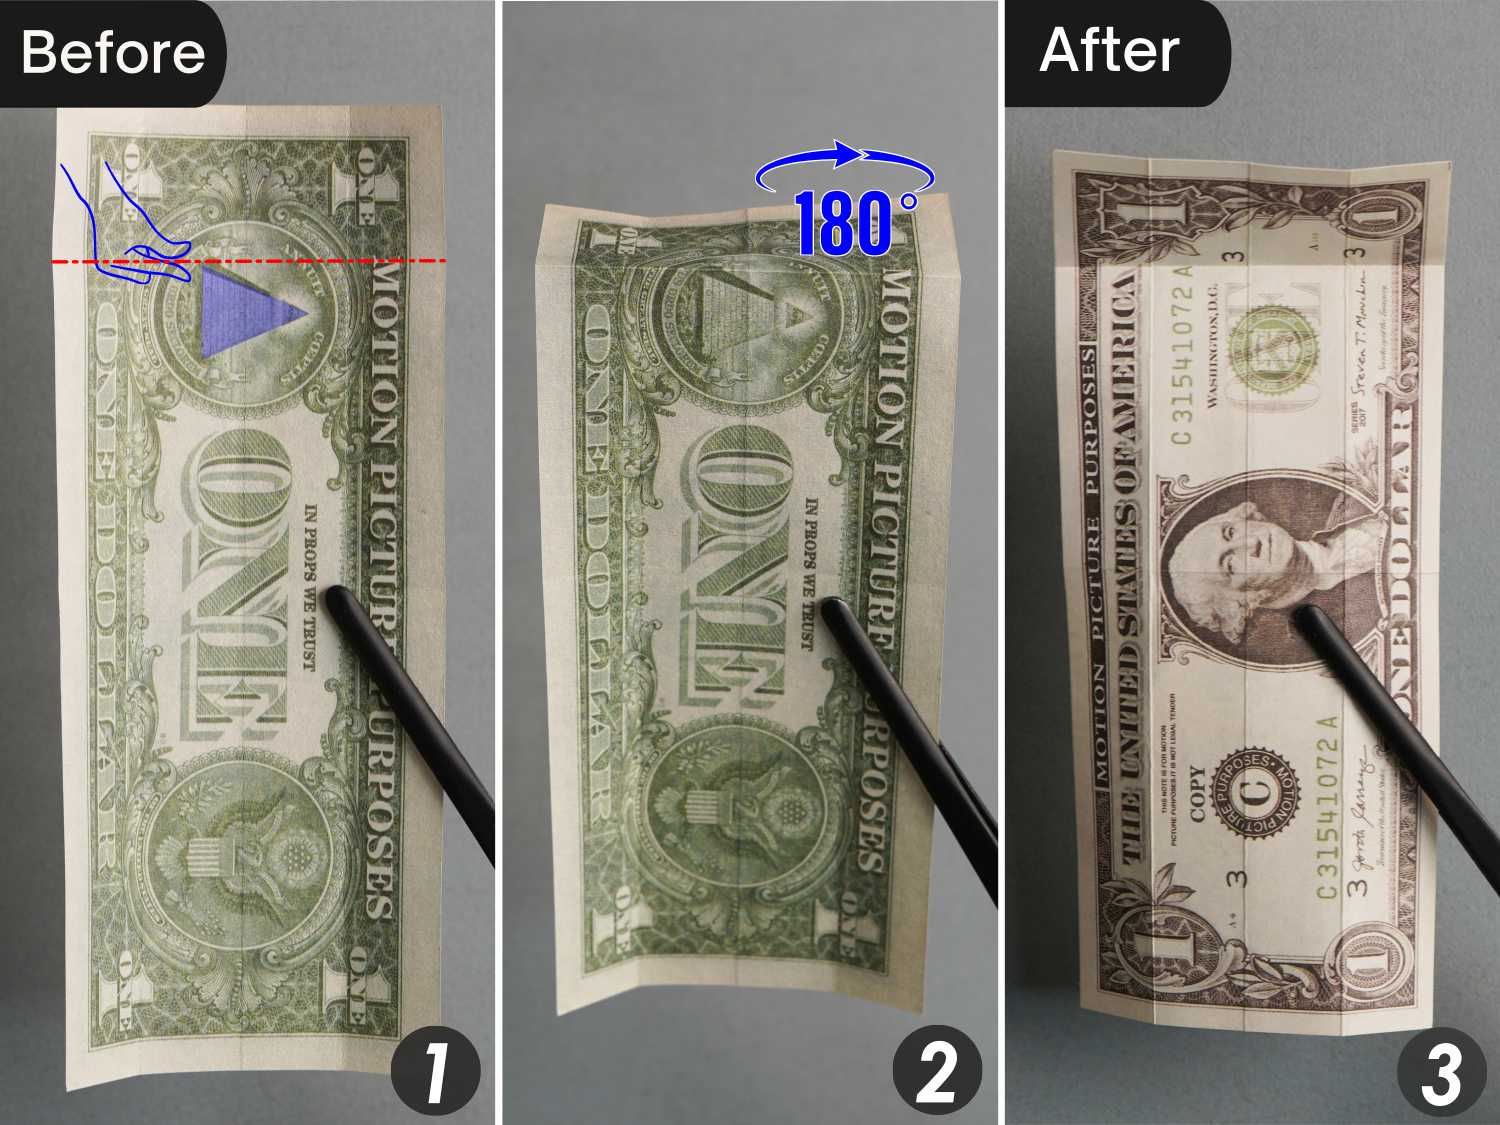
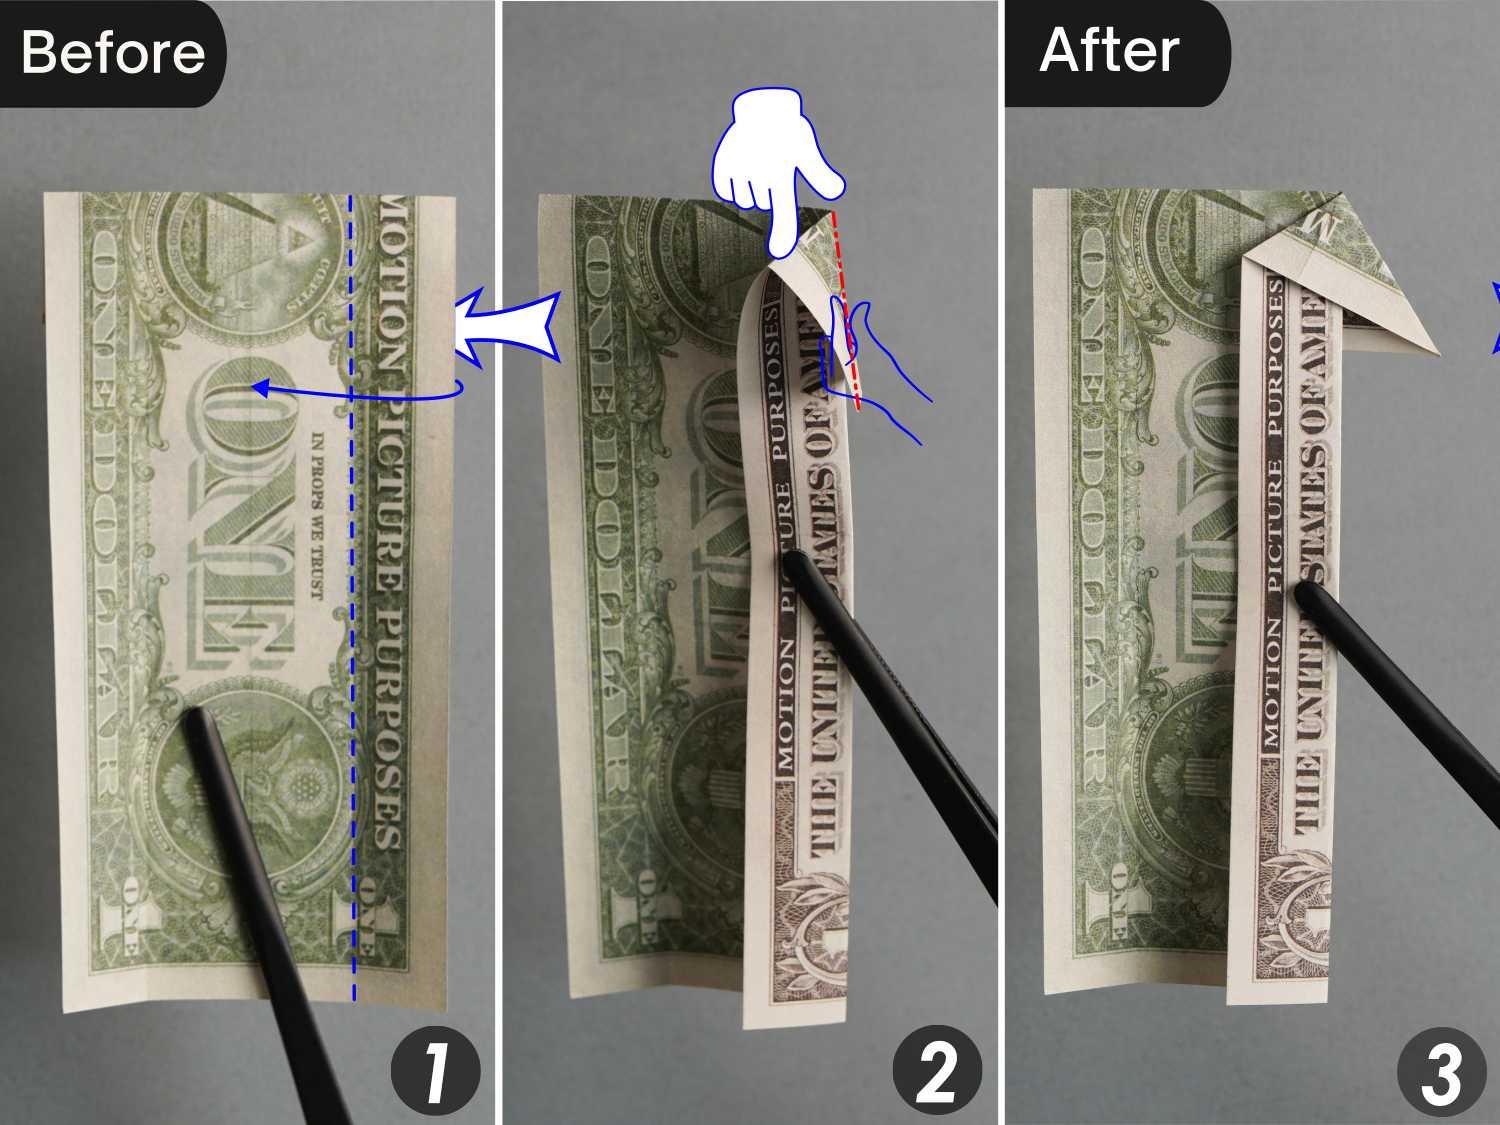
Step 4
Here, we can see a pyramid on the top side. Make a mountain crease indicated by the red dotted line horizontally extending from the top left corner of the pyramid. Flip the bill from left to right.
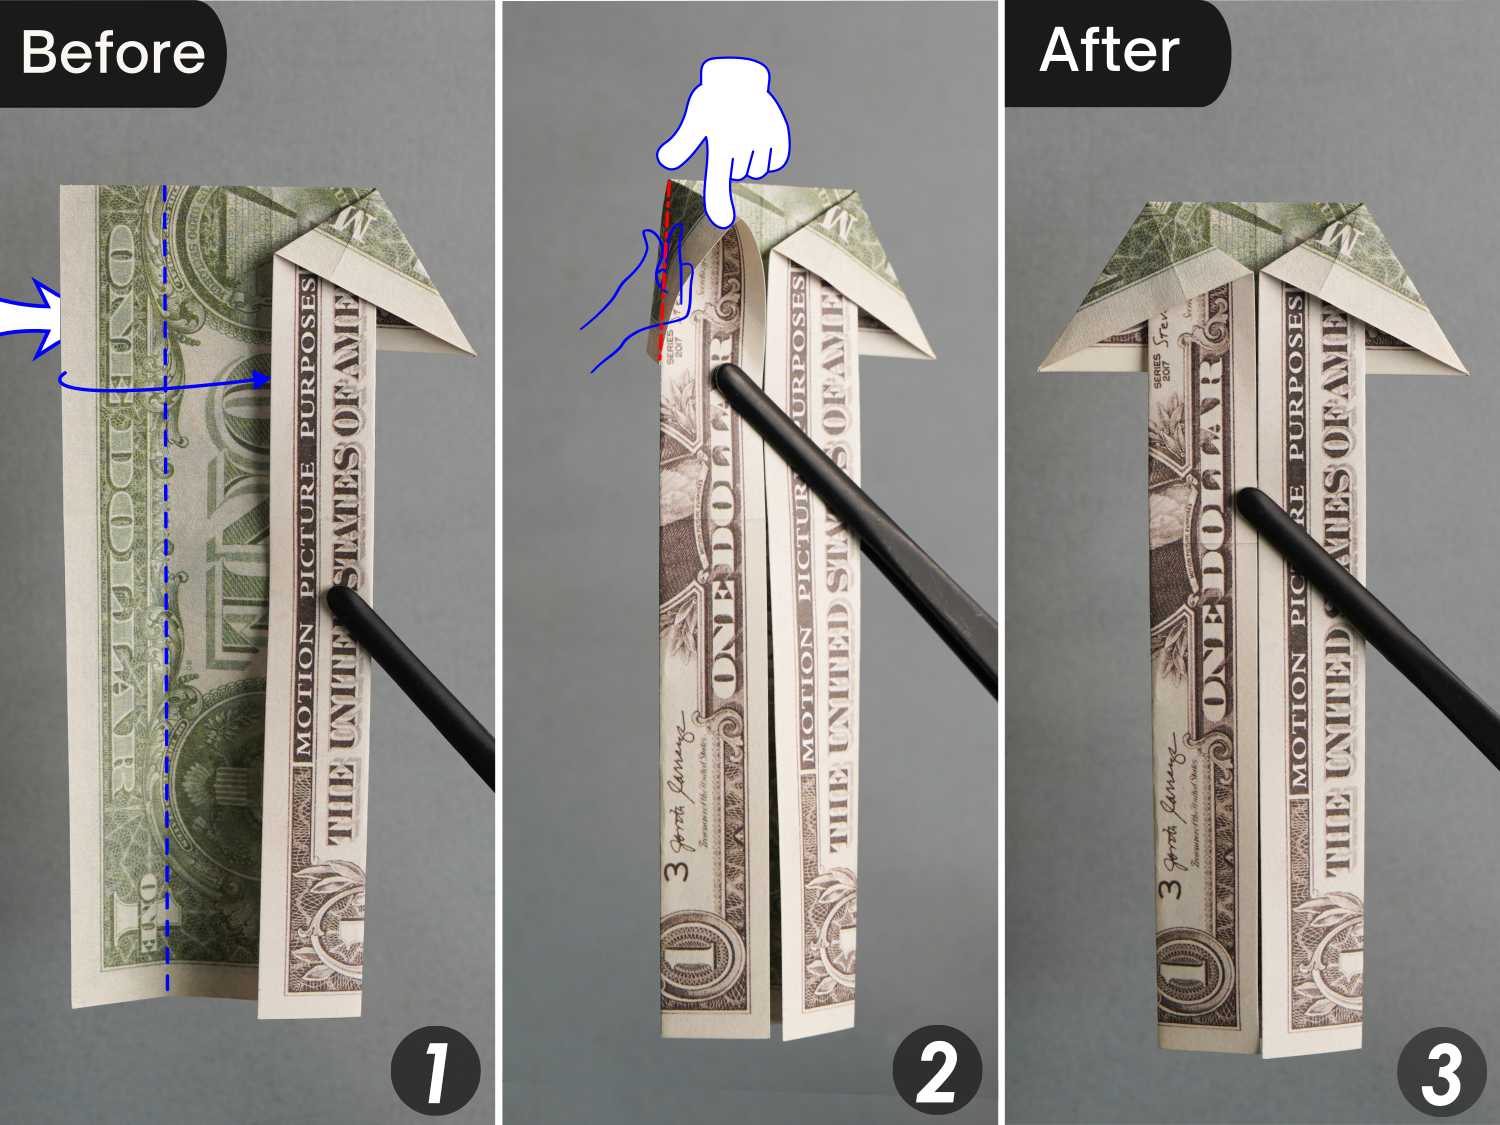
Step 5
Fold down the top edge along the crease you made in the previous step, then turn the bill over from left to right.
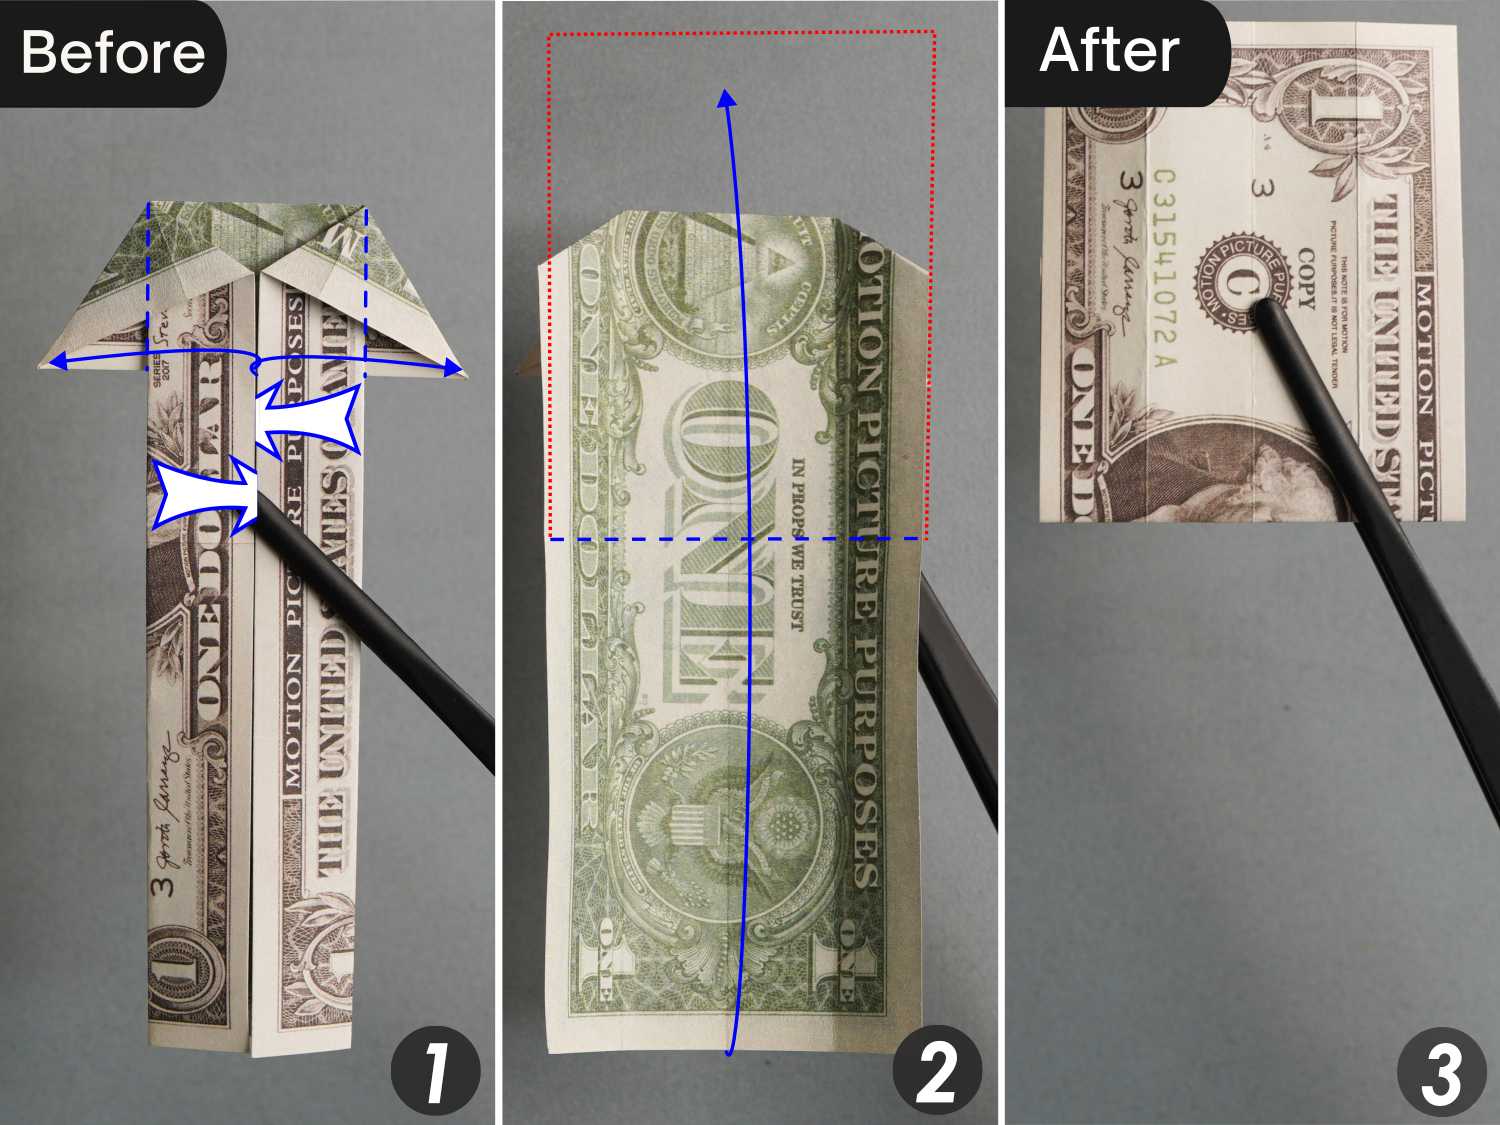
Step 6
Fold the right edge to align with the center vertical crease, then make a mountain crease indicated by the red dotted line in the second picture, and flatten this corner.
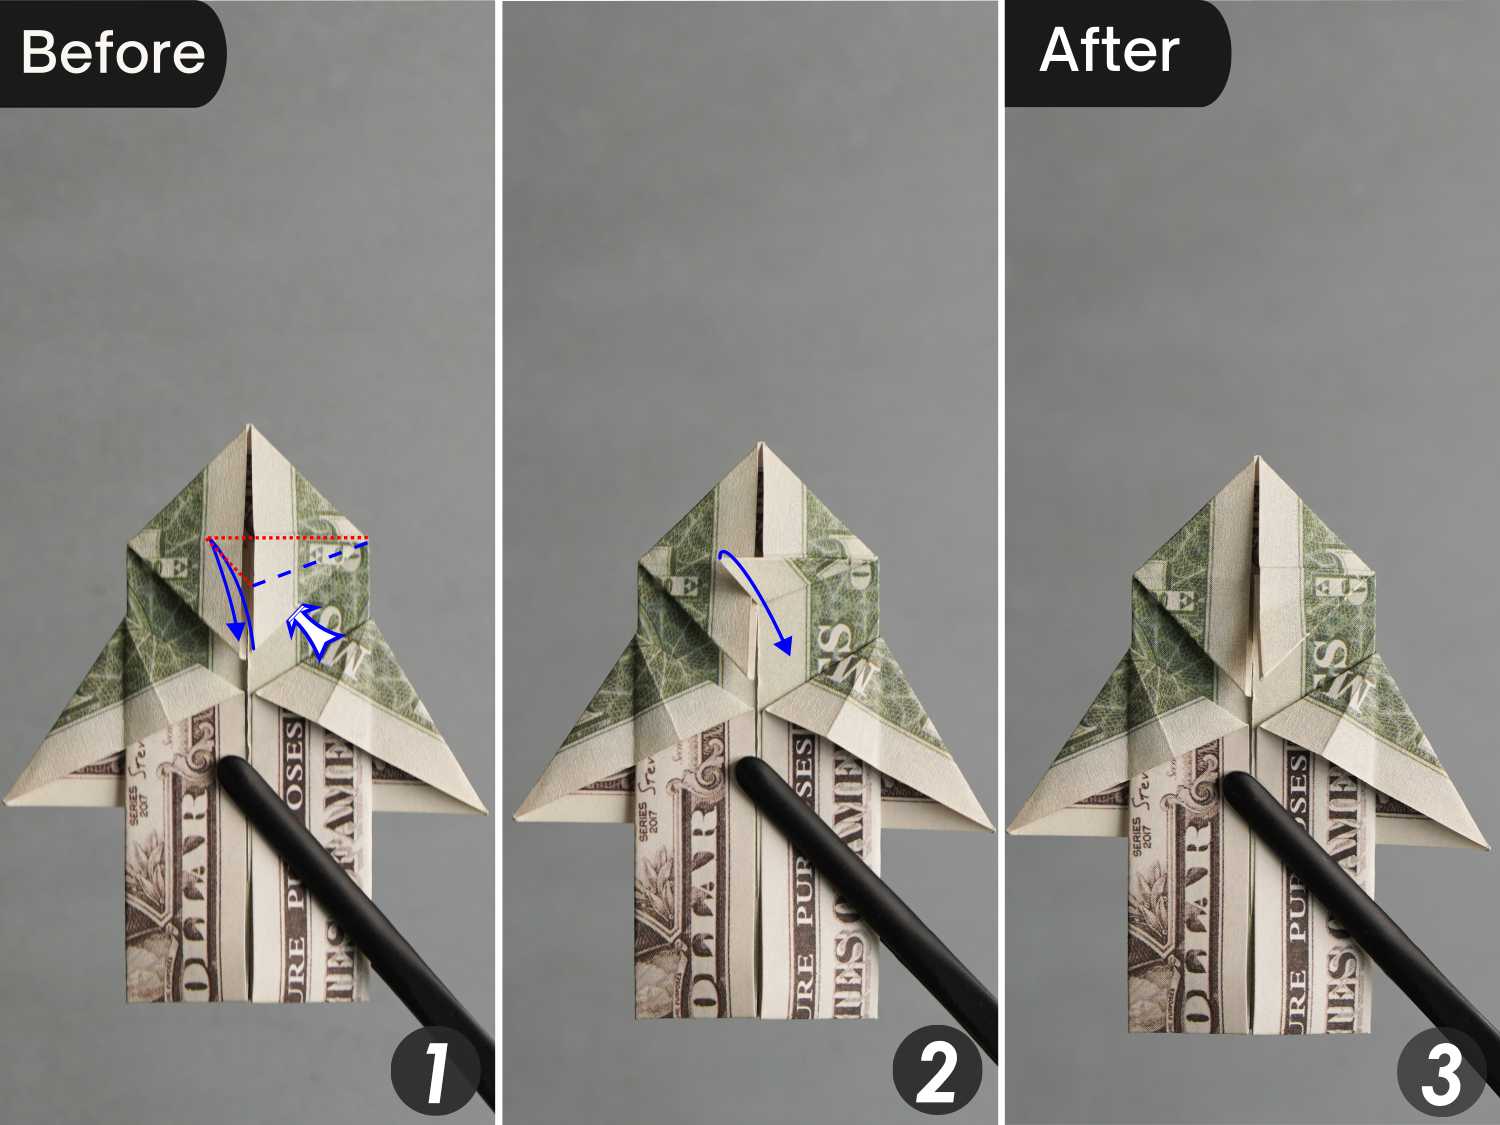
Step 7
Repeat this for the left side.
Fold the left edge to align with the center vertical crease, then make a mountain crease indicated by the red dotted line in the second picture, and flatten this corner.
Step 8
Fold the left and right layers to the sides, then fold the bottom edge upward along the existing horizontal crease.
Step 9
Fold the left and right edges to align with the center vertical crease to reveal the flap on each side.
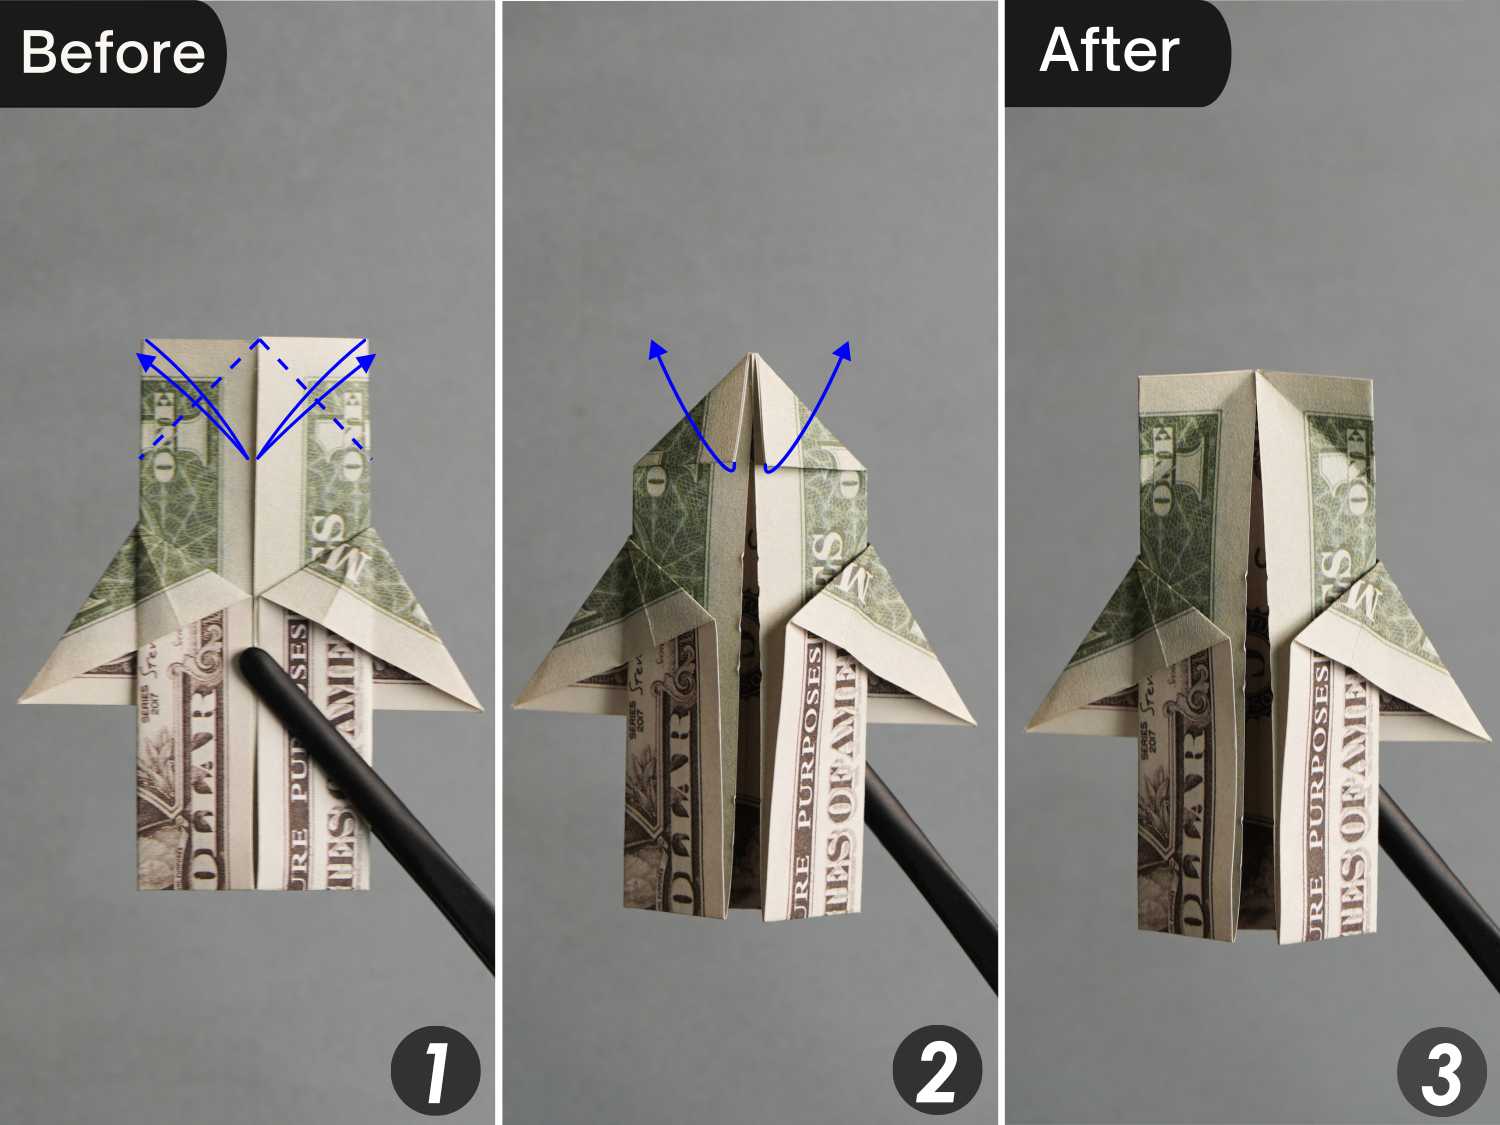
Step 10
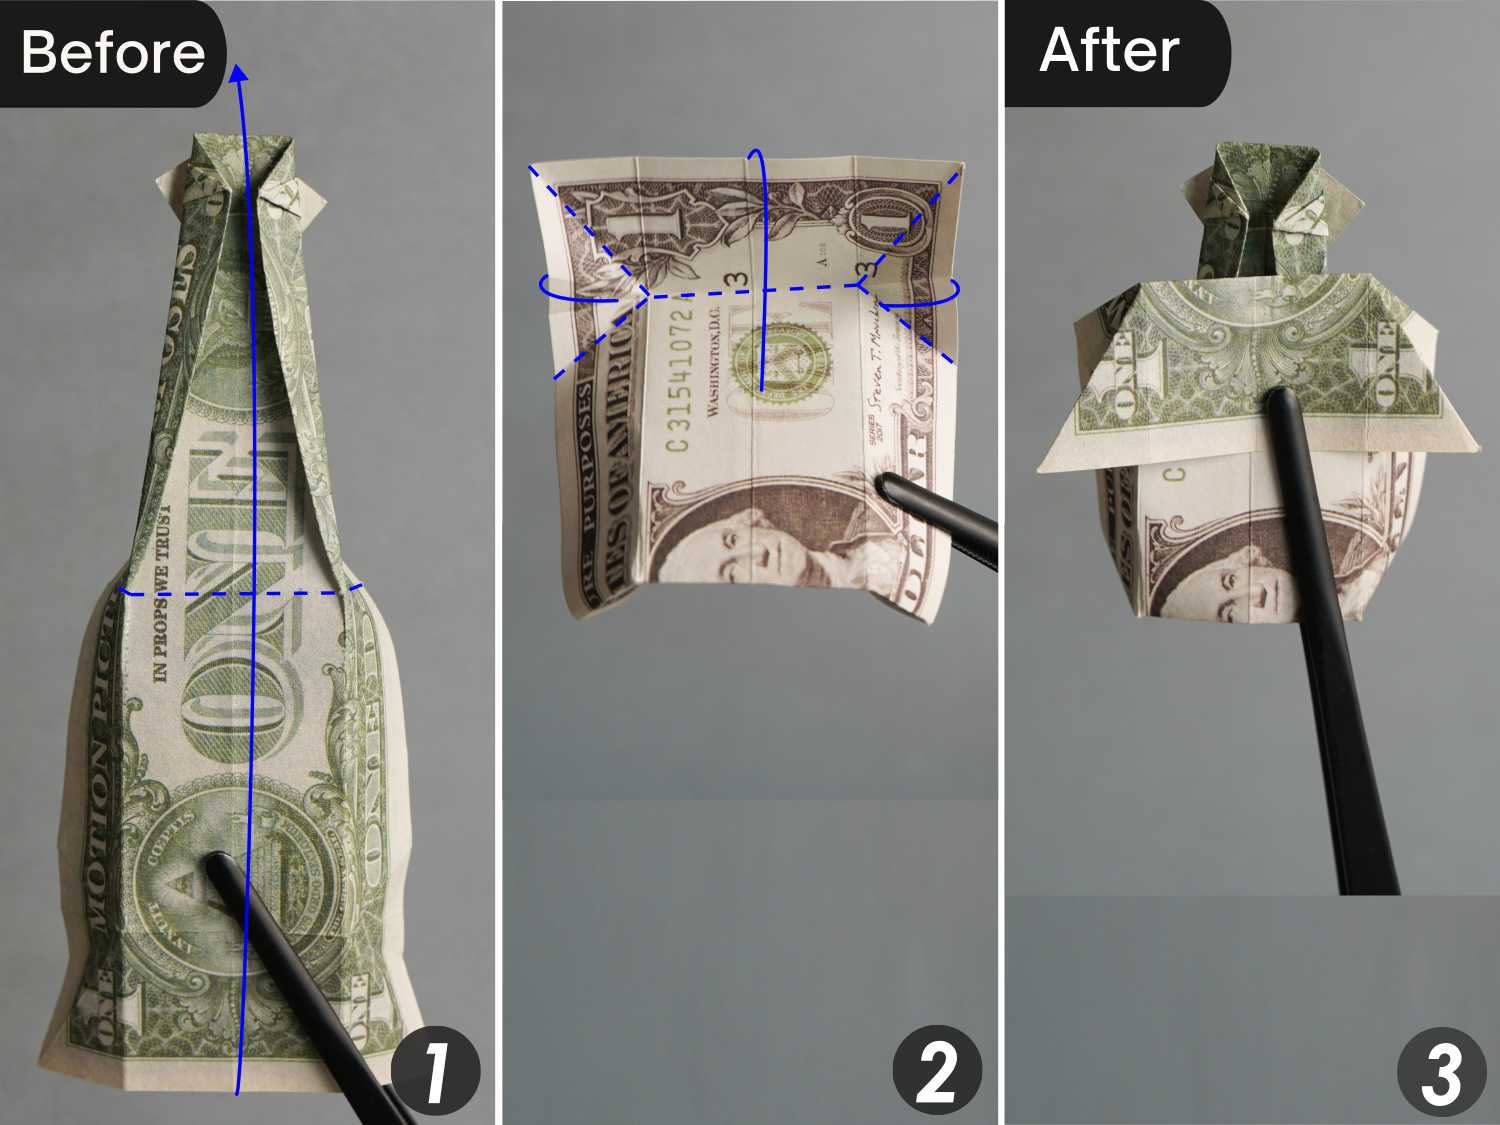
Fold the top left and right corners diagonally along the dotted lines, leaving two creases, and unfold them.
Step 11
Fold down the top edge along the dotted line, leaving a crease, and unfold it.
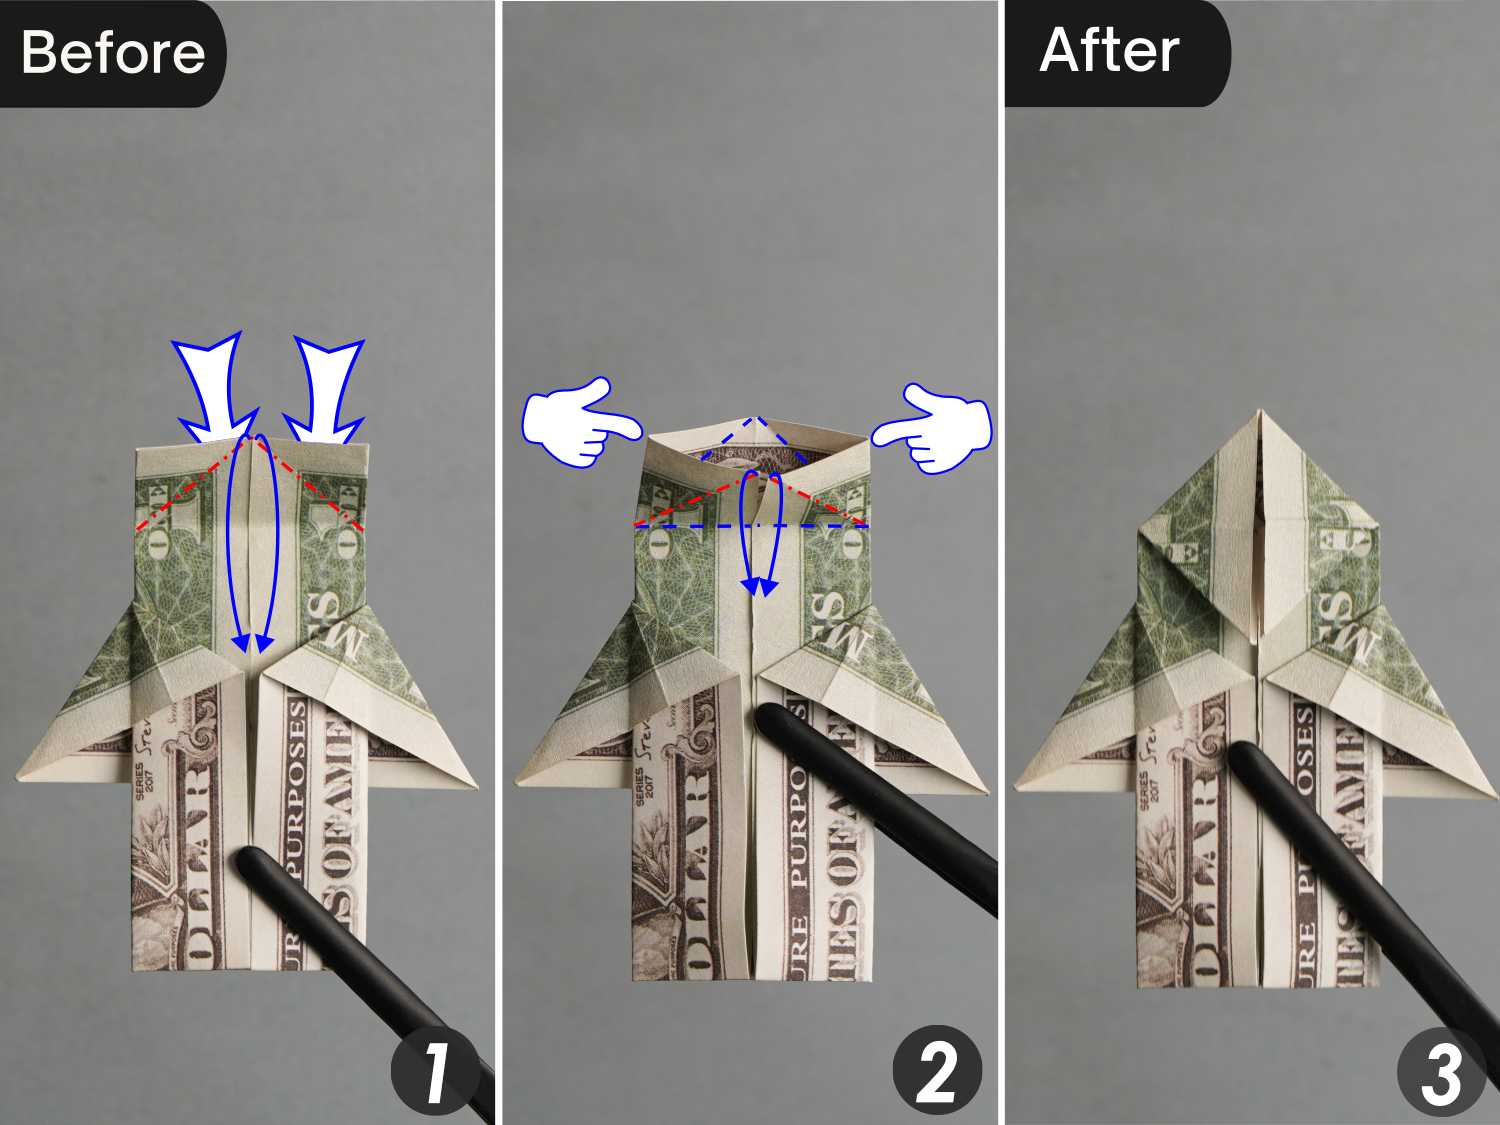
Step 12
Mountain fold the creases you made in step 10, indicated by the red dotted lines, then push the left and right corners toward the center. Flatten the fold to create a triangle on each side.
Step 13
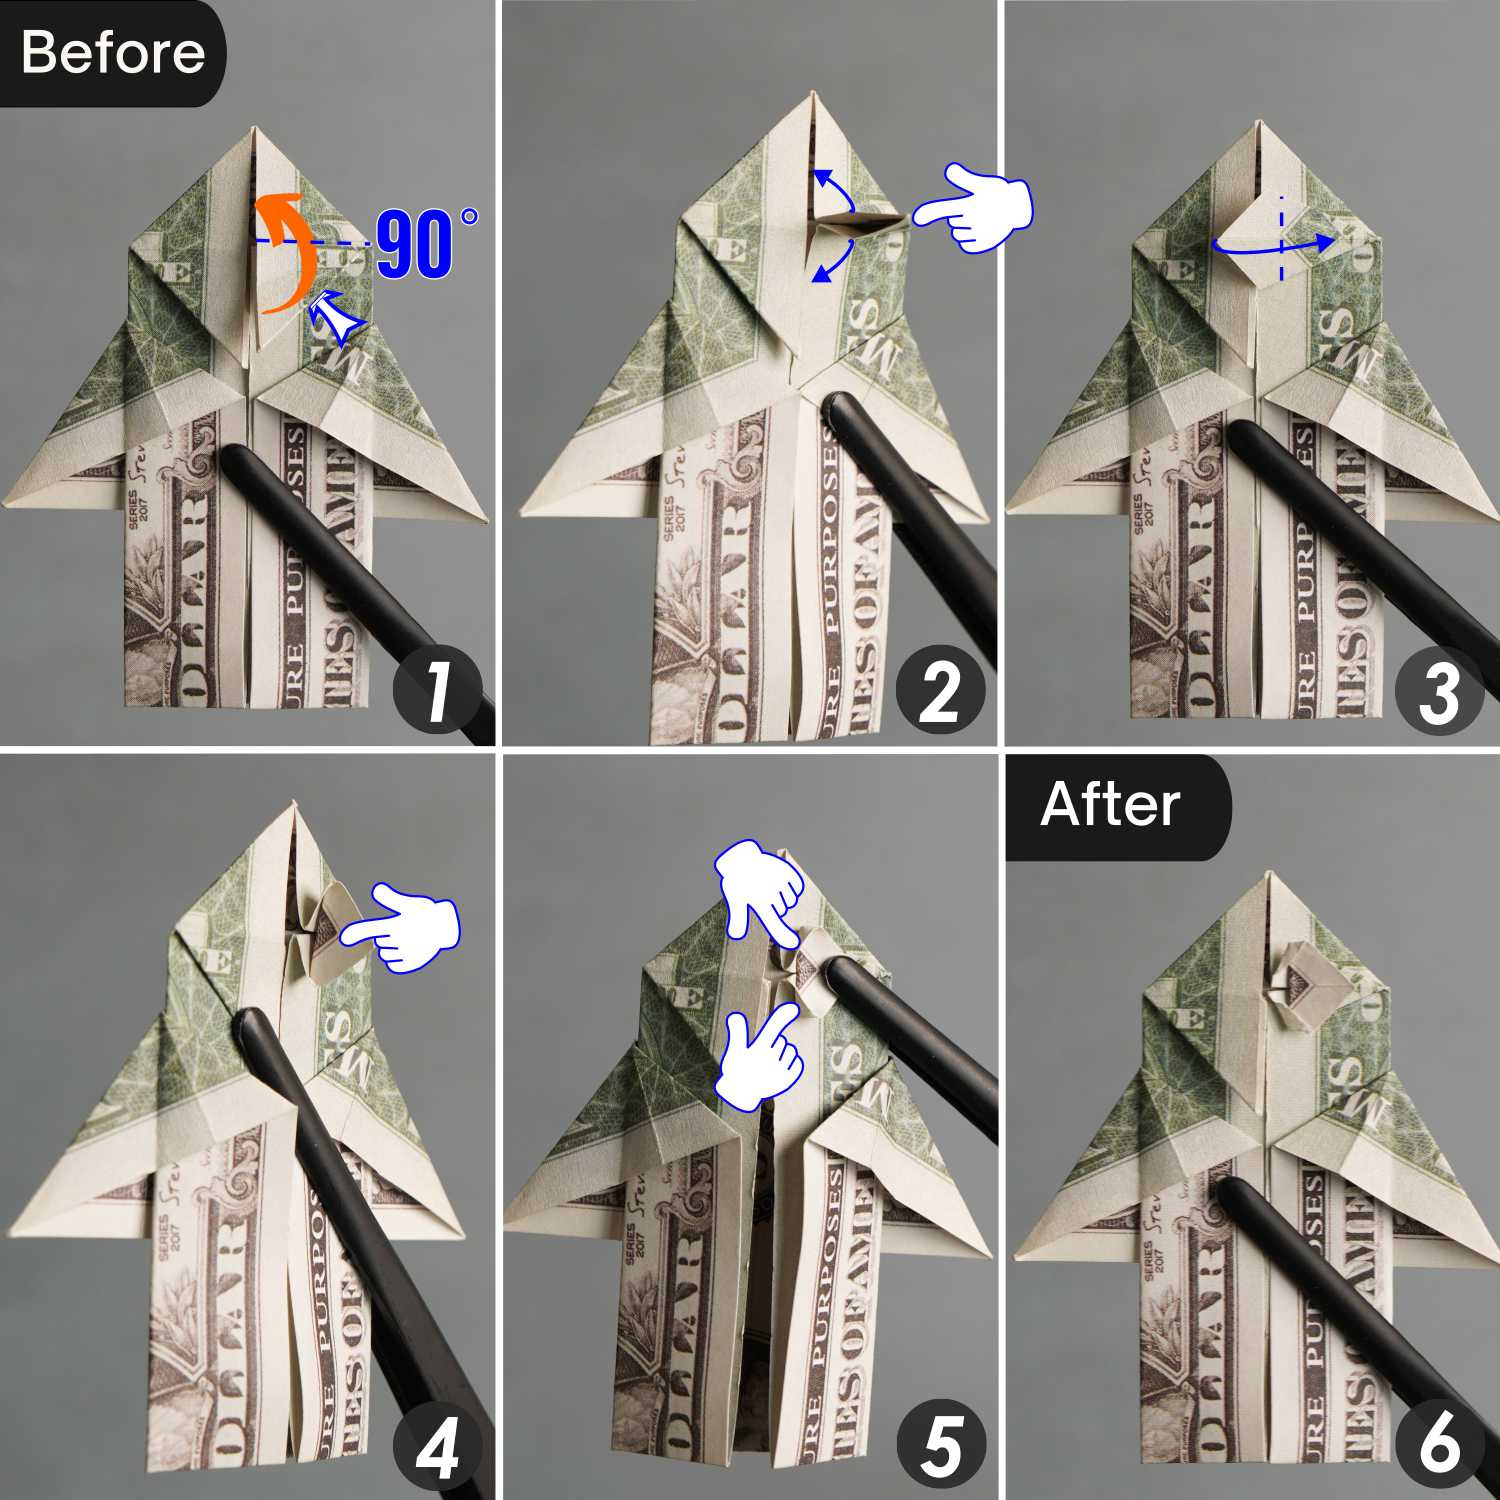
Fold the bottom right edge of the right triangle to align with its horizontal crease, leaving a crease, and unfold it.
Step 14
Bring up the bottom corner of the right triangle along the horizontal crease, open and squash it along the creases you made in the previous step [pictures 1 and 2]
Then, fold the left corner of the resulting quadrilateral to the right side along the dotted line, and flatten the fold [pictures 3 to 5]
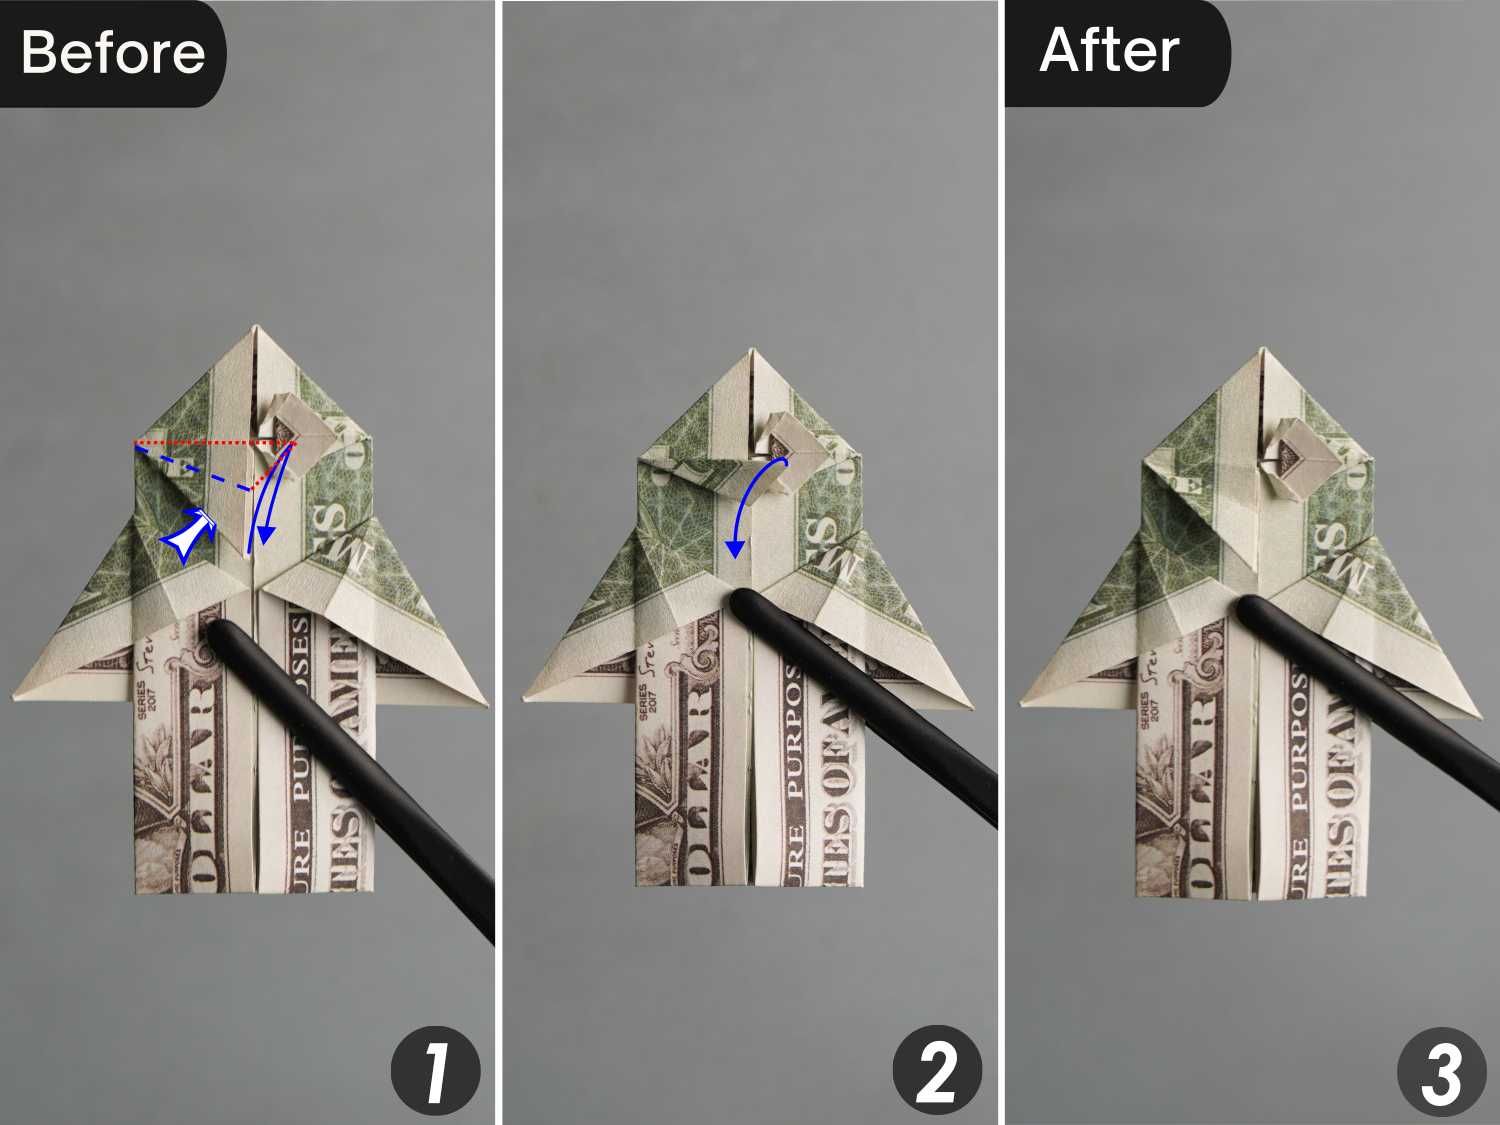
Step 15
Fold the bottom left edge of the left triangle to align with its horizontal crease, leaving a crease, and unfold it.
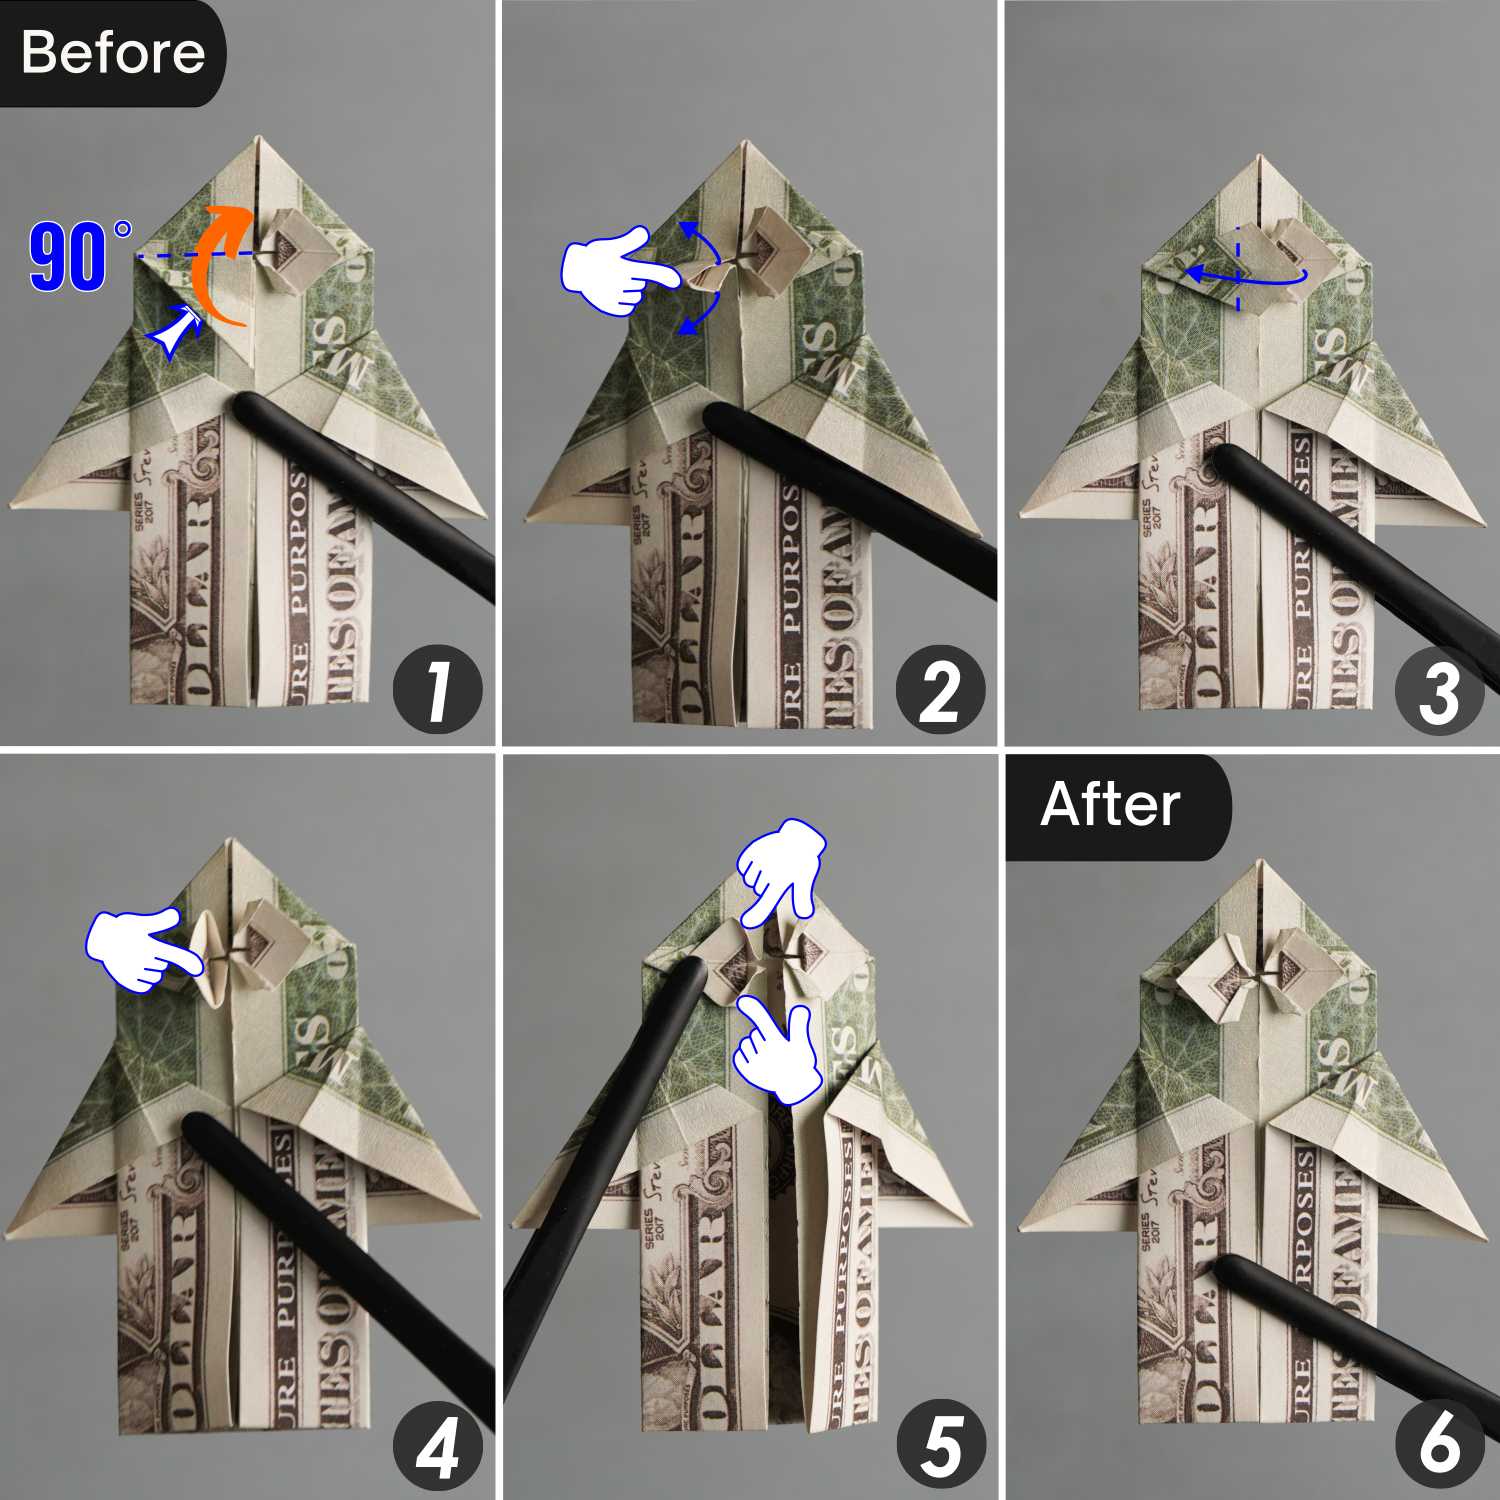
Step 16
Bring up the bottom corner of the left triangle along the horizontal crease, open and squash it along the creases you made in the previous step [pictures 1 and 2]
Then, fold the right corner of the resulting quadrilateral to the left side along the dotted line, and flatten the fold [pictures 3 to 5]
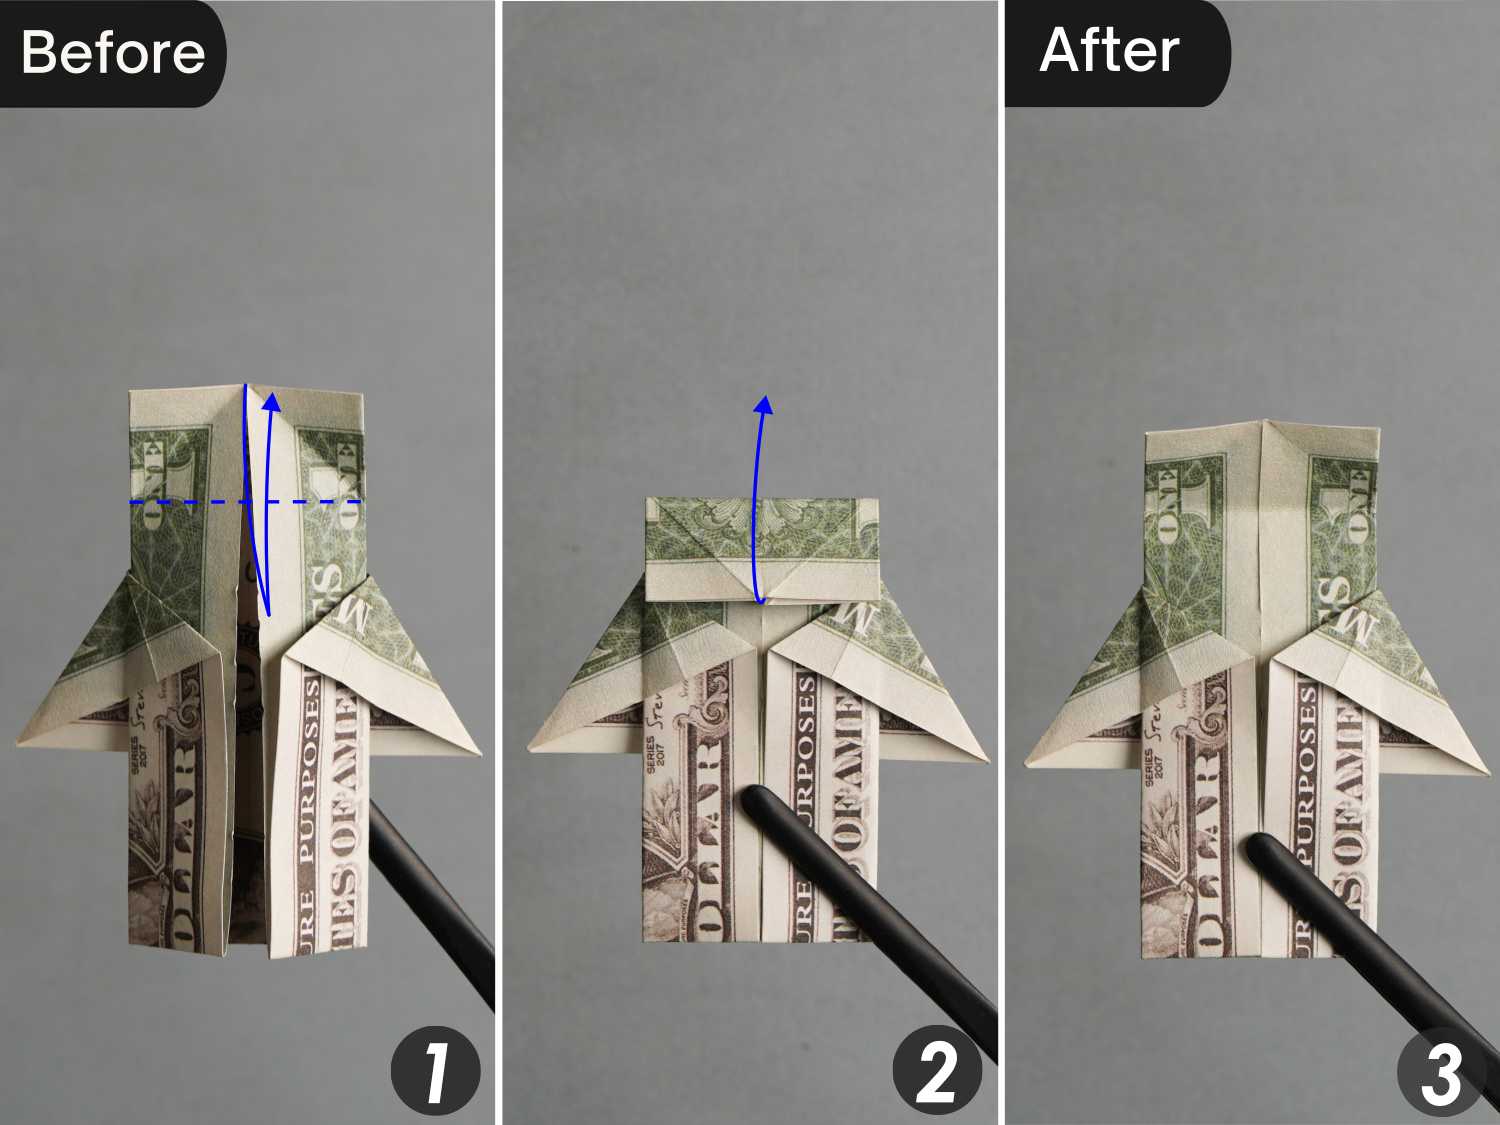
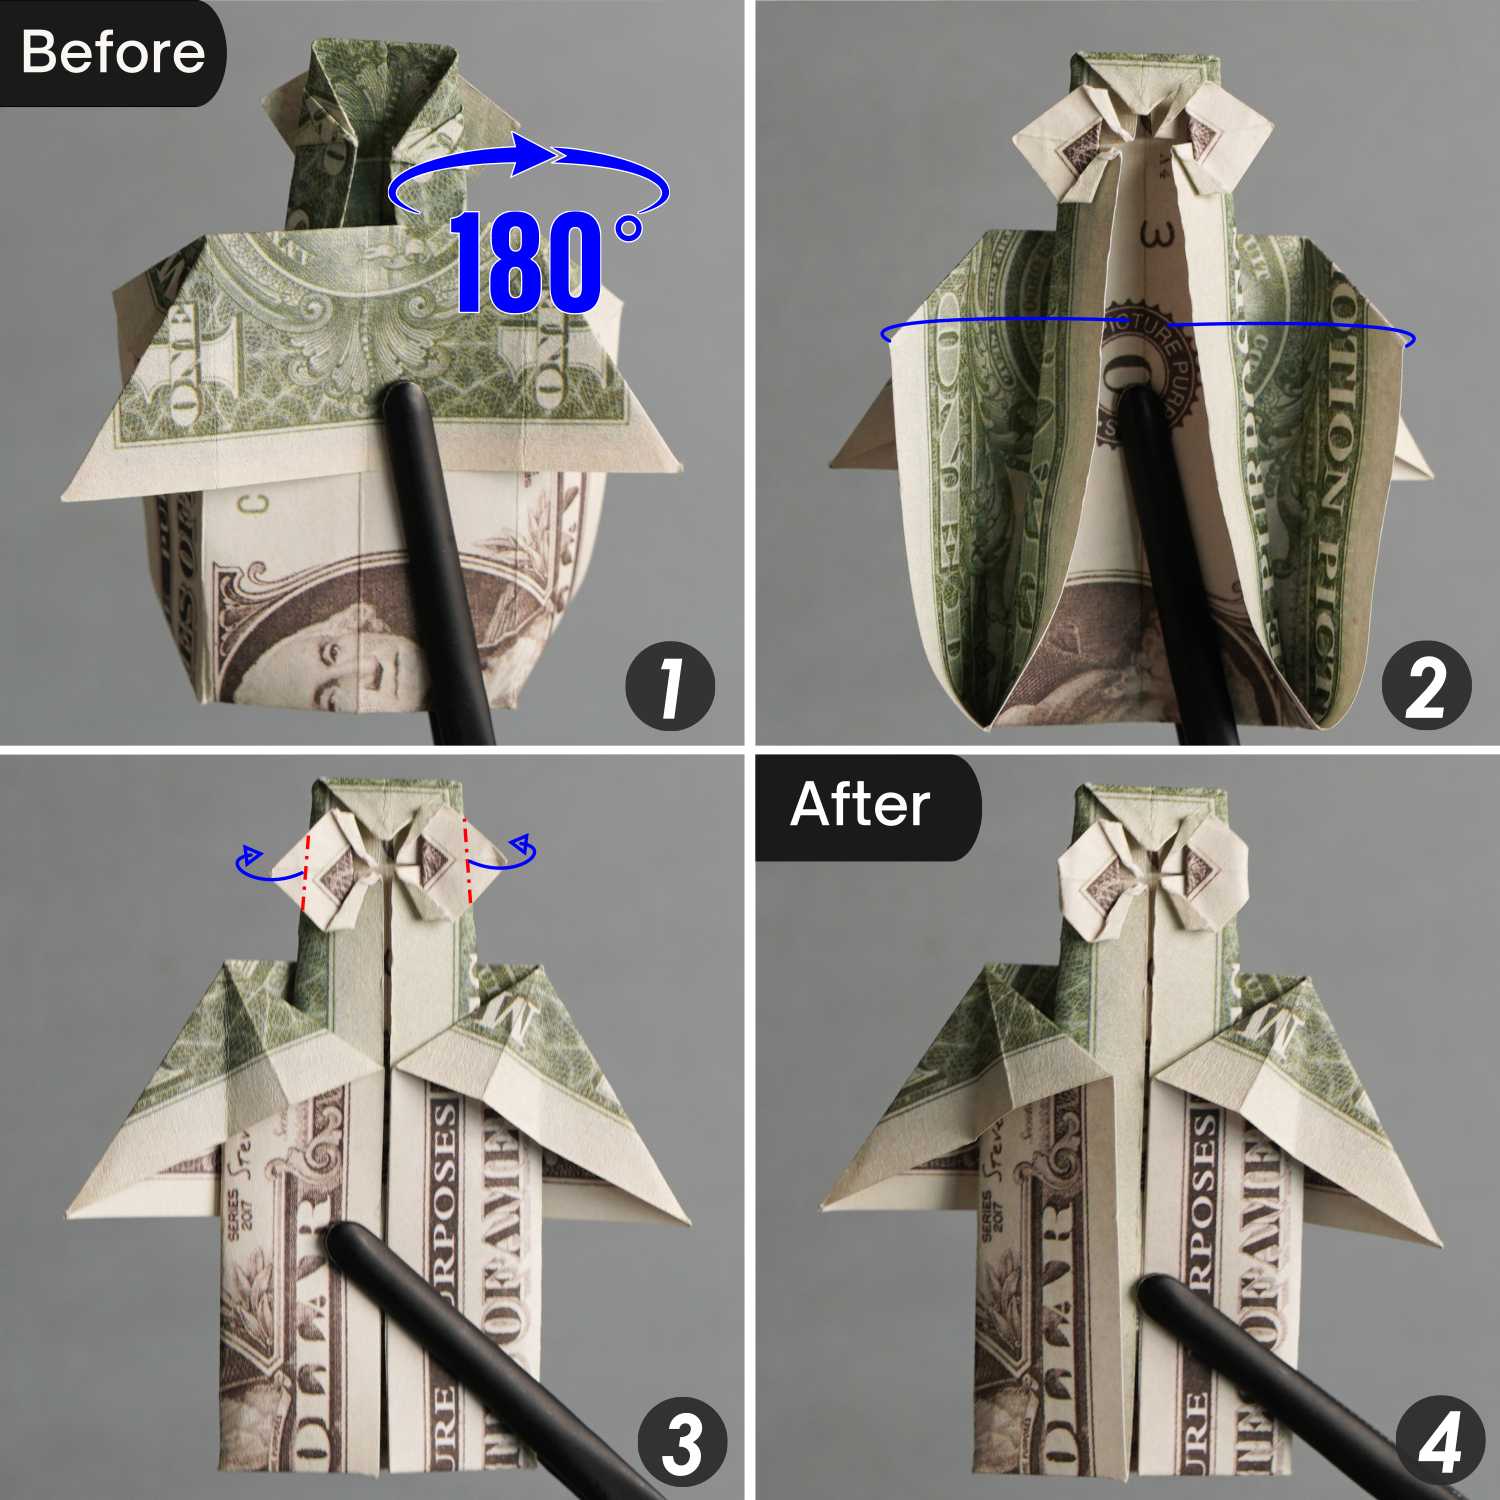
Step 17
Fold the top corner downward along the dotted line, and then bring up the left and right top layers.
Step 18
Flip the bill from left to right, then fold the top layer back to the bottom side.

Step 19
Turn the bill over from left to right, and then expand the bottom part.
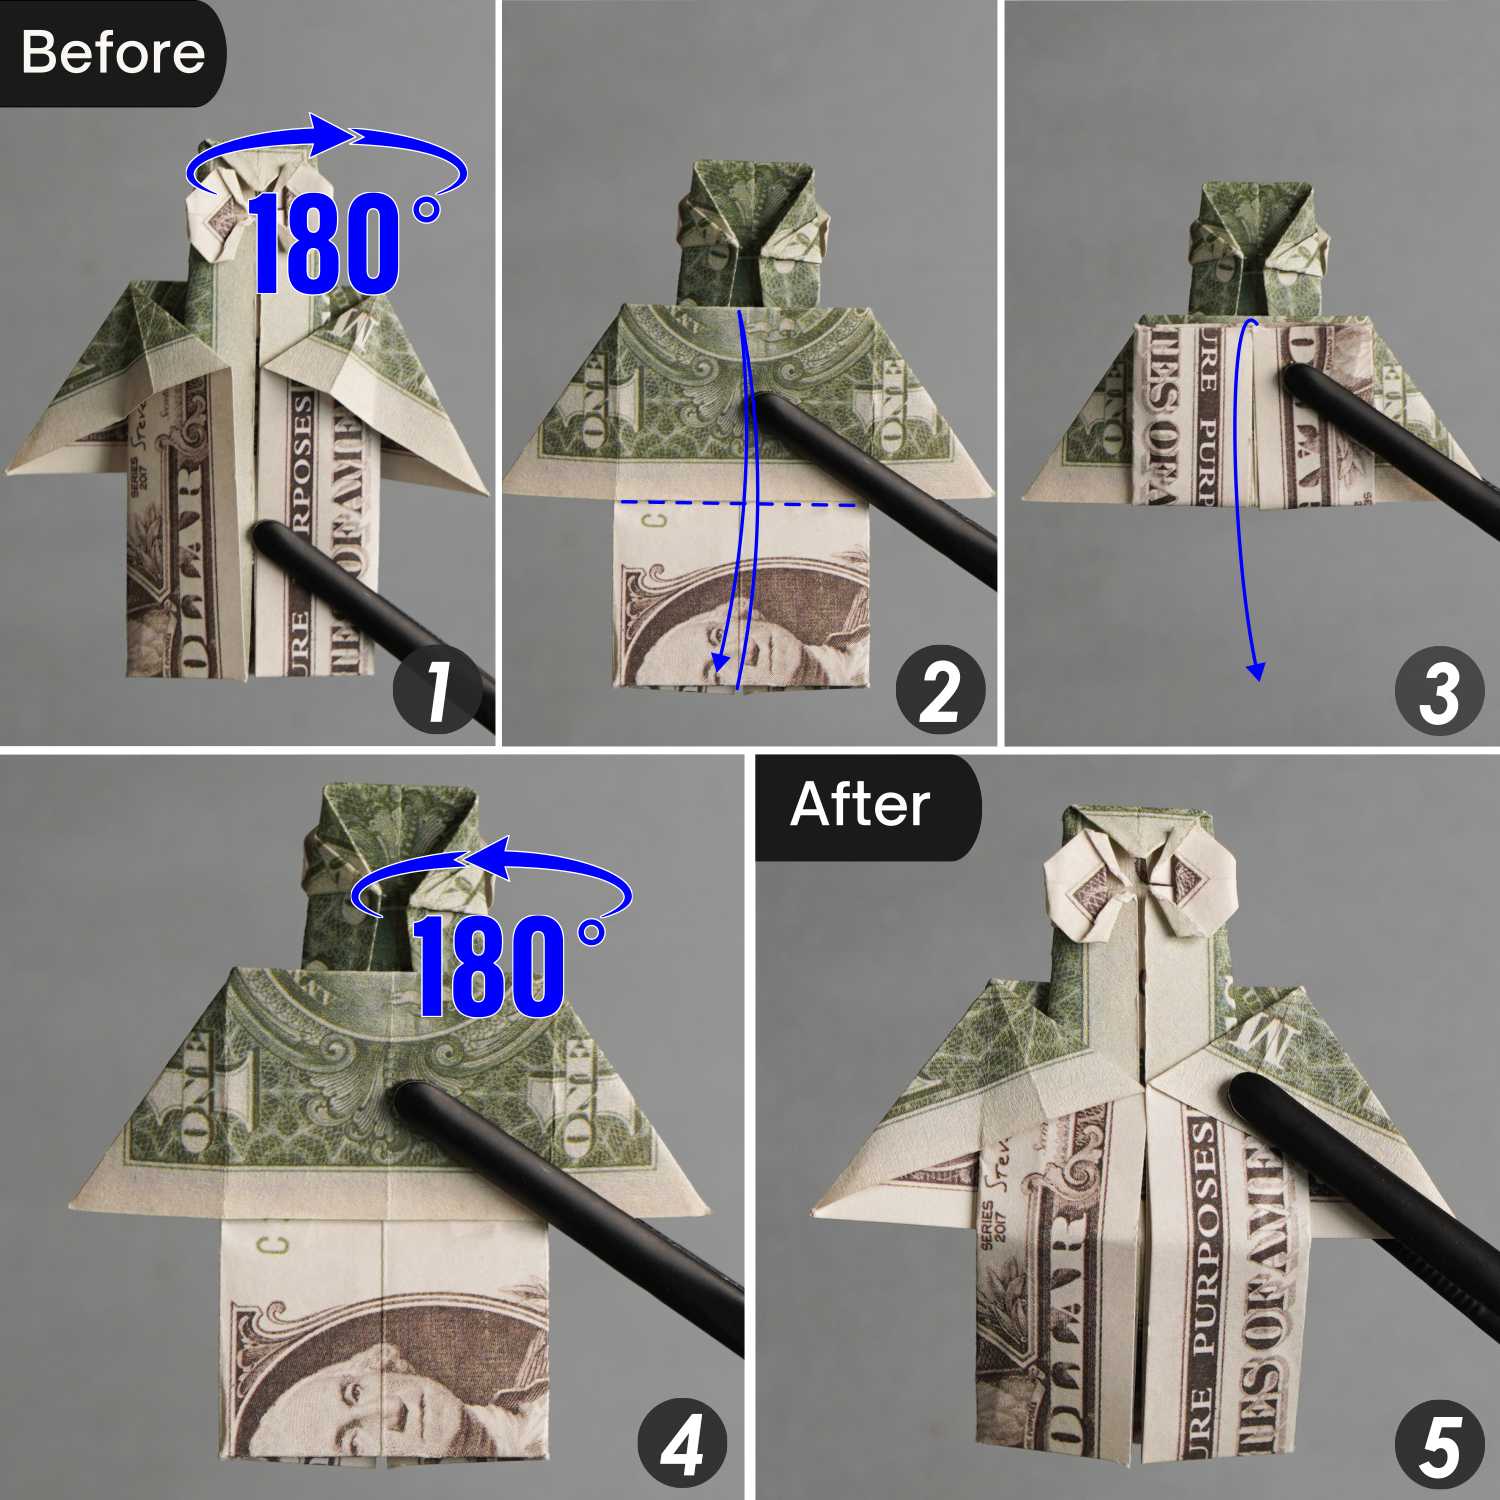
Step 20
Fold the left and right edges to align with the center vertical crease, then flip the bill from left to right.
Step 21
Fold the left and right corners along the blue dotted lines connecting two blue spots, and then turn the bill over from left to right.

Step 22
Lift the bottom section of the left and right layers, and flip the bill from left to right.
Step 23
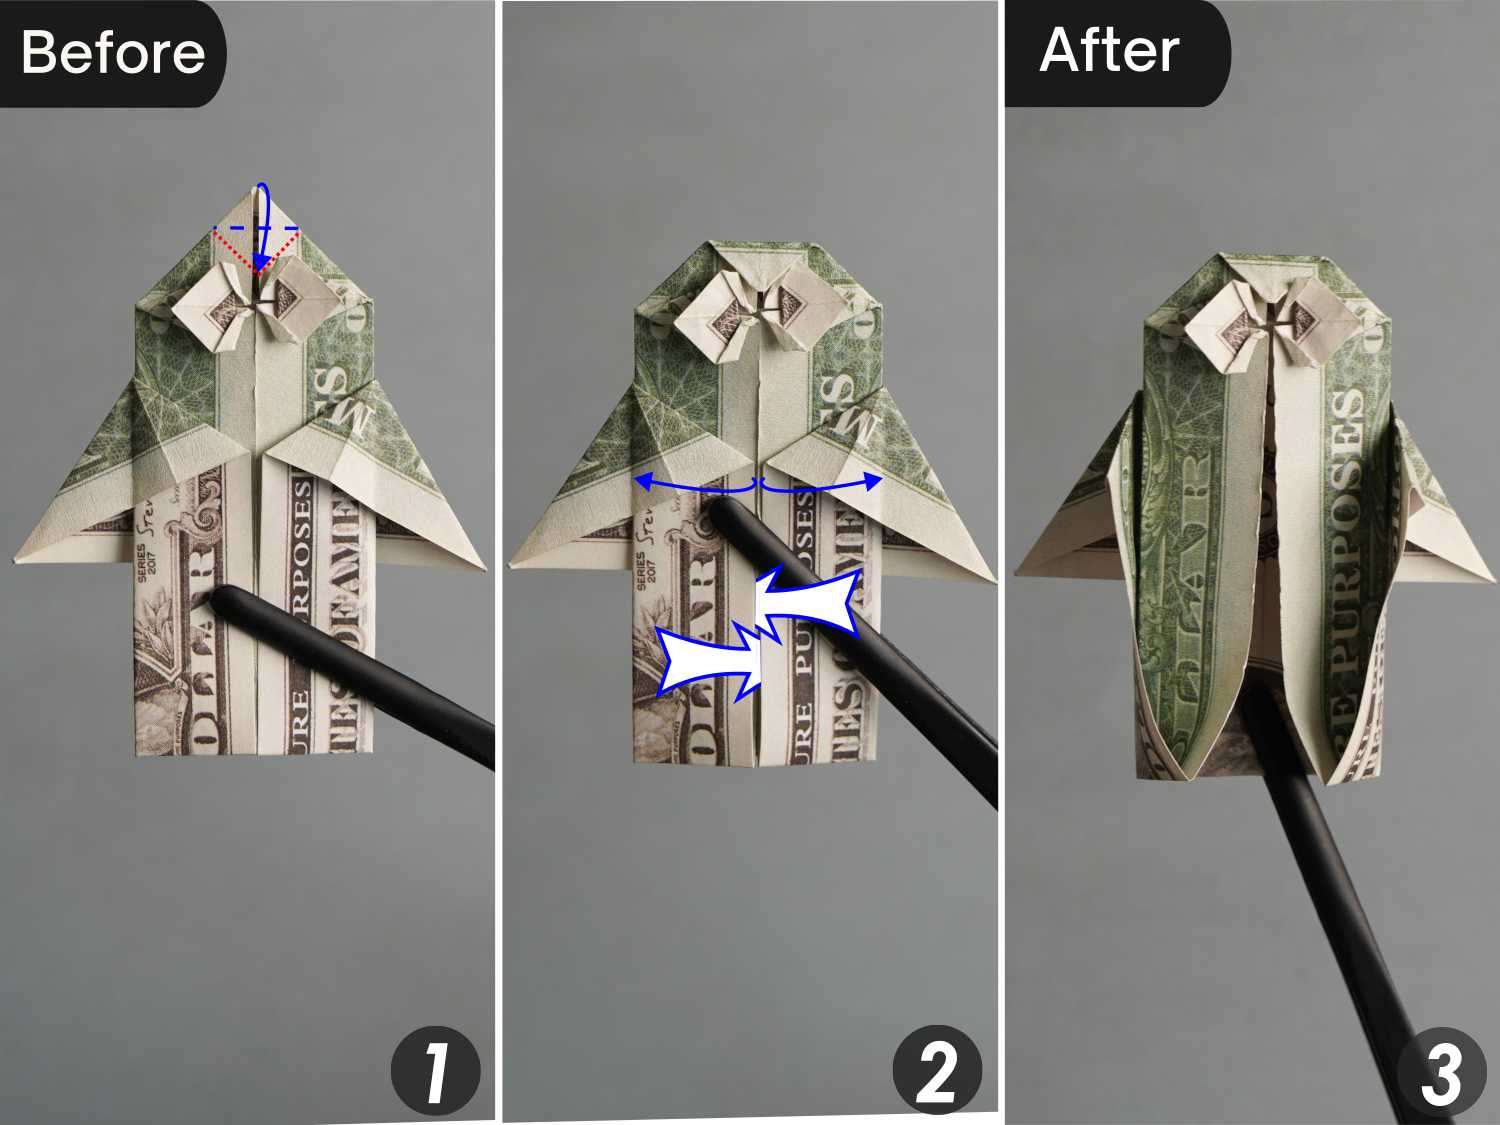
Fold the bottom edge along the horizontal crease, then fold the top edge downward along the horizontal crease, and valley fold the creases indicated by the blue dotted lines.
Step 24
Flip the bill from left to right, then fold the two edges on each side to align with the center vertical crease. Finally, fold the left and right corners of the eyes a little backward.
Step 25
Flip the model from left to right, then fold the bottom edge upward along the dotted line, and unfold it. Flip the model back.
Step 26
Fold the two corners on the bottom edge’s midpoint upward along the dotted lines, and make two mountain creases on the bottom layer indicated by the red dotted lines. Finally, turn the bill over from left to right.
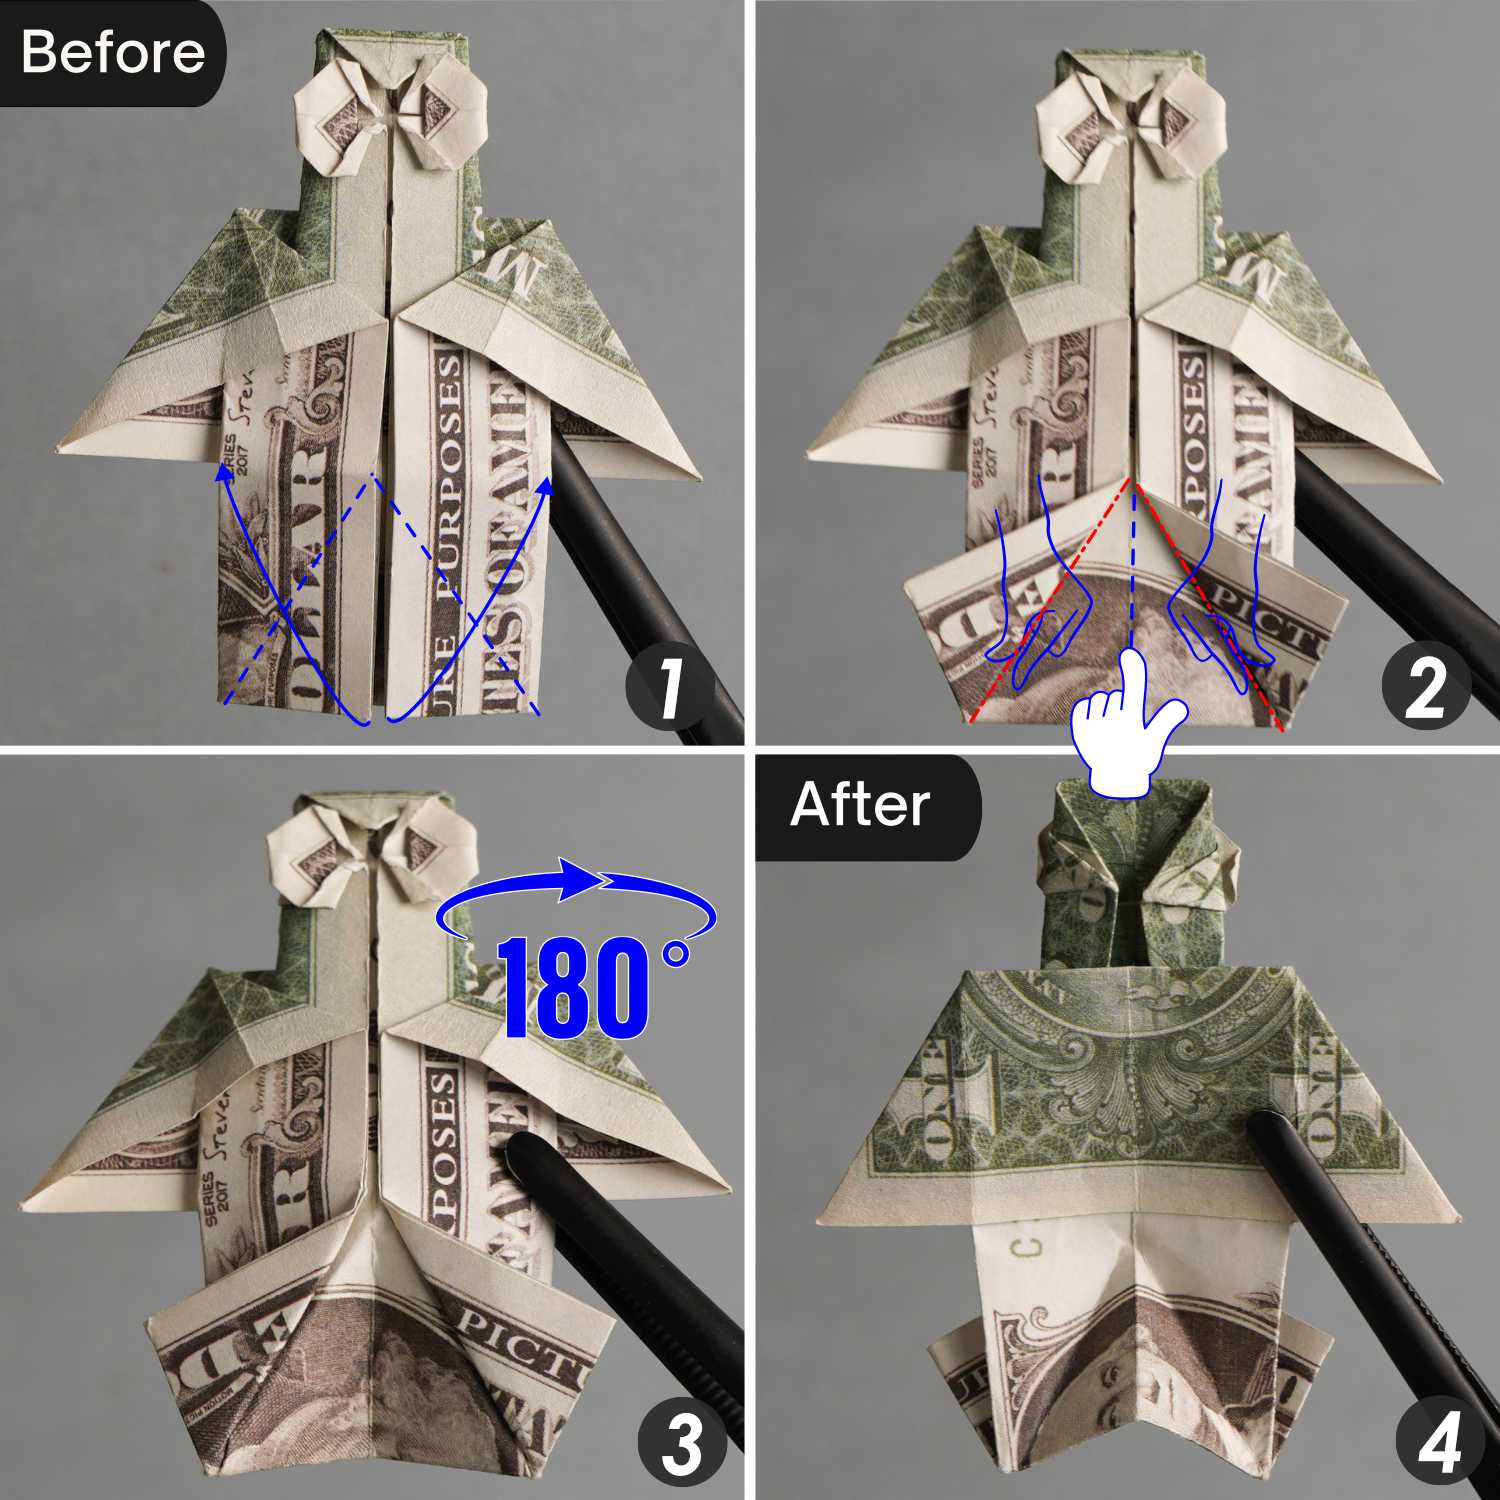
Step 27
Bring the bottom two corners together to form a triangular flap, press this flap to the left side, and then fold the left edge of this triangle to align with its right edge, leaving a crease, and unfold it. Finally, open and squash this flap along the creases you just made.

Step 28
Flip the owl from left to right, then make two mountain creases indicated by the red dotted lines, and make two valley creases indicated by the blue dotted lines. Finally, turn the owl over from left to right.
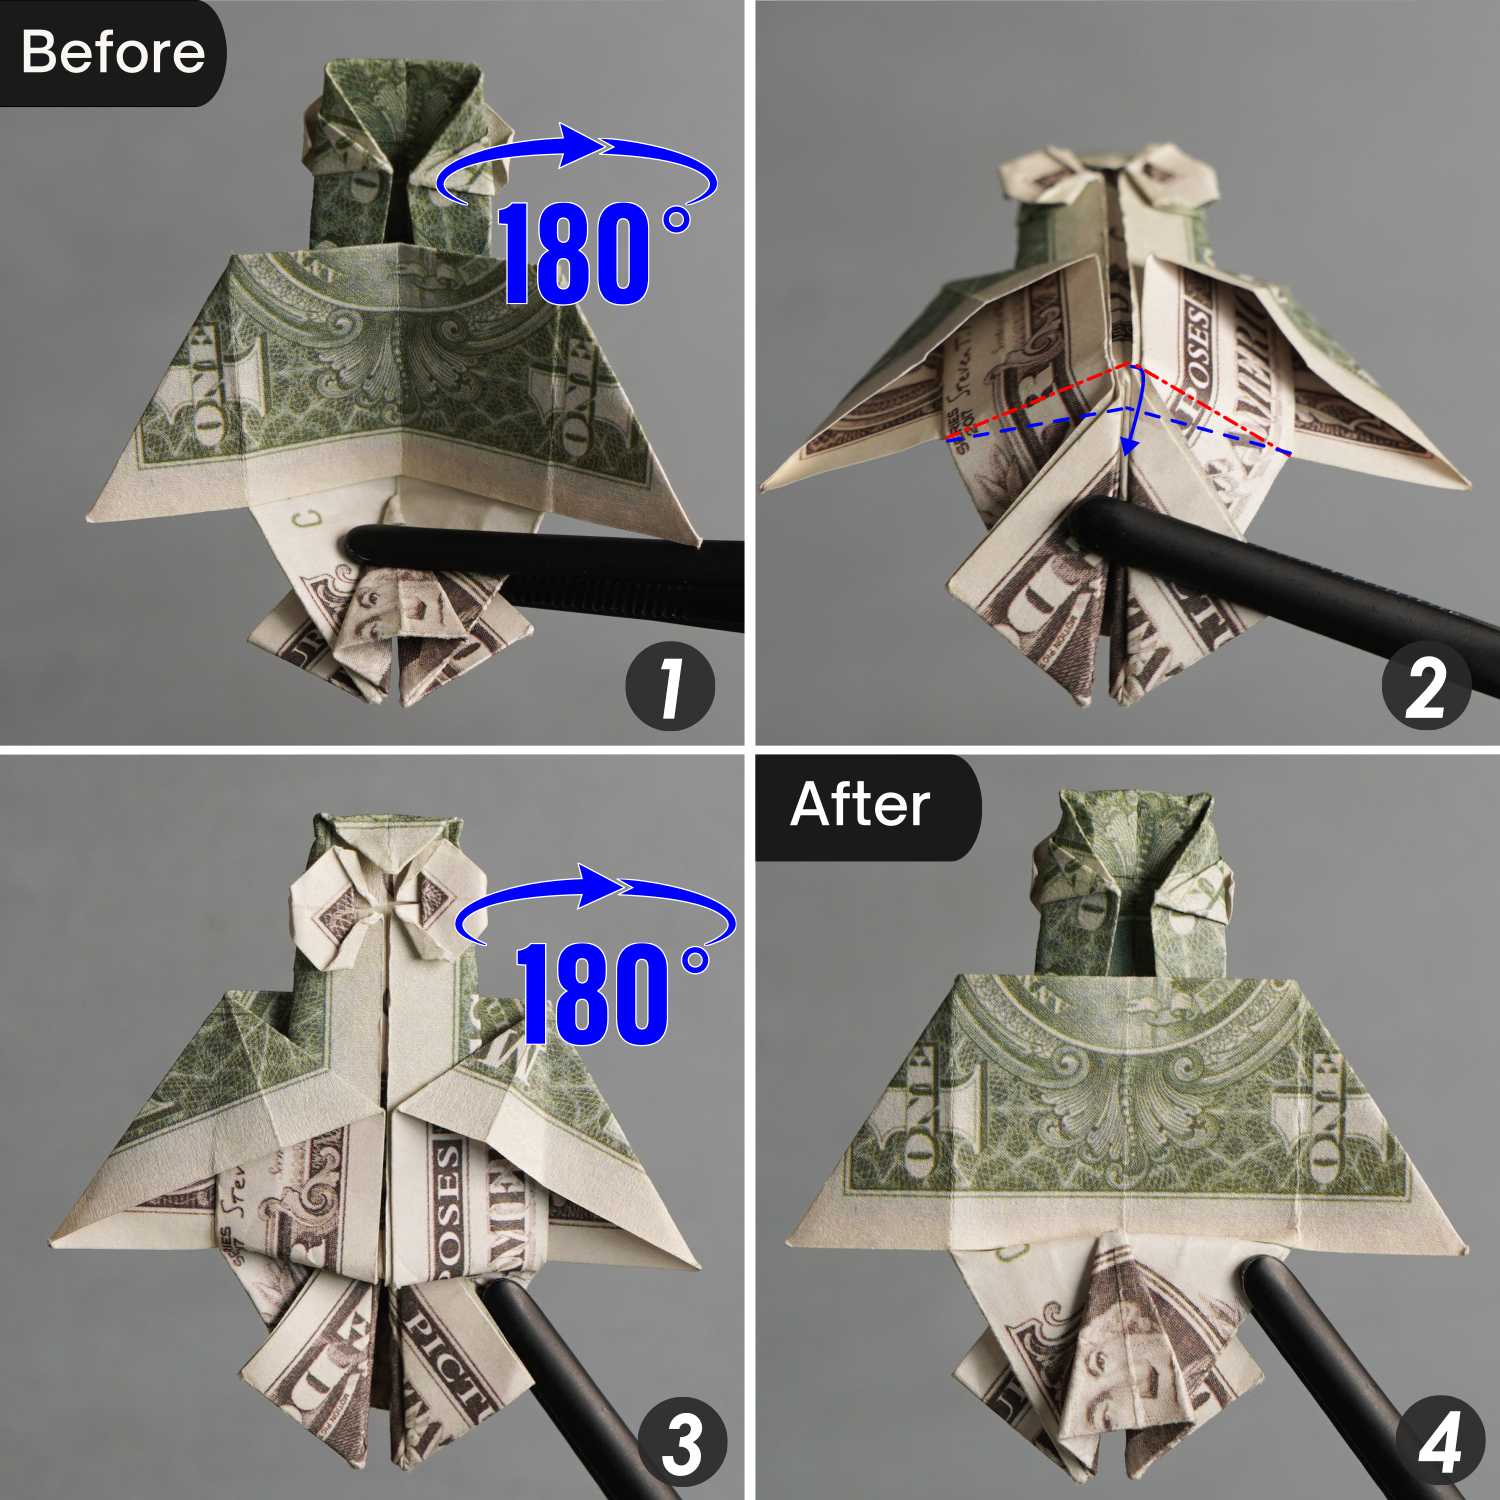
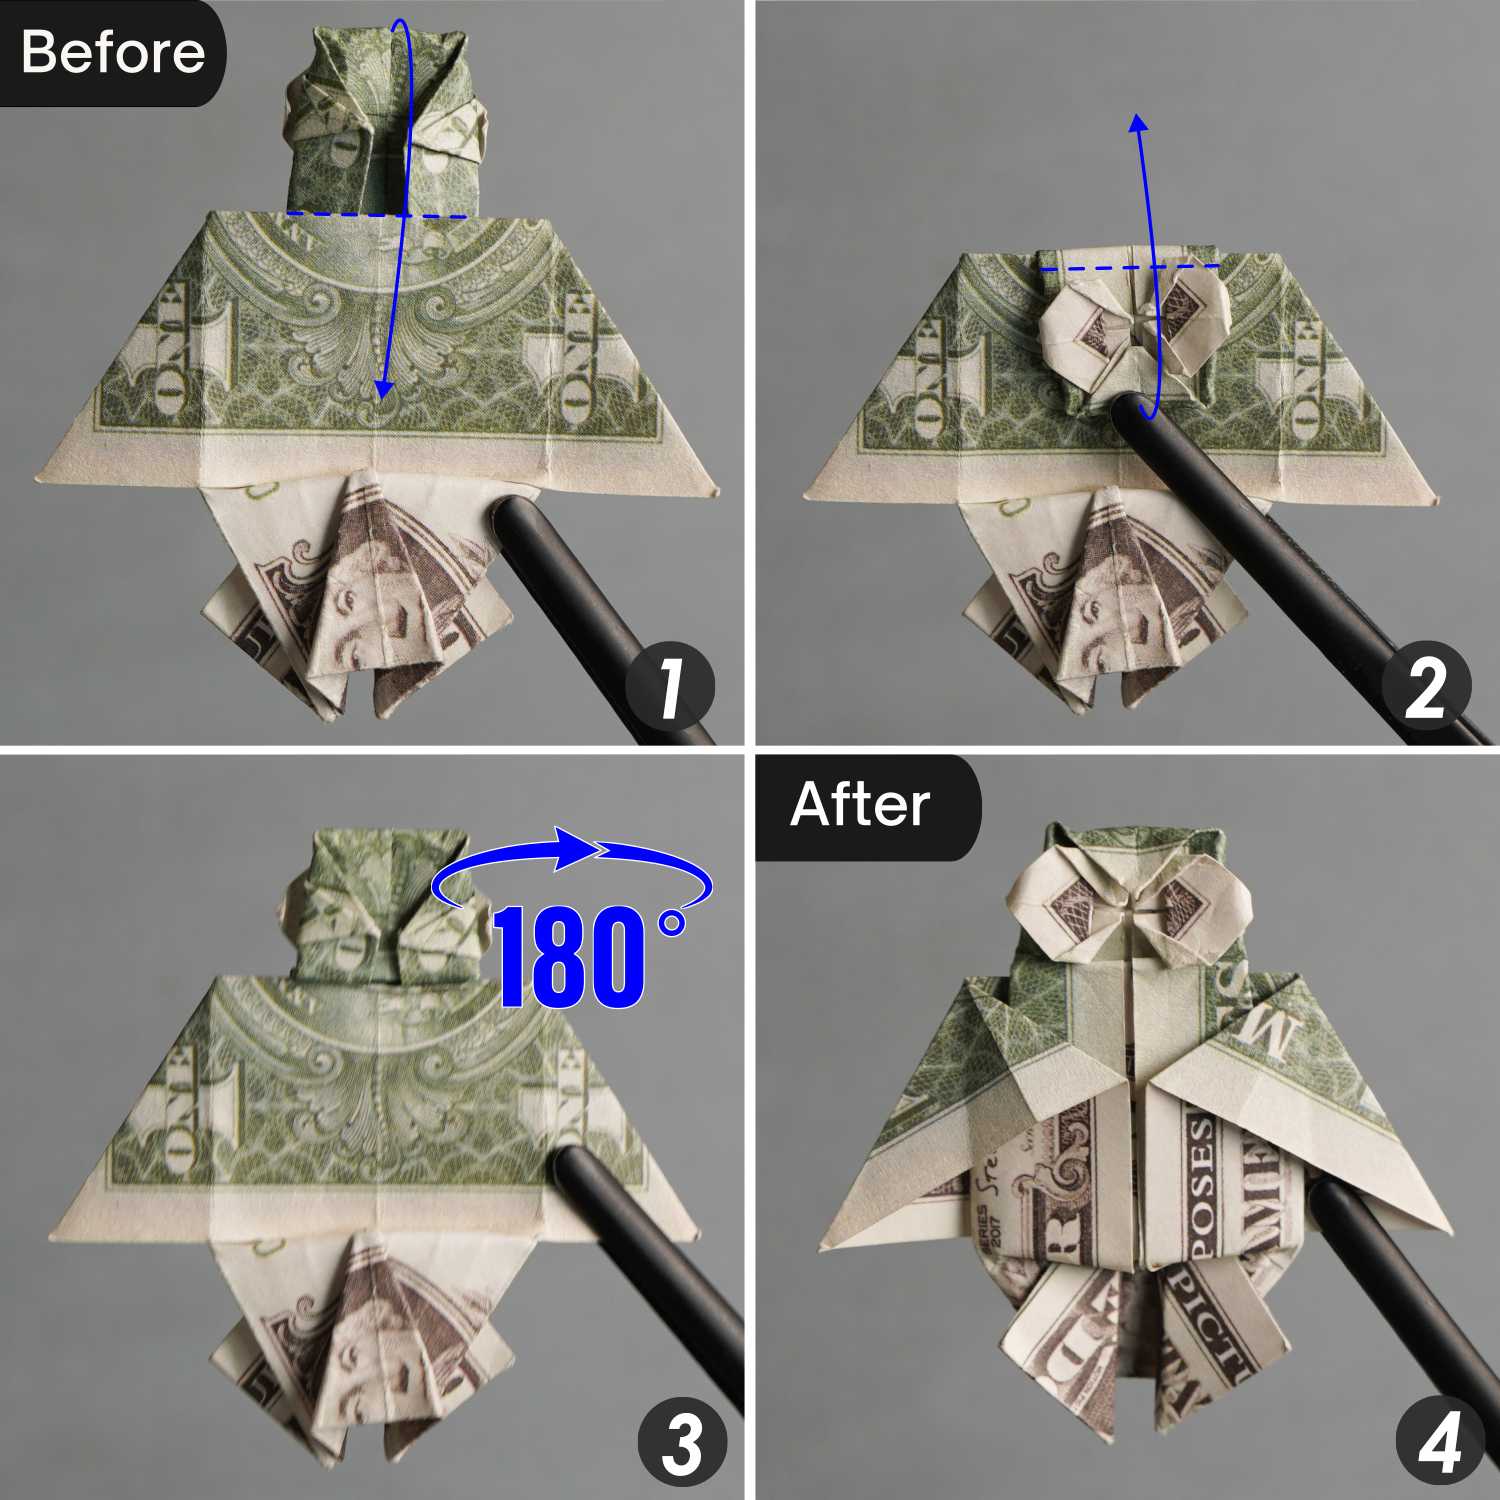
Step 29
To shorten its neck, fold down the head part, then fold it back to the top side to form a zigzag. Finally, turn the owl over from left to right, and this is the final shape.